Refer to Engine Control Schematic
I/P, Generator and Driver Information Display
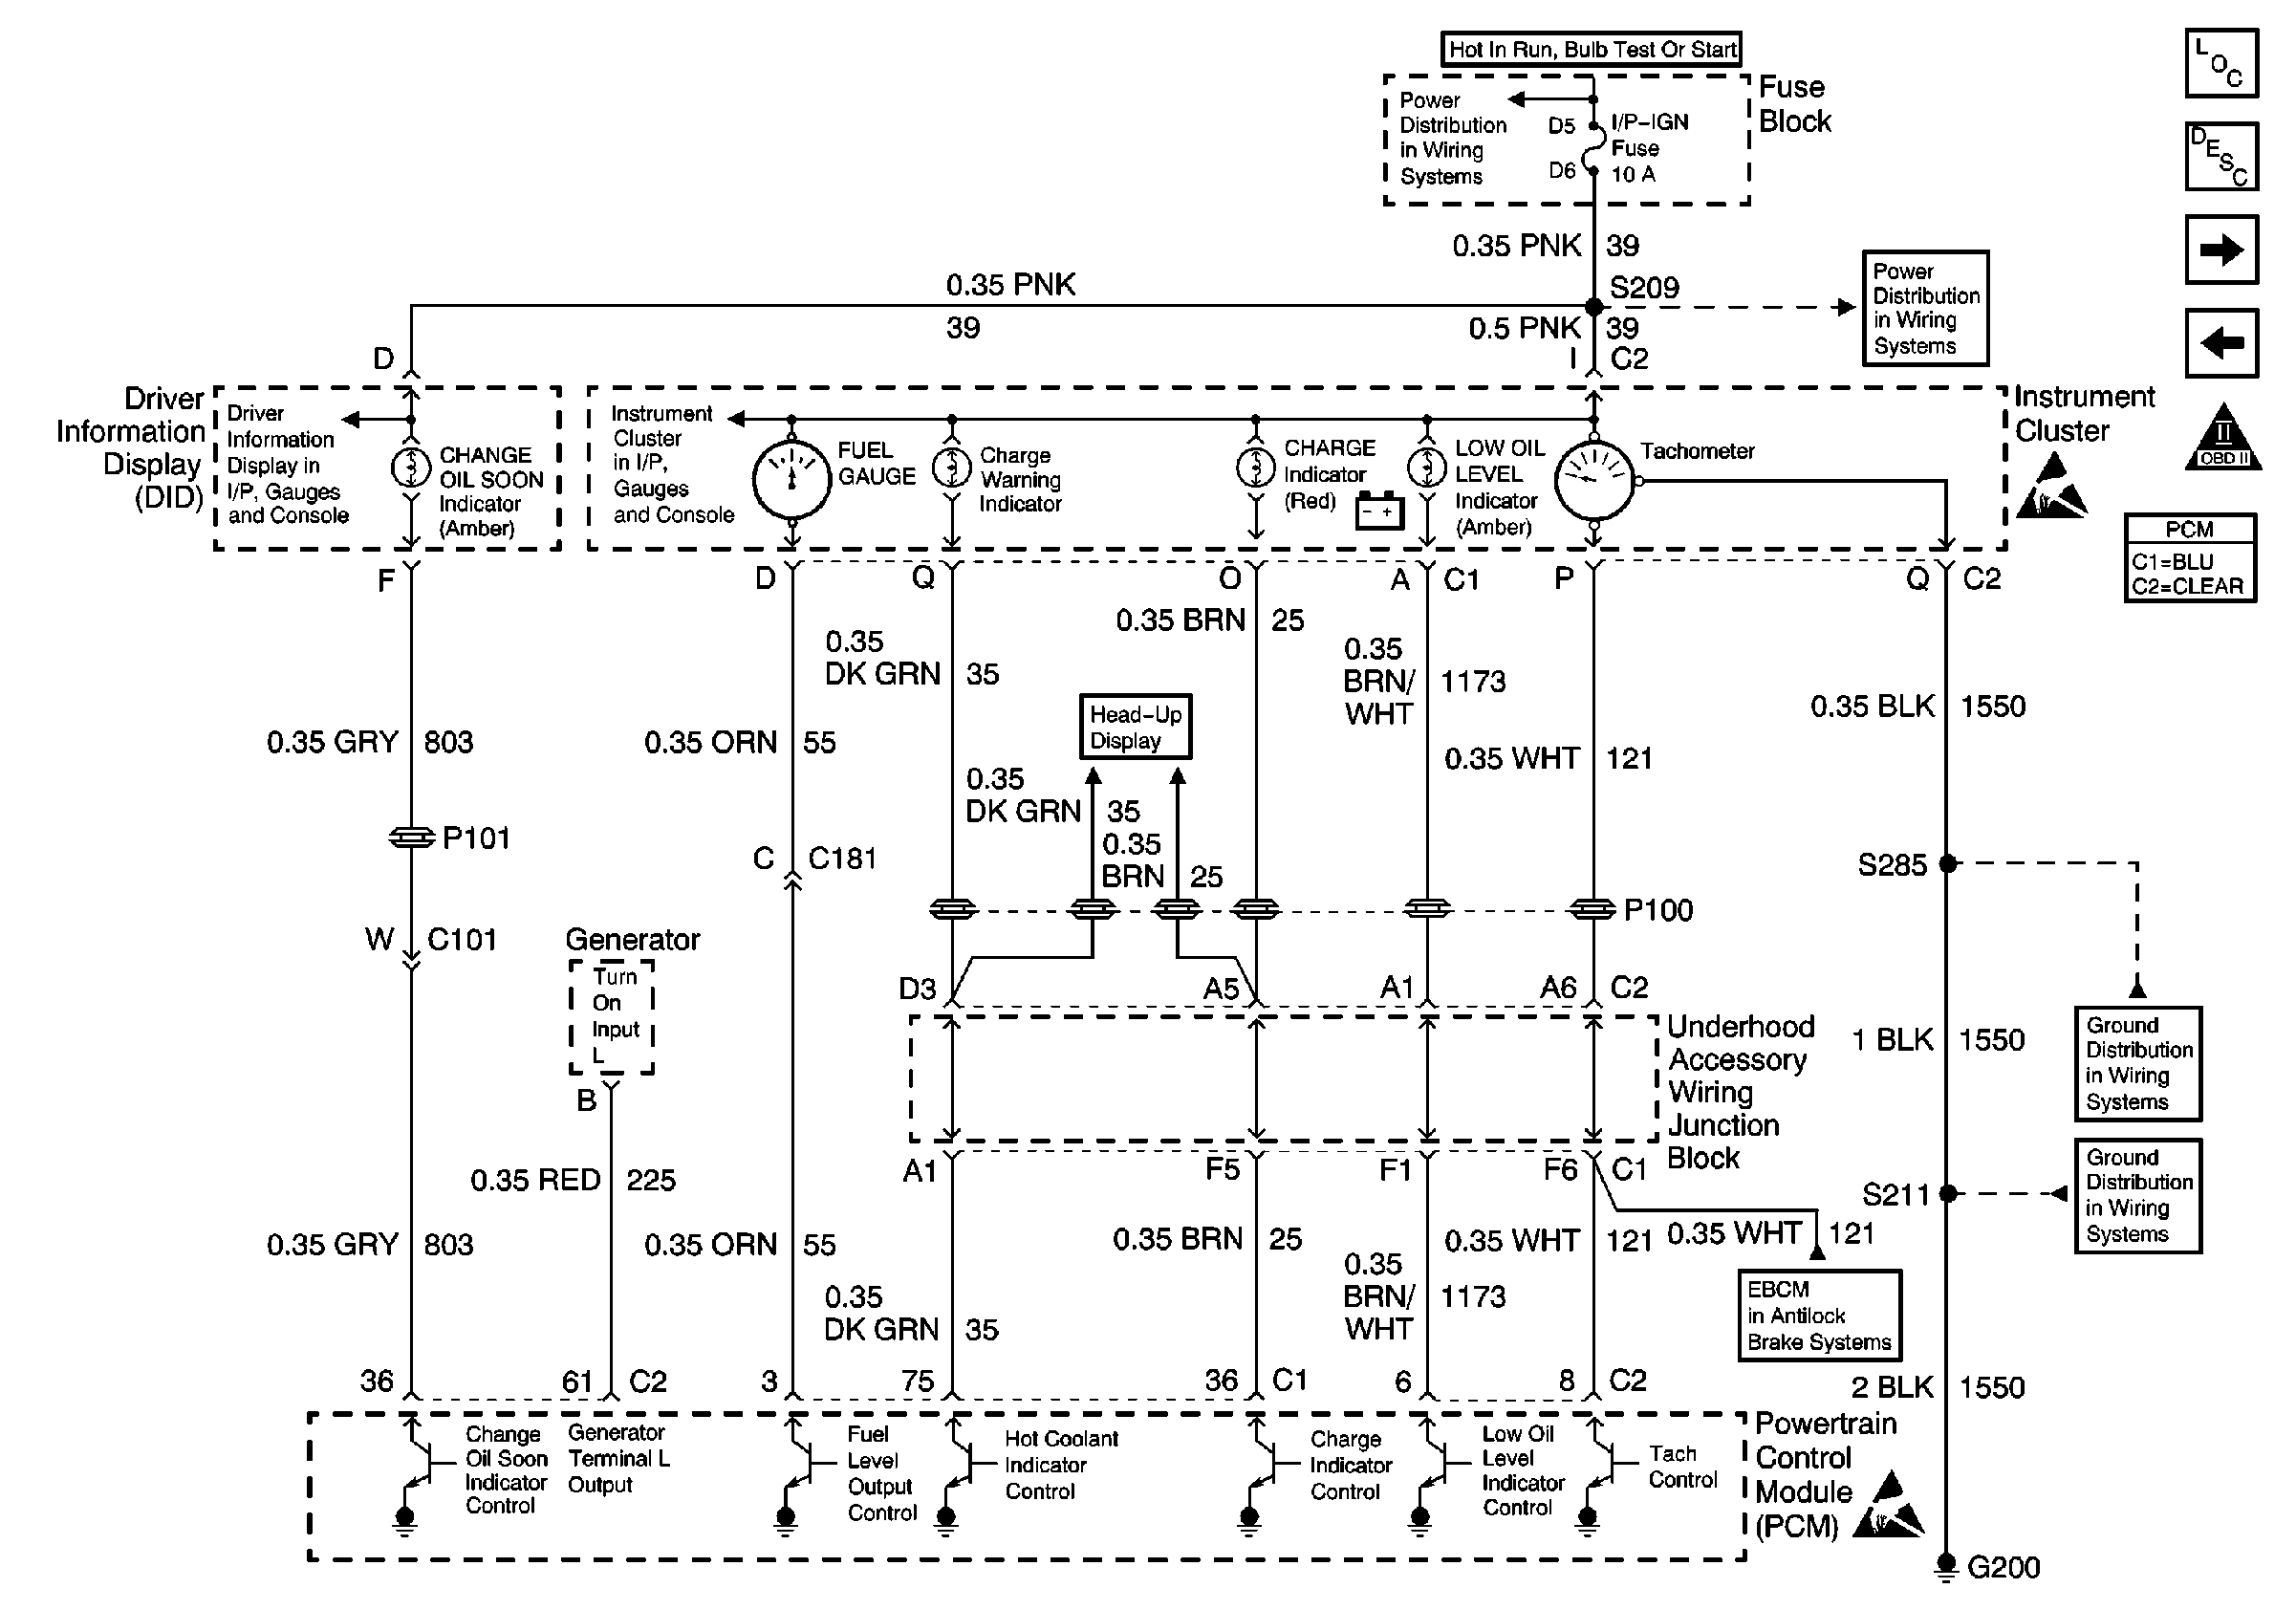
.
Circuit Description
The PCM energizes the bulb, LED, or driver information center indicator by supplying a path to ground through the PCM.
Conditions which will illuminate each lamp are as follows:
| • | Low Oil Level Indicator- will be illuminated for about a 1 minute after the ignition has been turned ON when the PCM tests for low oil level and the engine oil level switch indicates that a low oil level condition exists (Engine Oil Level Switch circuit not grounded). The PCM determines whether or not to test for low oil level based on the difference between engine coolant temperature at the last shutdown and engine coolant temperature at startup. This is to ensure that the oil has drained back into the sump before testing. When the ignition is first turned ON, the PCM commands the Low Oil Level lamp ON for a brief period of time to test the bulb. To test for low oil level at startup, one of the following conditions must be present: |
| - | If the engine coolant temperature was between 15°C (59°F) and 130°C (266°F) at the last key OFF, the engine coolant temperature at key ON must be at least 12°C (22°F) cooler than the engine coolant temperature at the last key OFF. |
| - | If the engine coolant temperature was higher than 82°C (180°F) at the last key OFF, the time between last key OFF and the present key ON must be sufficient to allow the oil to drain back to the sump. The PCM will remain powered up for 15 seconds to ensure that the oil has drained back to the sump. If the key is turned back ON while the PCM is still powered up, the oil level will not be tested. |
| • | Charge Indicator - The PCM supplies battery voltage to the generator's internal regulator (generator terminal L). When a fault in the Charging System occurs, the internal regulator grounds the L terminal voltage and the PCM commands the generator lamp ON. The PCM will command the generator lamp ON when the following conditions are present: |
| - | Engine speed is above 1200 RPM and system voltage is below 10 volts for at least 10 seconds. |
| - | The PCM detects a low voltage condition on the generator's L terminal for at least 10 seconds. |
| • | Hot Coolant Indicator - The PCM will command the hot coolant lamp ON when engine coolant temperature rises above 124°C (255°F). The PCM will turn the hot coolant lamp OFF when engine coolant temperature decreases to below 121°C (248°F). |
| • | Change Oil Soon Indicator- The PCM will command the Change Oil lamp ON when the PCM determines the oil life has reached its maximum. |
Diagnostic Aids
Inspect for the following conditions:
Important: : Remove any debris from the connector surfaces before servicing a component. Inspect the connector gaskets when diagnosing or replacing a component. Ensure that the gaskets are installed correctly. The gaskets prevent contaminate intrusion.
| • | Poor terminal connection. |
| Inspect the harness connectors for backed out terminals, improper mating, broken locks, improperly formed or damaged terminals, and faulty terminal to wire connection. Use a corresponding mating terminal to test for proper tension. Refer to Wiring Systems for diagnosis and repair. |
| • | Damaged harness. |
| Inspect the wiring harness for damage. If the harness inspection does not reveal a problem, observe the display on the scan tool while moving connectors and wiring harnesses related to the sensor. A change in the scan tool display may indicate the location of the fault. Refer to Wiring Systems for diagnosis and repair. |
| • | Inspect the PCM and the engine grounds for clean and secure connections. |
If the DTC is determined to be intermittent, reviewing the Failure Records can be useful in determining when the DTC was last set.
Test Description
The number(s) below refer to the step number(s) on the diagnostic table:
-
Tests for voltage at the feed side of the affected lamp. The Instrument Cluster fuse supplies power to the feed side of the affected lamp.
-
Verifies that the PCM is providing ground to the affected lamp.
-
Tests if ground is constantly being applied to the affected lamp.
-
The replacement PCM must be programmed.
Step | Action | Value(s) | Yes | No |
|---|---|---|---|---|
1 | Did you perform the Powertrain On-Board Diagnostic (OBD) System Check? | -- | Go to Step 2 | |
2 |
Does the lamp turn ON and OFF with each command? | -- | Go to Diagnostic Aids | Go to Step 3 |
Does the test lamp illuminate? | -- | Go to Step 4 | Go to Step 10 | |
Does the test lamp turn ON and OFF with each command? | -- | Go to Step 8 | Go to Step 5 | |
Does the test lamp remain illuminated with each command? | -- | Go to Step 7 | Go to Step 6 | |
6 | Test the control circuit of the affected lamp for a short to voltage or an open. Refer to Circuit Testing and Wiring Repairs in Wiring Systems. Did you find and correct the condition? | -- | Go to Step 13 | Go to Step 9 |
7 | Test the control circuit of the affected lamp for a short to ground. Refer to Circuit Testing and Wiring Repairs in Wiring Systems. Did you find and correct the condition? | -- | Go to Step 13 | Go to Step 9 |
8 | Inspect for poor connections at the Instrument Cluster. Refer to Testing for Intermittent Conditions and Poor Connections and Connector Repairs in Wiring Systems. Did you find and correct the condition? | -- | Go to Step 13 | Go to Step 11 |
9 | Inspect for poor connections at the harness connector of the PCM. Refer to Testing for Intermittent Conditions and Poor Connections and Connector Repairs in Wiring Systems. Did you find and correct the condition? | -- | Go to Step 13 | Go to Step 12 |
10 | Repair the feed circuit to the Instrument Cluster. Refer to Wiring Repairs in Wiring Systems. Did you find and correct the condition? | -- | Go to Step 13 | |
11 | Replace the affected lamp. Refer to Instrument Cluster Indicator Lamp Replacement in Instrument Panel, Gauges, and Console. Did you complete the replacement? | -- | Go to Step 13 | -- |
|
Important: : The replacement PCM must be programmed. Replace the PCM. Refer to Powertrain Control Module Replacement/Programming . Did you complete the replacement? | -- | Go to Step 13 | -- | |
13 |
Does the DTC reset? | -- | Go to Step 2 | System OK |
