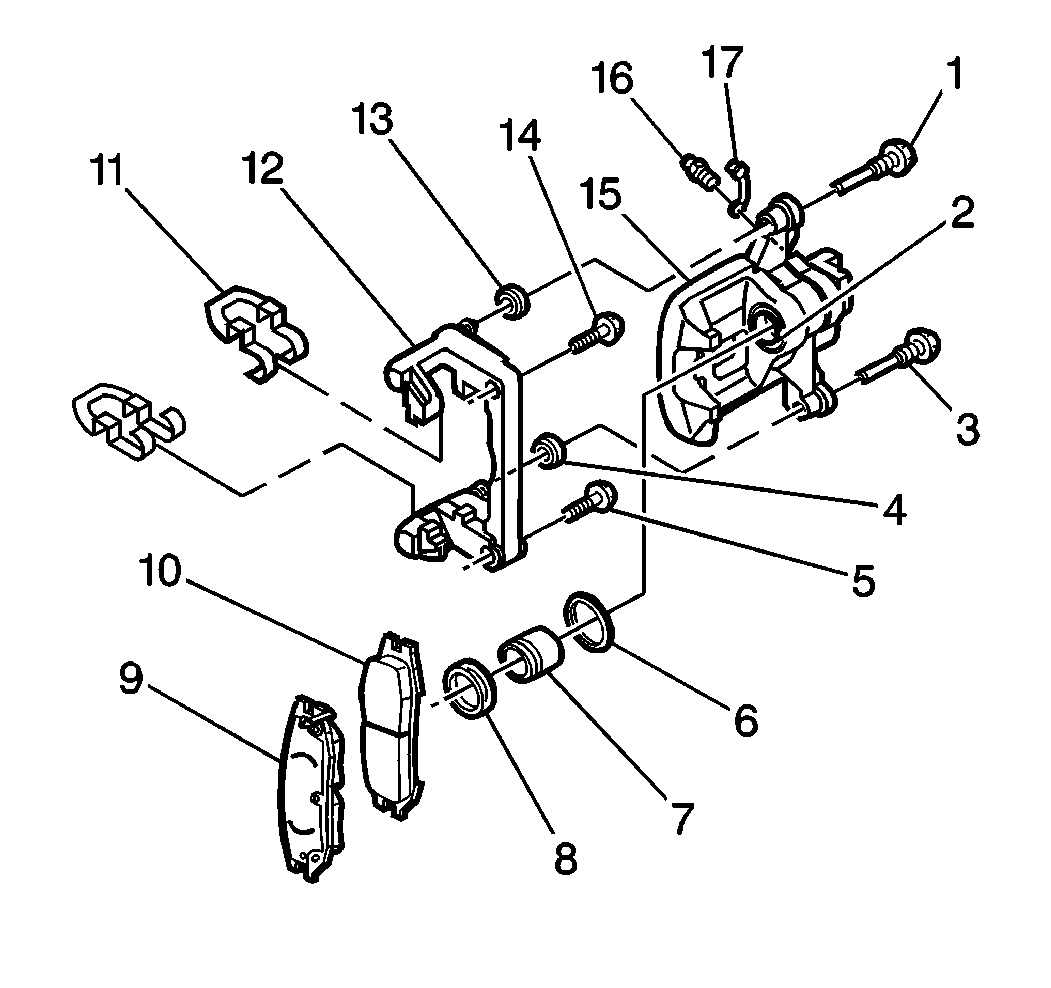
- Bottom the piston (7)
into the caliper bore (2).
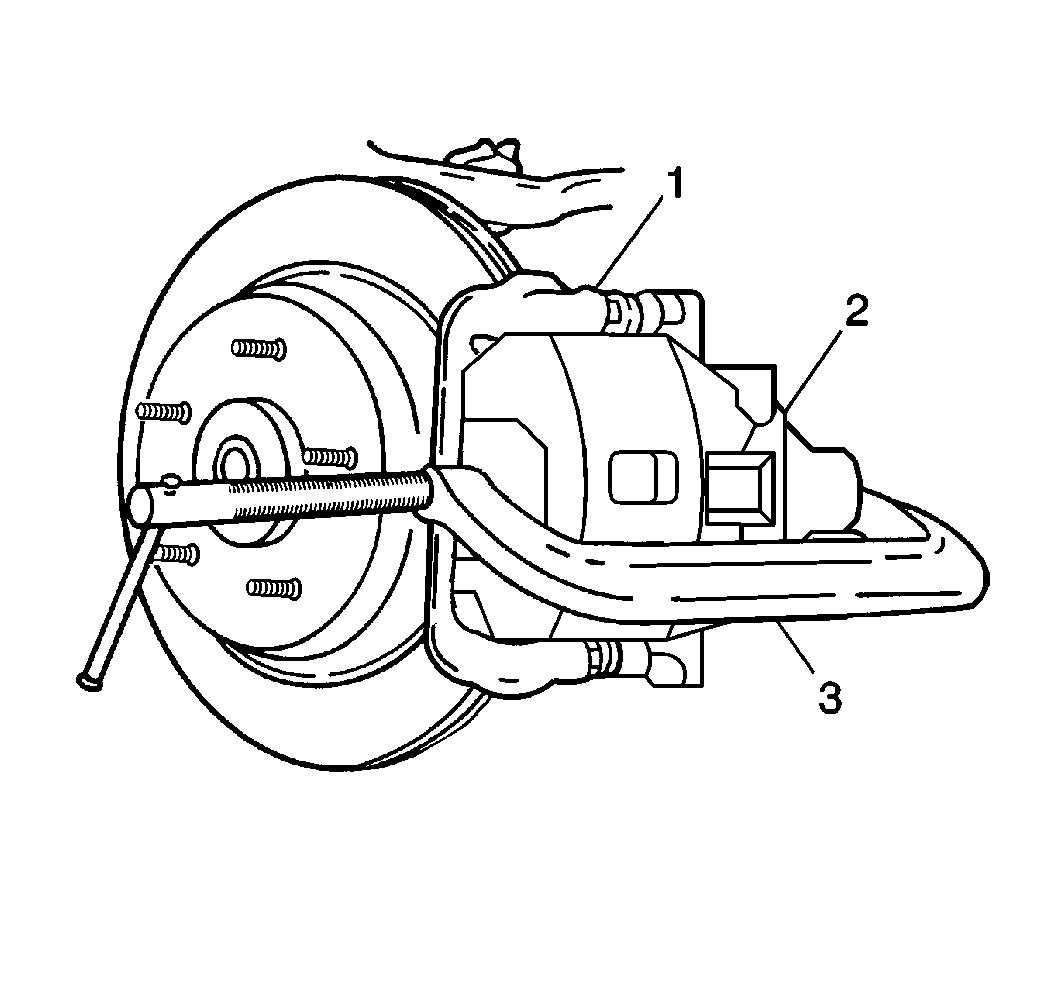
Use a C-clamp before installing new brake pads in order to compress
the piston. Use an old brake pad or wooden block across the face of the
piston. Do not damage the piston or the caliper boot.
- Install the 2 retainers (11) to the caliper bracket (12).
Important: The wear sensor is on the outside pad. The sensor is positioned at the
trailing edge (downward) of the pad during forward wheel rotation.
- Install the pads (9, 10) to the caliper bracket (12).

Notice: Use care to avoid damaging pin boot when rotating caliper.
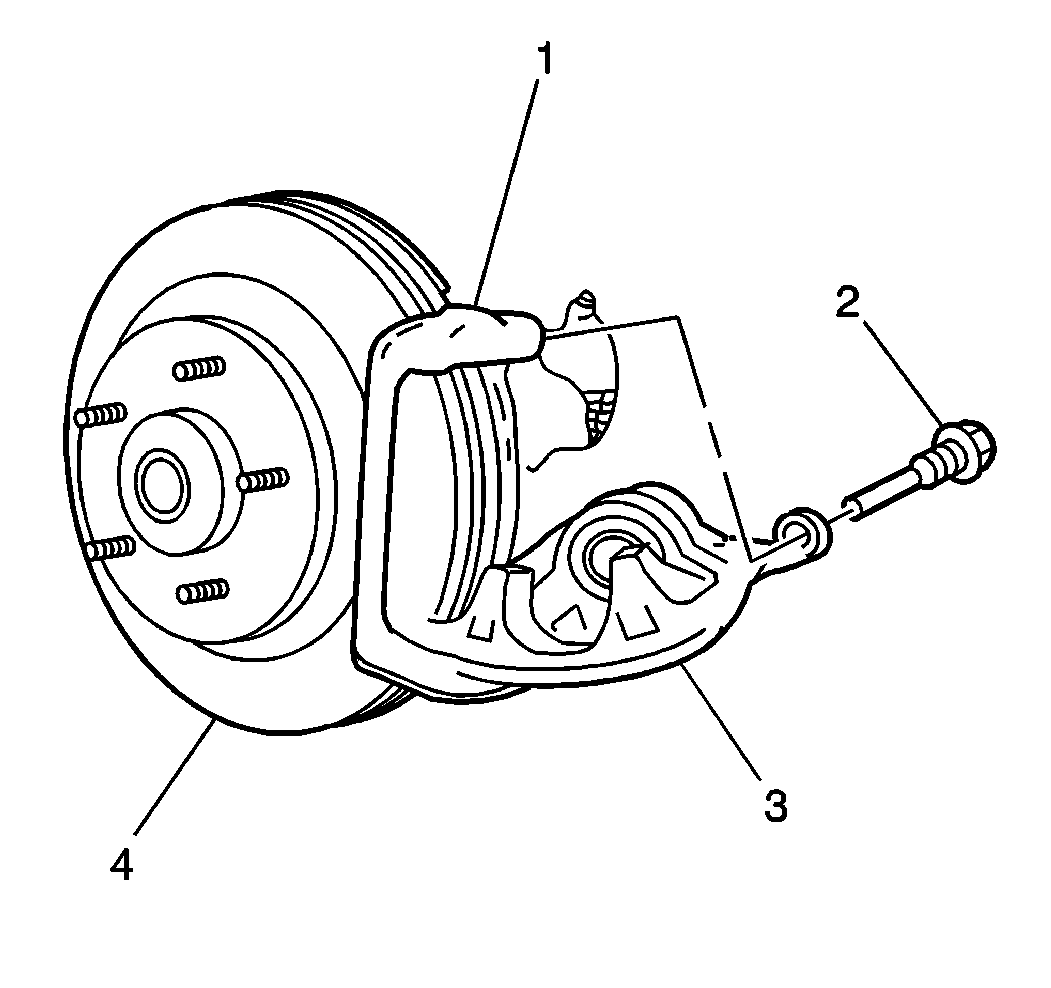
- Swing the caliper (3) upward in position around the pads.
- Lubricate the bolt and the bolt boot. Use silicone grease.
Notice: Use the correct fastener in the correct location. Replacement fasteners
must be the correct part number for that application. Fasteners requiring
replacement or fasteners requiring the use of thread locking compound or sealant
are identified in the service procedure. Do not use paints, lubricants, or
corrosion inhibitors on fasteners or fastener joint surfaces unless specified.
These coatings affect fastener torque and joint clamping force and may damage
the fastener. Use the correct tightening sequence and specifications when
installing fasteners in order to avoid damage to parts and systems.
- Install the upper
caliper bolt (2).
Tighten
Tighten the caliper bolt to 44 N·m (32 lb ft).
- Remove the 2 wheel lug nuts retaining the rotor to the hub.
- Install the rear tire and the wheel assembly. Refer to
Tire and Wheel Removal and Installation
in Tires
and Wheels. Align the previous marks on the wheel, hub and bearing.
- Lower the vehicle.
- With the engine OFF, gradually apply the brake pedal to approximately
2/3 of its travel distance.
- Slowly release the brake pedal.
- Wait 15 seconds, then repeat steps 10 and 11 until a firm brake
pedal is obtained. This will properly seat the brake caliper pistons and
brake pads.
- Fill the brake master cylinder reservoir to the proper level.
Refer to
Master Cylinder Reservoir Filling
in Hydraulic Brakes.
- Burnish the pads and rotors. Refer to
Brake Pad and Rotor Burnishing
.


