Tools Required
| • | J 21854-01 Pivot Pin Remover |
| • | J 41688 Centering Sphere Installer |
Removal Procedure
- Disable the SIR system. Refer to SIR Disabling and Enabling in SIR.
- Remove the ignition lock cylinder case. Refer to Ignition Lock Cylinder Case Replacement .
- Remove the tilt spring only. Refer to Steering Column Tilt Spring Replacement .
- Remove the theft deterrent control module. Refer to Theft Deterrent Module Replacement .
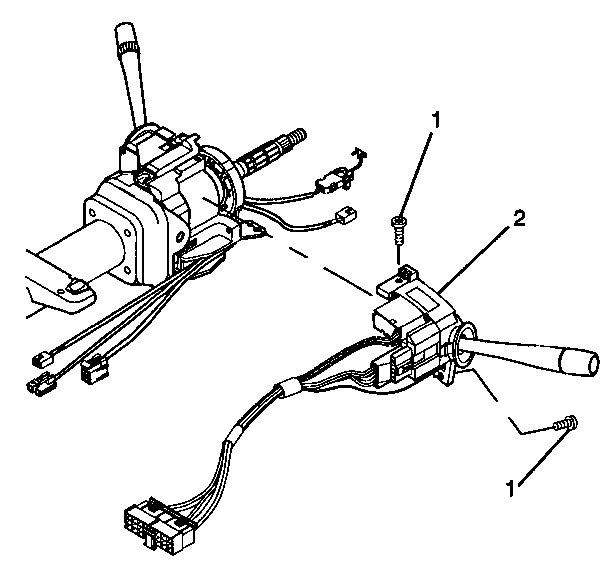
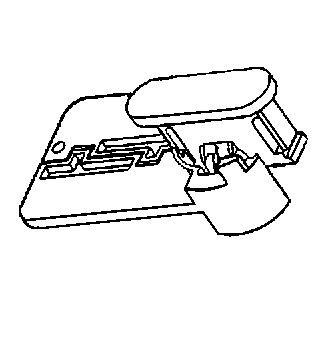
- Remove the 2 pan head screws (1) from the turn signal and multifunction switch assembly (2).
- Remove the turn signal and multifunction switch assembly (2).
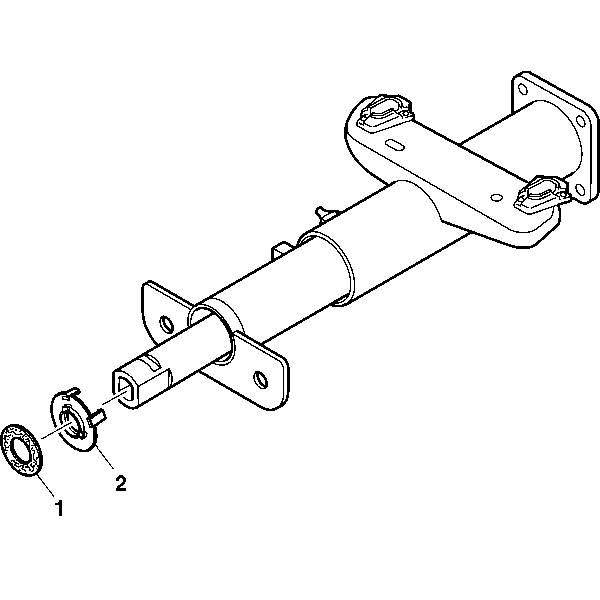
- Remove the steering shaft seal (1).
- Remove the sensor retainer (2) from the adapter and bearing assembly.
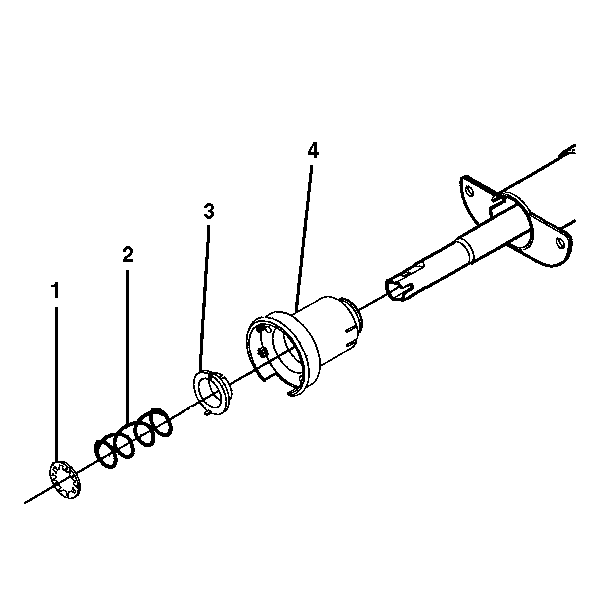
- Remove the lower spring retainer (1) from the steering shaft assembly.
- Dispose of the lower spring retainer (1).
- Remove the lower bearing spring (2) from the steering shaft assembly.
- Remove the lower bearing seat (3) from the adapter and bearing assembly (4).
- Remove the adapter and bearing assembly (4) from the steering shaft assembly.
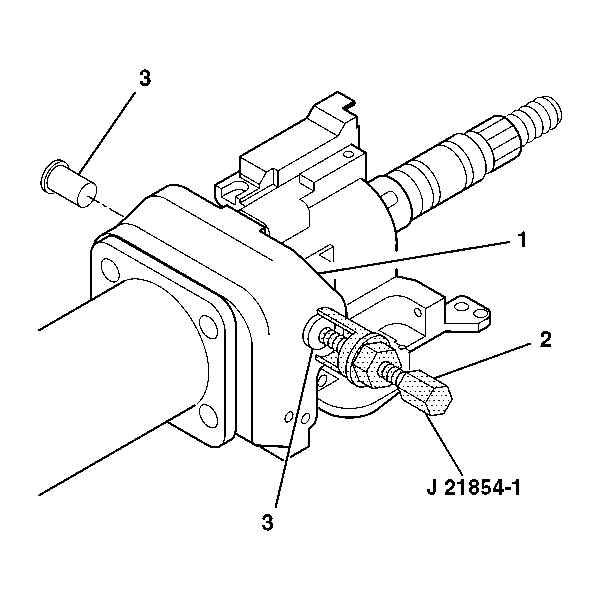
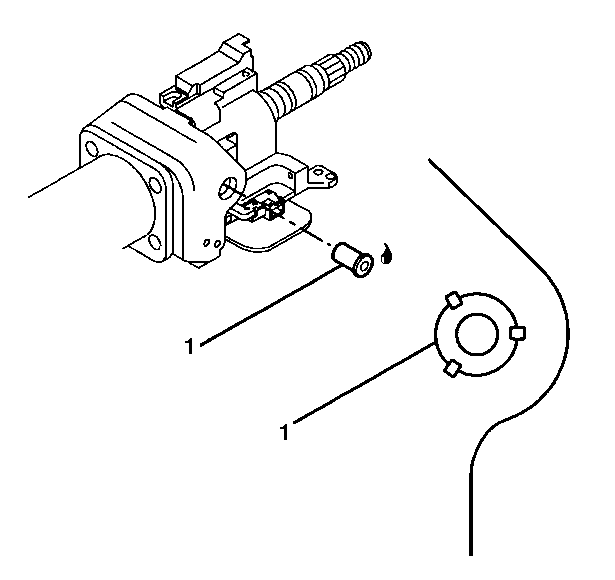
- Remove the 2 pivot pins (3) from the steering column tilt head assembly (1) by using J 21854-01 .
- Install the tilt knob into the steering column tilt head assembly.
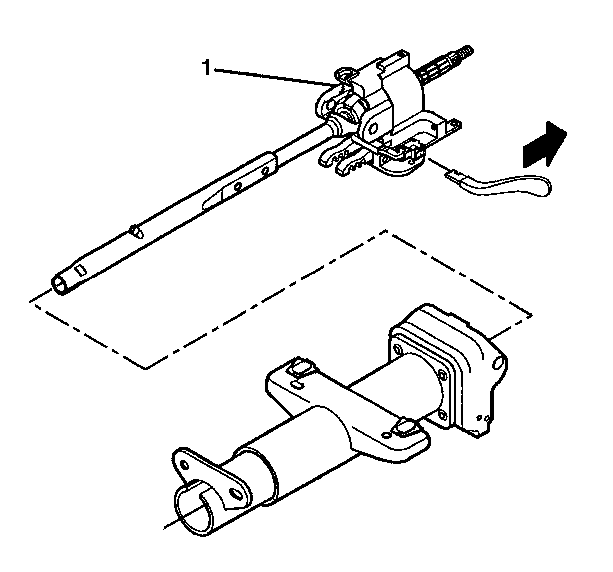
- Pull back on the tilt knob and at the same time pull the steering column tilt head assembly down and away from the steering column.
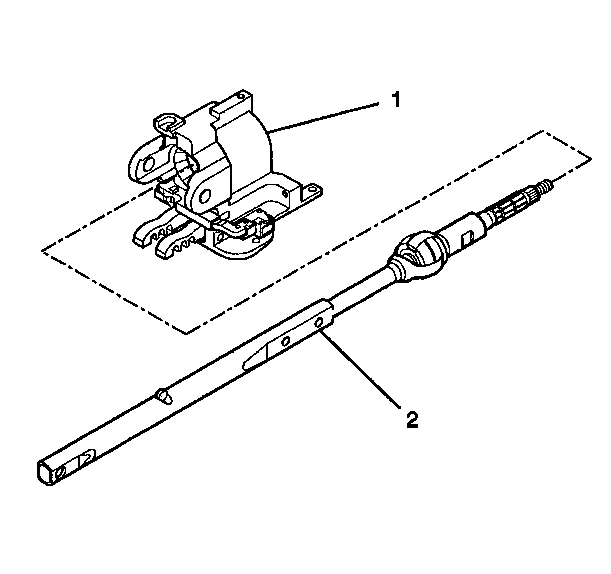
- Remove the steering column tilt head assembly with the steering shaft assembly (1) from the steering column support assembly (2).
- Remove the tilt knob.
- Remove the steering shaft assembly (2) from the steering column tilt head assembly (1).
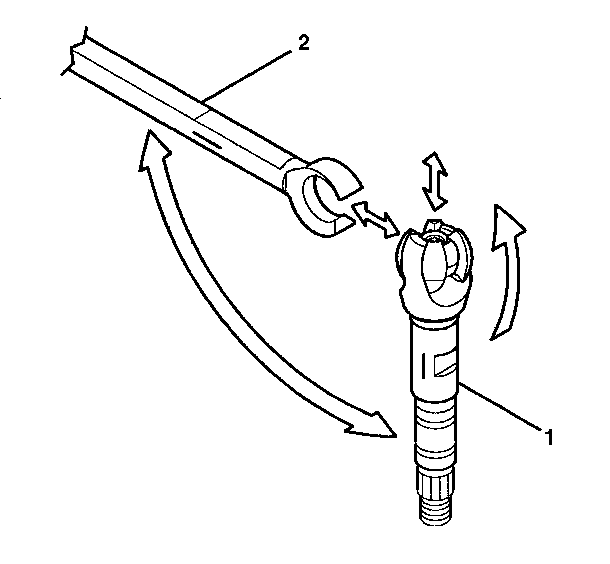
- Tilt the race and upper shaft assembly (1) 90 degrees to the lower shaft assembly (2).
- Disengage the race and upper shaft assembly (1) from the lower shaft assembly (2).
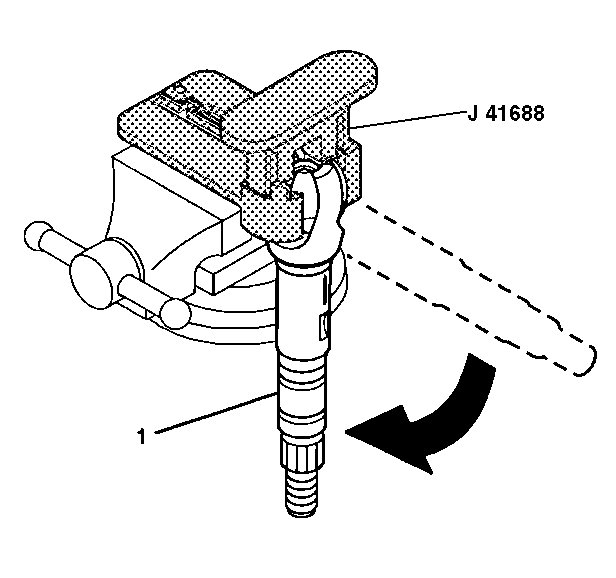
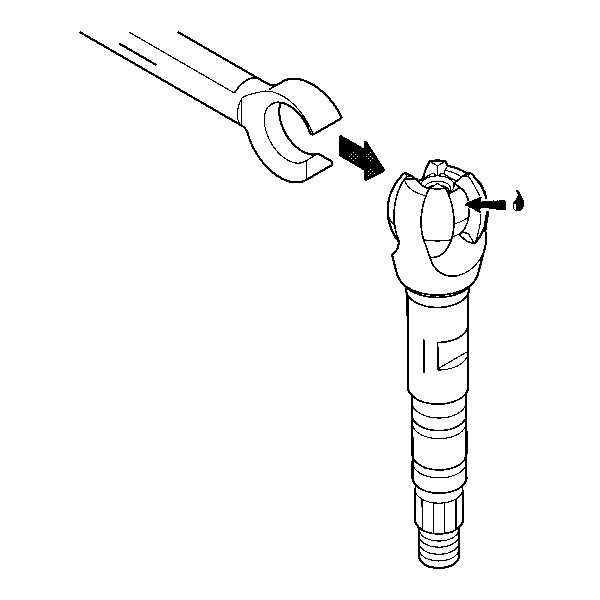
- Insert the race and upper shaft assembly (1) into J 41688 .
- Rotate the driver 90 degrees in the counterclockwise direction in order to disengage the centering sphere.
- Remove the shaft preload spring from the centering sphere.
- If necessary, discard the old centering sphere and the old joint preload spring.
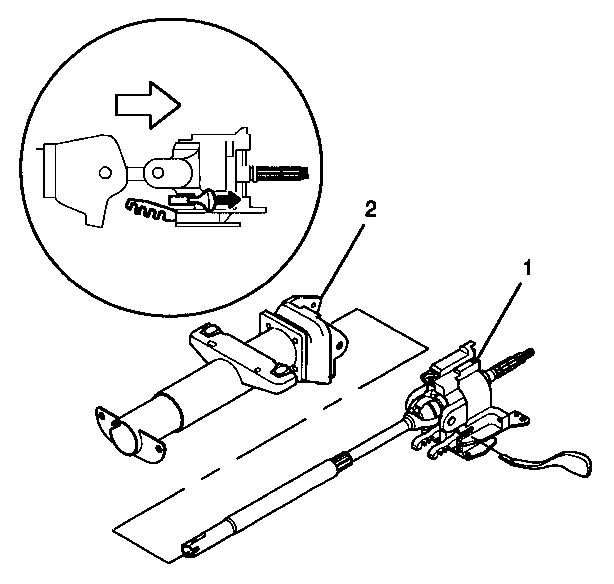
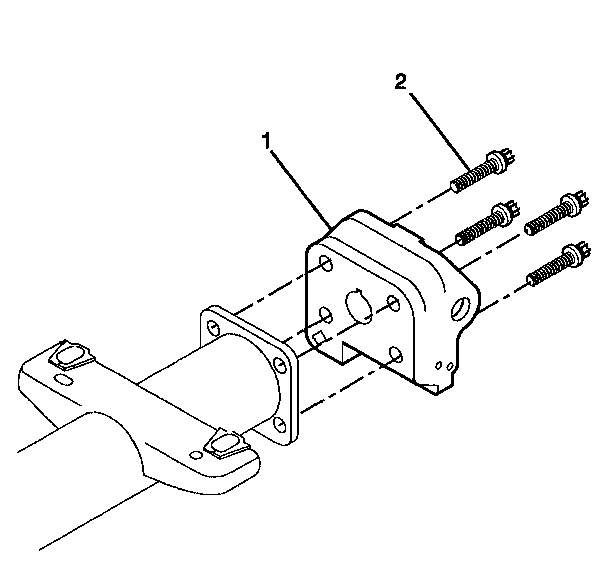
- Remove the 4 TORX® head screws (2) from the steering column support assembly (1).
- Dispose of the 4 TORX® head screws.
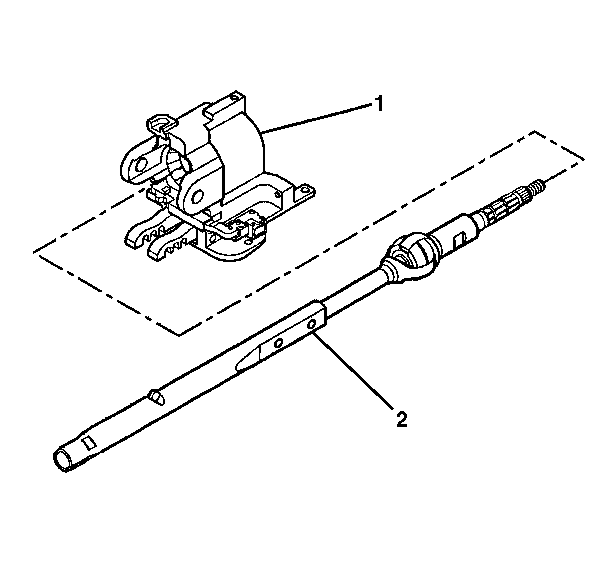
- Remove the steering column support assembly (1) from the steering column jacket assembly.
Caution: Refer to SIR Caution in the Preface section.
Important: Mark the race and upper shaft assembly and the lower shaft assembly before disassembly. Failure to assemble the race and upper shaft assembly and the lower shaft assembly correctly will cause the steering wheel to be turned 180 degrees.
Installation Procedure
- Attach the steering column support assembly (1) to the steering column jacket assembly with the 4 TORX® head screws (2).
- Grease the centering sphere (1) with GM P/N 12345718 (Canadian P/N 10953516).
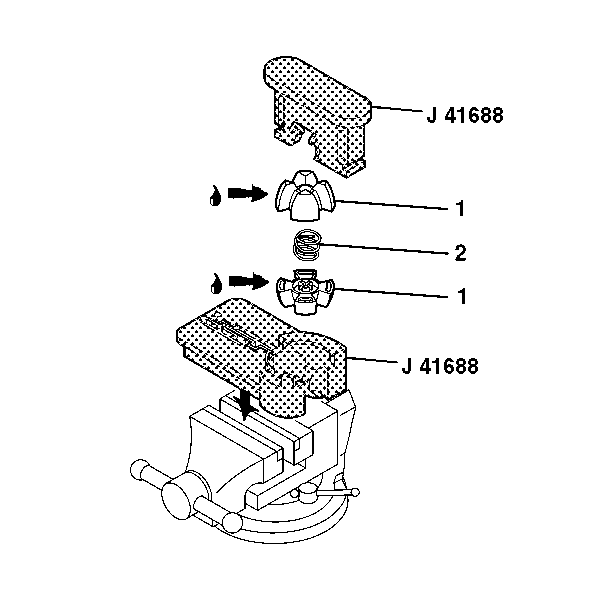
- Install the centering sphere (1) and the joint preload spring (2) by using J 41688 .
- Place the base of J 41688 in a vise.
- Place the bottom half of the new centering sphere (1), the new joint preload spring (2), the top half of the new centering sphere (1), into J 41688 .
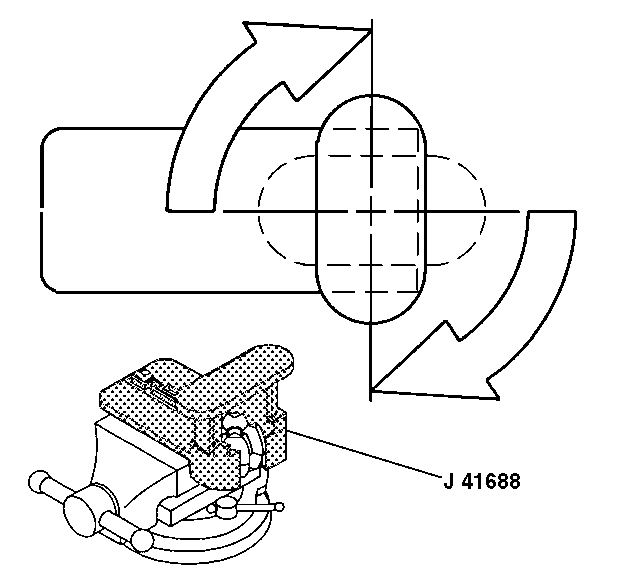
- Compress the centering sphere and the joint preload spring.
- Rotate the driver 90 degrees in the clockwise direction until the arms lock in place.
- Attach the race and upper shaft assembly (1) to the centering sphere.
- Rotate the race and upper shaft assembly (1) downward 90 degrees until the centering sphere is locked in place.
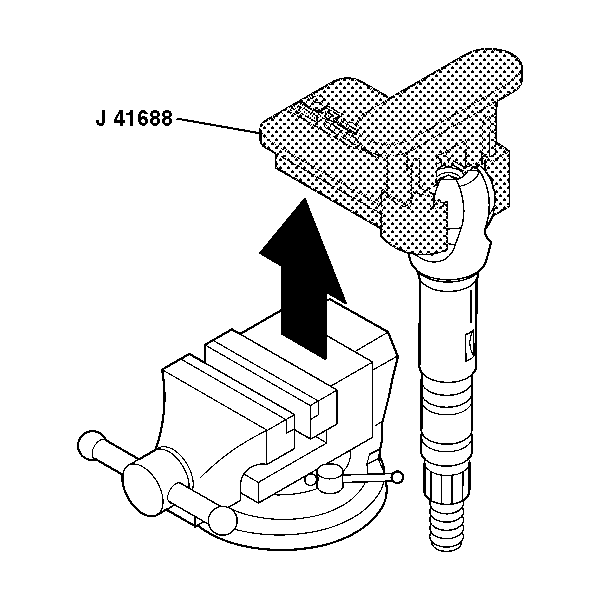
- Remove the race and upper shaft assembly and J 41688 from the vise.
- Disassemble J 41688 by separating the base.
- Remove the race and upper shaft assembly, which is now attached to the centering sphere, from J 41688 .
- Lubricate the exposed steering shaft with GM P/N 12345718 (Canadian P/N 10953516).
- Align the lower steering shaft assembly to the race and upper shaft assembly by using the marks.
- Tilt the lower steering shaft assembly at 90 degrees to the race and upper shaft assembly.
- Install the lower steering shaft assembly onto the race and upper shaft assembly.
- Install the steering shaft assembly (2) into the steering column tilt head assembly (1).
- Install the steering shaft assembly with the steering column tilt head assembly (1) into the steering column support assembly.
- Move the tilt knob and push the steering column tilt head assembly up towards the steering column in order to lock the steering wheel lock shoes in place.
- Stake the steering column support assembly in 3 locations.
- Install the 2 pivot pins (1) into the steering column tilt head assembly.
- Install the adapter and bearing assembly (4) onto the steering column jacket assembly.
- Install the lower bearing seat (3) onto the adapter and bearing assembly (4). The lower bearing seat must contact the adapter and bearing assembly (4).
- Install the lower bearing spring (2) onto the steering shaft assembly.
- Install the lower spring retainer (1) onto the steering shaft assembly.
- Install the sensor retainer (2) onto the adapter and bearing assembly.
- Install the steering shaft seal (1) onto the steering shaft assembly.
- Install the turn signal and multifunction switch assembly (2) onto the steering column tilt head assembly.
- Install the 2 pan head tapping screws (1) into the turn signal and multifunction switch assembly (2).
- Install the theft deterrent control module. Refer to Theft Deterrent Module Replacement .
- Install the tilt spring only. Refer to Steering Column Tilt Spring Replacement .
- Install the ignition lock cylinder case. Refer to Ignition Lock Cylinder Case Replacement .
- Enable the SIR system. Refer to SIR Disabling and Enabling in SIR.
Notice: Refer to Fastener Notice in the Preface section.
Important: Replace the steering column support assembly if the steering column support assembly has been staked 3 times.
Tighten
Tighten the screws to 17 N·m (13 lb ft).
| 21.1. | Lubricate the pivot pins (1) with GM P/N 12346293 (Canadian P/N 992723). |
| 21.2. | Firmly seat each pivot pin (1) into the steering column tilt head assembly. |
| 22.1. | Align the tab on the adapter and bearing assembly (4) with the slot in the steering column jacket assembly. |
| 22.2. | Push the adapter and bearing assembly (4) onto the steering shaft assembly until the tab snaps into the slot. |
Important: The steering shaft assembly must be rotated to the center position or 12 o'clock position.
| 26.1. | Align the slots of the sensor retainer (2) to the ribs of the adapter and bearing assembly. |
| 26.2. | Push the sensor retainer (2) onto the steering shaft assembly so that the sensor retainer (2) contacts the adapter and bearing assembly. |
Tighten
Tighten the screws to 7 N·m (62 lb in).
Caution: Improper routing of the wire harness assembly may damage the inflatable restraint steering wheel module coil. This may result in a malfunction of the coil, which may cause personal injury.
