Removal Procedure
Caution: Refer to Brake Fluid Irritant Caution in the Preface section.
Notice: Refer to Brake Fluid Effects on Paint and Electrical Components Notice in the Preface section.
Notice: To prevent equipment damage, never connect or disconnect the wiring harness connection from the EBCM with the ignition switch in the ON position.
- Turn the ignition switch to the OFF position.
- Remove the fuel injector sight shield, 3.8L engine only. Refer to Fuel Injector Sight Shield Replacement in Engine Mechanical-3.8L.
- Remove the front fender upper diagonal brace. Refer to Front Fender Upper Diagonal Brace Replacement in Body Front End.
- Disconnect the accelerator and cruise control cable from the accelerator control cable bracket.
- Disconnect the cruise control module from the left strut tower. It is not necessary to remove the cable from the module. Refer to Cruise Control Module Replacement In Cruise Control. Position the module and cables aside.
- Remove the air cleaner intake duct. Refer to Air Cleaner Inlet Duct Replacement in Engine Controls-3.1L or Air Cleaner Inlet Duct Replacement in Engine Controls-3.8L.
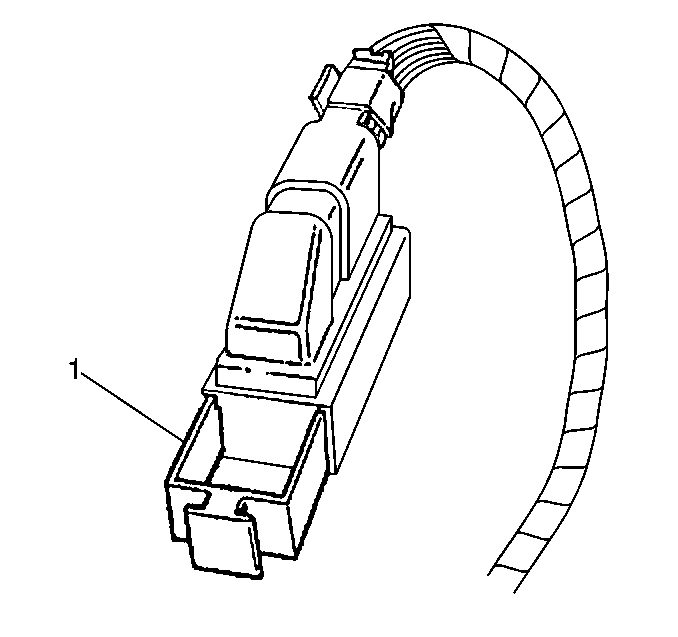
- Disengage the locking tab (1) from the EBCM harness connector.
- Disconnect the EBCM harness connector.
- Remove any dirt/debris from the assembly.
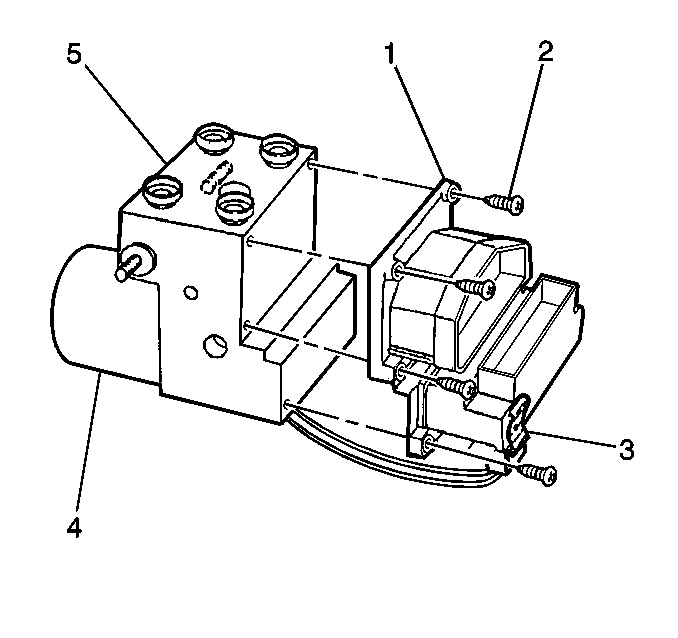
- Remove the 6 EBCM to BPMV retainers (2).
- Separate the EBCM (1) from the BPMV (4) by gently pulling apart until separated.
- Disconnect the pump motor connector (3) at the bottom of the EBCM.


Important: Do not pry apart using a tool. Be careful not to damage BPMV surface.
Important: Care must be taken not to damage the solenoid valves when the EBCM is removed from the BPMV.
Installation Procedure
- Connect the pump motor connector (3) to the bottom of the EBCM.
- Install the EBCM (1) to the BPMV (4).
- Install the 6 EBCM to BPMV retainers (2).
- Connect the EBCM harness connector.
- Reengage the locking tab (1) to the EBCM harness connector.
- Install the air cleaner intake duct. Refer to Air Cleaner Inlet Duct Replacement in Engine Controls-3.1L or Air Cleaner Inlet Duct Replacement in Engine Controls-3.8L.
- Reposition the module and cables. Connect the cruise control module to the left strut tower. Refer to Cruise Control Module Replacement in Cruise Control.
- Connect the accelerator and cruise control cable to the accelerator control cable bracket.
- Install the front fender upper diagonal brace. Refer to Front Fender Upper Diagonal Brace Replacement in Body Front End.
- Install the fuel injector sight shield, 3.8L engine only. Refer to Fuel Injector Sight Shield Replacement in Engine Mechanical-3.8L.
- Turn the ignition switch to the RUN position, do not start engine.
- Perform the Diagnostic System Check - ABS .

Notice: Use the correct fastener in the correct location. Replacement fasteners must be the correct part number for that application. Fasteners requiring replacement or fasteners requiring the use of thread locking compound or sealant are identified in the service procedure. Do not use paints, lubricants, or corrosion inhibitors on fasteners or fastener joint surfaces unless specified. These coatings affect fastener torque and joint clamping force and may damage the fastener. Use the correct tightening sequence and specifications when installing fasteners in order to avoid damage to parts and systems.
Tighten
Tighten the retainers to 2.9 N·m (26 lb in).

