Inspection Procedure
Important: The brake pads must have freedom of movement within the brake caliper
bracket. If movement is restricted by debris or rust, the brake pads may remain
against the rotor after the brake pedal is released. This condition may contribute
to the following:
| • | Accelerated brake pad wear |
- Use a suction gun in order to remove and discard 1/3 of the brake
fluid from the master cylinder.
- Raise and suitably support the vehicle. Refer to
Lifting and Jacking the Vehicle
in General Information.
- Remove the tire and wheel. Refer to
Tire and Wheel Removal and Installation
in Tires and Wheels.

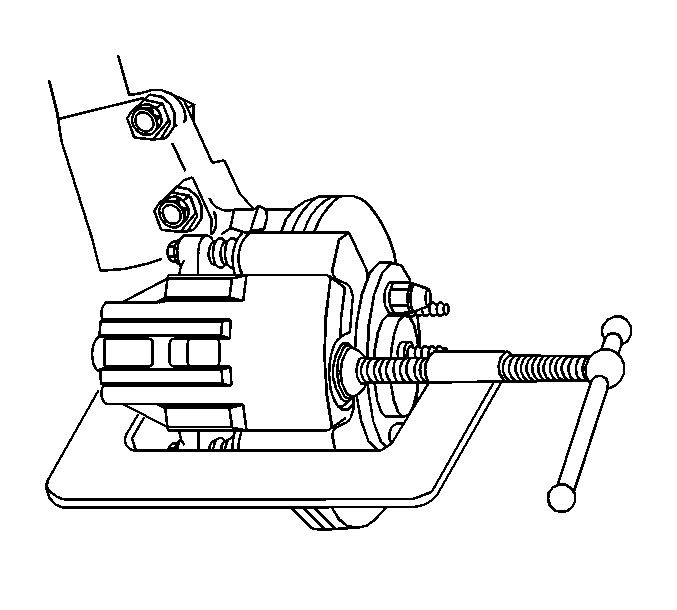
- Install a C-clamp over
the top of the brake caliper and against the back of the outboard brake pad.
- Tighten the C-clamp in order to push the brake caliper piston
into the brake caliper bore as far as possible.
- Remove the C-clamp from the brake caliper.
Important: The brake pad should move easily within the brake caliper bracket.
- Check the outer brake pad for freedom of movement relative to the brake
caliper bracket.
Important: The brake caliper should move easily within the brake caliper bracket.

- Use your hands in order
to push the brake caliper inboard as far as possible. If the brake caliper
does not move easily, perform the following steps.
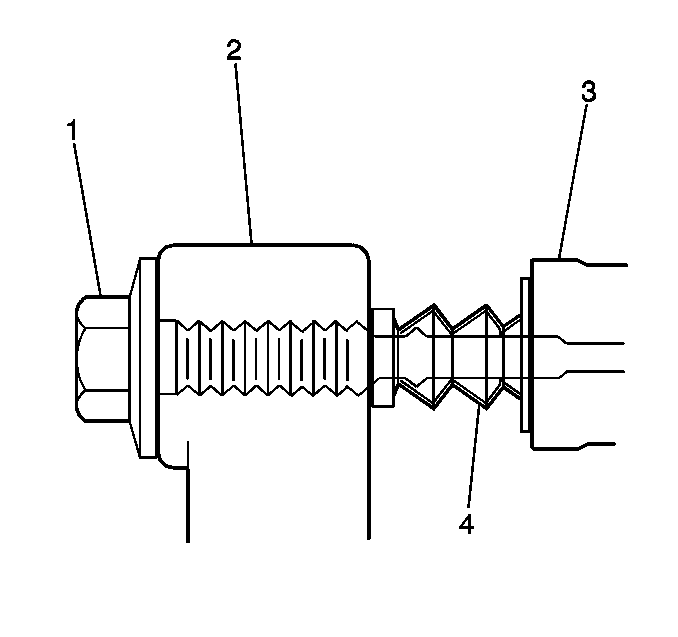
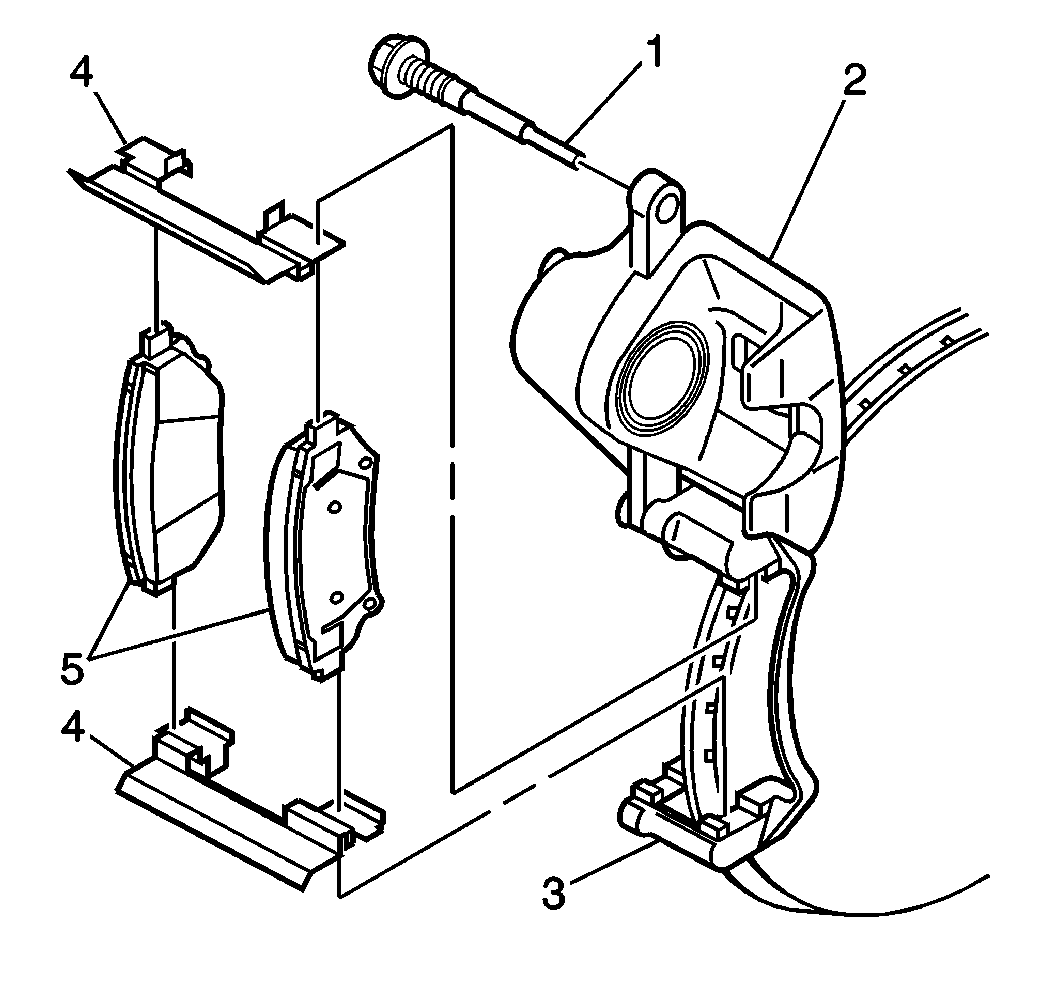
| • | Inspect and replace any worn or damaged brake caliper bolts (1). |
| • | inspect and replace any worn or damaged brake caliper bolt boots
(4). |
Important: The brake pad should move easily within the brake caliper bracket.
- Check the inner brake pad for freedom of movement relative to the brake
caliper bracket.
| • | If brake pad movement is restricted for either brake pad, proceed
to the Cleaning Procedure. |
| • | If brake pad movement is not restricted for either brake pad,
proceed to the Installation Procedure |
Cleaning Procedure

- Remove the brake pads
(5) from the brake caliper bracket.
- Remove the brake pad retainers (4) from the brake caliper bracket.
- Use a wire brush in order to clean away any rust and debris from
the brake caliper bracket where the brake pads/brake pad retainers contact
the brake caliper bracket.
- Use a wire brush in order to clean away any rust and debris from
the brake pads where the brake pads contact the brake pad retainers/brake
caliper bracket.
- Clean away any rust and debris from the brake pad retainers.
- Install the brake pad retainers to the brake caliper bracket.
- Apply a thin coat of silicone grease (GM P/N 18010909 or
equivalent) to the brake pad retainers/brake caliper bracket where the brake
pads come in contact with the brake pad retainers/brake caliper bracket.
- Perform the Inspection Procedure for the opposite side brake caliper/bracket.
Installation Procedure
- Install the tire and wheel.
Tire and Wheel Removal and Installation
in Tires and Wheels.
- Perform the Inspection Procedure for the opposite side brake caliper/bracket.
- Lower the vehicle.
- Fill the master cylinder to the proper level with new clean brake
fluid. Refer to
Master Cylinder Reservoir Filling
in Hydraulic Brakes.
Caution: Do not move the vehicle until a firm brake pedal is obtained. Failure
to obtain a firm pedal before moving vehicle may result in personal injury.
- Pump the brake pedal (3/4 of a full stroke) as many times as necessary
to obtain a firm brake pedal.


