For 1990-2009 cars only
Removal Procedure
Notice: To prevent equipment damage, never connect or disconnect the wiring harness connection from the EBCM with the ignition switch in the ON position.
- Turn the ignition switch to the OFF position.
- Remove the air cleaner housing from the engine compartment. Refer to Air Cleaner Assembly Replacement in Engine Controls.
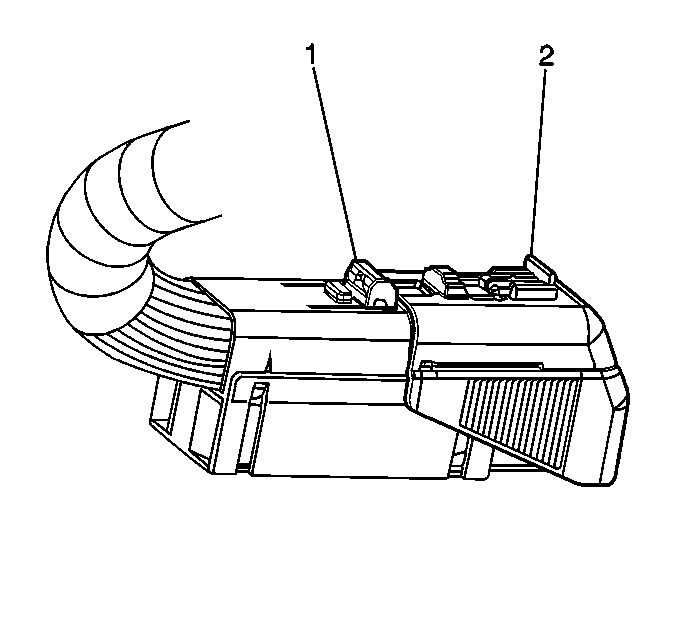
- Remove red locking tab from connector lock tab (1).
- Push down lock tab (1) and then move sliding connector cover (2) to the open position.
- Disconnect the EBCM harness connector.
- Brush off any dirt/debris that has accumulated on the assembly.
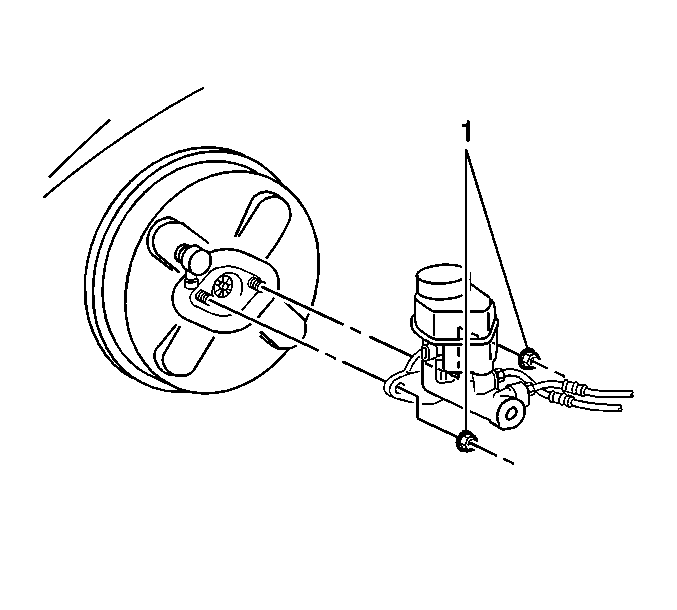
- Remove the master cylinder mount nuts (1).
- Remove the master cylinder and place the master cylinder off to the side, do not disconnect the master cylinder brake pipes.
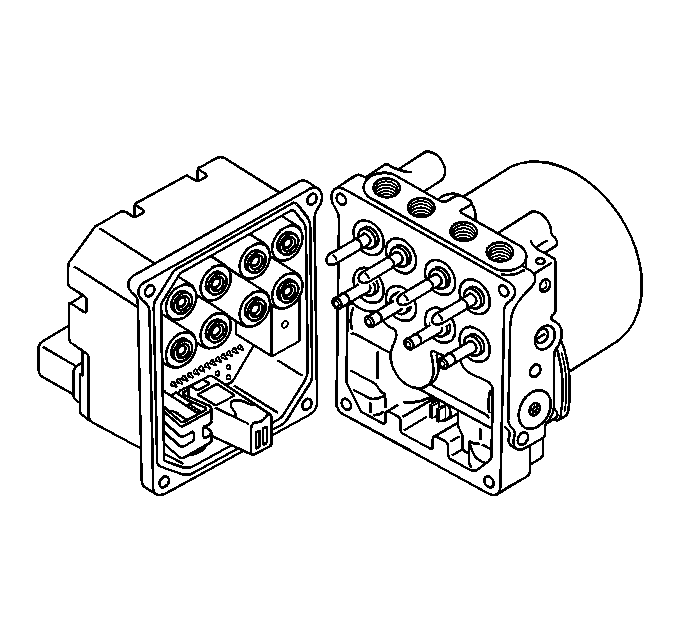
- Remove the four EBCM to BPMV screws.
- Separate the EBCM from the BPMV by gently pulling apart until separated.


Important: Do not pry apart using a tool. Be careful not to damage BPMV surface. Care must be taken not to damage the solenoid valves when the EBCM is removed from the BPMV.
Installation Procedure
- Clean the BPMV surface with alcohol using a clean rag.
- Install the EBCM to the BPMV.
- Install the four screws that attaches the EBCM to BPMV.
- Install the master cylinder to the brake booster.
- Install the master cylinder mount nuts (1).
- Connect the EBCM harness connector.
- Push down lock tab (1) and then move sliding connector cover (2) back in the home position to lock.
- Insert red locking tab back in place.
- Install the air cleaner housing. Refer to Air Cleaner Assembly Replacement in Engine Controls.
- Turn the ignition switch to the RUN position, do not start engine.
- Perform the Diagnostic System Check - ABS .

Tighten
Tighten the four screws to 5 N·m (44 lb in).

Tighten
Tighten the two mount nuts to 25 N·m (18 lb ft).

