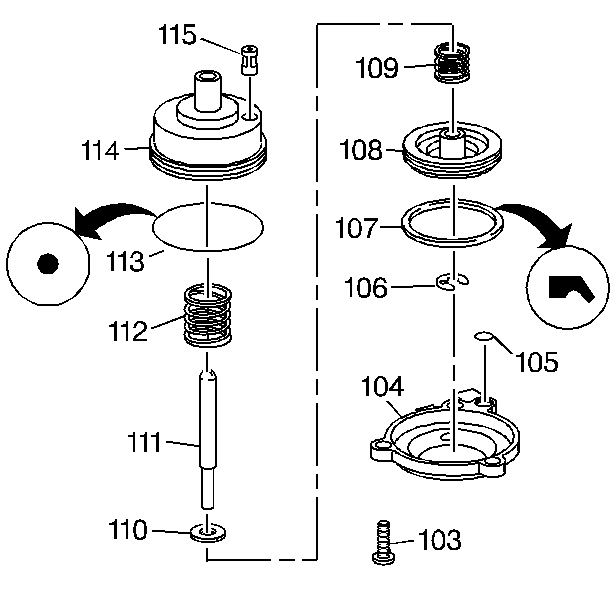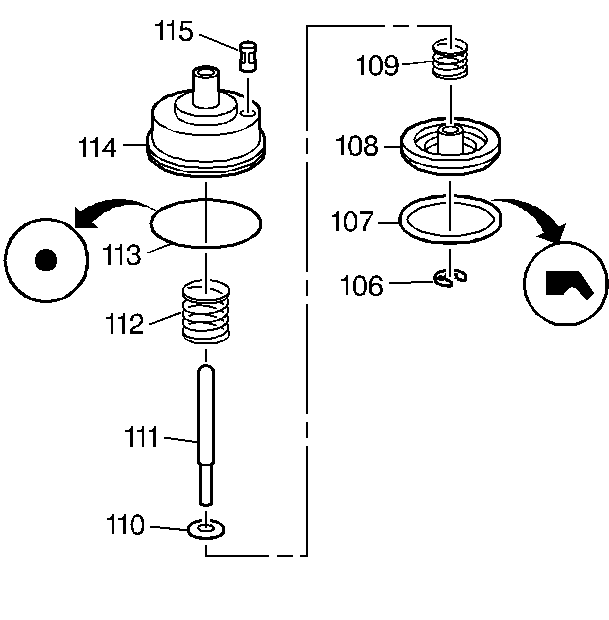
- Inspect the components of the 2-1 manual band servo for the following
conditions:
| • | A damaged, worn or porous servo piston cylinder (114) |
| • | A damaged, worn or porous servo piston (108) |
| • | A damaged or worn servo piston pin (111) |
| • | A broken or damaged servo piston spring (112) |
| • | A broken or damaged servo piston cushion spring (109) |
| • | A damaged or plugged servo exhaust screen (115) |
| • | A damaged servo cover seal (105) |
| • | A damaged servo piston seal (107) |
| • | A damaged servo piston cylinder O-ring seal (113) |

- Assemble the servo piston spring retainer (110), the servo piston cushion
spring (109) and the servo piston (108) onto the servo piston pin (111).
- Use a small screwdriver in order to install the servo piston pin
retaining ring (106).
- Install the servo piston seal (107) onto the servo piston (108).
Lubricate the servo piston seal (107) with automatic transmission fluid.
- Assemble the servo exhaust screen (115) and the servo piston cylinder
O-ring seal (113) onto the servo piston cylinder (114). Lubricate the servo
piston cylinder O-ring seal (113) with automatic transmission fluid.
- Attach the servo piston spring (112) to the servo piston assembly
(106-111).
- Install the servo piston and spring assembly (106-112) into
the servo piston cylinder assembly (113-115) and set the assemblies
aside.


