Information on Inability to Shift Out of Park and System Buzzer Sounds After Installation of Sit-N-Lift System

| Subject: | Information on Inability to Shift Out of Park and System Buzzer Sounds After Installation of Sit-N-Lift™System |
| Models: | 2001-2004 Chevrolet Venture |
| 2001- 2004 Oldsmobile Silhouette |
| 2001-2004 Pontiac Montana |
| with RPA -- AQW-- Sit-N-Lift™ System |
This bulletin is being revised to correct the RPA code. Please discard Corporate Bulletin # 04-08-50-002 (Section 08 -- Body & Accessories)
Some technicians may find that after installation of a Sit-N-Lift™ system, the system buzzer sounds and the vehicle will not shift out of park.
If the proper installation instructions are not followed, it is possible to bend the limit switch bracket and possibly damage the limit switch. If this occurs, the seat does not retract the full travel and, therefore, will not make contact with the pivot switch. In this case, the seat does not lock, sounds the buzzer, and will not allow the vehicle to shift out of park.
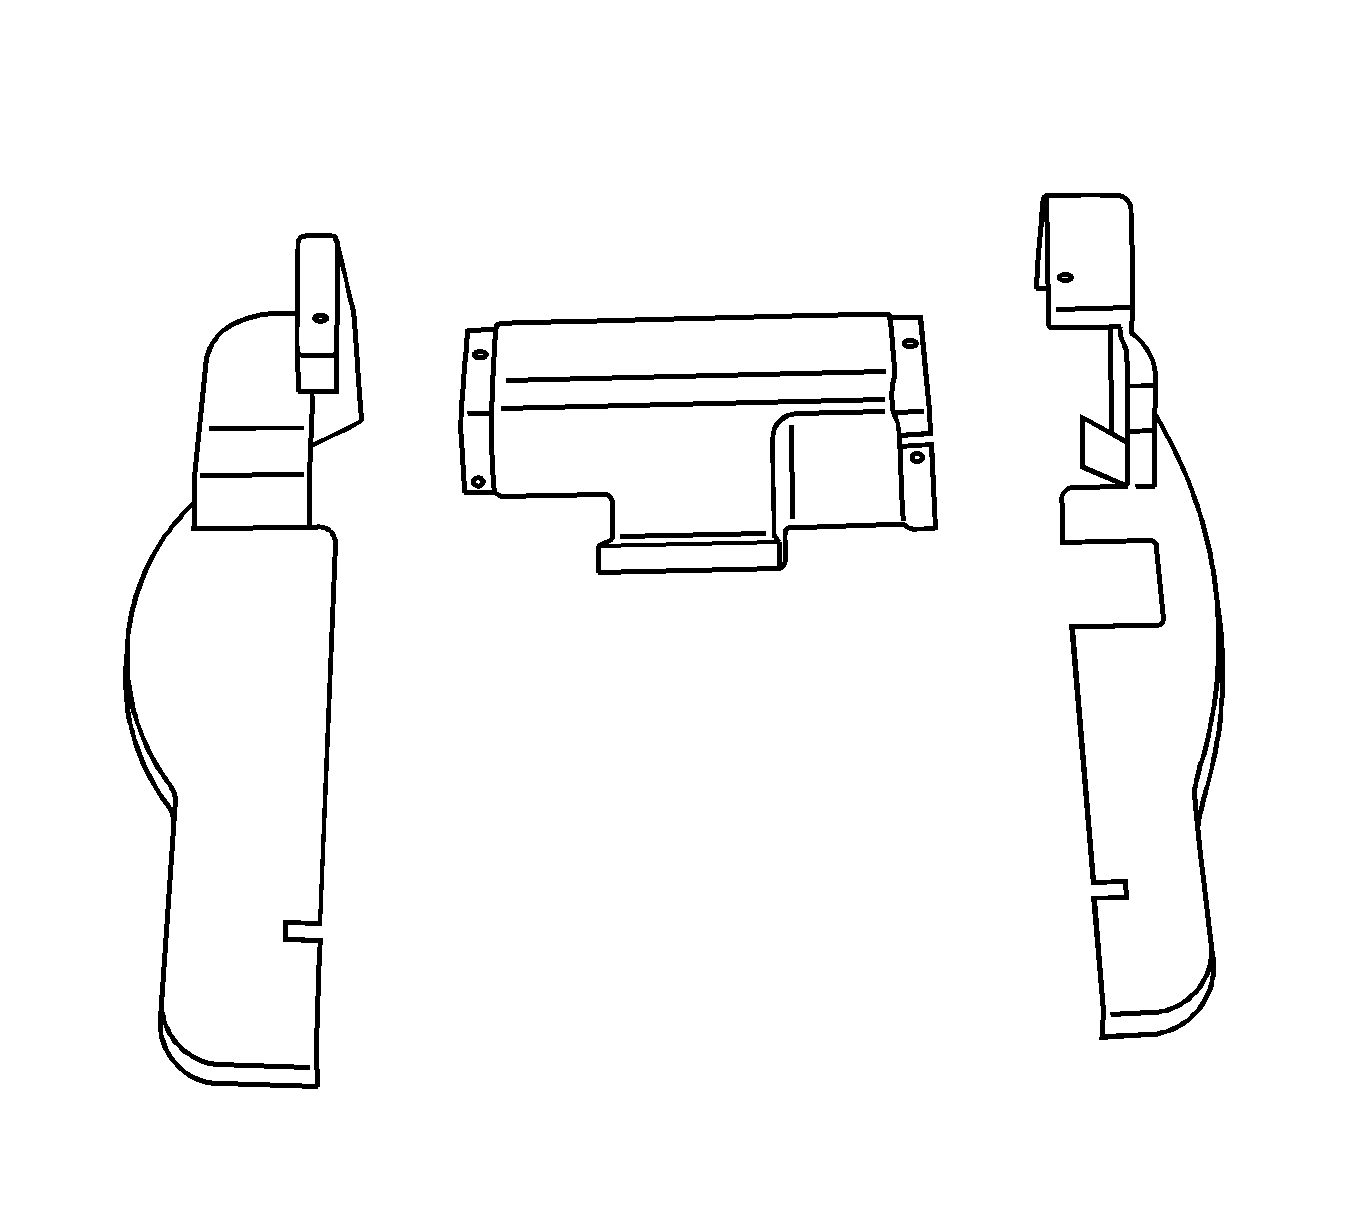
The limit switch bracket has been redesigned to provide better protection to the limit switch. To correct this concern, follow the procedure below to replace the limit switch bracket. If the limit switch casing has been damaged, it will also be necessary to replace the limit switch.
- Position the seat so that it is extended out of the vehicle.
- Remove the upper seat trim.
- Remove the bolts from the limit switch bracket.
- Remove the bracket with the switch from the seat base.
- Remove the switch from the bracket.
- Disconnect the electrical connector.
- Reinstall the limit switch to the new bracket.
- Connect the electrical connector to the limit switch.
- Install the tie-wrap through the holes at the bottom of the bracket, adjacent to the connector to retain the connector to the limit switch.
- Reinstall the bracket and limit switch.
- Install the bolts to the bracket.
- Install the stop bracket to the seat base:
- Adjust the lift stop position. The lift should stop when the post on the left stop makes contact in the rubber bushing, and the right post is 2-4 mm (0.040-.080 in) from contacting the metal hook.
- Inspect the seat for proper installation by operating the seat in and out, and ensuring the vehicle can be shifted out of park.
- With the seat in the extended-out position, reinstall the upper seat trim.
- Reposition the seat in the vehicle.
Important: The screws that hold the limit switch to the bracket will have to be installed from the opposite side due to the redesign of the bracket.
Tighten
Tighten the bolts to 5.8 N·m (50 lb in).

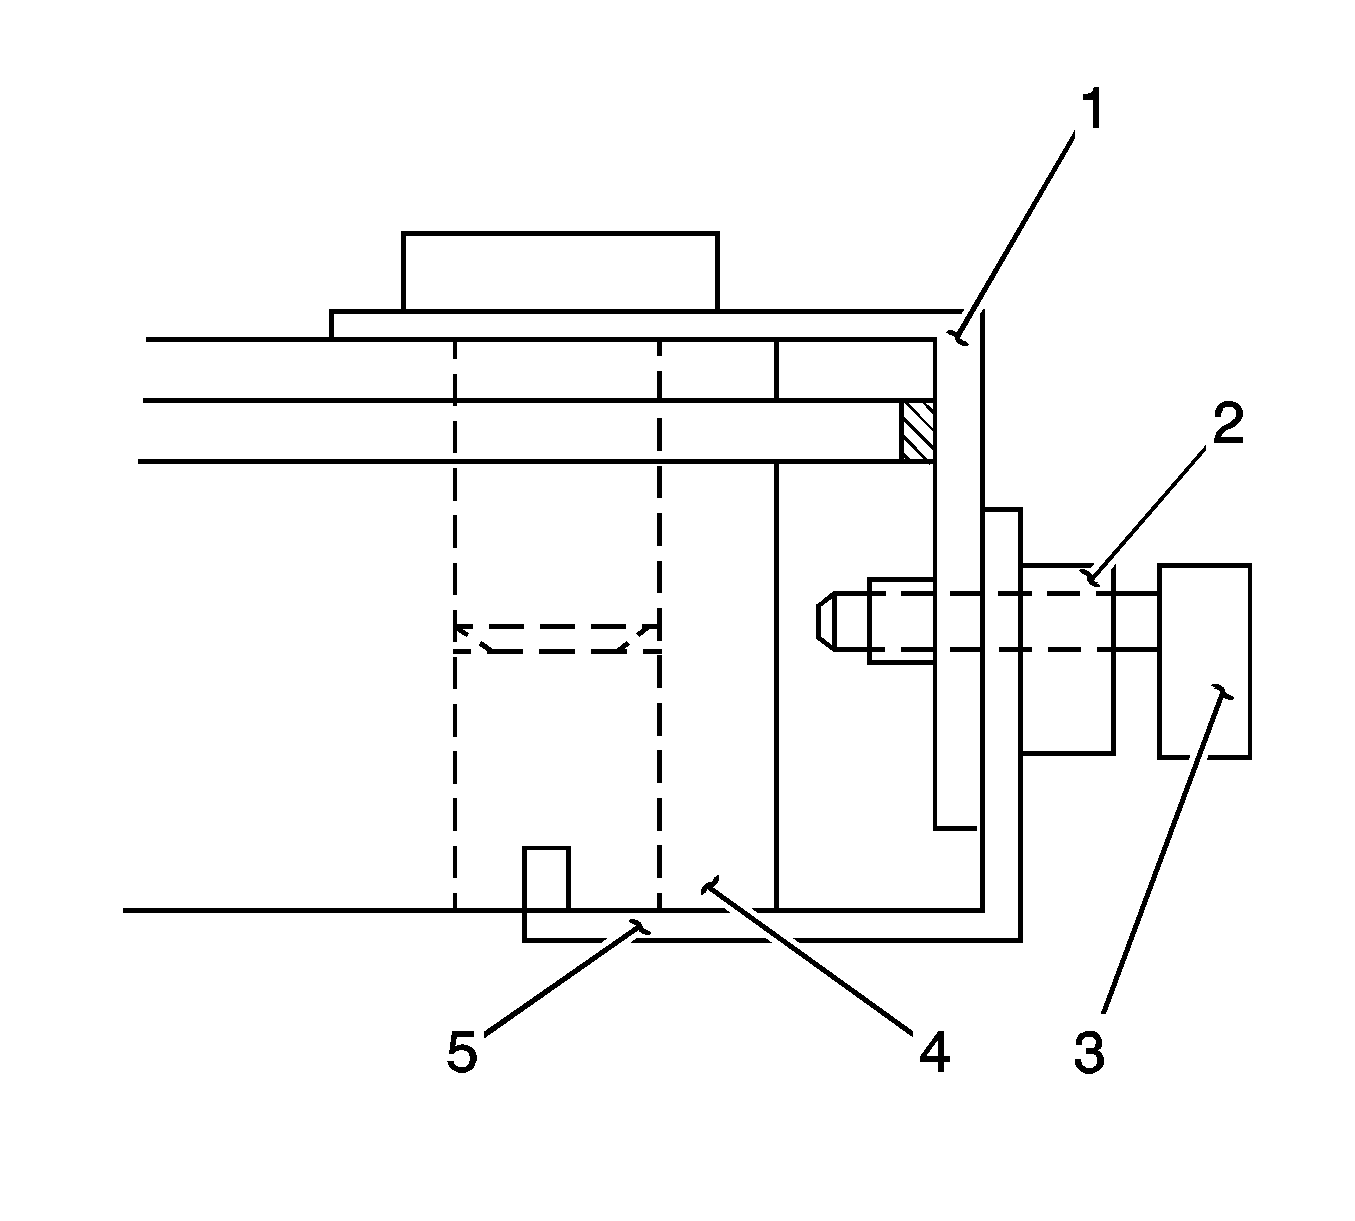
| 12.1. | Remove the bolt from the right rear side rail. |
| 12.2. | Install the upper stay (1) onto the rear slide rail (4). |
| 12.3. | Install the bolt. |
Tighten
Tighten the bolt to 50 N·m (35 lb ft).
| 12.4. | Install the lower stay (5) using the switch bolt (3) and lock nut (2). Tighten the switch bolt (3) until it touches the slide rail end (4) and then loosen the bolt (3) approximately 1 turn to have a clearance of 1mm from the end of the rail. |
| 12.5. | Tighten the lock nut (2). |
Tighten
Tighten the nut to 5.8 N·m (50
lb in).
Important: Adjust the limit switch at the top hole on the slotted mounted bracket. The switch body is delicate. Take care when you adjust and tighten the switch.
Parts Information
Part Number | Description |
|---|---|
88963160 | Upper Limit Switch -- Sit-N-Lift™ |
88963155 | Upper Limit Switch Bracket -- Sit-N-Lift™ |
Parts are currently available from GMSPO.
Warranty Information
For vehicles repaired under warranty, use:
Labor Operation | Description | Labor Time |
|---|---|---|
R9702 | Replace -- Limit Switch and Bracket -- Sit-N-Lift™ System | 0.6 hr |
