Case Extension Assemble FWD Only

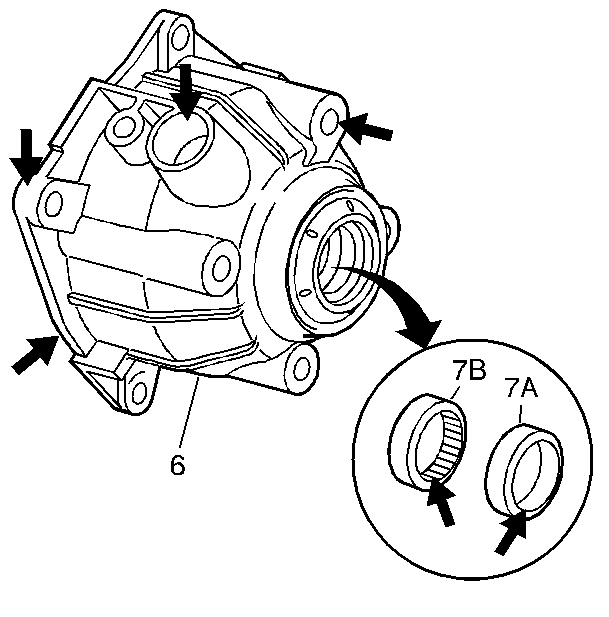
- Inspect the case extension assembly (6) for the following conditions:
| • | A damaged or porous sealing surface for the case extension seal |
| • | A damaged or porous sealing surface for the vehicle speed sensor |
| • | A damaged or porous sealing surface for the right drive shaft oil seal assembly |
| • | A worn or damaged front differential carrier bushing (7A) or output shaft bearing assembly (7B) |
| • | A porous or damaged case extension housing |

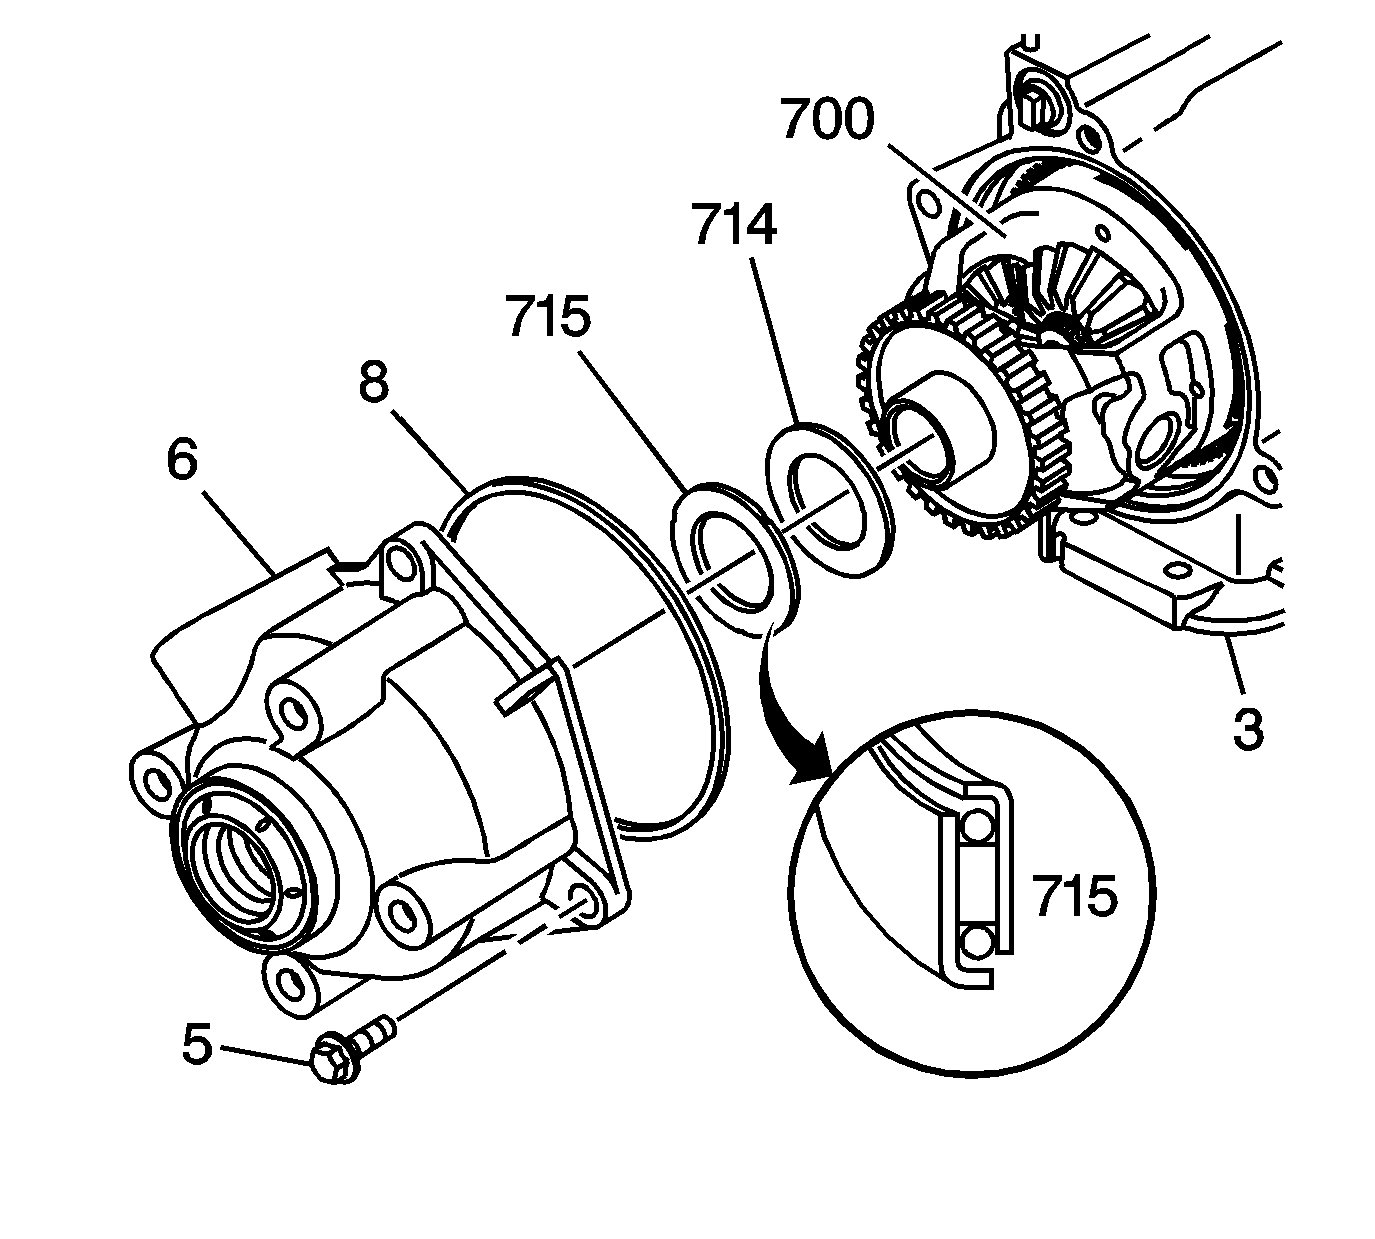
- Install the differential carrier/case selective thrust washer (714) onto the differential/final drive
carrier assembly (700).
- Install the thrust bearing (715) onto the differential/final drive carrier assembly (700).
- Affix the seal (8) onto the case extension (6).
- Install the case extension assembly (6) onto the case (3).
Notice: Use the correct fastener in the correct location. Replacement fasteners
must be the correct part number for that application. Fasteners requiring
replacement or fasteners requiring the use of thread locking compound or sealant
are identified in the service procedure. Do not use paints, lubricants, or
corrosion inhibitors on fasteners or fastener joint surfaces unless specified.
These coatings affect fastener torque and joint clamping force and may damage
the fastener. Use the correct tightening sequence and specifications when
installing fasteners in order to avoid damage to parts and systems.
- Install only two case extension bolts (5) for later removal.
Tighten
Tighten the bolts until the extension is flush to the case.
- Perform end play check, refer to
Differential Carrier End Play Check
.


