For 1990-2009 cars only
Steering Shaft, Lower Bearing, and Jacket Replacement Column Shift
Tools Required
| • | J 21854-01 Pivot Pin Remover |
| • | J 41688 Centering Sphere Installer Tool |
Removal Procedure
- Remove the ignition lock cylinder case. Refer to Ignition Lock Cylinder Case Replacement .
- Remove the tilt spring assembly only. Refer to Steering Column Tilt Spring Replacement .
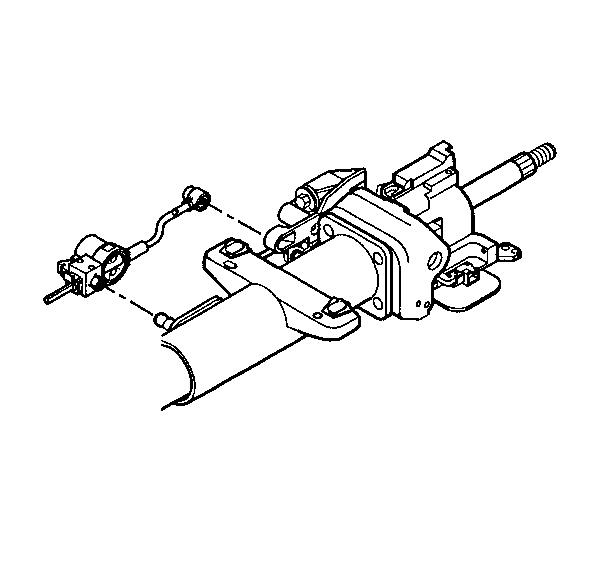
- Remove the automatic transmission shift lock control.
- Use a screwdriver to pry the automatic transmission shift lock control from the steering column jacket assembly.
- Remove the 3 flat -head 6-lobed socket tapping screws from the linear shift assembly.
- Remove the following items from the steering shaft assembly:
- Dispose of the lower spring retainer (4).
- Remove the 2 pivot pins from the steering column support assembly with J 21854-01 .
- Install the tilt knob and tilt the column to the upright position.
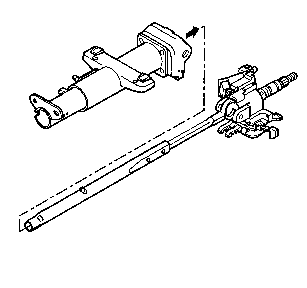
- Remove the upper tilt head assembly with the steering shaft assembly.
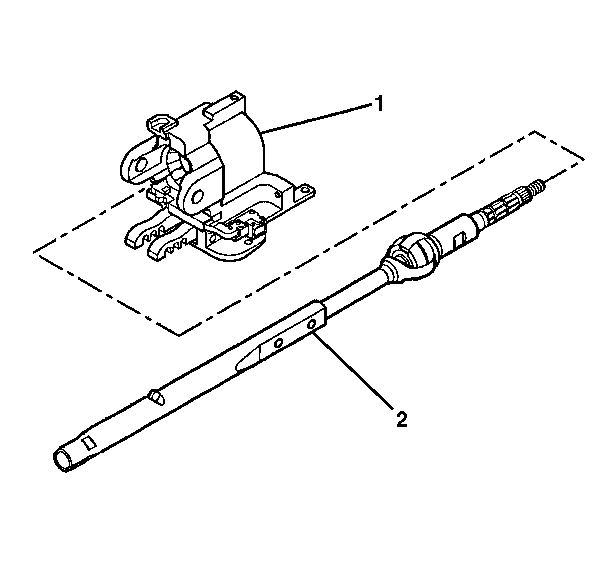
- Remove the steering shaft assembly (2) from the steering column tilt head assembly (1).
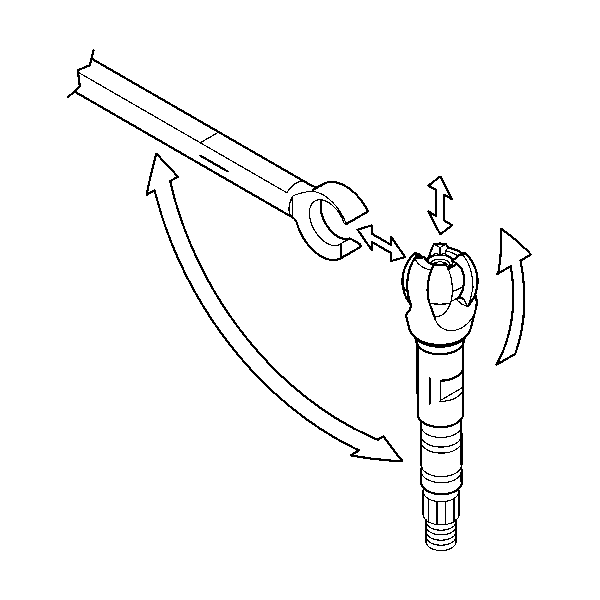
- Tilt the race and upper shaft assembly 90 degrees to the lower shaft assembly and disengage. If necessary, remove and discard the old centering sphere and spring.
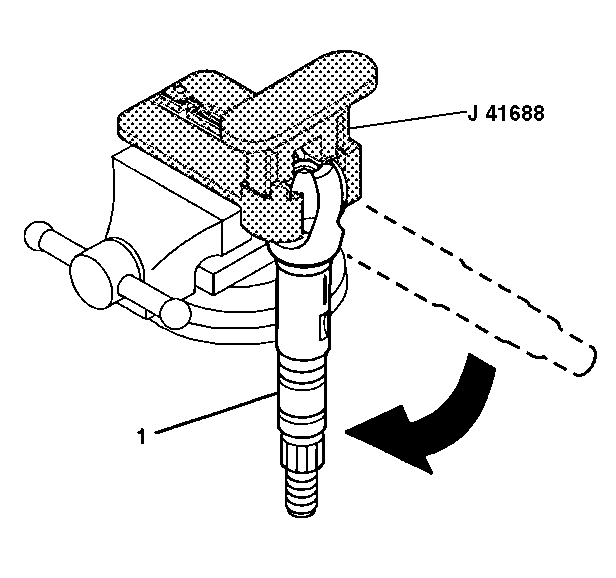
- Insert the race and upper shaft assembly (1) into J 41688 .
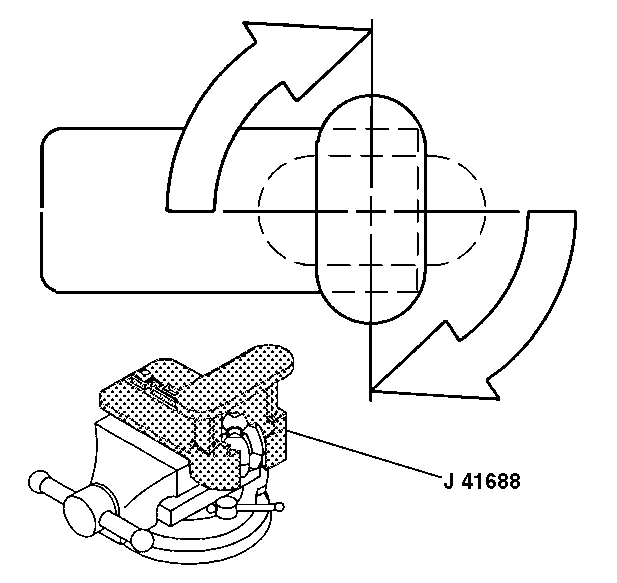
- Rotate the driver 90 degrees in the counterclockwise direction in order to disengage the centering sphere.
- Remove the shaft preload spring and the centering sphere from J 41688 .
- If necessary, discard the old centering sphere and the old joint preload spring.
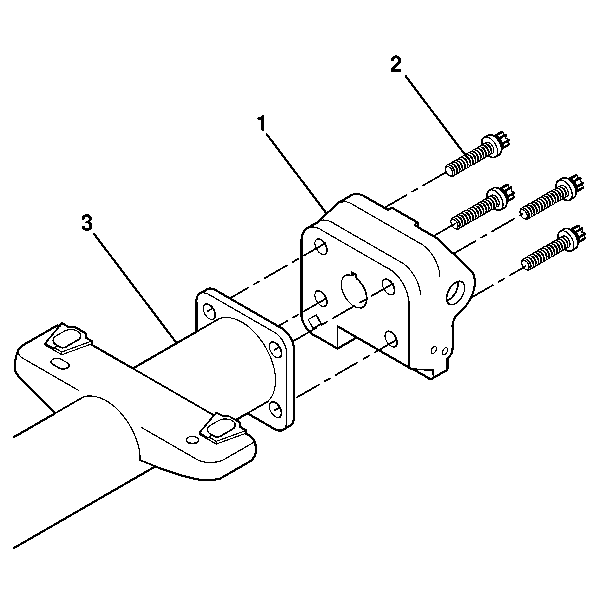
- Remove the 4 steering column support TORX® screws from the steering column support assembly (1).
- Dispose of the 4 steering column support TORX® screws (2).
- Remove the steering column support assembly (1) from the steering column jacket assembly (3).
- Inspect the steering column for accident damage. Refer to Steering Column Accident Damage Inspection .
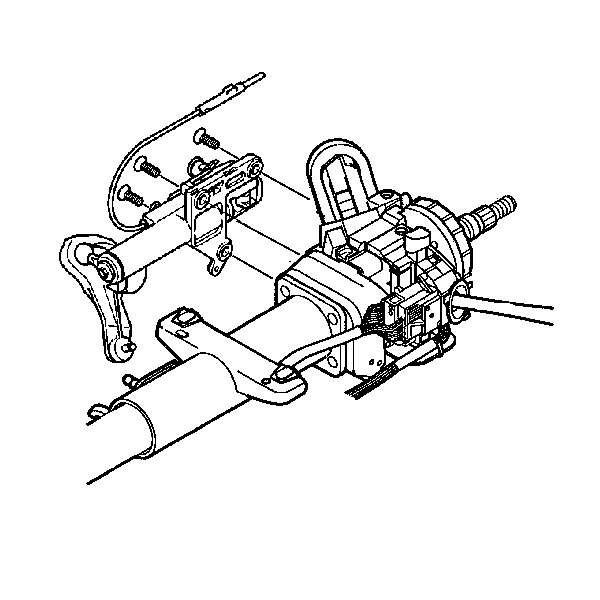
Remove the linear shift assembly.
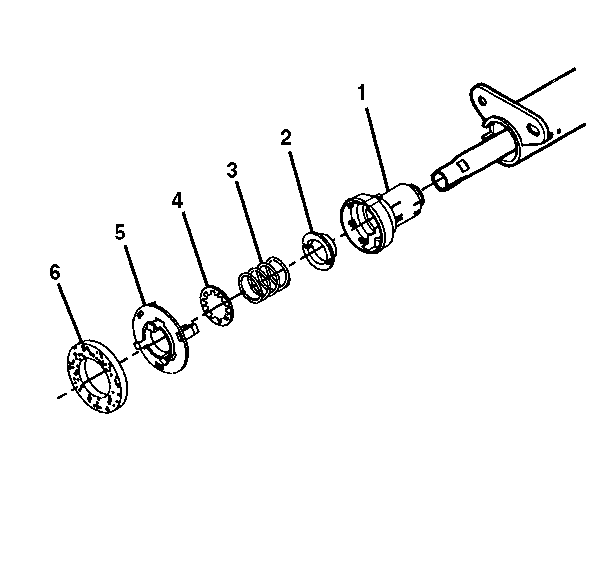
| 6.1. | The steering shaft seal (6) |
| 6.2. | The sensor retainer (5) |
| 6.3. | The lower spring retainer (4) |
| 6.4. | The lower bearing spring (3) |
| 6.5. | The lower bearing seat (2) |
| 6.6. | The adapter and bearing assembly (1) |
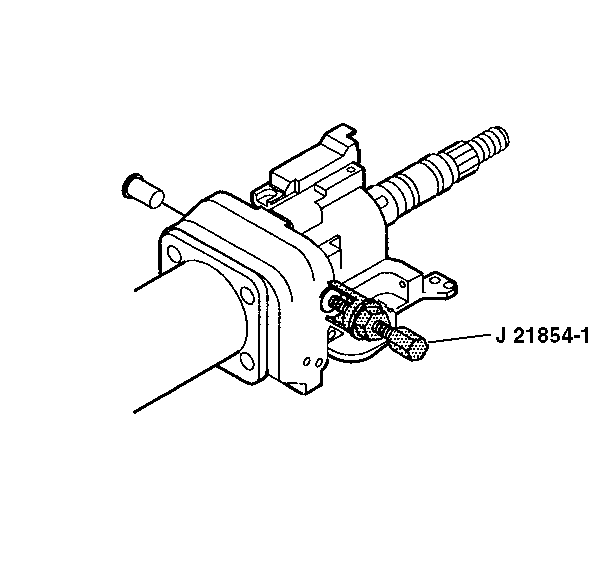
Important: Mark the race and upper shaft assembly and the lower shaft assembly to ensure proper assembly. Failure to assemble properly will cause the steering wheel to be turned 180 degrees.
Installation Procedure
- Install the steering column support assembly (1) to the steering column jacket assembly (3).
- Install the 4 new steering column support TORX® screws (2).
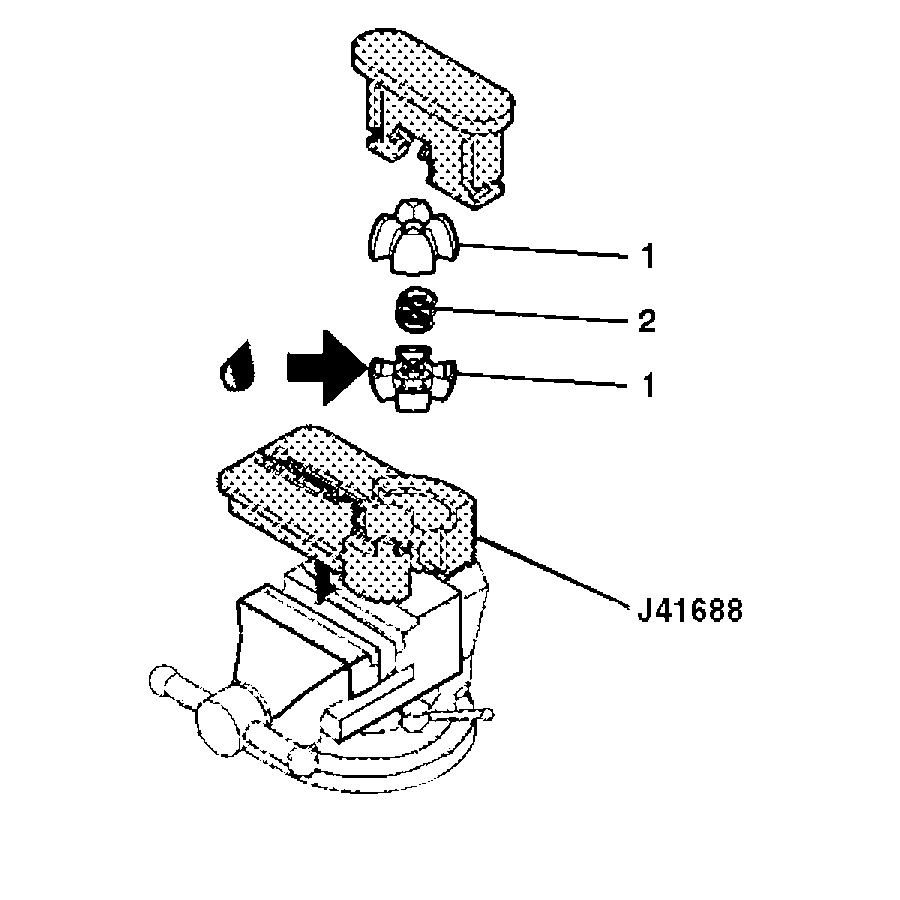
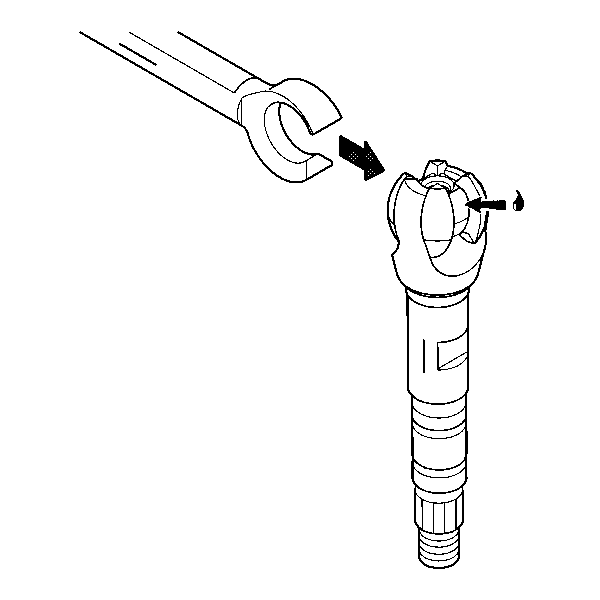
- Lubricate the centering sphere (1) with GM P/N 12345718 (Canadian P/N 10953516).
- Install the centering sphere (1) and the joint preload spring (2) into J 41688 .
- Compress the centering sphere and joint preload spring. Rotate the driver 90 degrees in the clockwise direction until the arms lock in place.
- Install the race and upper shaft assembly (1) into J 41688 .
- Rotate the race and upper shaft assembly (1) 90 degrees.
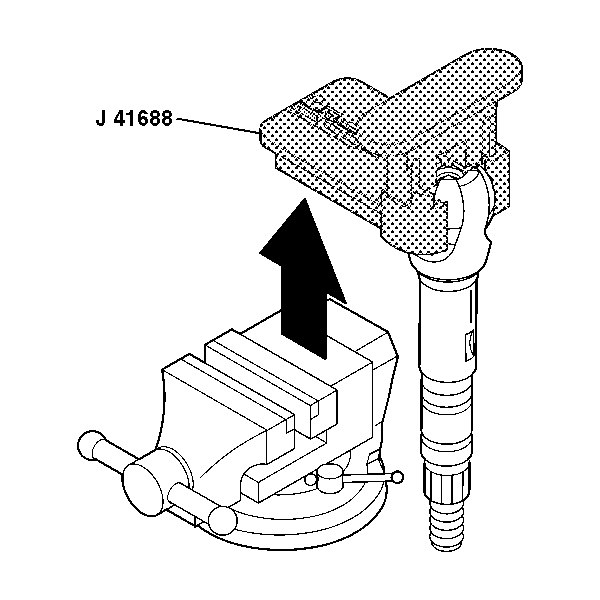
- Remove the race and upper shaft assembly with J 41688 .
- Rotate the race and upper shaft assembly 90 degrees from J 41688 and remove with the race and upper shaft assembly.
- Lubricate the centering sphere with GM P/N 12345718 (Canadian P/N 10953516).
- Install the lower shaft assembly to the race and upper shaft assembly.
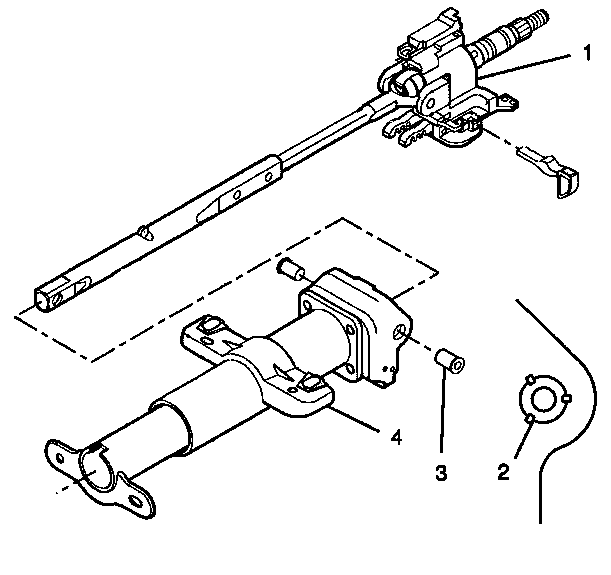
- Install the steering shaft assembly (2) into the steering column tilt head assembly (1).
- Install the steering column tilt head assembly (1) to the steering column jacket assembly (4).
- Install the 2 pivot pins (3).
- Stake the pivot pins location (2).
- Install the following components onto the steering shaft assembly:
- Install the linear shift assembly.
- Install the 3 flat -head 6-lobed socket tapping screws
- Install the automatic transmission shift lock control.
- Install the gear shift lever and put the column in the NEUTRAL position.
- Adjust the automatic transmission shift lock control using the following steps:
- Inspect the automatic transmission shift lock control using the following steps:
- Install the tilt spring assembly only. Refer to Steering Column Tilt Spring Replacement .
- Install the ignition lock cylinder case. Refer to Ignition Lock Cylinder Case Replacement .

Important: Once the steering column support assembly has been staked 3 times, it must be replaced.
Notice: Refer to Fastener Notice in the Preface section.
Tighten
Tighten the 4 steering column support TORX® screws to 17 N·m
(13 lb ft).



| 16.1. | The adapter and bearing assembly (1) |
| 16.2. | The lower bearing seat (2) |
| 16.3. | The lower bearing spring (3) |
| 16.4. | The lower spring retainer (4) |
| 16.5. | The sensor retainer (5) |
| 16.6. | The steering shaft seal (6) |

The linear shift assembly must be out of the PARK position to install the lower socket tapping screw.
Tighten
Tighten the 3 flat -head 6-lobed lobed socket tapping screws
to 10 N·m (89 lb in).

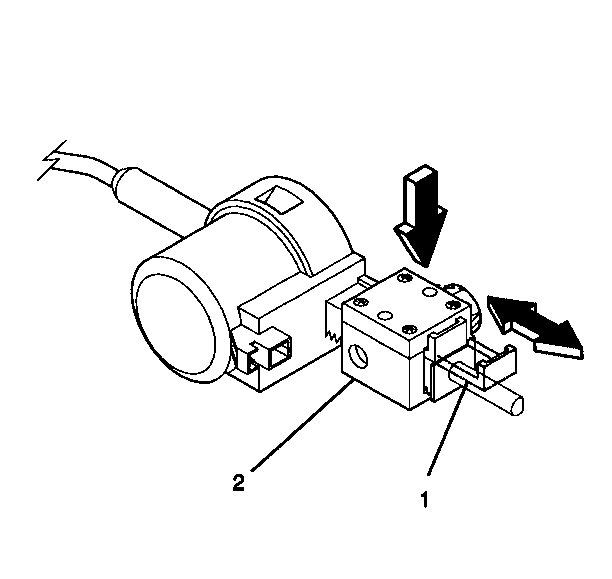
| 21.1. | Pull the tab (1) out on the block side (2) of the automatic transmission shift lock control. |
| 21.2. | Press on the adjuster block (2) to compress the internal adjuster spring to disengage the adjuster teeth. Slide the adjuster block (2) as far away from the solenoid as possible. |
| 21.3. | Lock in place by pushing the tab (1) back in. |
| 22.1. | The automatic transmission shift lock control must lock the shift lever clevis when it is put into the PARK position. |
| 22.2. | When the column is installed in the vehicle you will not be able to shift the gear shift lever out of the PARK position without pressing on the brake pedal. The solenoid will be energized. |
| 22.3. | Readjust if needed. |
