SMU-New Automatic Level Control Sensor Link Ball Stud Replacement (IRS) Procedure, Automatic Level Control Sensor Link Replacement (IRS) Procedure, Automatic Level Control Sensor Replacement (IRS) Pro

| Subject: | New Automatic Level Control Sensor Link Ball Stud Replacement (IRS) Procedure, Automatic Level Control Sensor Link Replacement (IRS) Procedure, Automatic Level Control Sensor Replacement (IRS) Procedure |
| Models: | 2002-2005 Chevrolet Venture |
| 2002-2004 Oldsmobile Silhouette |
| 2002-2005 Pontiac Montana |
This bulletin is being issued to add the Automatic Level Control Sensor Link Ball Stud Replacement (IRS) procedure, Automatic Level Control Sensor Link Replacement (IRS) procedure and Automatic Level Control Sensor Replacement (IRS) procedure in the Automatic Level Control sub-section of the Service Manual.
The following information has been updated within SI. If you are using a paper version of this Service Manual, please make a reference to this bulletin on the affected page.
Automatic Level Control Sensor Link Ball Stud Replacement (IRS)
Removal Procedure
- Remove the ELC/TRAILER fuse.
- Raise and support the vehicle. Refer to Lifting and Jacking the Vehicle.
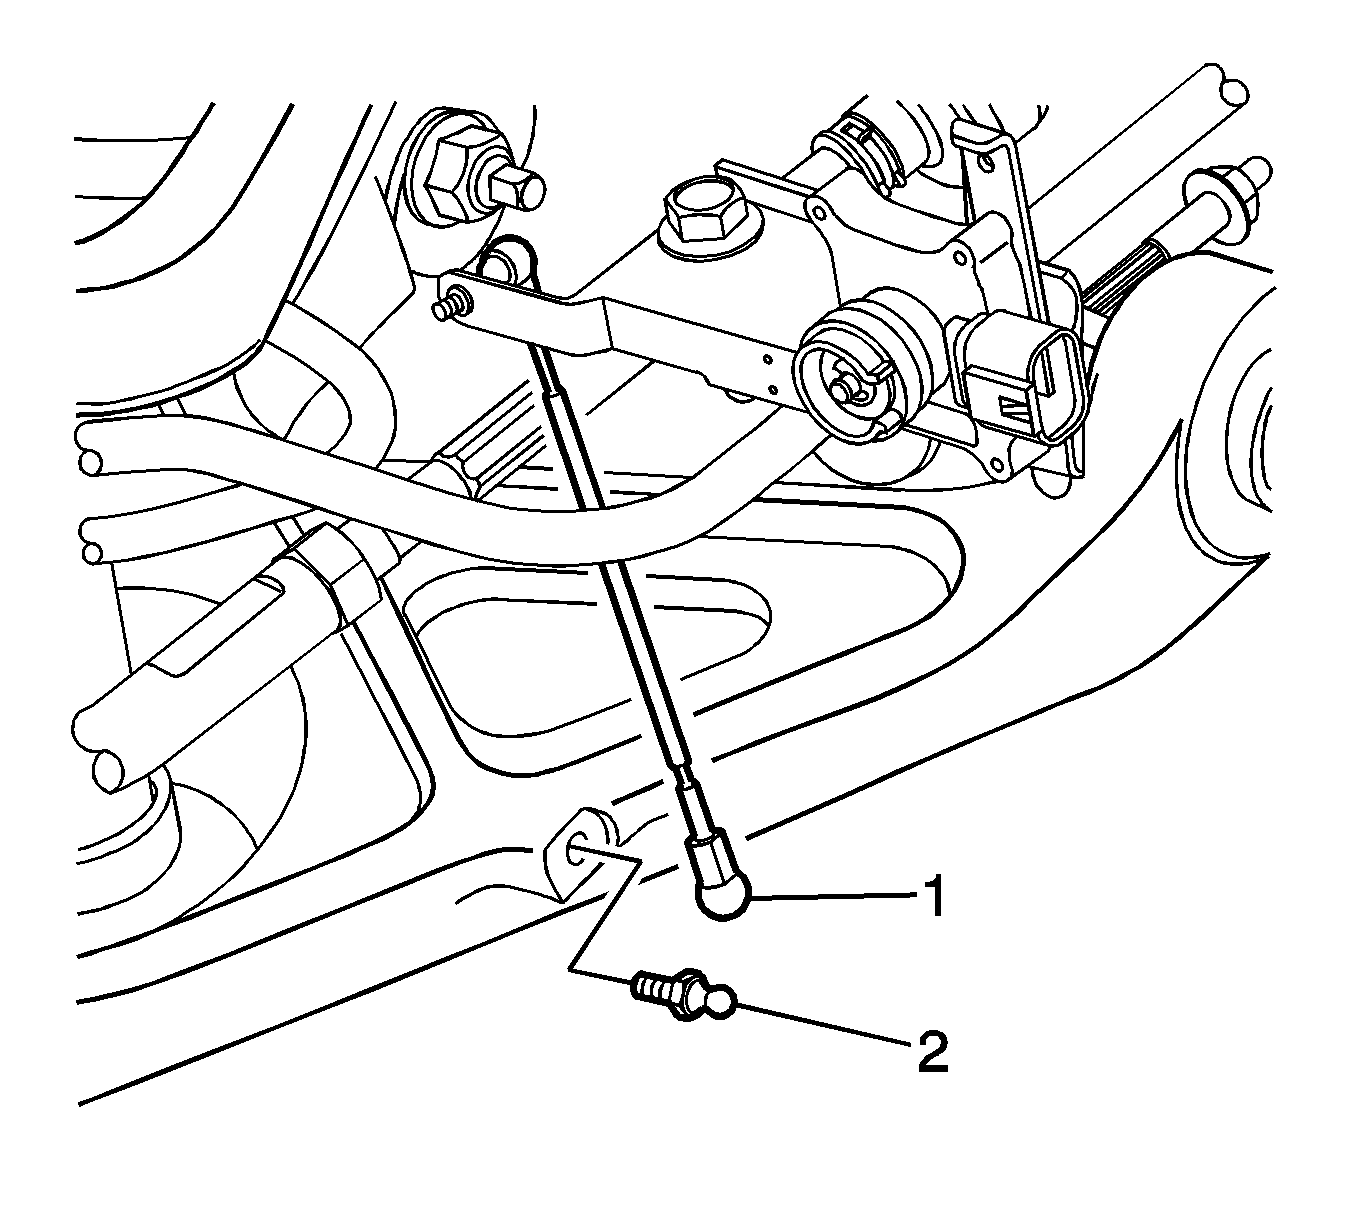
- Remove the automatic level control sensor link (1) from the ball stud.
- Remove the ball stud (2) from the control arm.

Important: When removing the link, do NOT bend or break the sensor arm.
Installation Procedure
- Install the ball stud (2) to the control arm.
- Install the automatic level control sensor link (1) to the ball stud.
- Lower the vehicle.
- Install the ELC/TRAILER fuse.

Tighten
Tighten the ball stud to 12 N·m (106 lb in).
Automatic Level Control Sensor Link Replacement (IRS)
Removal Procedure
- Raise and support the vehicle. Refer to Lifting and Jacking the Vehicle.
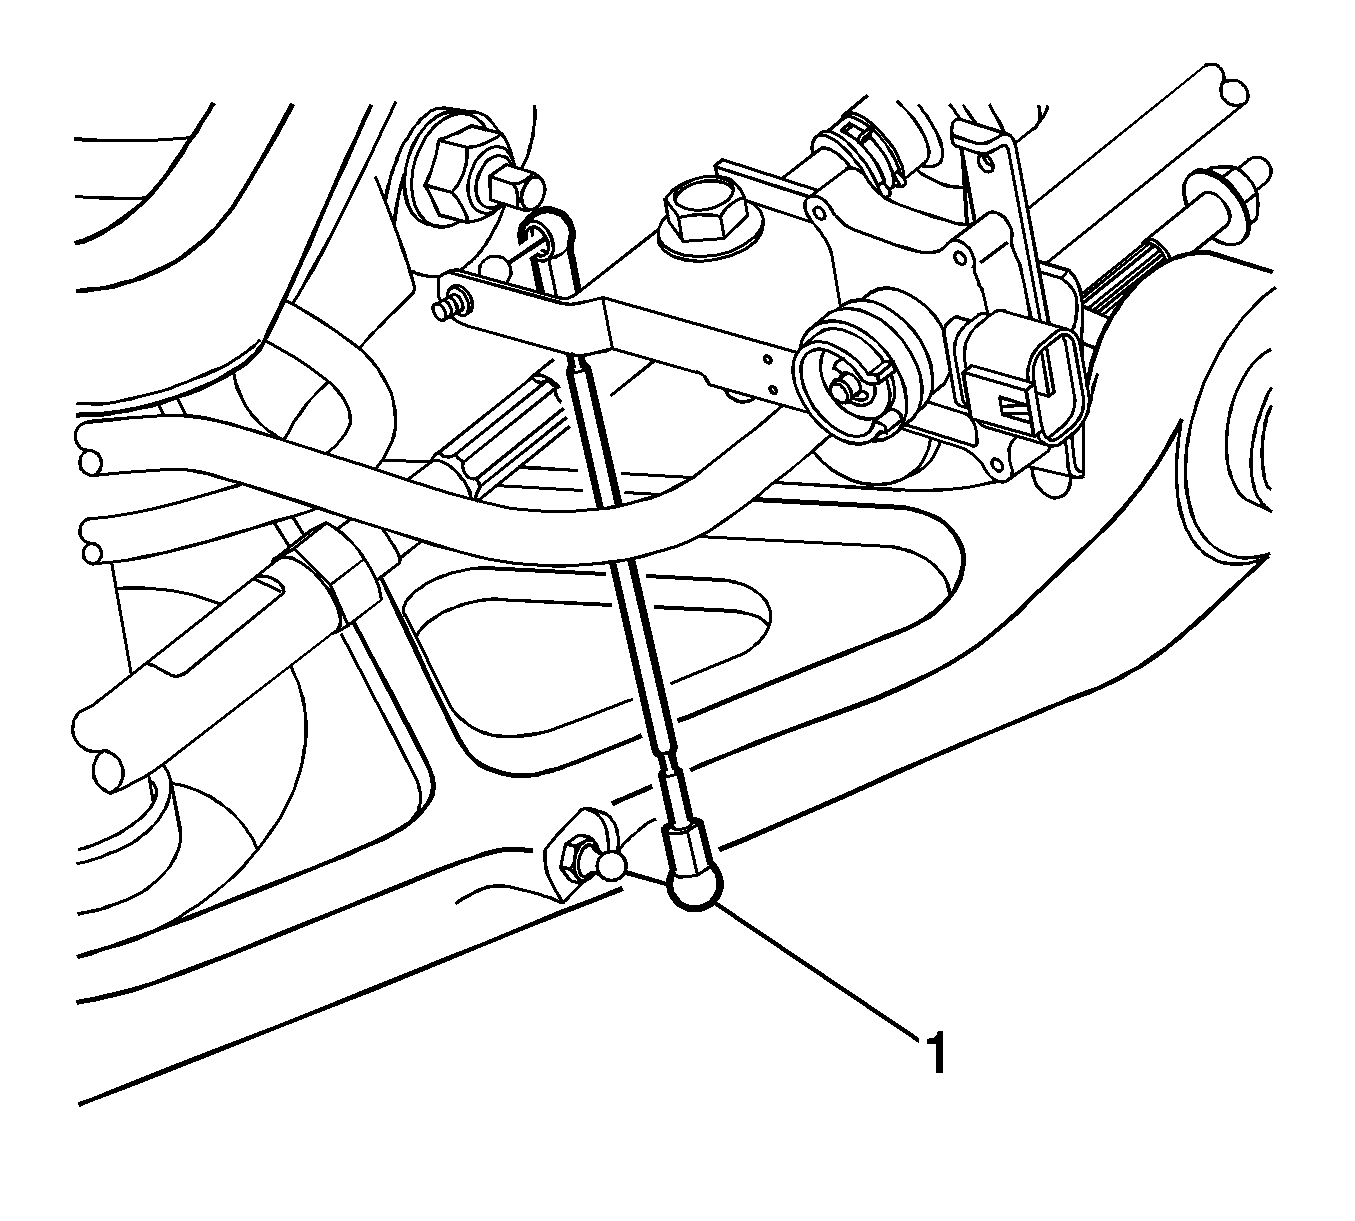
- Remove the ELC sensor link (1) from the ball studs on the sensor and control arm.

Installation Procedure
- Position the ELC sensor link (1) to the ball studs on the sensor and control arm.
- Press the ELC sensor link ends onto the ball studs until fully seated.
- Lower the vehicle.

Automatic Level Control Sensor Replacement (IRS)
Removal Procedure
- Raise and support the vehicle. Refer to Lifting and Jacking the Vehicle in General Information.
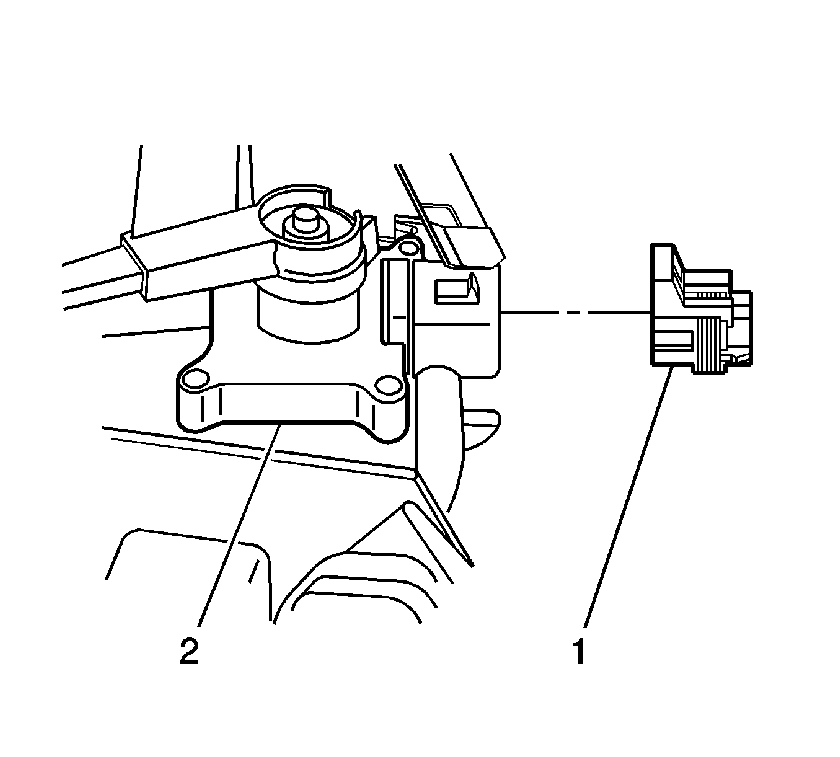
- Remove the automatic level control height sensor electrical connector (1).
- Remove the automatic level control height sensor link from the ball stud. Refer to Automatic Level Control Sensor Link Replacement.
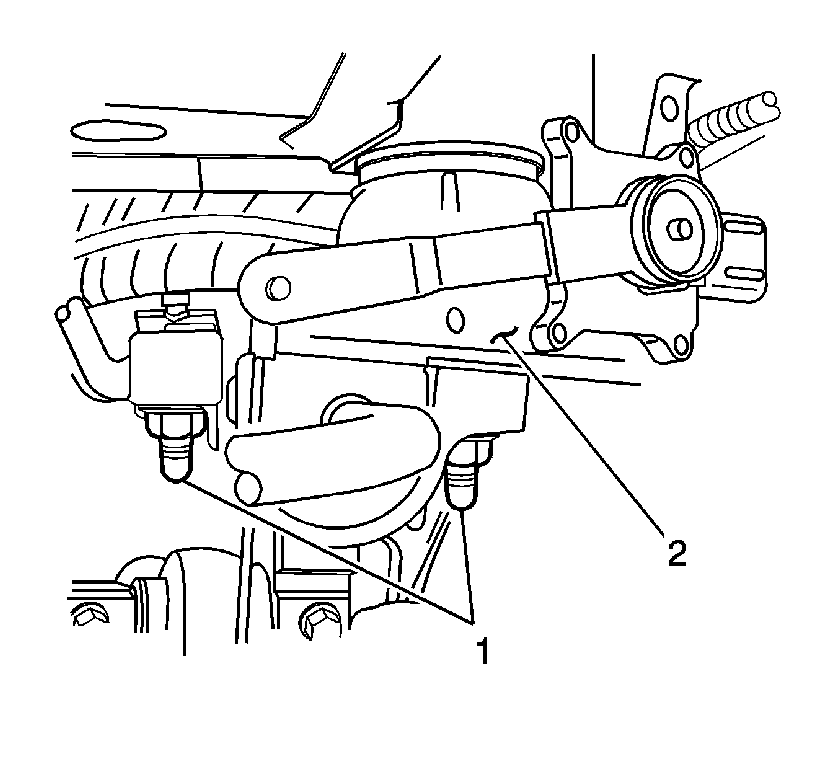
- Remove the automatic level control height sensor bracket bolts (1).
- Remove the automatic level control height sensor from the vehicle.
- Remove the automatic level control height sensor link from the sensor arm .
Important: When replacing the height sensor a diagnostic system check must be performed .


Installation Procedure
- Install the automatic level control height sensor link onto the sensor arm .
- Install the automatic level control height sensor to the vehicle.
- Install the height sensor bracket bolts (1).
- Install the automatic level control height link to the tie rod ball stud. Refer to Automatic Level Control Sensor Link Replacement.
- Install the automatic level control height sensor electrical connector (1).
- Lower the vehicle.

Notice: Refer to Fastener Notice in Cautions and Notices.
Tighten
Tighten the height sensor bracket bolts to 85 N·m (63 lb ft)

