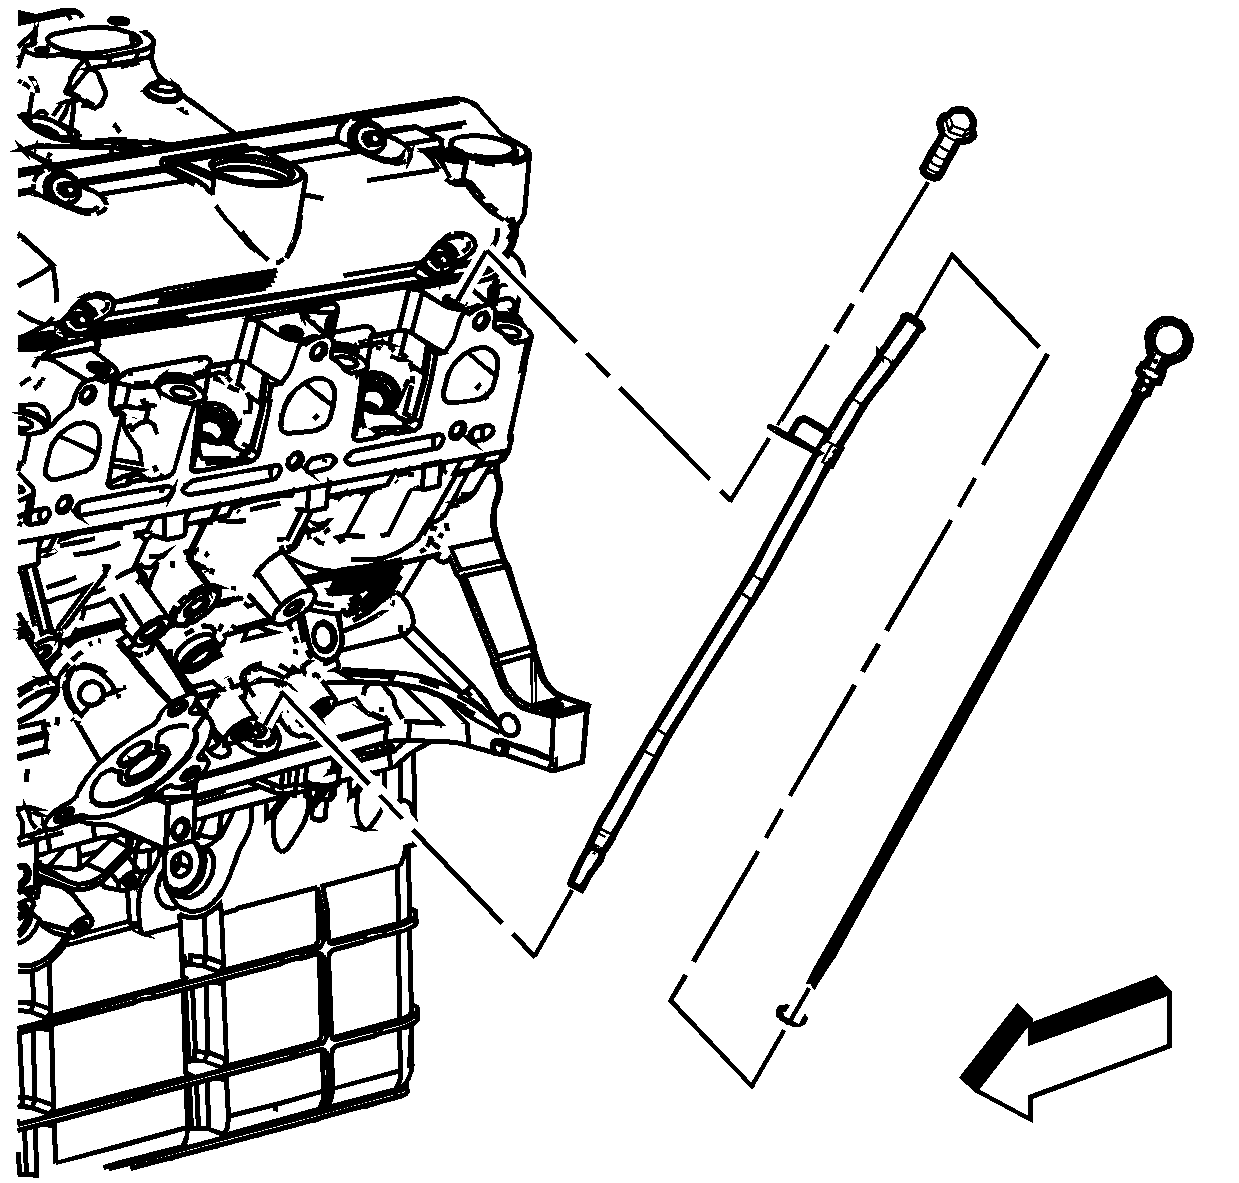
- Install the oil level indicator tube and oil level indicator.
- Install the oil level indicator tube bolt.
- Install the thermostat bypass pipe.
- Install the thermostat bypass pipe to engine front cover bolt.
- Apply threadlock GM P/N 12345382 (Canadian P/N 10953489) to the throttle body studs.
- Install the thermostat bypass pipe to throttle body bolt and nuts.
- Install the heated oxygen sensor connector to the thermostat bypass pipe.
- Install the spark plug wire clip to the thermostat bypass pipe.
- Install the spark plug wires onto the spark plugs.
- Position the 16 pin connector harness as shown in the graphic and secure the connector in its respective location.
- Install the thermostat bypass pipe hose to pipe.
Notice: Use the correct fastener in the correct location. Replacement fasteners must be the correct part number for that application. Fasteners requiring replacement or fasteners requiring the use of thread locking compound or sealant are identified in the service procedure. Do not use paints, lubricants, or corrosion inhibitors on fasteners or fastener joint surfaces unless specified. These coatings affect fastener torque and joint clamping force and may damage the fastener. Use the correct tightening sequence and specifications when installing fasteners in order to avoid damage to parts and systems.
Tighten
Tighten the oil level indicator tube bolt to 25 N·m (18 lb ft).

Tighten
Tighten the thermostat bypass pipe to engine front cover bolt to 10 N·m (89 lb in).
Tighten
Tighten the thermostat bypass pipe to throttle body bolt and nuts to 10 N·m (89 lb in).
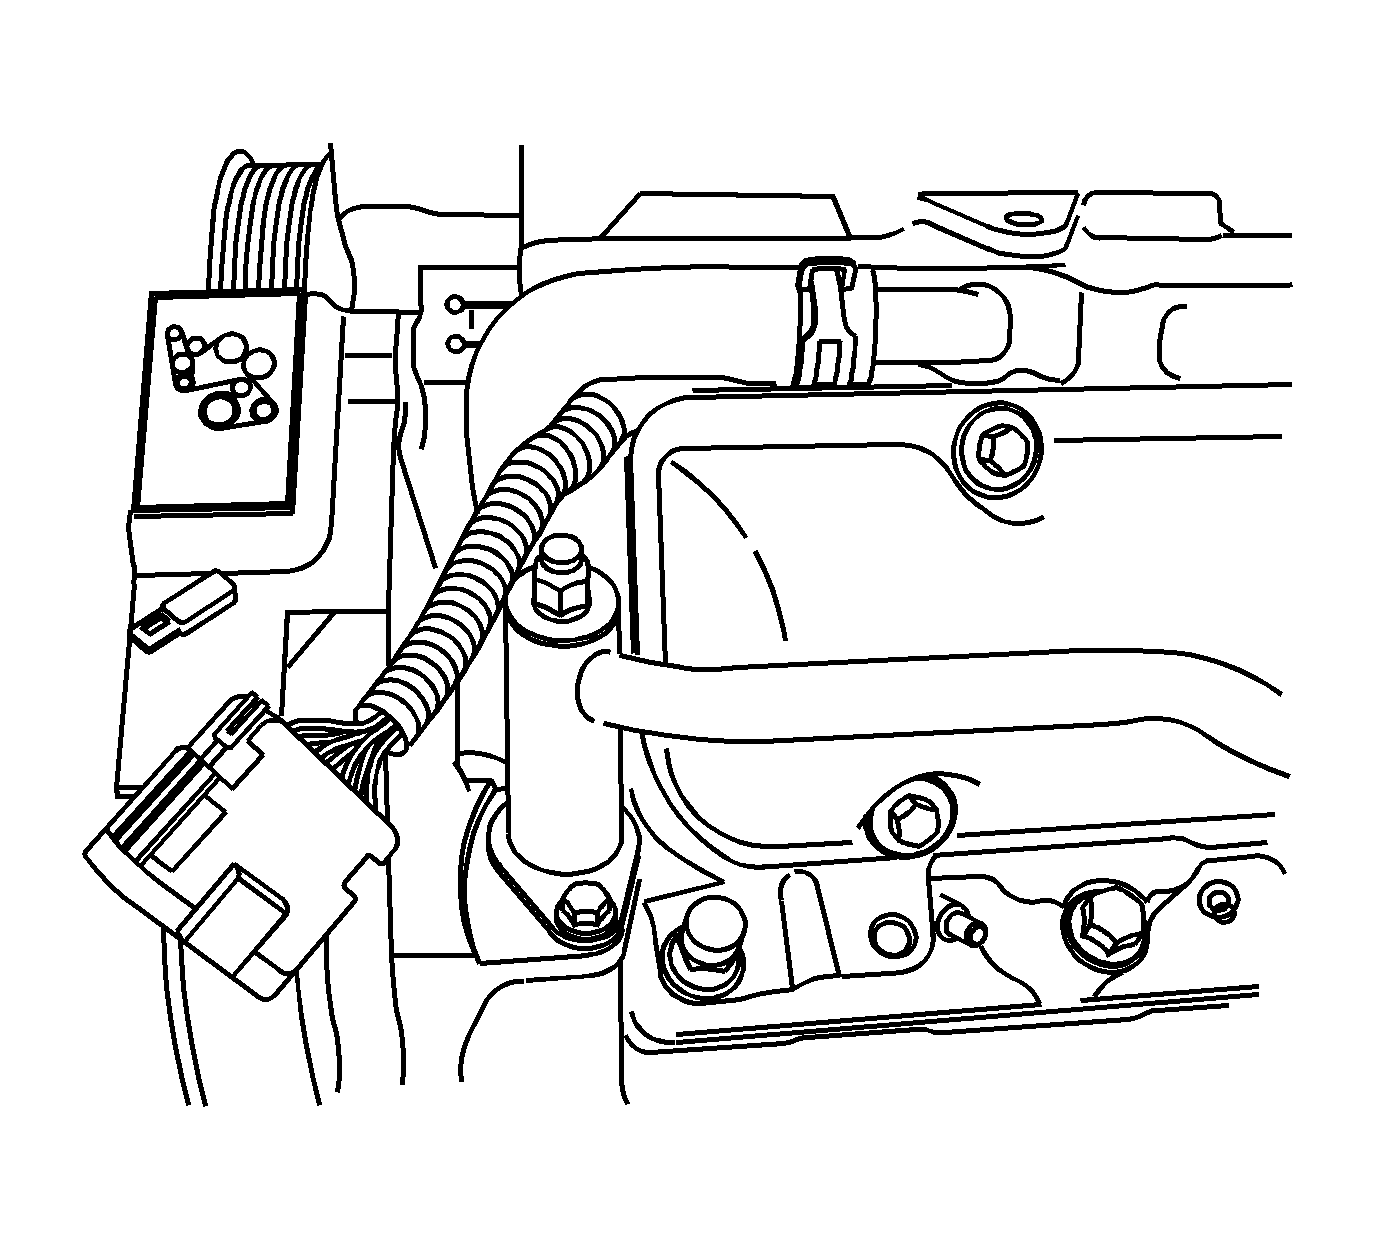
Important: Passenger cars will have a 16 spin connector attached to the bypass pipe. Passenger vans will have the connector attached to the drive belt shield.
