The DIC has different modes which can be accessed by pressing the DIC buttons located on the center of the instrument panel. The buttons are the information, set/reset, and menu buttons.
The button functions are detailed in the following pages.
DIC Buttons
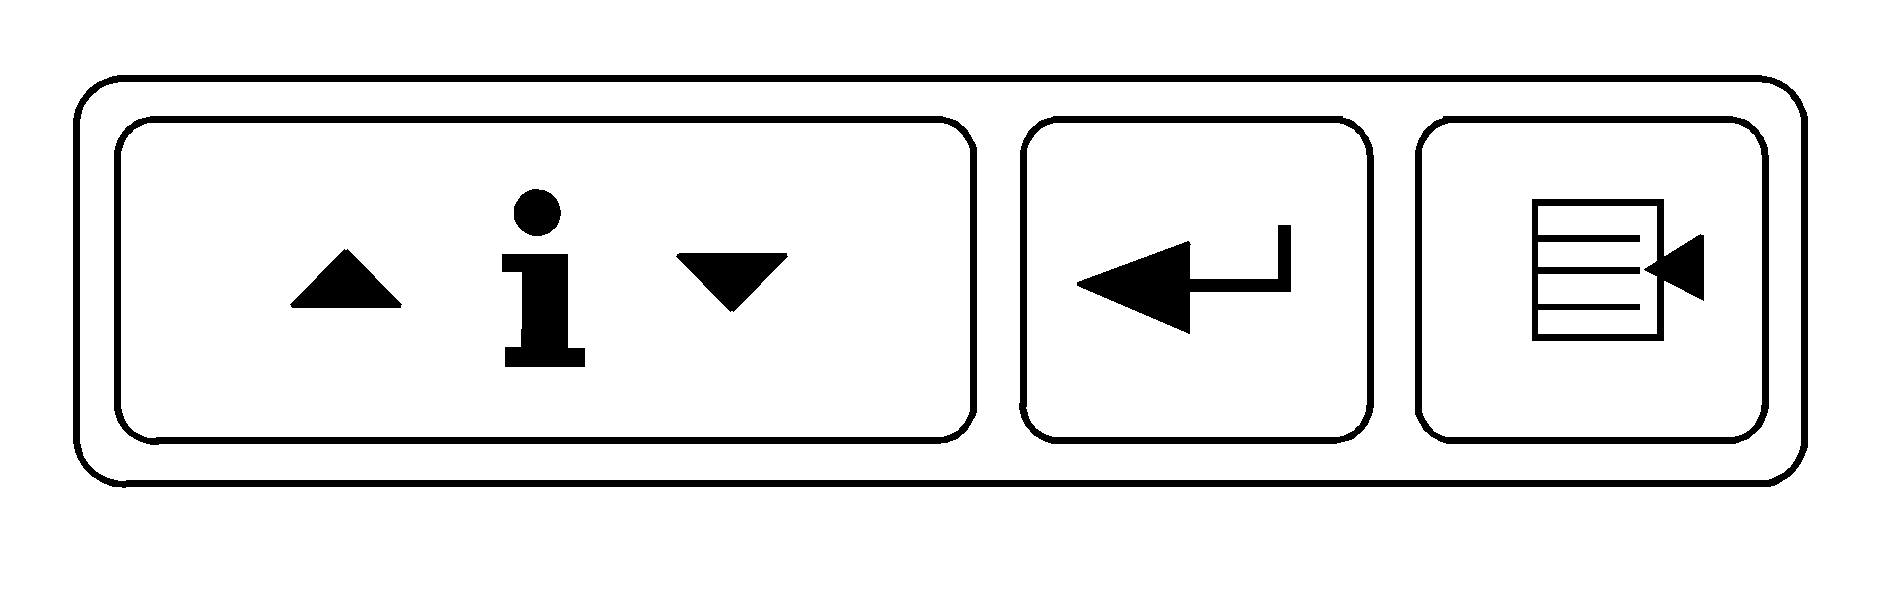
(Information): Press this button to display the odometer, trip distance, time elapsed, average speed, fuel economy, battery voltage, oil life, tire pressure readings, and to turn off the DIC.
(Set/Reset): Press this button to set or reset certain functions and to turn off or acknowledge messages on the DIC.
(Menu): Press this button to display the units, language, personalization, if equipped, compass zone and compass calibration, if equipped. See DIC Vehicle Personalization and DIC Compass for more information.
Information Button Items
(Information): Press this button to scroll through the following items:Odometer
Press the information button until the odometer displays. This mode shows the distance the vehicle has been driven in either miles or kilometers.
Trip A and Trip B
Press the information button until A or B displays. This mode shows the current distance traveled in either miles or kilometers since the last reset for each trip odometer. Both trip odometers can be used at the same time.
The display will show the odometer on the top line and the trip odometer information, either A or B, on the bottom line.
Each trip odometer can be reset to zero separately by pressing the set/reset button while the desired trip odometer is displayed.
There is also a retroactive trip odometer function that performs the following for each trip odometer:
| • | If the vehicle's speed has exceeded 3 mph (5 km/h) during the current ignition cycle, this function will set the trip odometer to the distance driven during the current ignition cycle. |
| • | If the vehicle's speed has not exceeded 3 mph (5 km/h), this function will set the trip odometer to the distance driven during the previous ignition cycle plus the distance driven during the current ignition cycle. |
Press and hold the set/reset button for three seconds, then release the button. The retroactive trip odometer value will be set into the currently displayed trip odometer.
Time Elapsed
Press the information button until TIME ELAPSED :00 displays. This mode is like a stopwatch, in that you can clock the time it takes to get from one point to another. Each of the fields for the hours, minutes, and seconds are two numeric digits.
Once TIME ELAPSED :00 is displayed, press the set/reset button to start the timing feature. Press the set/reset button again to stop it. If you will be starting and stopping your vehicle, during a trip for instance, the TIME ELAPSED feature will automatically start timing where it left off when you last stopped. To reset it, press and hold the set/reset button for about 1.5 seconds. The display will return to zero.
Average Speed
Press the information button until AVERAGE SPEED displays. This mode shows the average speed of the vehicle in miles per hour (mph) or kilometers per hour (km/h). This average is calculated based on the various vehicle speed recorded since the last reset of this value. To reset the value, press the information button to display AVERAGE SPEED, then press and hold the set/reset button. The display will return to zero.
Fuel Range
Press the information button until FUEL RANGE displays. This mode shows the approximate number of remaining miles or kilometers the vehicle can be driven without refueling.
Fuel range is based on several factors, including distance travelled, fuel used, fuel capacity, etc. This estimate will change if driving conditions change. For example, if driving in traffic and making frequent stops, this mode may read one number, but if the vehicle is driven on a freeway, the number may change even though the same amount of fuel is in the fuel tank. This is because different driving conditions produce different fuel economies. Generally, freeway driving produces better fuel economy than city driving. Fuel range cannot be reset.
If your vehicle is low on fuel, FUEL RANGE LOW will display followed by the LOW FUEL message. See "LOW FUEL" under DIC Warnings and Messages for more information.
Average Fuel Economy
Press the information button until AVG ECONOMY displays. This mode shows the approximate average miles per gallon (mpg) or liters per 100 kilometers (L/100 km). This number is calculated based on the number of mpg (L/100 km) recorded since the last time this menu item was reset. To reset AVG ECONOMY, press and hold the set/reset button. The display will return to zero.
Battery
Press the information button until BATTERY displays. This mode shows the current battery voltage.
Your vehicle's charging system regulates voltage based on the state of the battery. The battery voltage may fluctuate when viewing this information on the DIC. This is normal.
If there is a problem with the battery charging system, a DIC message will display. See DIC Warnings and Messages and Electric Power Management for more information.
Oil Life
Press the information button until OIL LIFE displays. This mode shows an estimate of the oil's remaining useful life. If you see OIL LIFE 99% on the display, that means 99% of the current oil life remains. The engine oil life system will alert you to change the oil on a schedule consistent with your driving conditions.
When the remaining oil life is low, the CHANGE OIL SOON message will appear on the display. You should change the oil as soon as possible. See Engine Oil. In addition to the engine oil life system monitoring the oil life, additional maintenance is recommended in the Maintenance Schedule in this manual. See Scheduled Maintenance for more information.
Remember, you must reset the OIL LIFE yourself after each oil change. It will not reset itself. Also, be careful not to reset the OIL LIFE accidentally at any time other than when the oil has just been changed. It cannot be reset accurately until the next oil change. To reset the engine oil life system, see Engine Oil Life System. The display will show 100% when the system is reset.
Tire Pressure
On vehicles with the Tire Pressure Monitor System (TPMS), you can press the information button until FRONT TIRE PRESSURE displays. This mode shows the pressure for the front tires. To view the pressure for the rear tires, press the information button again until REAR TIRE PRESSURE displays. The tire pressure will be shown in either pounds per square inch (psi) or kilopascals (kPa).
If a low tire pressure condition is detected by the system while driving, a message advising you to check the pressure in a specific tire will appear in the display. The tire pressure light will also flash and then remain on during the same ignition cycle. See Inflation - Tire Pressure and DIC Warnings and Messages for more information.
If the tire pressure display shows dashes or blanks instead of a value, there may be a problem with your vehicle. If this consistently occurs, see your dealer for service.
Menu Button Items
(Menu): Press this button to scroll through the following items:Units
Press the menu button until UNITS displays. This mode allows you to select between English or Metric units of measurement. Once in this mode, press the set/reset button to select between ENGLISH or METRIC.
Language
Press the menu button until the language screen displays. This mode allows you to select the language in which the DIC messages will appear. Once in this mode, press the set/reset button to select among the following choices:
| • | English |
| • | Francais (French) |
| • | Espanol (Spanish) |
Personalization (Uplevel Only)
Press the menu button until PERSONAL PROGRAM displays. Your vehicle may have personalization capabilities that allow you to program certain features to a preferred setting for up to two drivers.
Your vehicle may also have customization capabilities that allow you to program certain features to one preferred setting. Customization features can only be programmed to one setting on the vehicle and cannot be programmed to a preferred setting for up to two drivers. See DIC Vehicle Personalization for additional information on personal programming.
Compass Zone (Uplevel Only)
To change the compass zone through the DIC, see DIC Compass.
Compass Calibration (Uplevel Only)
The compass can be manually calibrated. To calibrate the compass through the DIC, see DIC Compass.
