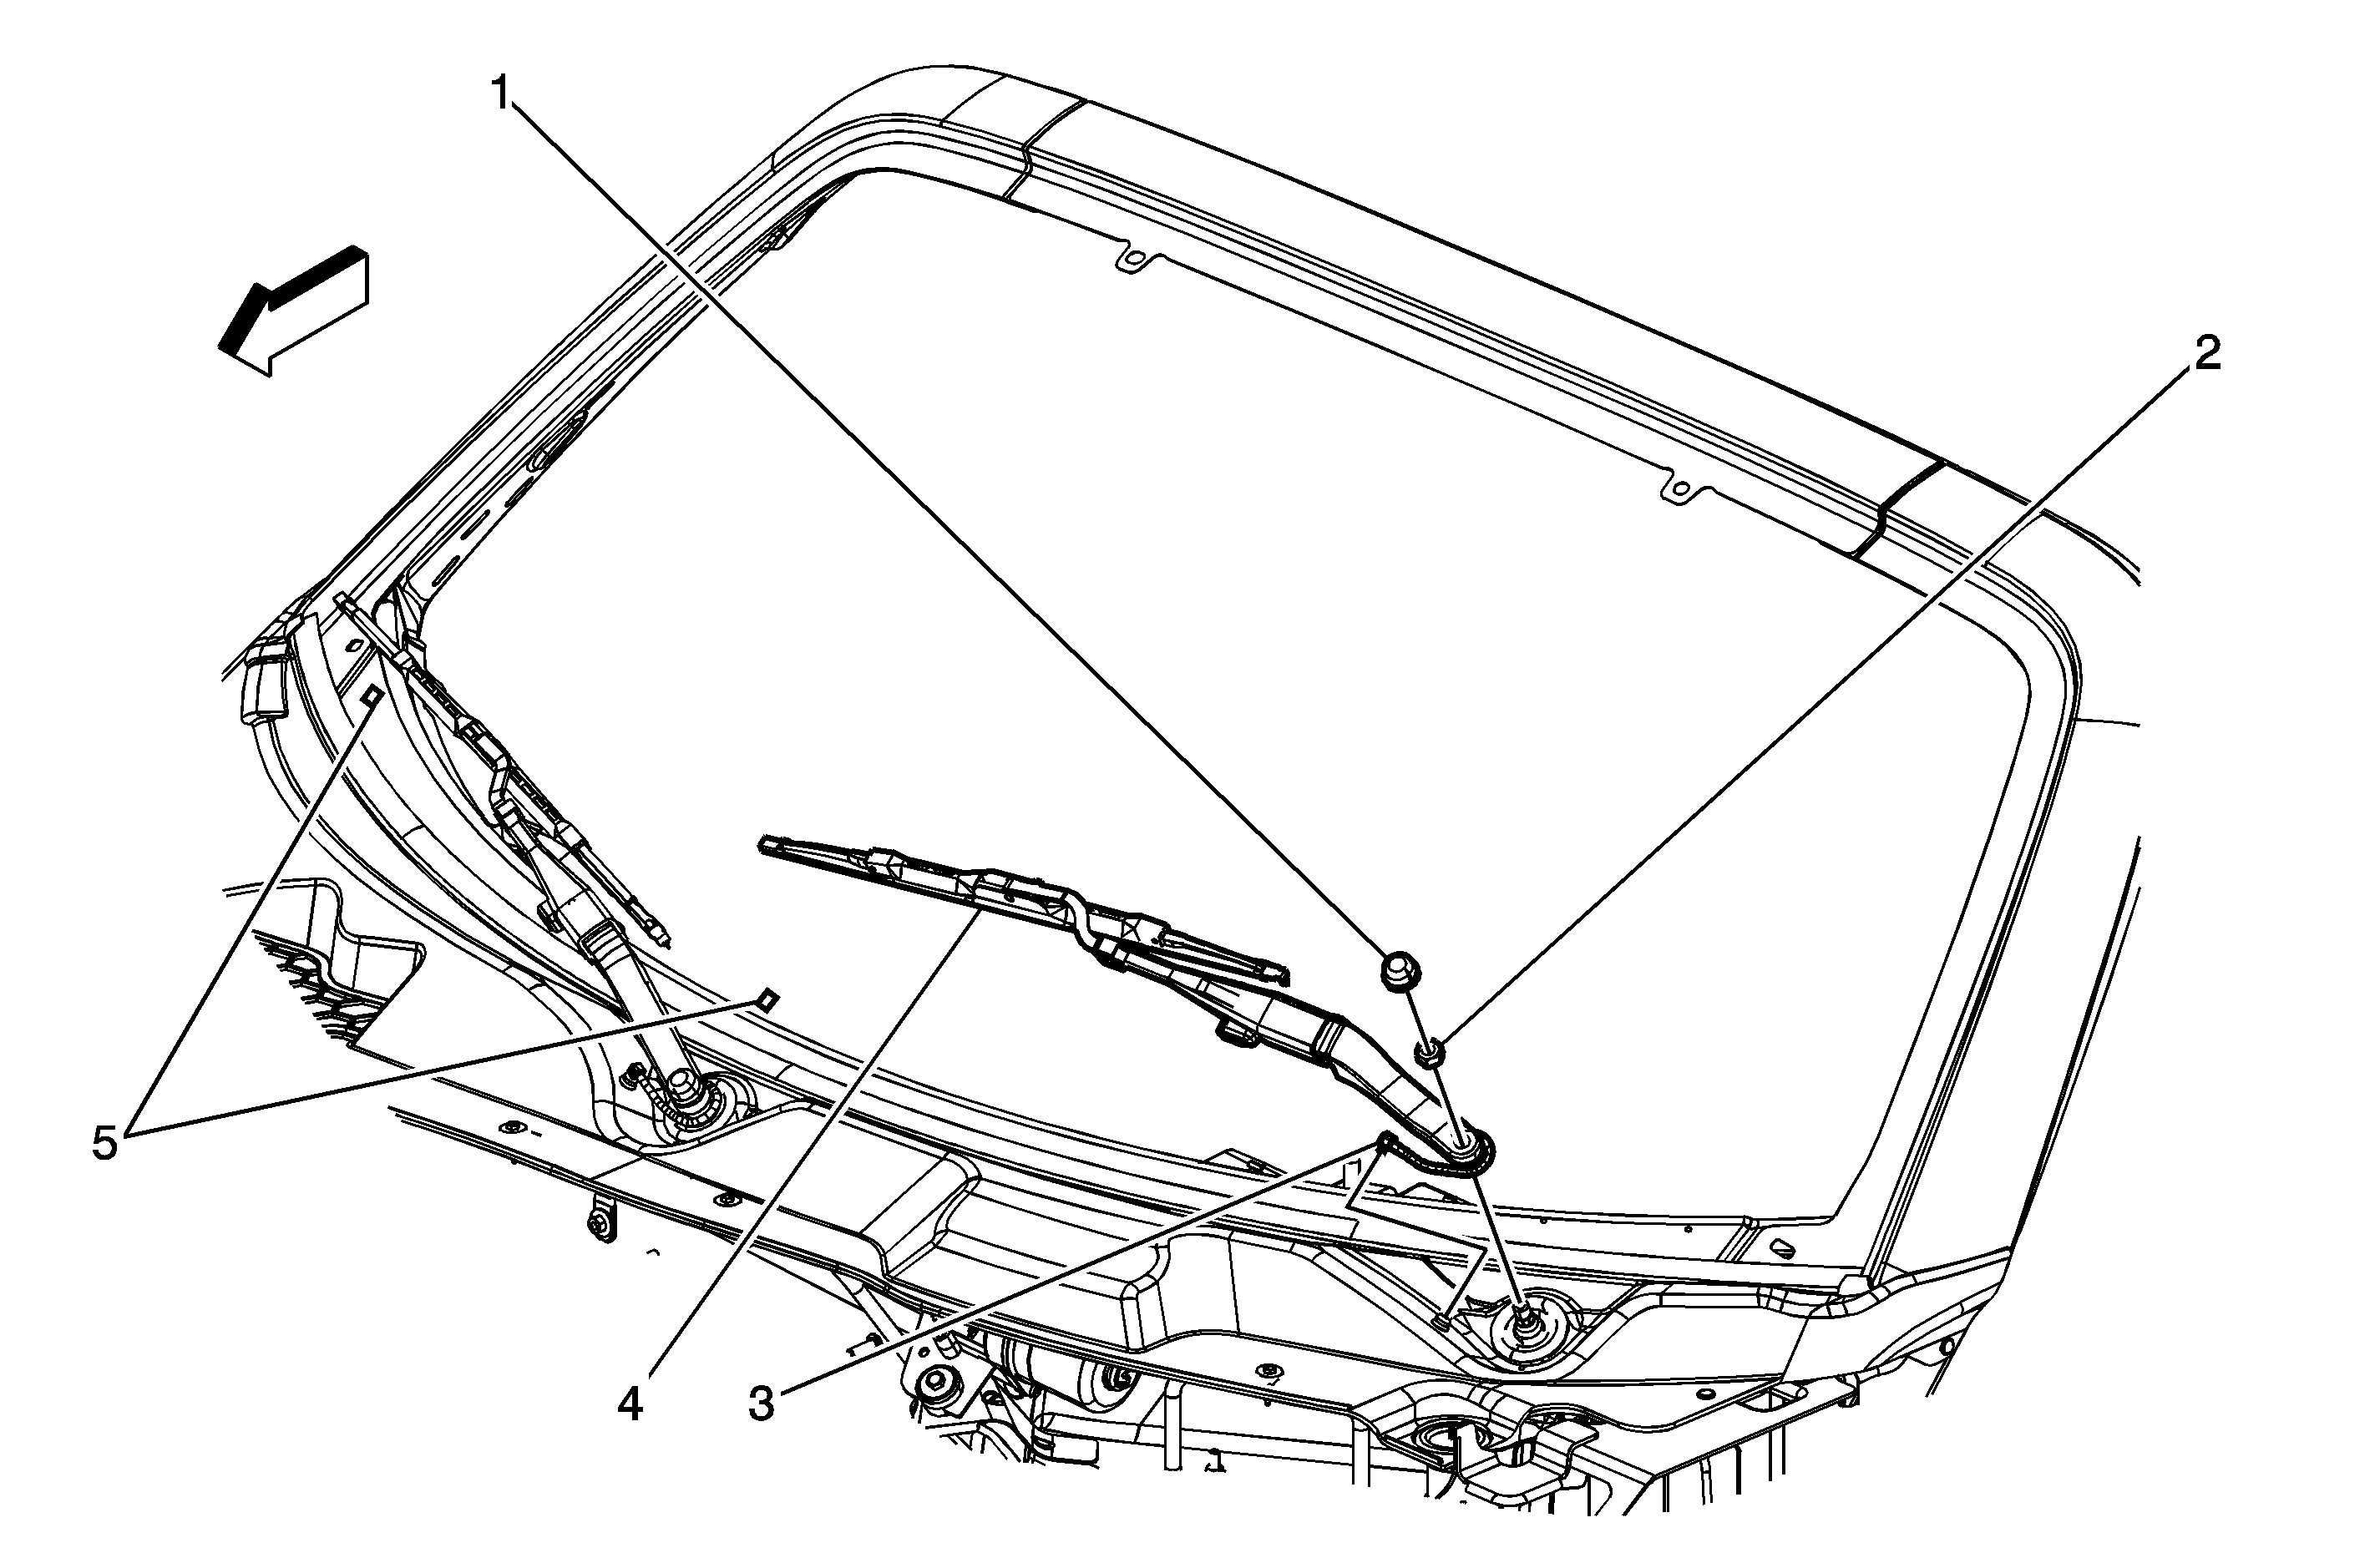
Callout
| Component Name
|
|
Notice: Refer to Fastener Notice in the Preface section. Fastener Tightening Specifications:
Refer to
Fastener Tightening Specifications
.
Preliminary ProcedureRemove the wiper blade from the wiper arm. Refer to
Windshield Wiper Blade Replacement
.
Tip
Carefully lower the bare wiper arm onto the windshield. |
1
| Windshield Washer Arm Nut Cap
Tip
Use a small flat-bladed tool to remove the cap. |
2
| Windshield Washer Arm Nut
Tip
Hold the wiper arm blade into position on the windshield blackout voids when applying torque to the nut.
Tighten
32 N·m (24 lb ft) |
3
| Windshield Washer Nozzle Hose Assembly
Tip
Carefully remove the washer hose from the spray nozzle in the air inlet panel prior to removing the wiper arm. |
4
| Windshield Washer Arm Assembly
Tip
- A slight up and down motion applied near the hinge point on the wiper arm will release the arm from the wiper pivot shaft.
- Use a soft wire brush to clean the knurls on the pivot shaft prior to re-installing the wiper arm.
|
5
| Blackout Voids
Tip
Position the edge of the wiper blade element to the top edges of the voids in the windshield blackout area. |
Callout
| Component Name
|
Preliminary Procedure
- Remove the wiper blade from the wiper arm. Refer to
Windshield Wiper Blade Replacement
.
- Carefully lower the wiper arm onto the windshield.
|
1
| Windshield Washer Arm Nut Cap
Tip
Use a small flat-bladed tool to remove the cap. |
2
| Windshield Washer Arm Nut
Notice: Refer to Fastener Notice in the Preface section.
Tip
Hold the wiper arm blade into position on the windshield blackout voids when applying torque to the nut.
Tighten
32 N·m (24 lb ft) |
3
| Windshield Washer Nozzle Hose Assembly
Tip
Carefully remove the washer hose from the spray nozzle in the air inlet panel prior to removing the wiper arm. |
4
| Windshield Washer Arm Assembly
Procedure
- A slight up and down motion applied near the hinge point on the wiper arm will release the arm from the wiper pivot shaft.
- Use a soft wire brush to clean the knurls on the pivot shaft prior to re-installing the wiper arm.
|
5
| Wiper Blade Alignment Mark
Tip
Position the edge of the wiper blade element to the top edges of the alignment marks in the windshield blackout area. |


