GM Service Manual Online
For 1990-2009 cars only
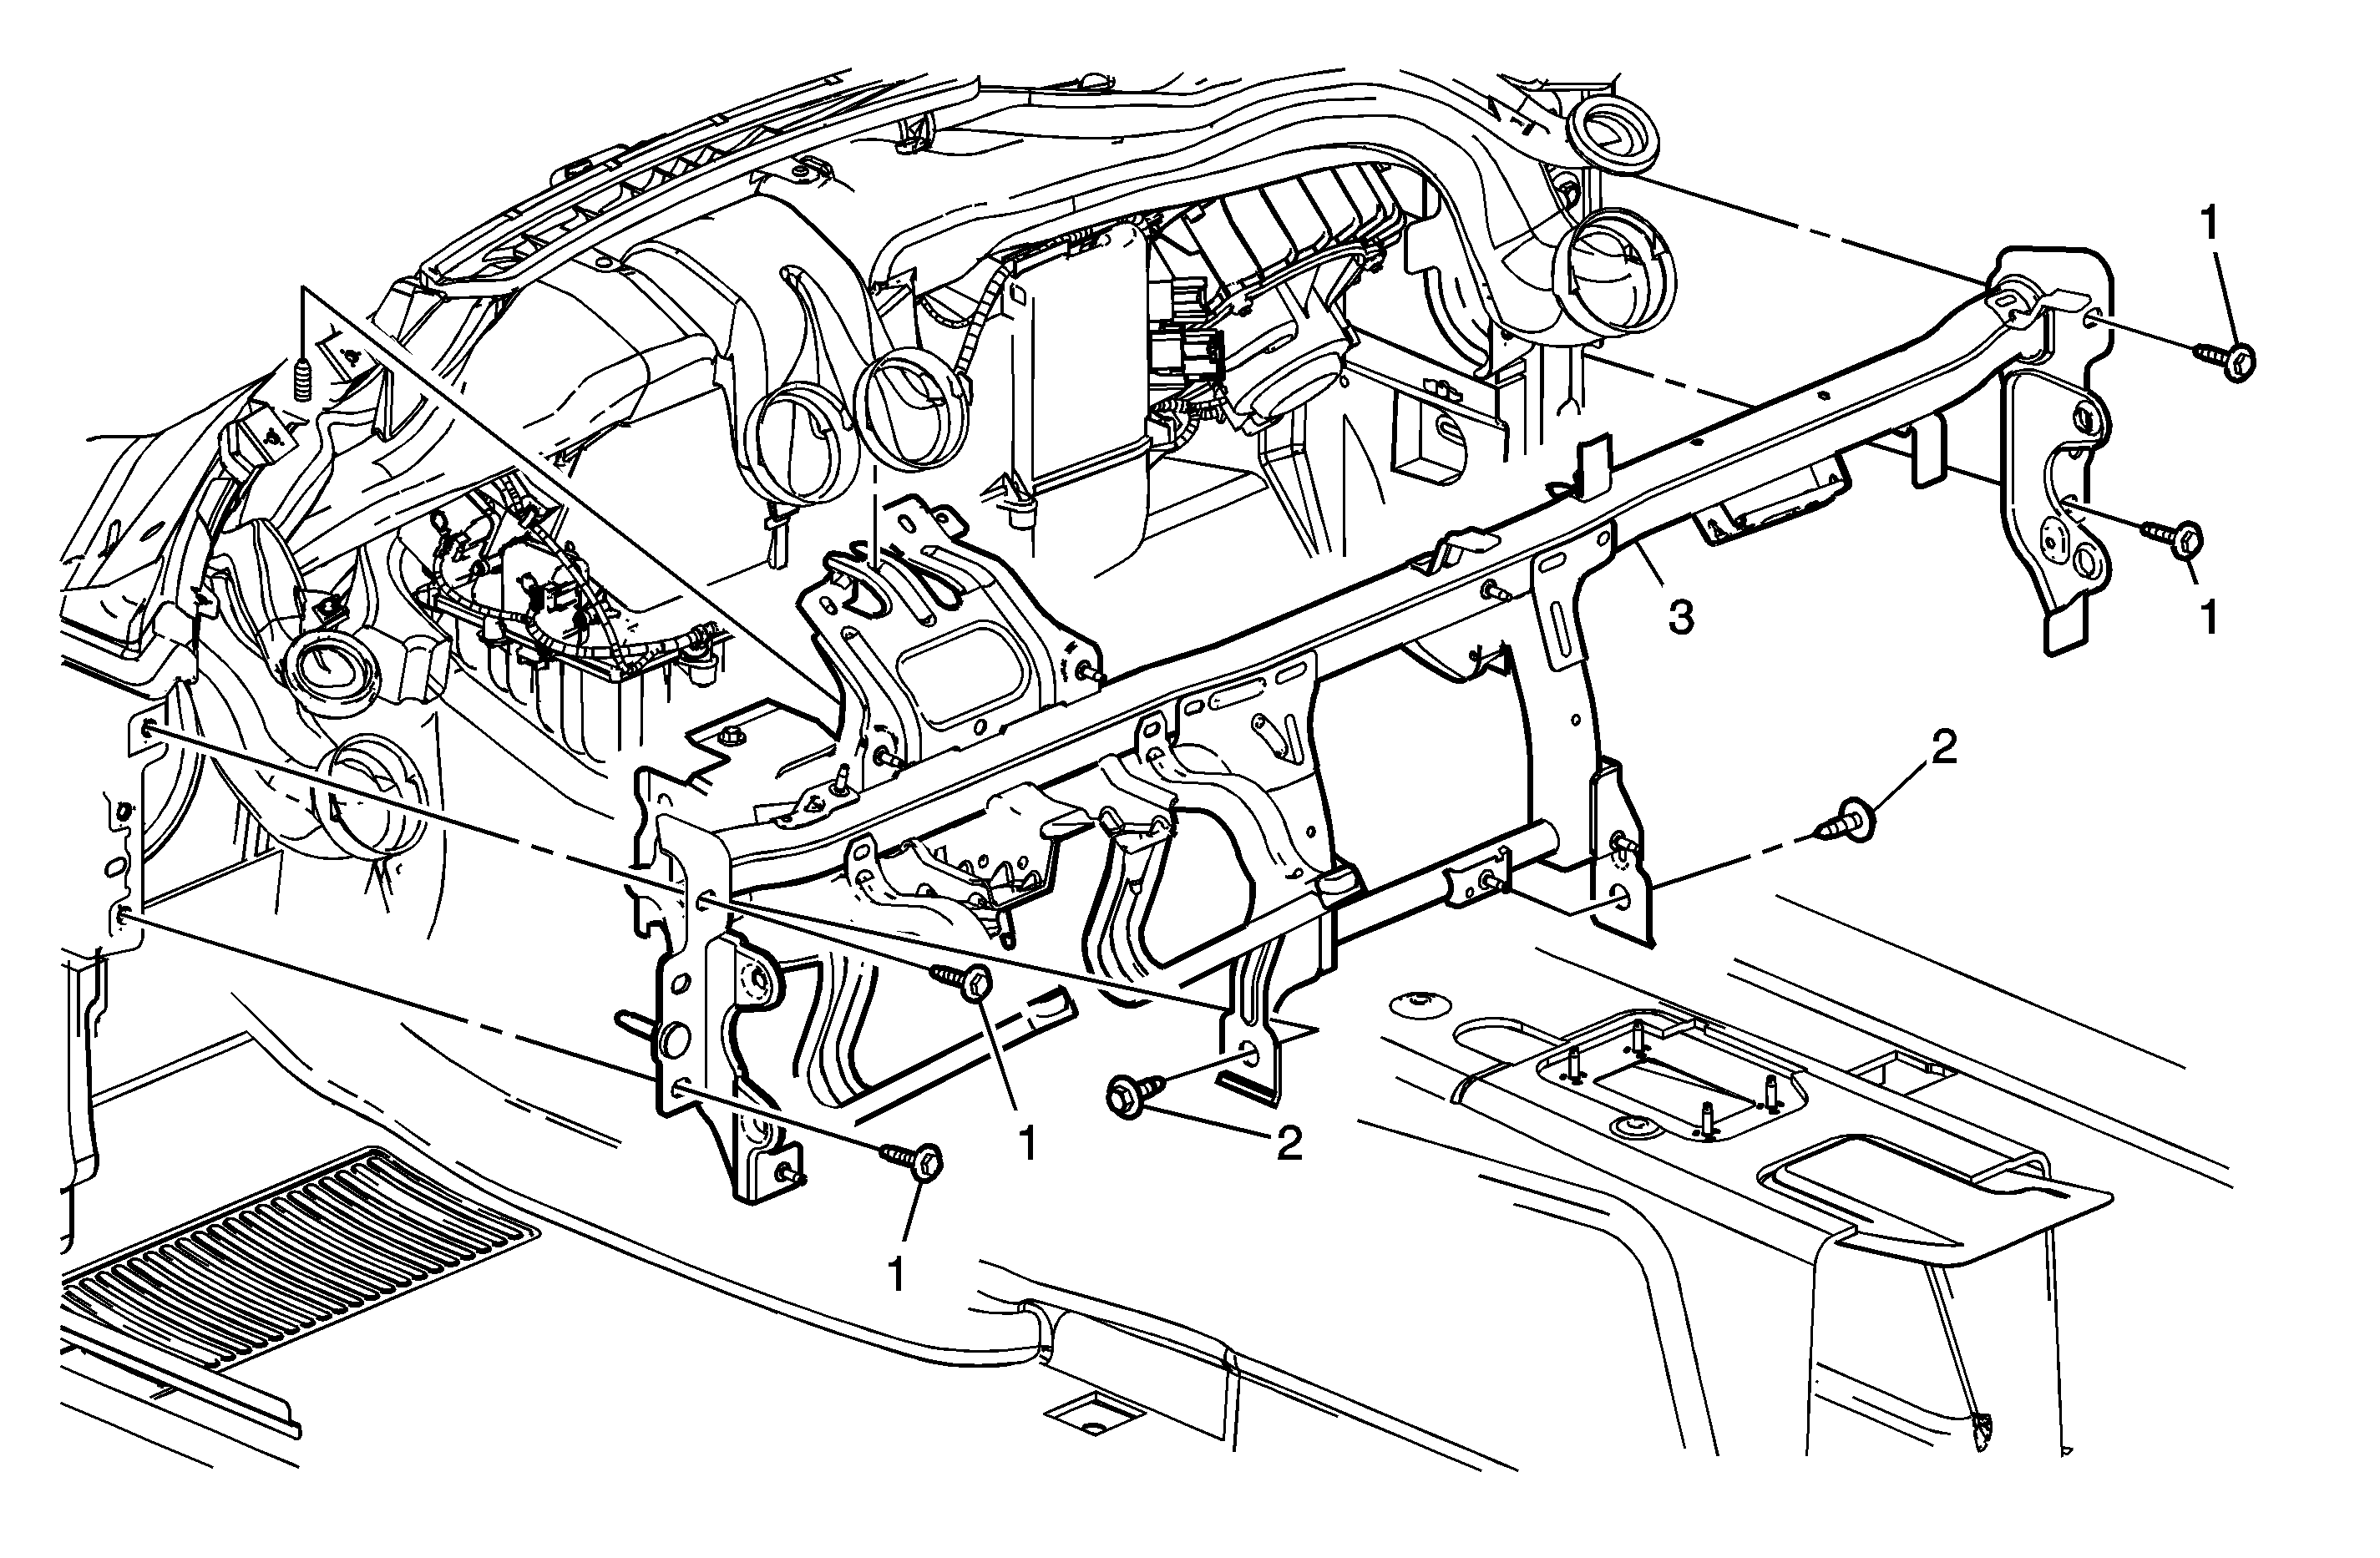
Object Number: 1584941  Size: MF

Callout

Component Name

Preliminary Procedures

  1. Remove the instrument panel (I/P) carrier assembly. Refer to Instrument Panel Carrier Replacement .
  2. Note the routing of the I/P wiring harness around the I/P tie bar to aid in the reinstallation procedure.
  3. Remove the nuts securing the air distribution duct to the I/P tie bar. Refer to Air Distributor Duct Replacement .
  4. Remove the bolts securing the I/P tie bar to the brake pedal bracket.

1

Instrument Panel Tie Bar Bolts (Qty: 4)

Notice: Refer to Fastener Notice in the Preface section.

Tighten
25 N·m (18 lb ft)

2

Instrument Panel Tie Bar Bolts (Qty: 2)

Tighten
12 N·m (106 lb in)

3

Instrument Panel Tie Bar Assembly


Object Number: 1584941  Size: MF

Callout

Component Name

Preliminary Procedures

  1. Remove the instrument panel (I/P) carrier assembly. Refer to Instrument Panel Carrier Replacement .
  2. Note the routing of the I/P wiring harness around the I/P tie bar to ensure the proper reinstallation.
  3. Remove the nuts securing the air distribution duct to the I/P tie bar. Refer to Air Distributor Duct Replacement .
  4. Remove the bolts securing the I/P tie bar to the brake pedal bracket.

1

Instrument Panel Tie Bar Bolts (Qty: 4)

Notice: Refer to Fastener Notice in the Preface section.

Tighten
25 N·m (18 lb ft)

2

Instrument Panel Tie Bar Bolts (Qty: 2)

Tighten
58 N·m (34 lb ft)

3

Instrument Panel Tie Bar Assembly

Procedure

With the aid of an assistant, remove the tie bar from the vehicle.