Callout | Component Name | ||||
|---|---|---|---|---|---|
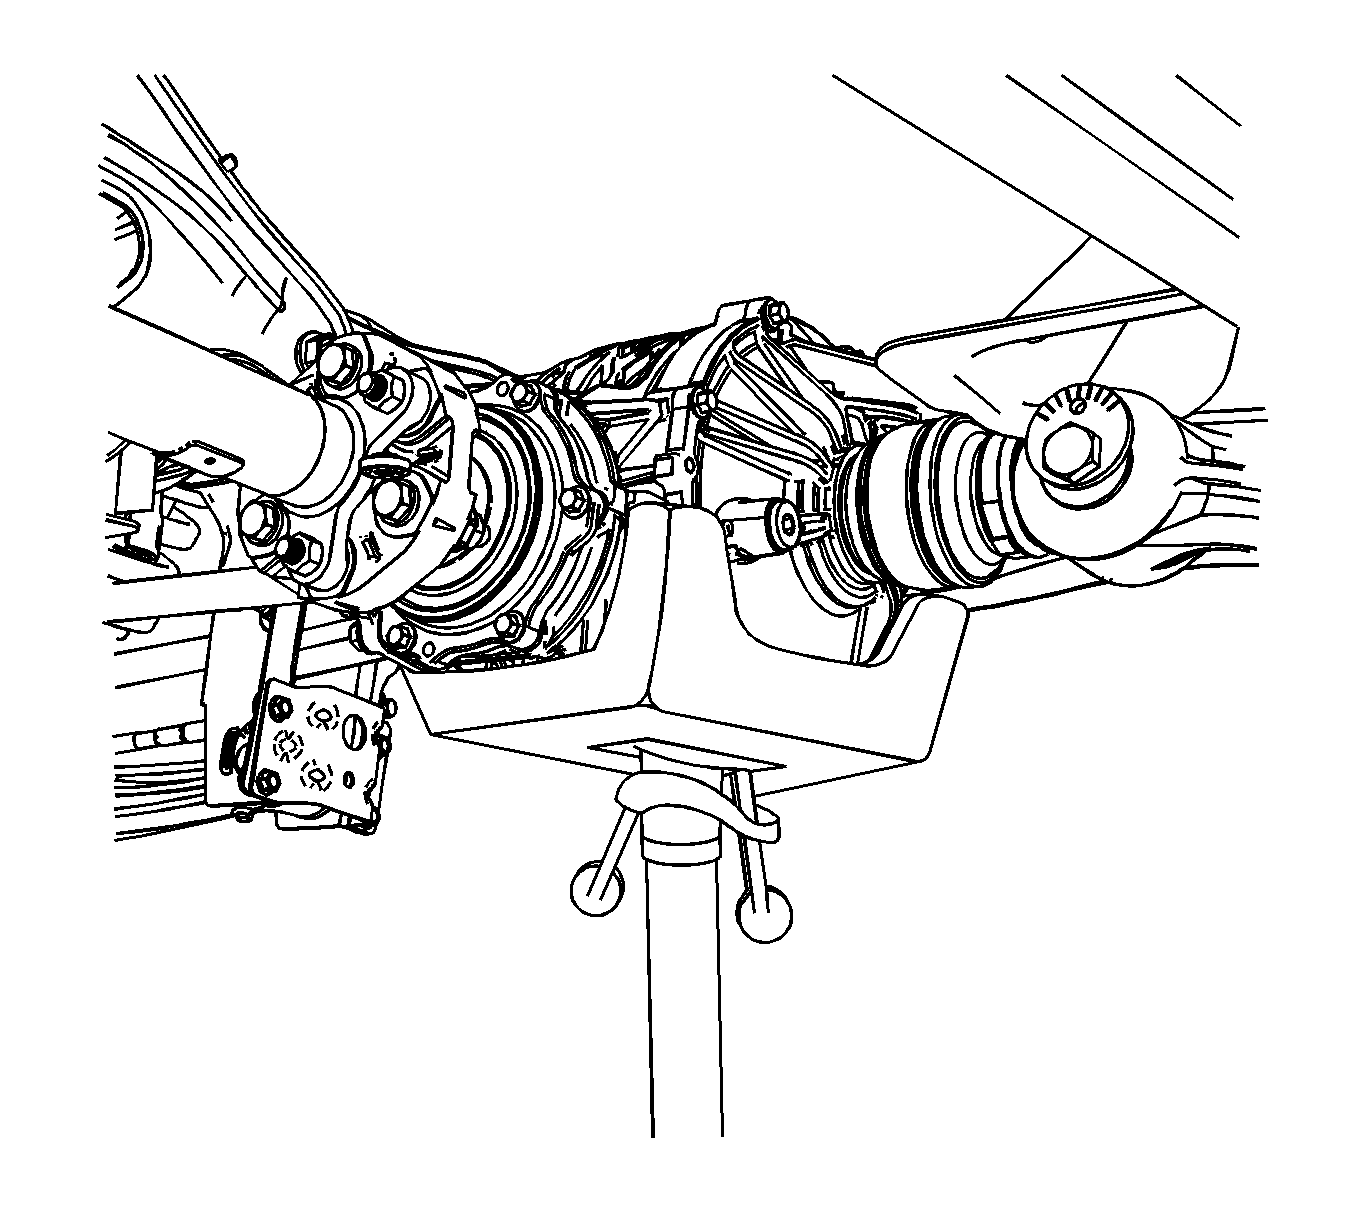
Preliminary ProcedureRaise and support the vehicle. Refer to Lifting and Jacking the Vehicle . | |||||
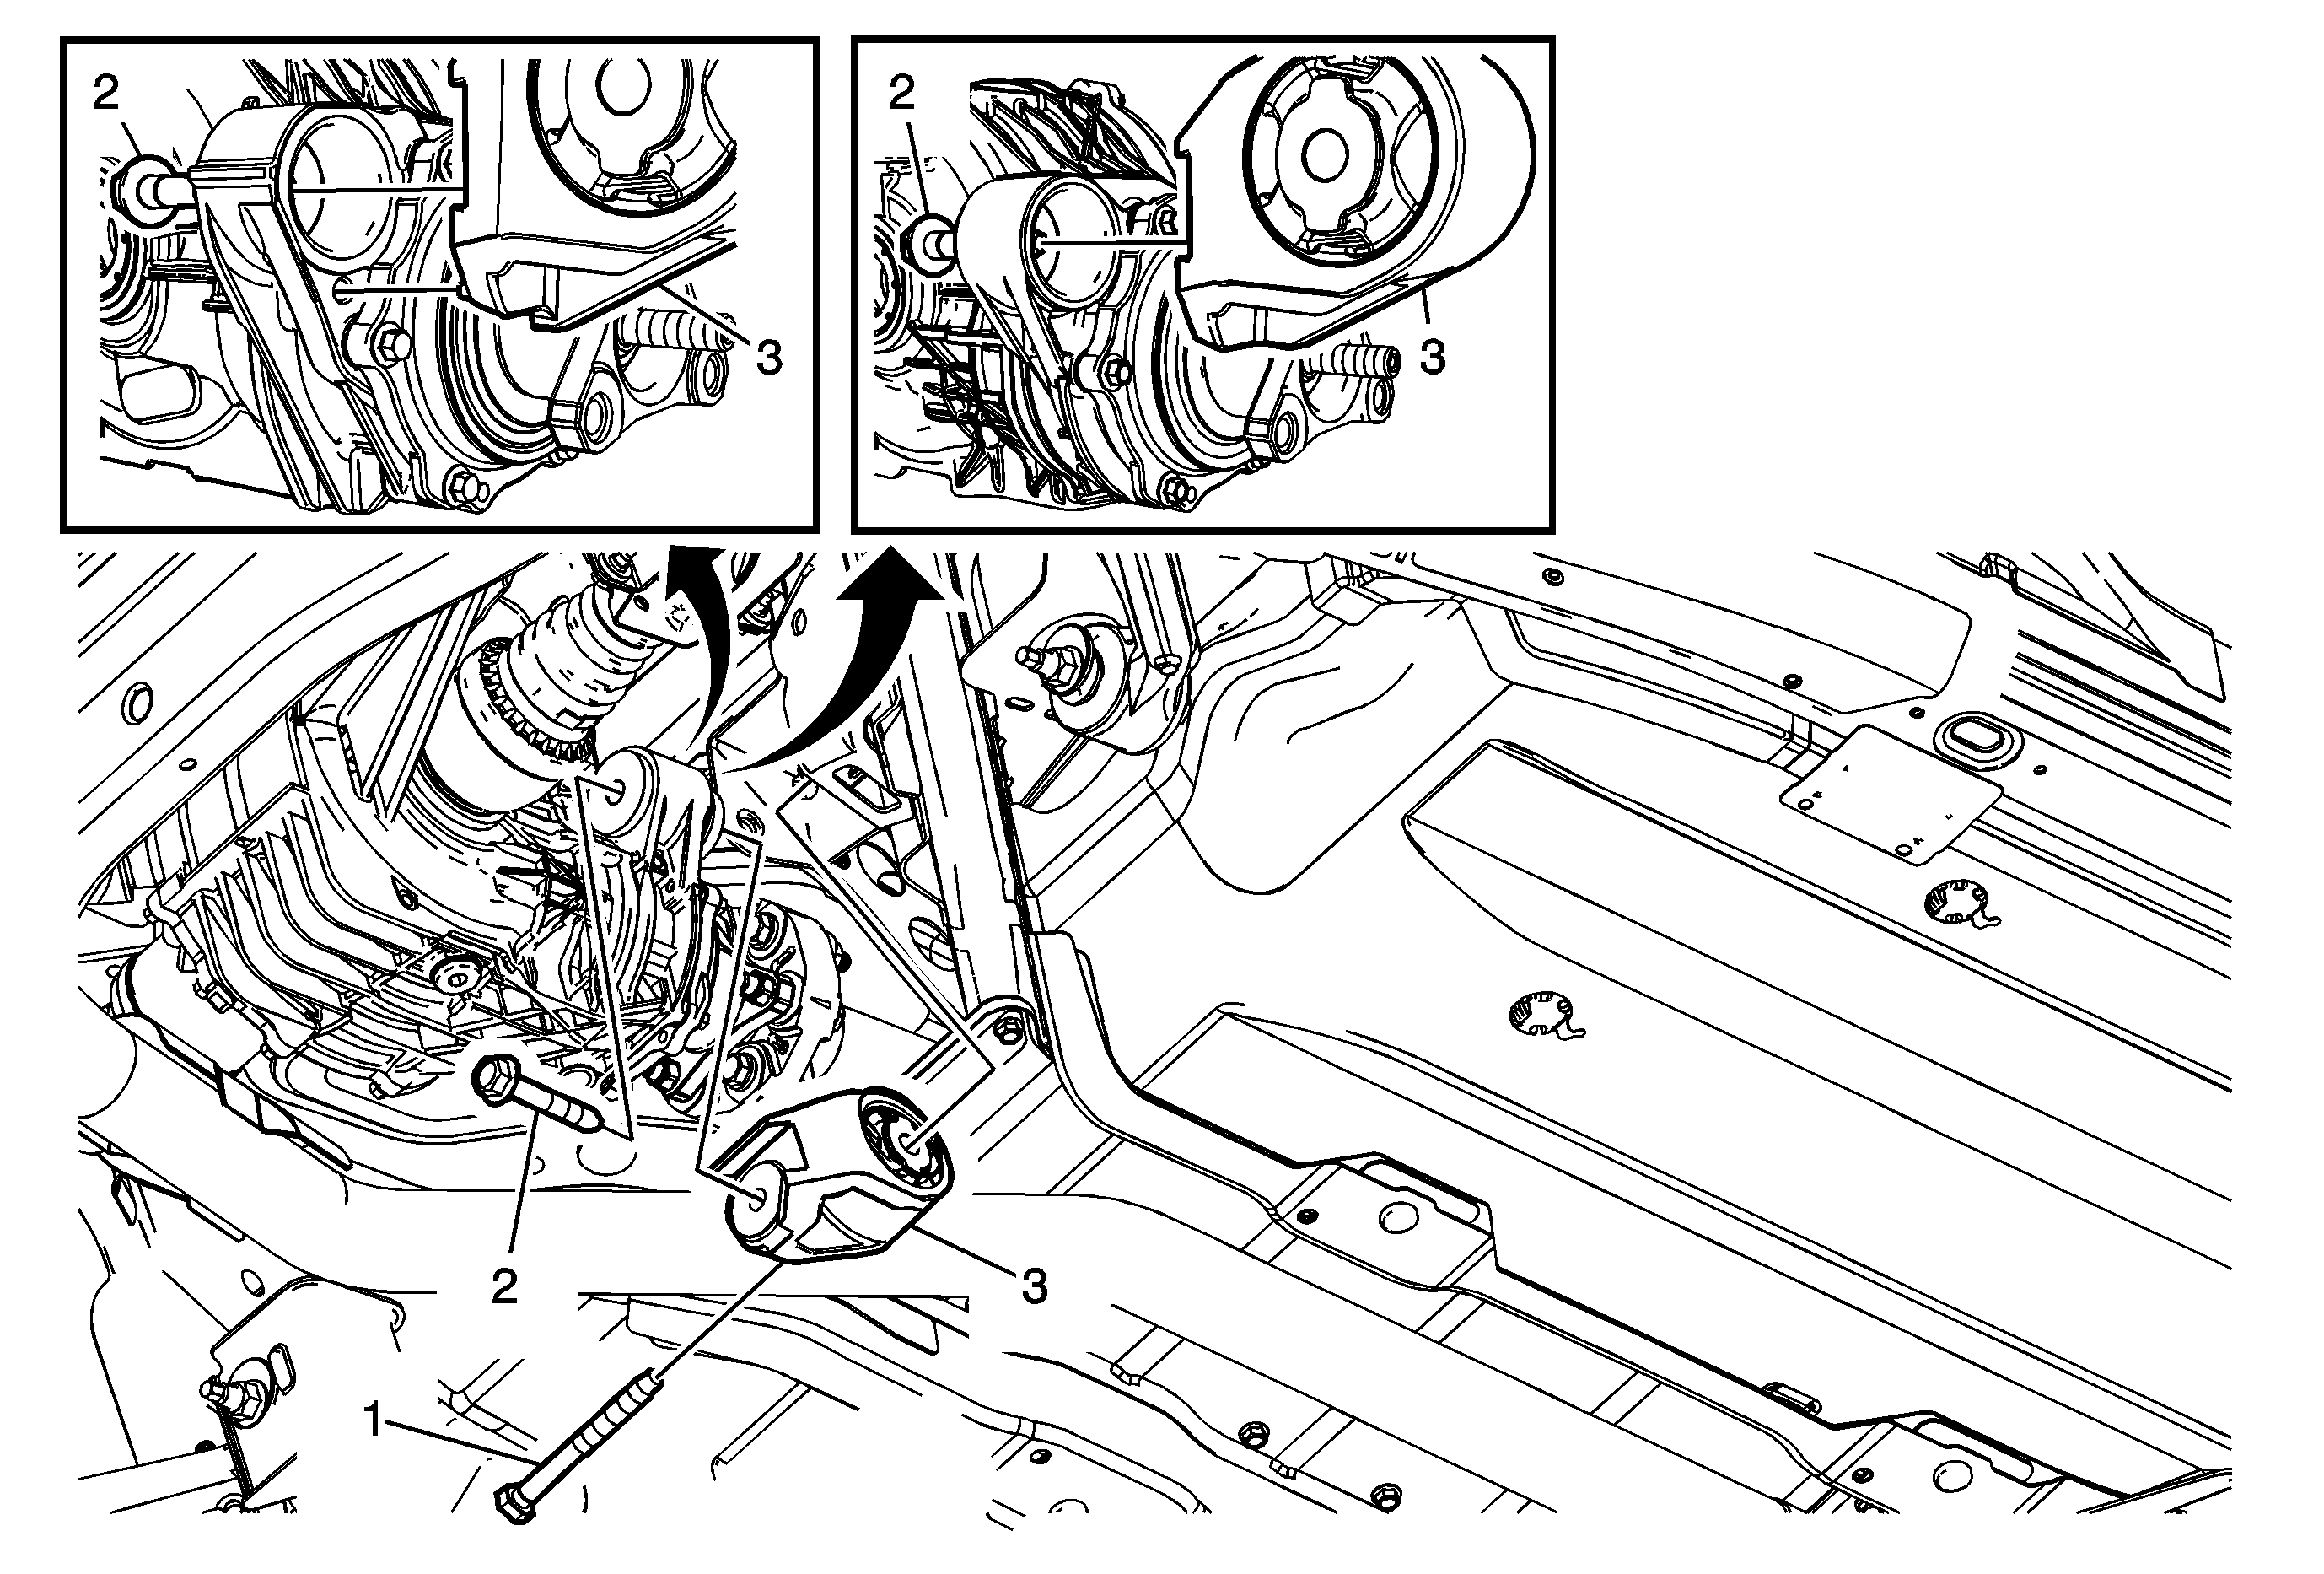
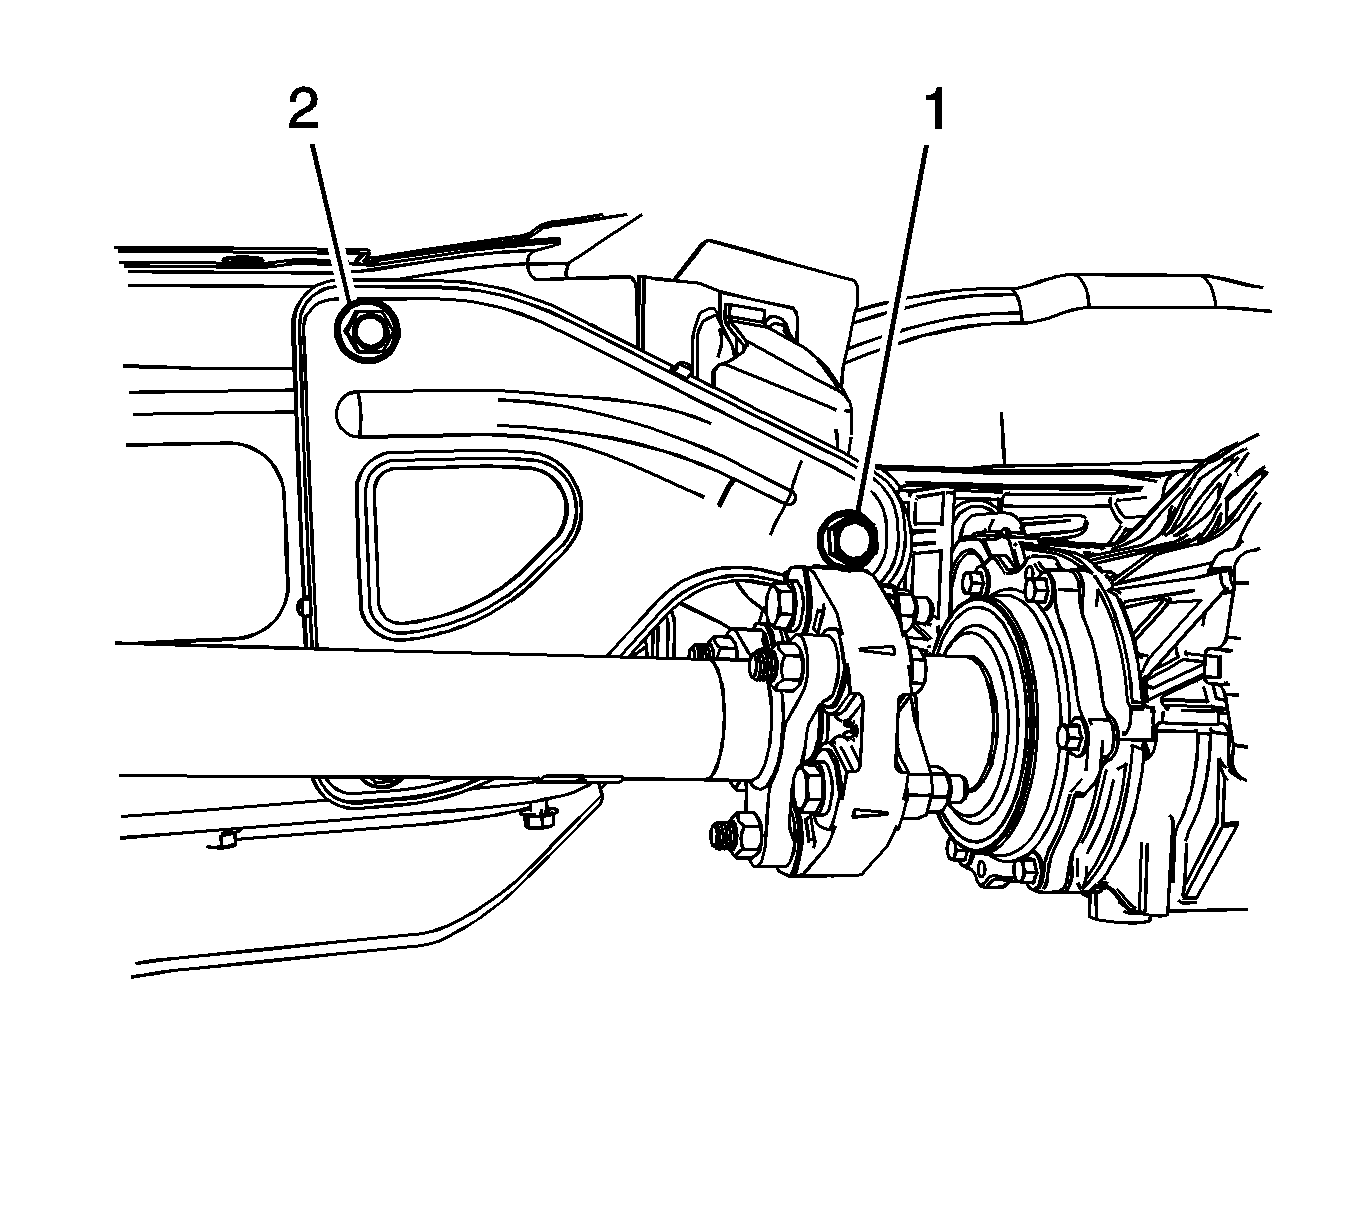
1 | Differential Mounting Bracket to Frame Bolt Notice: Refer to Fastener Notice in the Preface section. Tip
Tighten | ||||
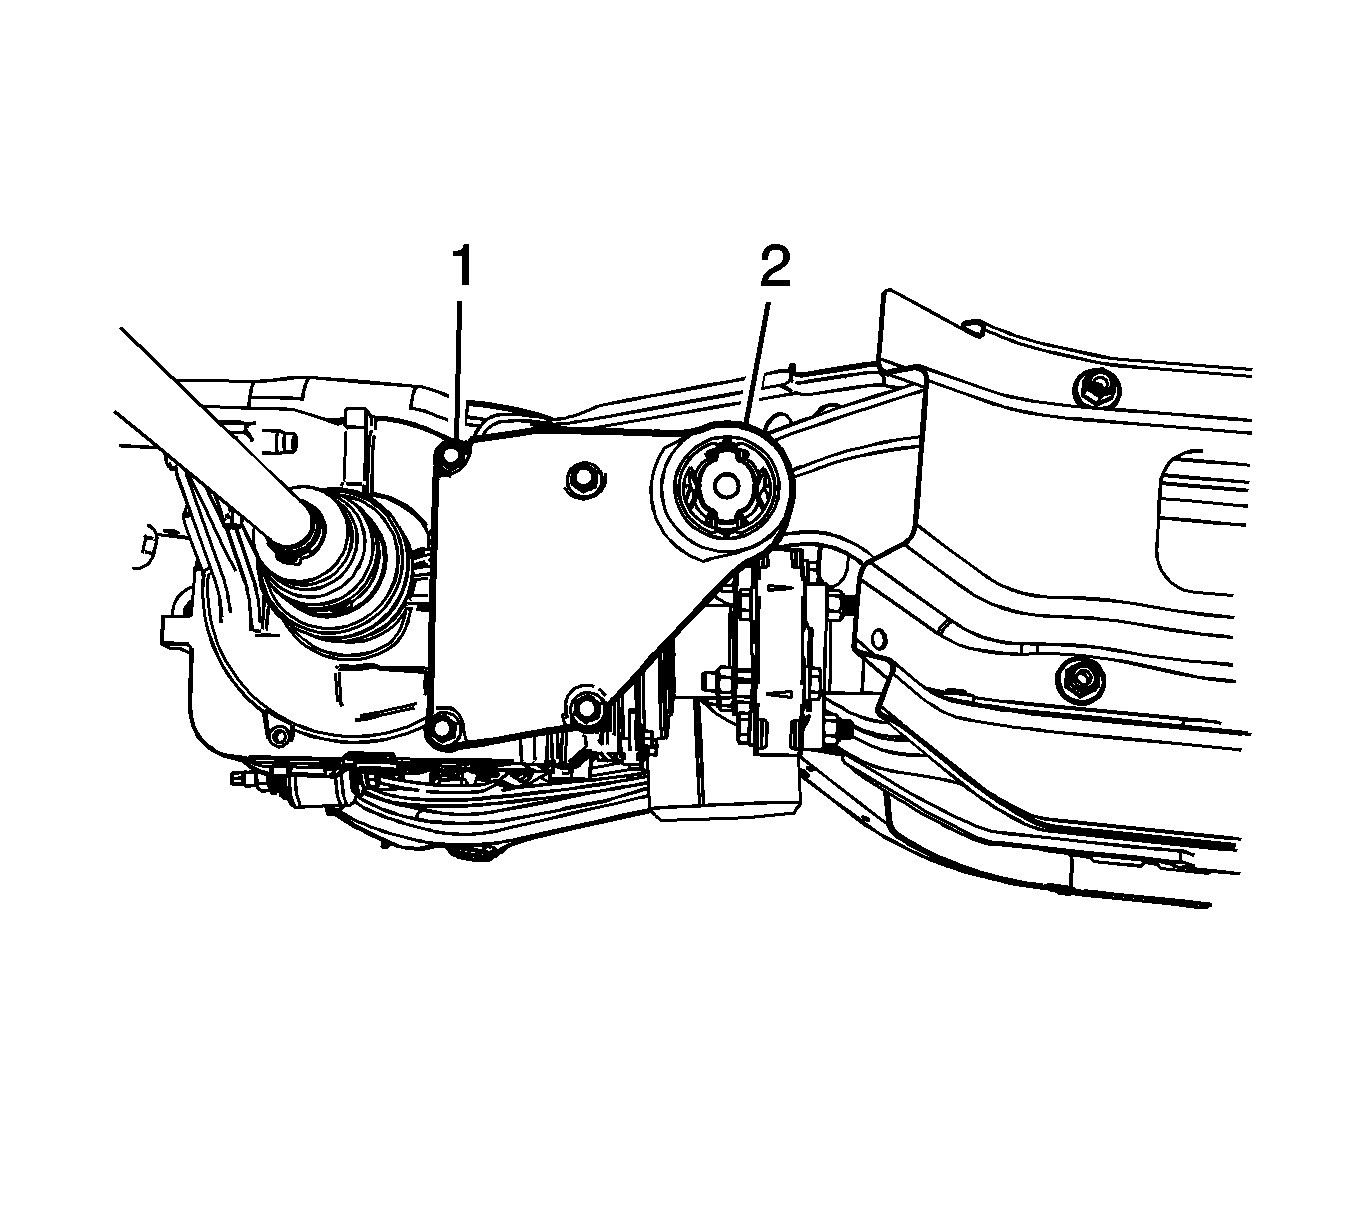
2 | Differential to Mounting Bracket Bolt Tighten
| ||||
3 | Differential Mounting Bracket | ||||
Removal Procedure
Important: Some portions of the frame and under body have been removed for the clarity of the location of the differential carrier bracket.
- Raise and support the vehicle. Refer to Lifting and Jacking the Vehicle.
- Remove the floor panel tunnel rear panel. Refer to Floor Panel Tunnel Panel Replacement - Rear.
- Support the rear differential carrier assembly with a suitable jack stand.
- Remove the differential mounting bracket bolt (1) frame bracket.
- Loosen the 2 frame bracket bolts (2).
- Remove the 4 differential carrier mounting bracket bolts (1).
- Remove the differential carrier mounting bracket (2).
Important: The following service procedure is to allow for enough clearance to remove the differential mounting bracket.
Important: DO NOT re-use the differential carrier bracket bolts. Discard and use NEW only.
Installation Procedure
- Remove any thread locker from the bolt holes in the differential carrier with brake clean or equivalent.
- Position the differential carrier bracket (2) on the differential.
- Apply GM threadlocker P/N 89021297 (Canadian P/N 10953488) or equivalent to the NEW differential carrier bracket bolts (1).
- Install the 4 NEW differential carrier bracket bolts (1).
- Hand tighten the differential frame bracket to differential carrier bolt (1).
- Install the 2 differential carrier bracket to frame bolts (2).
- Tighten the differential carrier bracket bolt (1).
- Remove the jack stand.
- Install the floor panel tunnel rear panel. Refer to Floor Panel Tunnel Panel Replacement - Rear.
- Remove the support and lower the vehicle.
Notice: Refer to Fastener Notice in the Preface section.
Tighten
Tighten the bracket bolts to 80 N·m (59 lb ft).
Tighten
Tighten the frame bracket bolts to 110 N·m plus 20 degrees.
Tighten
Tighten the bracket bolts to 175 N·m (122 lb ft).
