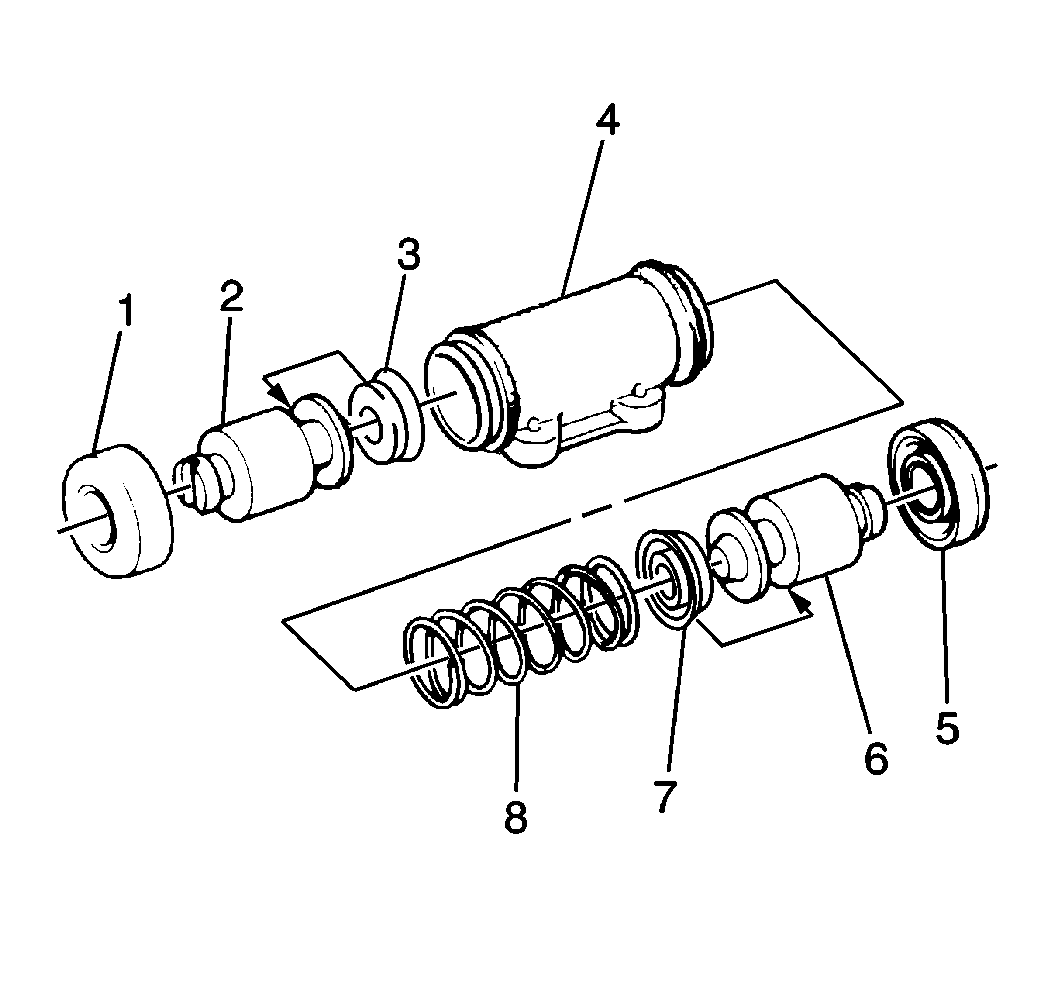
Disassembly Procedure

- Disassemble the boots
(1).
- Disassemble the pistons (2, 6).
- Disassemble the cup seals (3, 7).
- Disassemble the spring (8).
- Disassemble the bleeder valve.
- Clean the wheel cylinder body (4) in clean brake fluid.
- Dry the wheel cylinder body with filtered, unlubricated compressed
air.
- Inspect the cylinder body, piston, cup seals and spring for the
following:
- Replace as necessary. Replace all components included in repair
kits.
Assembly Procedure
Notice: Use the correct fastener in the correct location. Replacement fasteners
must be the correct part number for that application. Fasteners requiring
replacement or fasteners requiring the use of thread locking compound or sealant
are identified in the service procedure. Do not use paints, lubricants, or
corrosion inhibitors on fasteners or fastener joint surfaces unless specified.
These coatings affect fastener torque and joint clamping force and may damage
the fastener. Use the correct tightening sequence and specifications when
installing fasteners in order to avoid damage to parts and systems.
- Assemble the bleeder
valve.
Tighten
Tighten the bleeder valve to 8 N·m (71 lb in).

- Assemble the spring (8)
to the wheel cylinder body (4).
- Assemble the cup seals (3, 7), taking care that the lip does not
become turned under.
- Assemble the pistons (2, 6).
- Assemble the boots (1, 5) over the end of the wheel cylinder body
(4). Ensure that the lip of the boot sits securely in the groove on the wheel
cylinder body.


