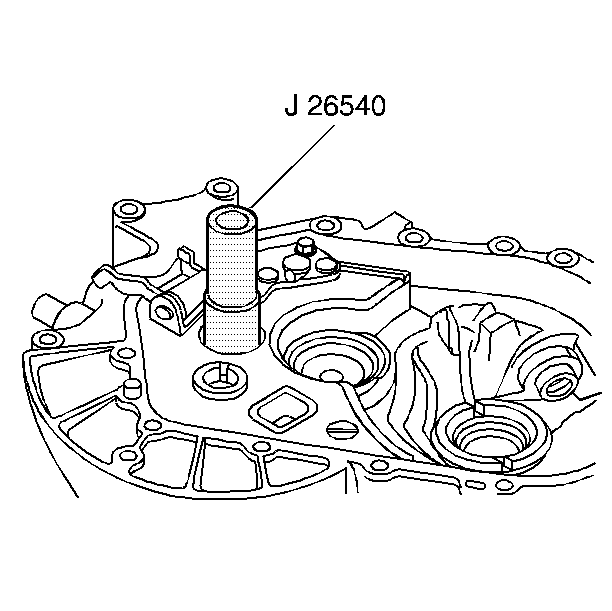
- Install a new input shaft seal using the J 26540
.
Important: Before installation, apply oil to the bearing.
- Install the front roller bearing into the clutch housing for the following
components:
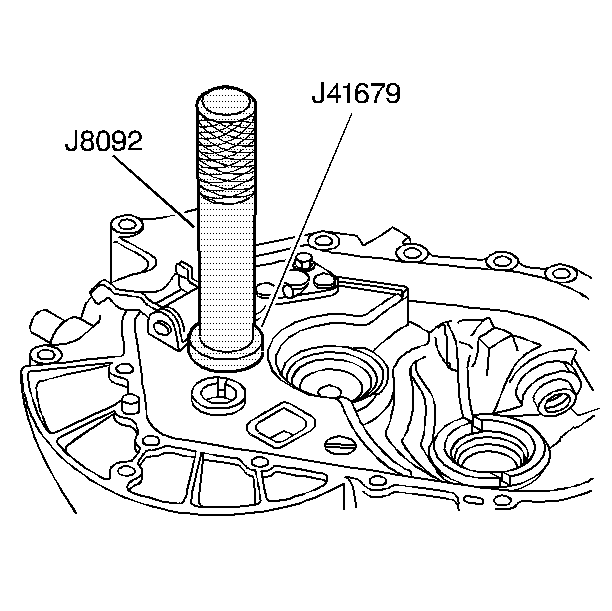
- Press the input bearing into the housing. Use the J 41679
with the J 8092
.
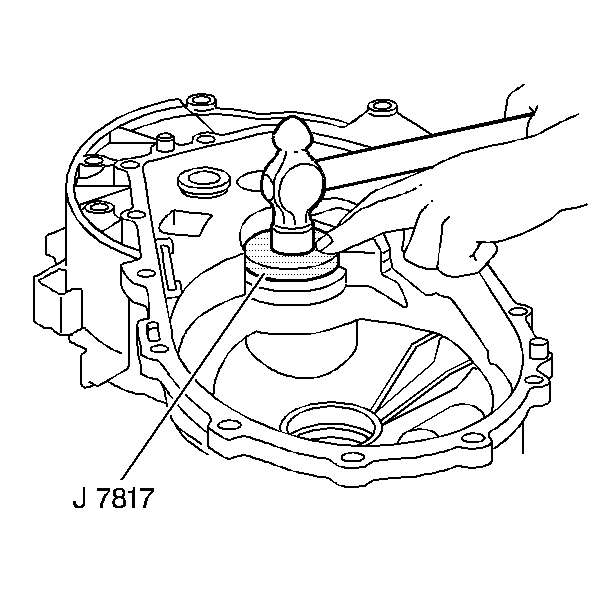
- Press the output race into the housing. Use the J 7817
with a hammer.
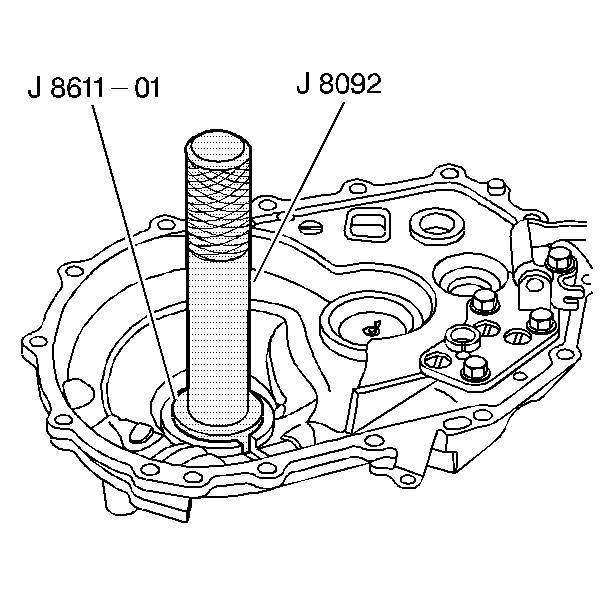
- Press the differential race into the housing. Use the J 8611-01
with the J 8092
.

- Apply grease to the three 10 mm interlock pins (5). Then, install
the pins (5) on the clutch housing.
- Install the reverse shift bracket on the clutch housing. Align the bracket
to the housing using the 3rd/4th shift shaft.
- Install the retaining bolts.
Tighten
Tighten the bolts to 17 N·m (13 lb ft).
Notice: Use the correct fastener in the correct location. Replacement fasteners
must be the correct part number for that application. Fasteners requiring
replacement or fasteners requiring the use of thread locking compound or sealant
are identified in the service procedure. Do not use paints, lubricants, or
corrosion inhibitors on fasteners or fastener joint surfaces unless specified.
These coatings affect fastener torque and joint clamping force and may damage
the fastener. Use the correct tightening sequence and specifications when
installing fasteners in order to avoid damage to parts and systems.
- Inspect the shift shaft for smooth operation.
- Install the differential case.
- Install the 3rd/4th gear shift shaft 13 mm lock pin.
- Install the following items in the clutch housing as one unit:
| • | The 3rd/4th gear shift fork |
| • | The 3rd/4th gear shift shaft |
- Install the 3rd/4th gear shift shaft in the raised collar of the
reverse shift lever bracket.
- Install the 1st/2nd gear shift fork on the synchronizer sleeve.
- Insert the 1st/2nd gear shift shaft into the reverse shift lever
bracket.
- Align the hole in the 1st/2nd gear shift fork with the hole in
the 1st/2nd gear shift shaft.
- Install a new double roll pin.
- Install the reverse shift lever on the reverse shift lever bracket.
- Install the reverse/5th gear shift blocker on the 5th gear shift
shaft.
- Install the 10 mm interlock pin on the 5th gear shift shaft.
- Install the 12 mm interlock pin on the 5th gear shift shaft.
- Install the 5th gear shift shaft
- Align the 5th gear shift shaft interlock detent.
- Install the reverse shift shaft.
- Install the reverse shift shaft snap ring.
- Install the reverse idle shaft together with the gear into the
clutch housing. Ensure that the release lever is engaged in the collar of
the gear.
- Determine the shim size.
- Position the outer bearing races on the following:
| • | The differential bearing |
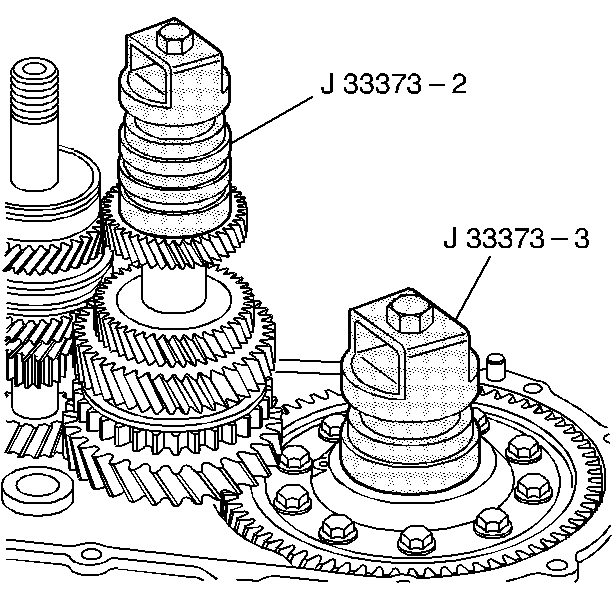
- Position the shim selection gauges on the bearing races of the following
parts:
| • | The differential bearing |
- Place the 7 spacers provided with the J 33373
evenly around the perimeter of the clutch housing.
- Install the bearing, the snap ring, and the shim retainer on the
transmission case.
- Apply Loctite™ 242 GM P/N 12345382, or equivalent, to the
threads of the 7 shim retainer screws and install with Torx™ (no. 45)
on the transmission case.
- Install the bearing and shim retainer screws.
Tighten
Tighten the screws to 23 N·m (17 lb ft).
- Carefully position the transmission case over the gauges and on the
spacers.
- Alternately install the 7 bolts provided with the tool kit, until
the case is seated on the spacers.
Tighten
Tighten the bolts to 13 N·m (115 lb in).
- Rotate each of the gauges in order to seat the bearings. Rotate
the differential case through three revolutions in each direction.
- With the gauges compressed, measure the gap between the outer
sleeve and the base pad using the available shim sizes.
| • | For the differential, use a shim 3 sizes larger than that which
will smoothly fit in the gap. |
| • | For the output shaft, use the largest shim that can be placed
into the gap and drawn through without binding. |
- When the 2 shims have been selected, remove the transmission case,
the 7 spacers, and the 2 gauges.
- Position the shim selected for the following parts into the bearing
race bores in the transmission case:
- Install the output shaft bearing race using the J 33370
and the J 8092
.
- Lubricate the rear differential case bearing race.
- Install the rear differential case bearing race using the J 8611-01
and the J 8092
.
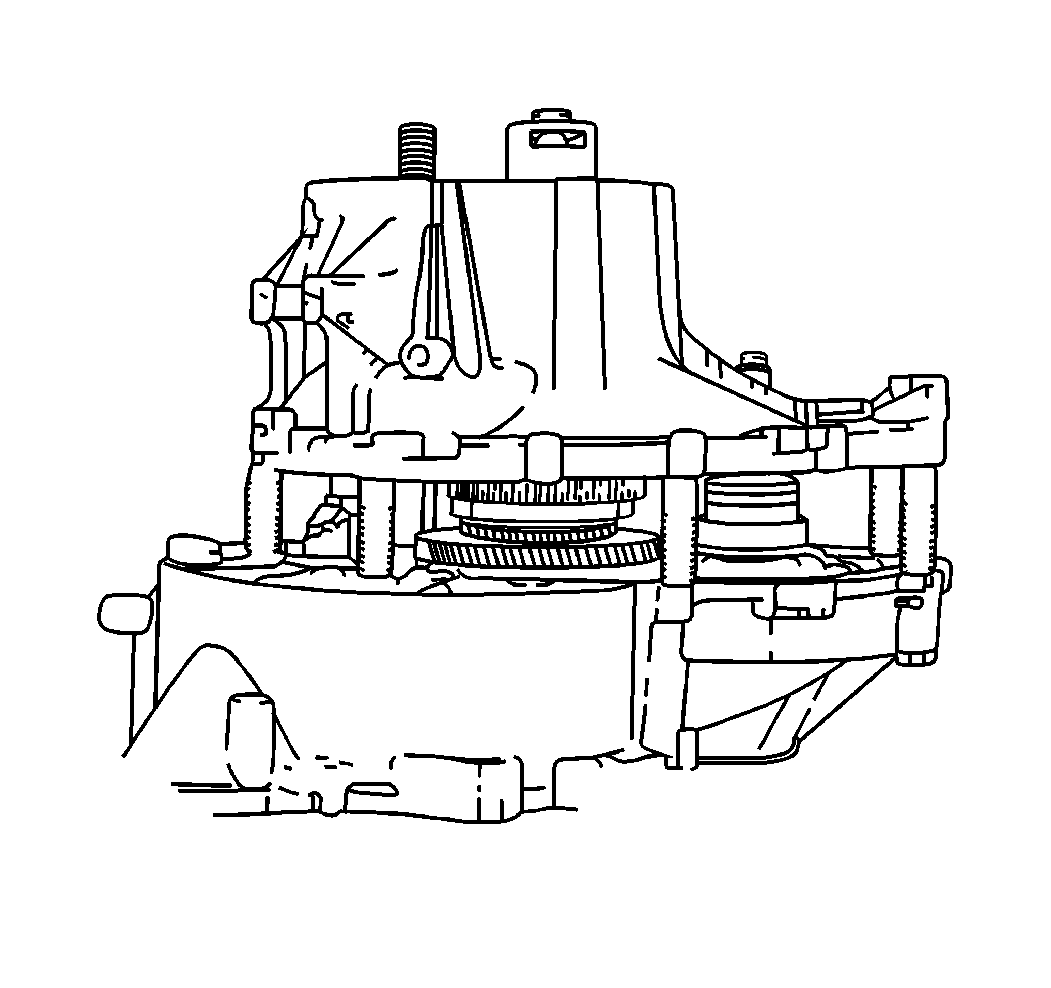
- Install the magnet in the clutch housing.
- Clean the clutch housing and transmission case mating surfaces.
- Apply a 1/8 inch bead of RTV silicone sealer GM P/N 1052917
or equivalent to the mating surfaces.
- Install the transmission case on the clutch housing.
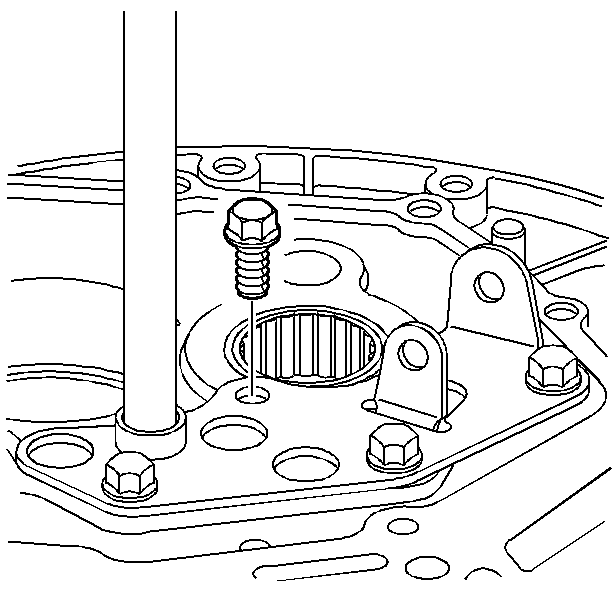
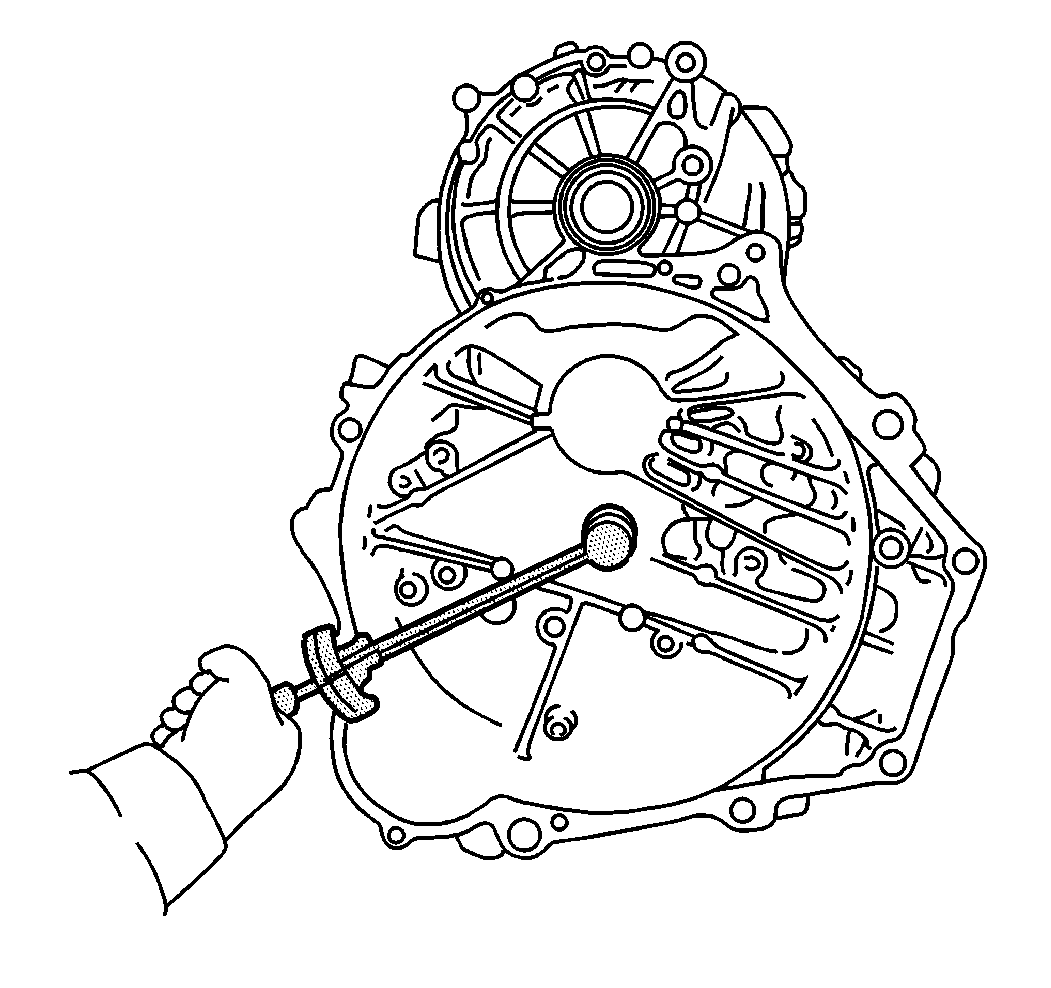
- Install the reverse idle shaft bolt on the transmission case.
Tighten
Tighten the bolt to 38 N·m (28 lb ft).
- Install the transmission case bolts in a diagonal sequence.
Tighten
Tighten the bolts to 38 N·m (28 lb ft).
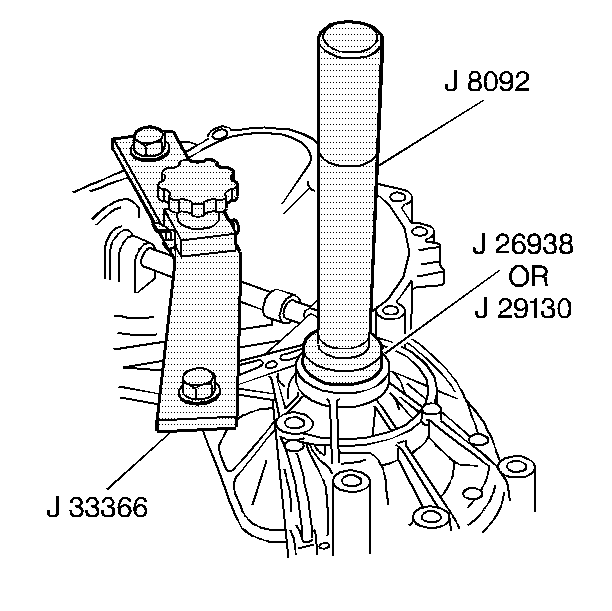
- Install drive axle seals using J 26938
with J 8092
.
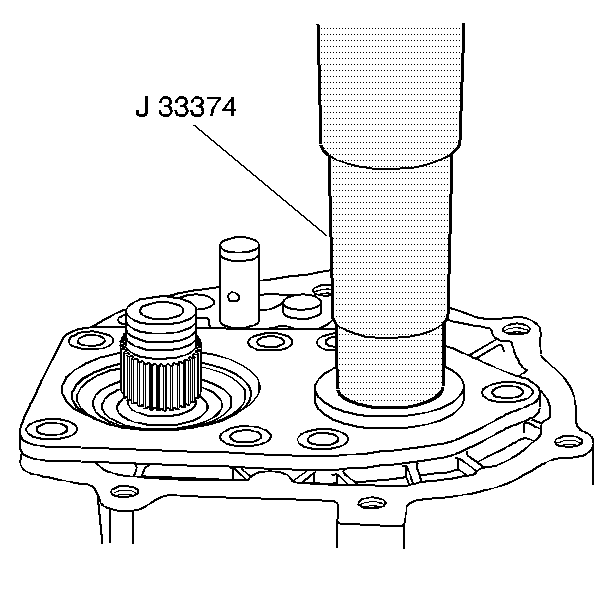
- Lubricate the output shaft thrust washer and collar.
- Install the thrust washer and collar using the J 33374
.
- Install the 5th gear on the input shaft.

- Assemble the following items on the hub/sleeve assembly:
- Install the following items on the output shaft:
| • | The hub/sleeve assembly |
- Align the shift fork on the shift shaft.
- Lubricate a new roll pin.
- Install the new pin on the shift shaft.
- Install the detent balls and the detent springs for the following:
- Install the detent bolts for the following:
Tighten
The bolts to 25 N·m (18 lb ft).
- Apply Loctite™ 414 GM P/N 12345093
or equivalent to the threads of the following parts (Use care not to allow
the material to flow into the splines of the 5th gear and input shaft):
- Install new input shaft nut.
Tighten
Tighten the nut to 128 N·m (94 lb ft).
- Stake the nut.
- Install new output shaft nut.
Tighten
Tighten the nut to 128 N·m (94 lb ft).
- Stake the nut.
- Assemble the control box as follows (Make sure the plines on the stopper
cam and the internal lever are aligned):
| 65.1. | Assemble the stopper cam to the internal lever. |
| 65.2. | Install the stopper cam/internal lever assembly on the shift lever. |
| 65.3. | Align the stopper cam alignment mark (1) with the center on the
internal lever. |
| 65.4. | Inspect the reverse inhibitor for proper operation. |
| 65.5. | Install a new roll pin on the internal lever. |
- Clean the control box and the transaxle case mating surface. Apply
a 1/8 inch bead of RTV Silicone Sealer GM P/N 7052917
or equivalent to the mating surface.
- Install the control box on the transmission case.
- Install the control box bolts.
Tighten
Tighten the bolts to 17 N·m (13 lb ft).
- Inspect the transmission for proper shifting.
- Install a new gasket on the rear cover.
- Install the rear cover.
- Install the rear cover bolts.
Tighten
Tighten the bolts to 17 (13 lb ft).
- Inspect the input shaft rotating torque. When measuring the input shaft
rotating torque, the input shaft should be to the upper side and the differential
assembly should be to the lower side.
- The input shaft rotating torque should be less than 7 lb inch.
