Valve Cleaning and Inspection
Important: Do not scratch the valve stem with the wire brush.
- Clean the valves of carbon, oil, and varnish. Carbon can be removed
with a wire brush. Varnish can be removed by soaking the valves in Parts Immersion
Solvent GM P/N United States 12345368, GM P/N Canada 10953514
or an equivalent.
- Clean the valve guides.
- Inspect the valve stem for wear. The valve tip may be reconditioned
by grinding.
- Follow the grinder manufacturer's instructions. Ensure that the
new surface is perpendicular to the valve stem.
- Inspect the valve keeper groove for chipping or wear. Replace
the valve if chipped or worn.
- Inspect the valve face for burning or cracking. If pieces are
broken off, inspect the corresponding piston and cylinder head area for damage.
- Inspect the valve stem for burrs and scratches. Burrs and minor
scratches may be removed with an oil stone.
- Inspect the valve stem for straightness and the valve head for
bending or distortion. Use V blocks. Bent or distorted valves must be replaced.
- Clean the deposits from the valve face. Inspect the valve face
for grooving.
- Replace the valve if the face is grooved. Valve faces cannot be
machined. If worn or damaged, the valves must be replaced.
- The valves may be lightly lapped to the valve seats.
Cylinder Head and Gasket Surface Cleaning and Inspection

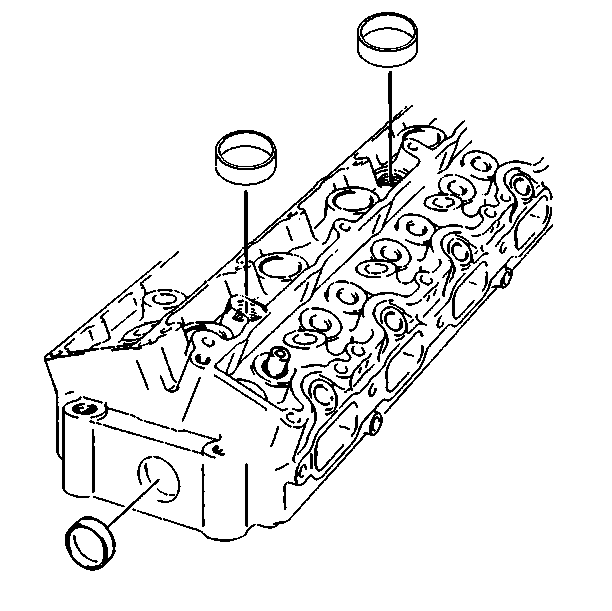
- Use the following procedure
to remove the cylinder head cup plugs:
| 1.1. | Obtain a suitable self-threading screw. |
| 1.2. | Drill a hole in the plug. |
| 1.3. | Install the self-threading screw. |
| 1.4. | Pry out the plug and discard it. |
| 1.5. | Remove the spark plugs. |
- Inspect the cylinder head gasket and mating surfaces for leaks,
corrosion and blow-by. If the gasket has failed, use the following faults
to determine the cause:
| • | Loose or warped cylinder head |
| • | Missing, off location or not fully seated dowel pins |
| • | Corrosion in the seal area around the coolant passages |
| • | Chips or debris in the cylinder head bolt holes |
| • | Bolt holes in the cylinder block not drilled or tapped deep enough |

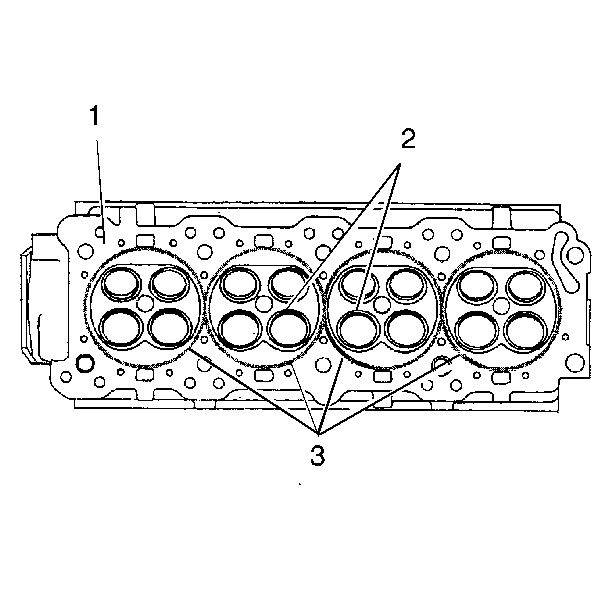
- Inspect the cylinder head
gasket surface.
| • | The cylinder head may be reused if corrosion is found only outside
a 4 mm (0.375 in) band around each combustion chamber (1). |
| • | Replace the cylinder head if the area between the valve seats
is cracked (2). |
| • | Replace the cylinder head if corrosion has been found inside
a 4 mm (0.375 in) band around each combustion chamber (3). |
- Clean the cylinder head bolts.
Important: Do not use a wire brush on any gasket sealing surface.
- Clean the cylinder head. Remove all varnish, soot and carbon to the
bare metal.
- Clean the valve guides.
- Clean the threaded holes. Use a nylon bristle brush.
- Clean the remains of the sealer from the plug holes.
- Inspect the cylinder head bolts for damaged threads or stretching
and damaged heads caused by improper use of tools.
- Replace all suspect bolts.
Important: Do not attempt to weld the cylinder head. Replace the cylinder head
instead.
- Inspect the cylinder head deck for corrosion, sand inclusions and blow
holes.

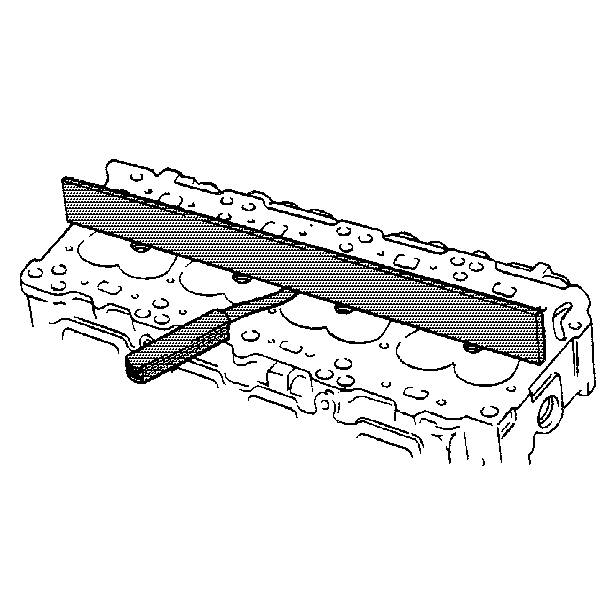
- Inspect the cylinder head
deck, the intake, and exhaust manifold mating surfaces for flatness. These
surfaces may be reconditioned by parallel grinding.
- Use the following steps to determine the amount of reconditioning
needed:
| • | If the warpage is less than 0.076 mm (0.003 in),
reuse the cylinder head, but do not resurface. |
| • | If the warpage is between 0.076 mm (0.003 in) and
0.25 mm (0.010 in), resurface the cylinder head before reusing. |
| • | If the warpage is over 0.25 mm (0.010 in), discard
the cylinder head. |
- Inspect all the threaded holes for damage. The threads may be
reconditioned with thread inserts.
- Inspect the sealing surfaces.
- Inspect the cylinder head cup plugs.


