Valve Cleaning and Inspection
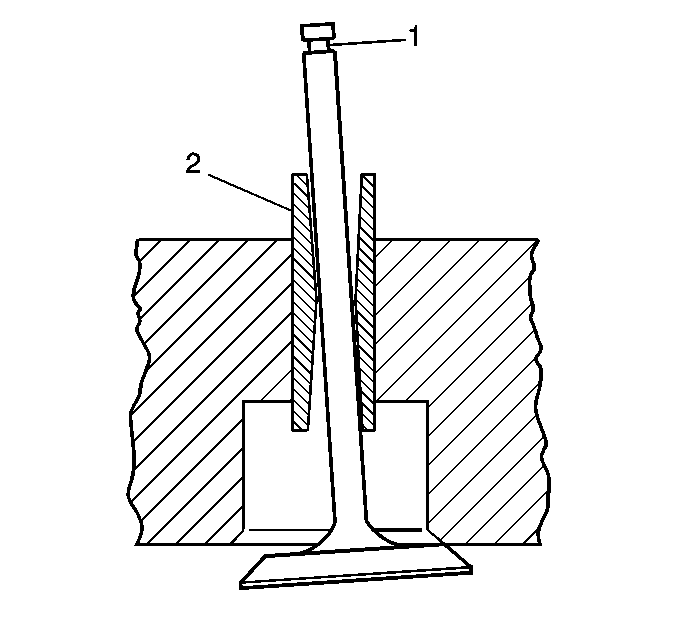
Important: Excessive valve stem to guide clearance may cause a noisy valve train,
premature valve stem oil seal wear, component damage, and/or excessive oil
consumption.
Insufficient valve stem to guide clearance will result in noisy or sticking
valves. Valves that are too tight may disturb engine smoothness or lead
to component damage.
- Inspect for excessive valve stem (1) to guide (2) clearance.
Important: Do not scratch the valve stem with the wire brush.
- Clean the valves of carbon, oil and varnish. Carbon can be removed with
a wire brush, varnish can be removed by soaking in Parts Immersion Solvent
GM P/N 12345368, Canadian P/N 10953514 or equivalent.
- Clean the deposits from the valve face.
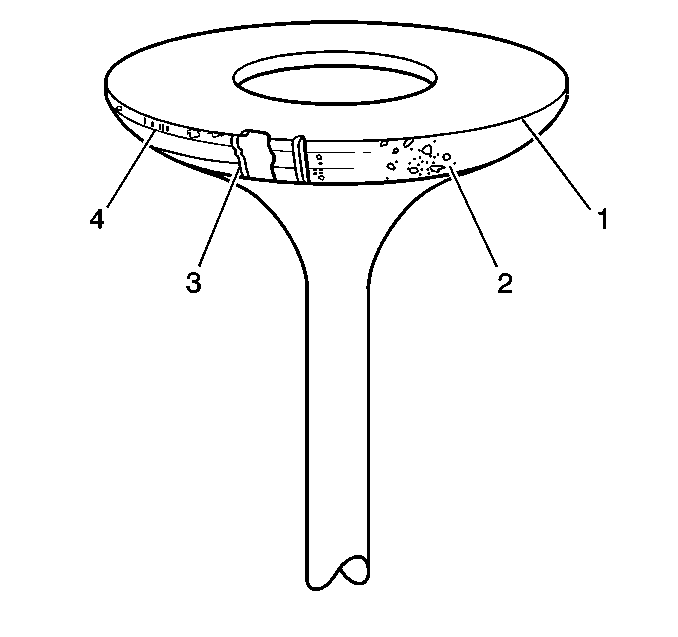
- Inspect the valve face
for the following:
| • | Worn or no margin (1, 4) |
| • | Burnt or eroded areas (3) |
- If any of the above conditions exist, replace the valve.
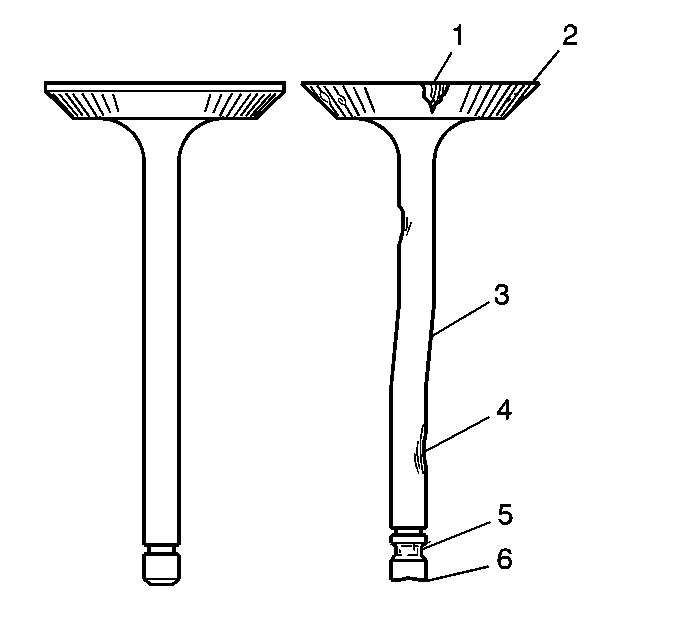
- Clean the valve guides
with a rifle brush and a suitable solvent.
- Inspect the valves for the following:
| • | Burnt or eroded areas (1) |
| • | A worn or scored stem (4) |
| • | A worn or chipped valve keeper groove (5) |
- If the valves are worn or damaged replace the valve.
- Burrs and minor scratches on the valve stem may be removed with
an oil stone.
- The valve stem end may be reconditioned by grinding. Follow the
grinder manufacturer's instructions.
- If the valve face had pieces broken off, inspect the corresponding
piston and cylinder head area for damage.
- The valves may be lightly lapped to the valve seats.
Valve and Seat Inspection
Tools Required
J 8001 Dial Indicator
Set
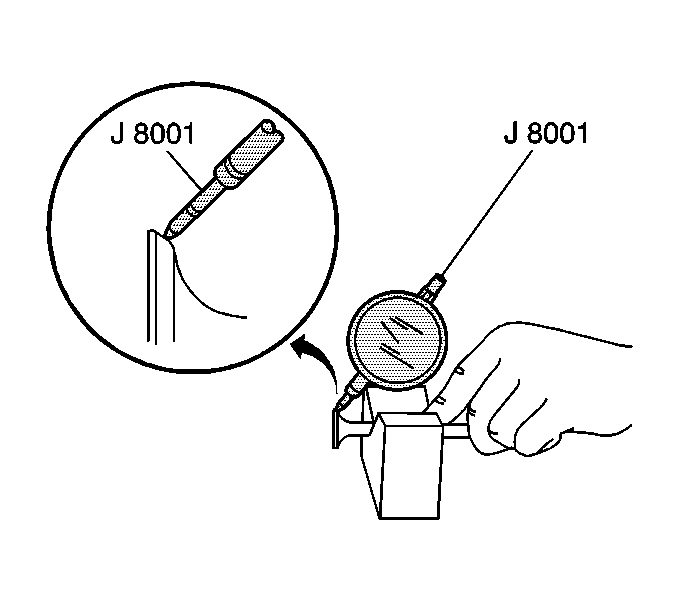
- Measure the radial runout
of the valve head using V-blocks and the J 8001
. If the runout exceeds specifications, replace the valve.
Maximum Valve Head Radial Runout
0.08 mm (0.003 in)
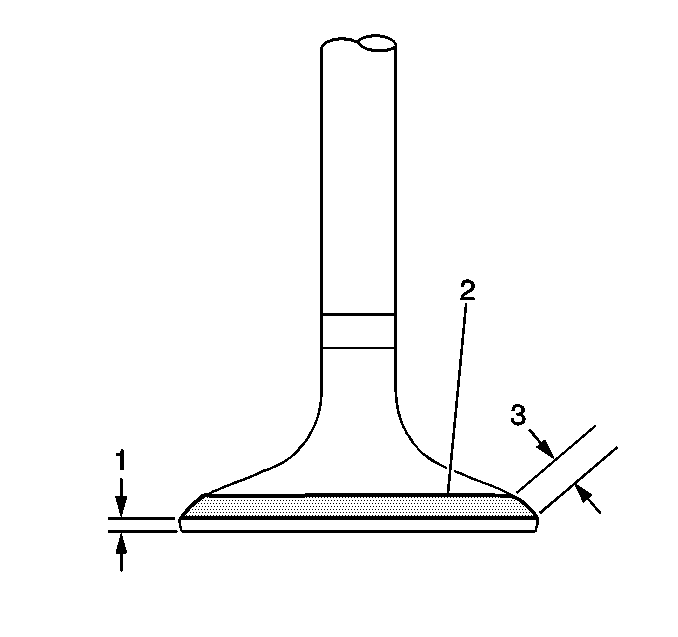
- Measure the valve margin (1).
If the margin is less than the minimum, replace the valve.
Standard Intake Valve Margin
1.0 mm (0.039 in)
Minimum Intake Valve Margin
0.6 mm (0.024 in)
Standard Exhaust Valve Margin
1.2 mm (0.047 in)
Minimum Exhaust Valve Margin
0.7 mm (0.028 in)
- Use Prussian blue to create a valve face-to-valve seat contact
pattern (2) on the valve face. The contact pattern should be uniform
around the diameter of the valve, in the middle of the valve face and
of the correct width.
Valve Face-to-Valve Seat Contact Pattern Width
1.1-1.3 mm (0.043-0.0512 in) for both intake
and exhaust valves.
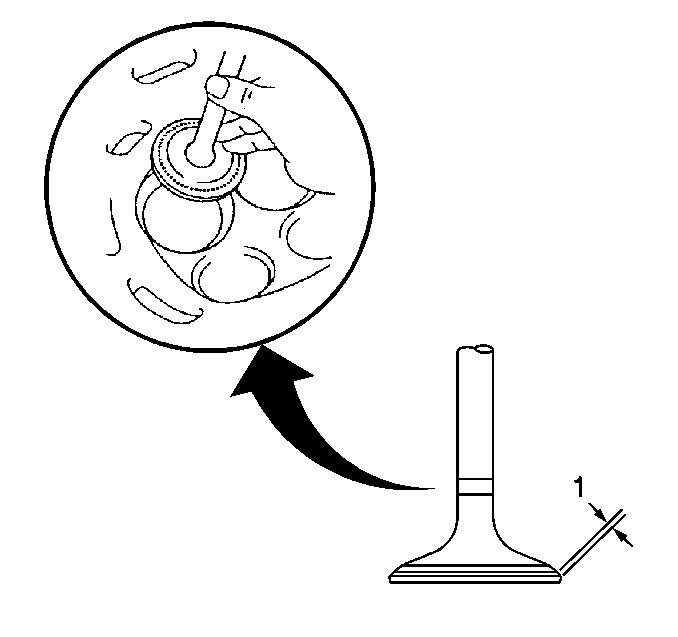
- Measure the valve contact
pattern (1) by performing the following:
| 4.1. | Apply a light coating of Prussian blue to the entire valve face.
Seat the valve but do not rotate it. The Prussian blue traces transferred
to the valve seat are an indication of concentricity of the valve seat. |
| 4.2. | Clean all traces of Prussian blue. |
| 4.3. | Apply a light coating of Prussian blue to the valve seat and repeat
the check. The traces of Prussian blue transferred to the valve face indicates
valve face concentricity. |
- Recondition the valve seat and/or replace the valves as necessary.
Valve and Guide Inspection
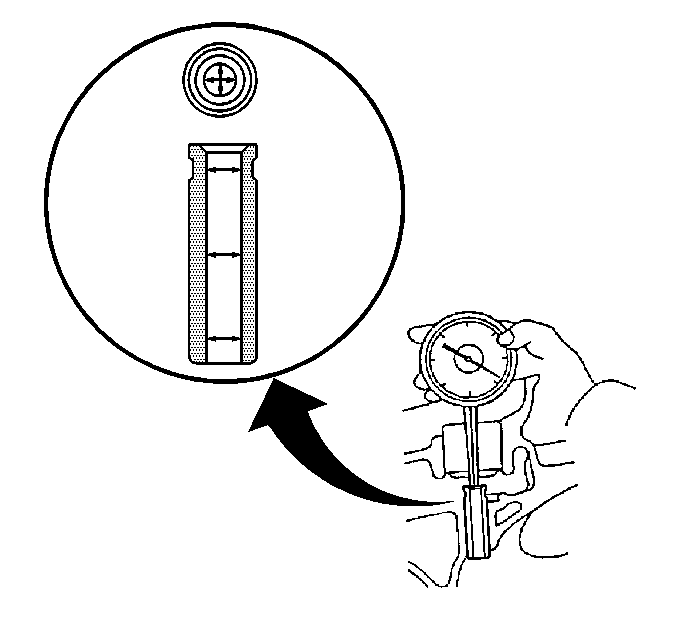
- Measure the inside diameter
of the valve guide.
Intake and Exhaust Valve Guide ID
6.000-6.012 mm (0.2362-0.2366 in)
- Excessive valve stem to guide clearance may cause a noisy valve
train, premature valve stem oil seal wear, component damage, and/or excessive
oil consumption.
Insufficient valve stem to guide clearance
will result in noisy or sticking valves. Valves that are too tight may disturb
engine smoothness or lead to component damage.
- If the valve guide diameter exceeds specifications, replace the
valve and the valve guide.
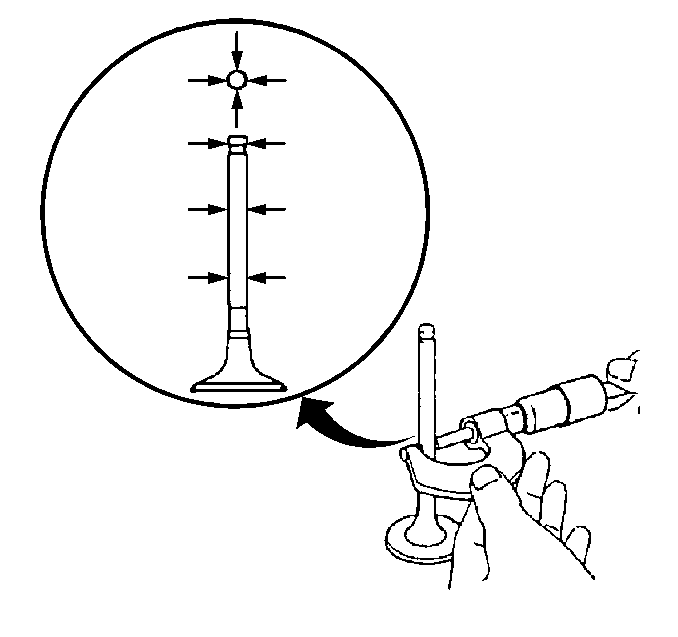
- Measure the outside diameter
of the valve stem using a micrometer.
Intake Valve Stem OD
5.965-5.980 mm (0.2348-0.2354 in)
Exhaust Valve Stem OD
5.940-5.955 mm (0.2339-0.2344 in)
- To obtain the valve guide oil, stem-to-guide clearance, subtract
the valve stem outside diameter measurement from the valve guide inside
diameter measurement.
Standard Intake Valve Oil Clearance
0.020-0.047 mm (0.0008-0.0018 in)
Maximum Intake Valve Oil Clearance
0.07 mm (0.0027 in)
Standard Exhaust Valve Oil Clearance
0.045-0.072 mm (0.0018-0.0028 in)
Maximum Exhaust Valve Oil Clearance
0.09 mm (0.0035 in)
- If the clearance is greater than the maximum, replace the valve
and the valve guide.
Valve Seat Repair
Important: Proper reconditioning of the valve seats is very important. Because
the valve guide (2) serves to support and center the valve grinder,
it is essential that the valve guide is cleaned properly. If the
valve guide requires reaming, this must be done first.
- Use the following as a general guideline when reconditioning the cylinder
head.
| • | Ream the valve guide bores first and then recondition the valve
seats. |
| • | Inspect the valve seats for excessive wear and burned spots. Valve
seats may be reconditioned by grinding. If grinding results in the new seat
being too wide it may be narrowed by using a 20 degree
or 70 degree stone. The 20 degree stone will lower
the seat and the 70 degree stone will raise the seat. |

| • | The valves must seat perfectly
for the engine to deliver optimum power and performance. |
| • | Cooling the valve heads is another important factor. Good contact
between each valve and its seat in the cylinder head is necessary to insure
that the heat in the valve head is properly carried away. |
| • | Regardless of what type of equipment is used, it is essential
that the valve guide bores are free from carbon or dirt to ensure the proper
centering of the pilot in the guide. |
| • | The valve seats should be concentric to within 0.05 mm
(0.031 in) total indicator reading. |
| • | Replace any valve that is not in serviceable condition. |
| • | Several different types of equipment are available for reconditioning
valves and valve seats. Use the manufacturers recommendations to obtain
proper results. |
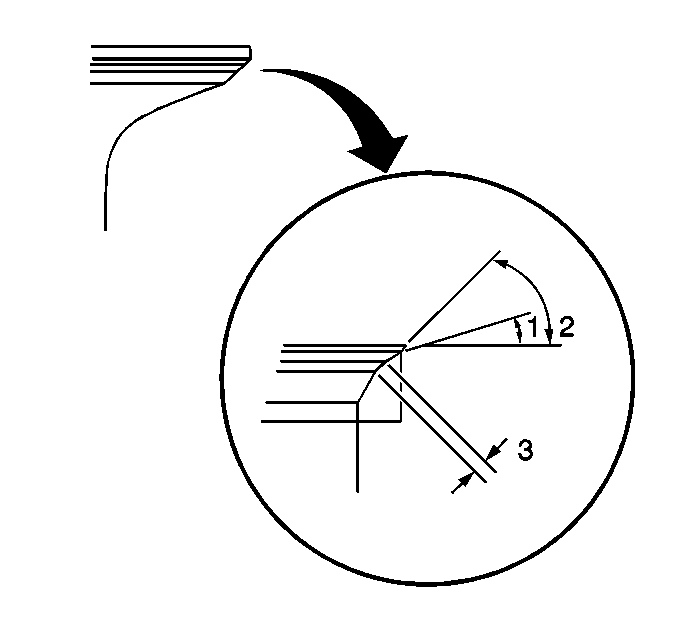
- Grind the exhaust valve
seat first with a 15 degree stone (1) and then with a 45 degree
stone (2).
Exhaust Valve Seat Width
1.1-1.3 mm (0.043-0.0512 in)
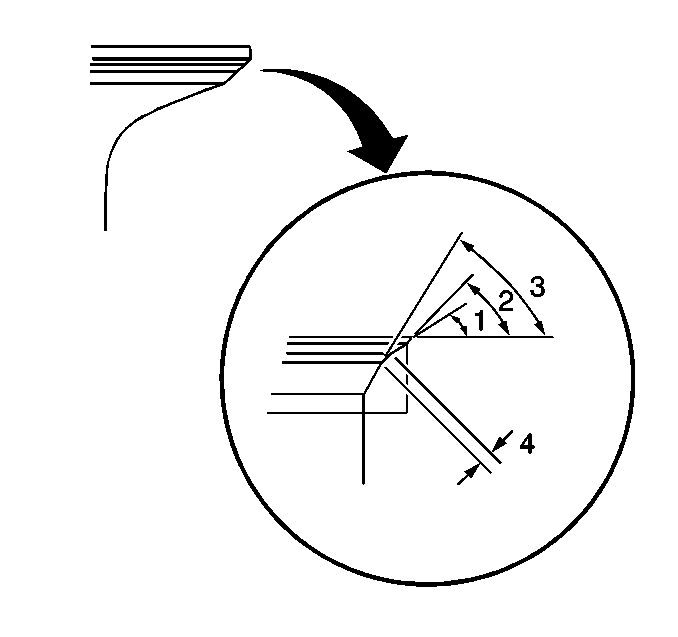
- Grind the intake valve
seat first with a 15 degree stone (1), then with a 60 degree
stone (3) and then with a 45 degree stone (2).
Intake Valve Seat Width
1.1-1.3 mm (0.043-0.0512 in)
- Lap the valves and seats with a coarse compound and then with
a fine compound.
- Clean all traces of the grinding compound from the valve components
before final assembly.
Valve Guide Replacement
Tools Required
| • | J 37968 Valve
Guide Seal/Installer Kit |
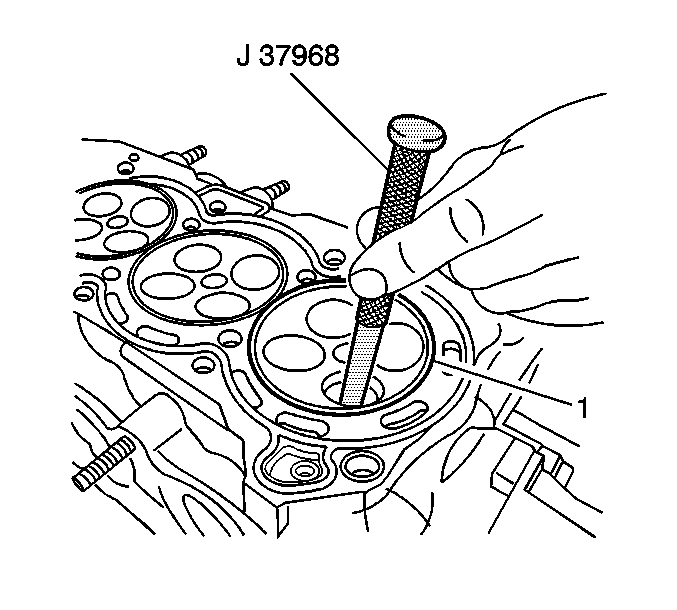
- Tap out the valve guide
from the combustion chamber side of the cylinder head using a hammer and
the J 37968
.
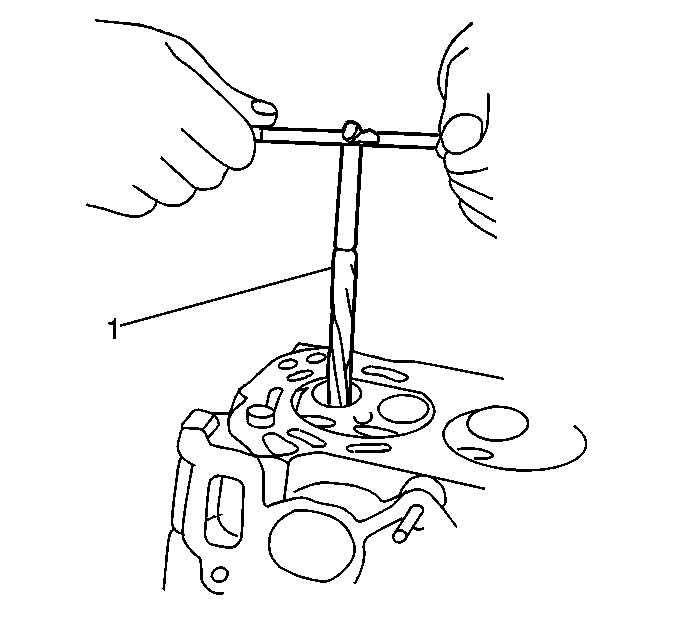
Notice: Clean the valve guides before reaming. Packing of chips or carbon may
result in the reamer jamming into the valve guide or broken reamer flutes.
- Ream the valve guide bore with the J 37972
11 mm reamer (1).
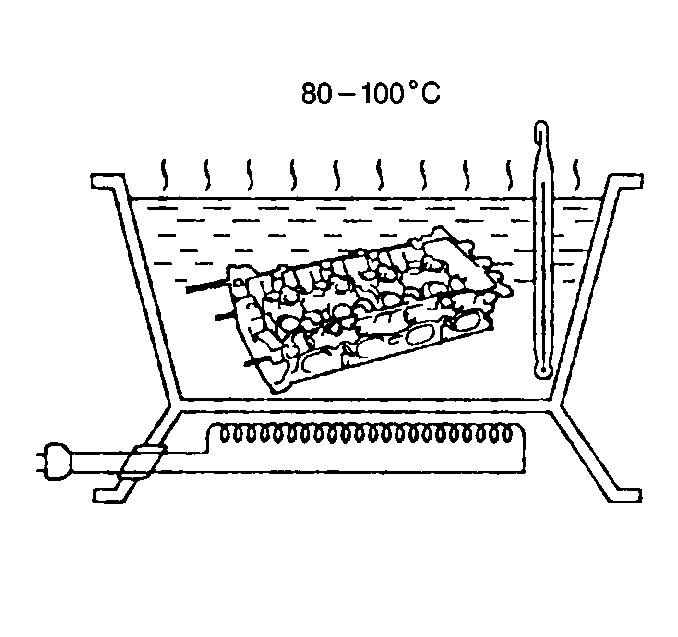
- Gradually heat the cylinder
head to 80-100°C (176-212°F).
Important: Intake and exhaust valve guides are identical. The new valve guide is
0.03 mm (0.0012 in) oversize. Intake and exhaust valve
guides should protrude 13.5 mm (0.53 in) above the cylinder
head surface.
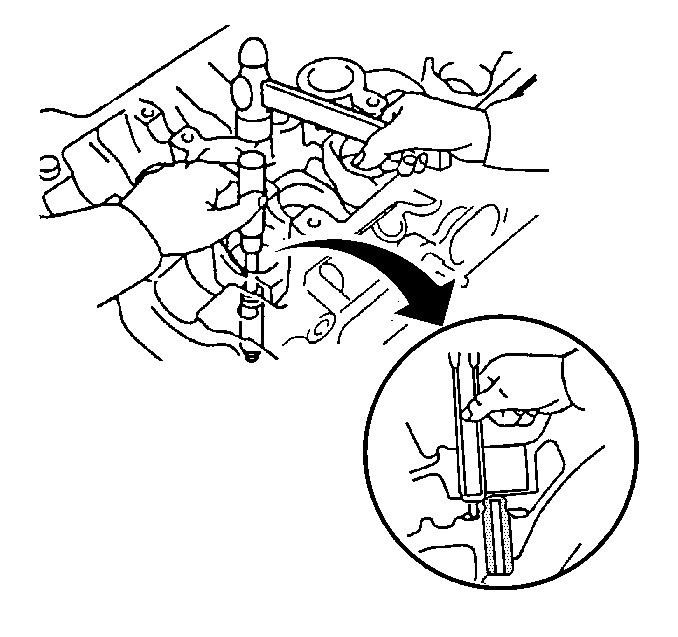
- Tap the new (oversize)
valve guide into the cylinder head from the camshaft side using the J 37968
, the J 43842
and a hammer.
- Install the valve guide to the specified protrusion height of
13.5 mm (0.53 in). The J 43842
should bottom out on the cylinder head when the specified protrusion
height is reached.
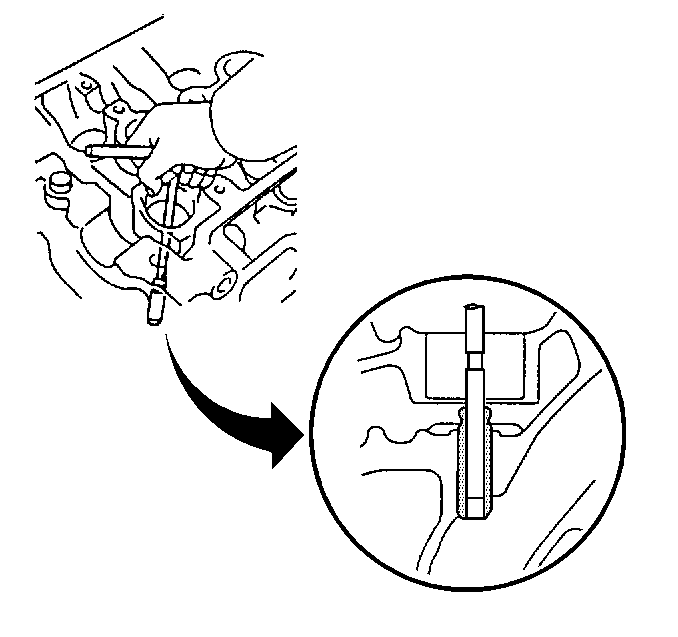
- Ream the new valve guide
with the J 38342
.


