Sunroof Will Not Open or close Completely (Replace Sunroof Motor)

| Subject: | Sunroof Will Not Open or Close Completely (Replace Sunroof Motor) |
| Models: | 1998-2004 Chevrolet Cavalier |
| 1999-2003 Oldsmobile Alero |
| 1998-2003 Pontiac Grand Am |
| 1998-2004 Pontiac Sunfire |
This bulletin is being revised to change the part number. Please discard Corporate Bulletin Number 03-08-67-009 (Section 08 -- Body and Accessories)
Condition
Some customers may comment that the sunroof will not open or will not close completely.
Cause
This condition may be due to the sunroof motor. Follow the procedure below for diagnostics.
Sunroof Motor Diagnosis
- Remove the headliner as necessary. Refer to Headliner Replacement in Interior Trim (SI Document ID #856974).
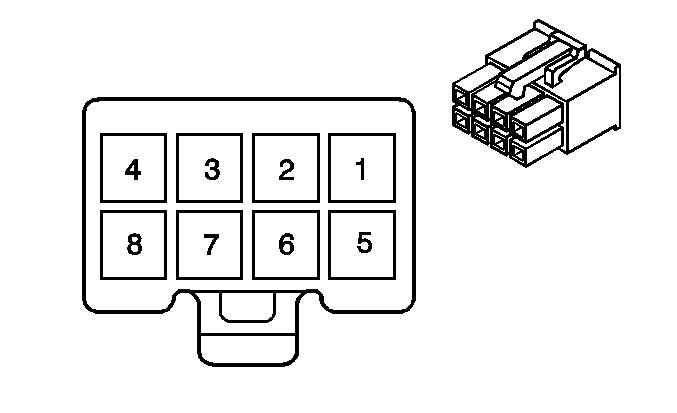
- Jumper Pin #1 and Pin #8 on the sunroof express module. If more access is needed, push the module towards the motor and unlock it from the bracket. Refer to the Illustration above.
- With the ignition ON, push the sunroof switch to the close position to fully seat the sunroof. If this action fully closes the sunroof, replace the sunroof motor only. Refer to the Sunroof Motor Replacement below. If this action does not fully close the sunroof, go to Diagnostic Starting Point-Roof (SI Document ID #823850).
- Remove the jumper and re-lock the sunroof express module back into its bracket.

Notice: Avoid operating the sunroof glass to the full open position. Since the limit switch has a jumper across it, there will be no indication to the sunroof module to stop the glass at the full open soft stop. The glass can slide past the full open position, possibly damaging the sunroof assembly and/or the roof.
Sunroof Motor Replacement
Service Procedure
- Clip the tie straps and remove the express module by sliding it towards the motor to unlock it from the slots provided in the module.
- Disconnect the wire harness from the express module, power supply, and switch.
- Remove the sunroof motor/actuator bolts (2) from the sunroof motor/actuator.
- Remove the sunroof motor/actuator from the sunroof module.
- Remove the sunroof glass.
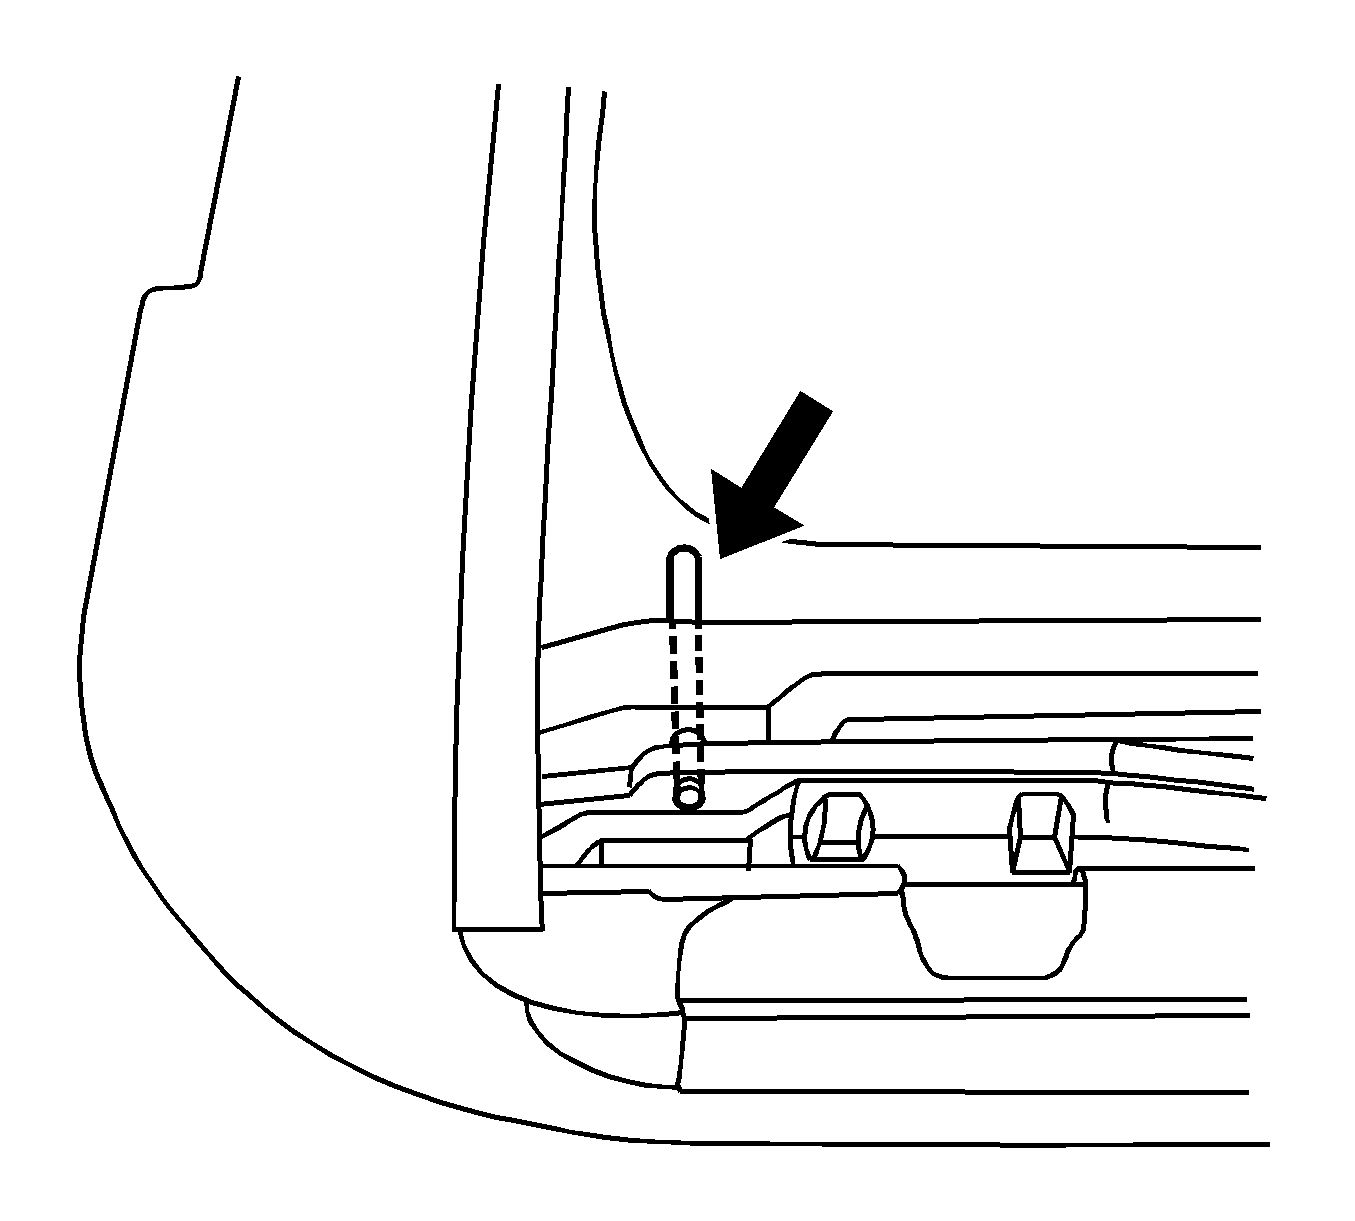
- Make sure the sunroof lift arms are aligned by inserting a pin in the front sunroof glass attachment hole to the lift arm cam. If you can insert a large paper clip through the two, it is aligned. Refer to the illustration above.
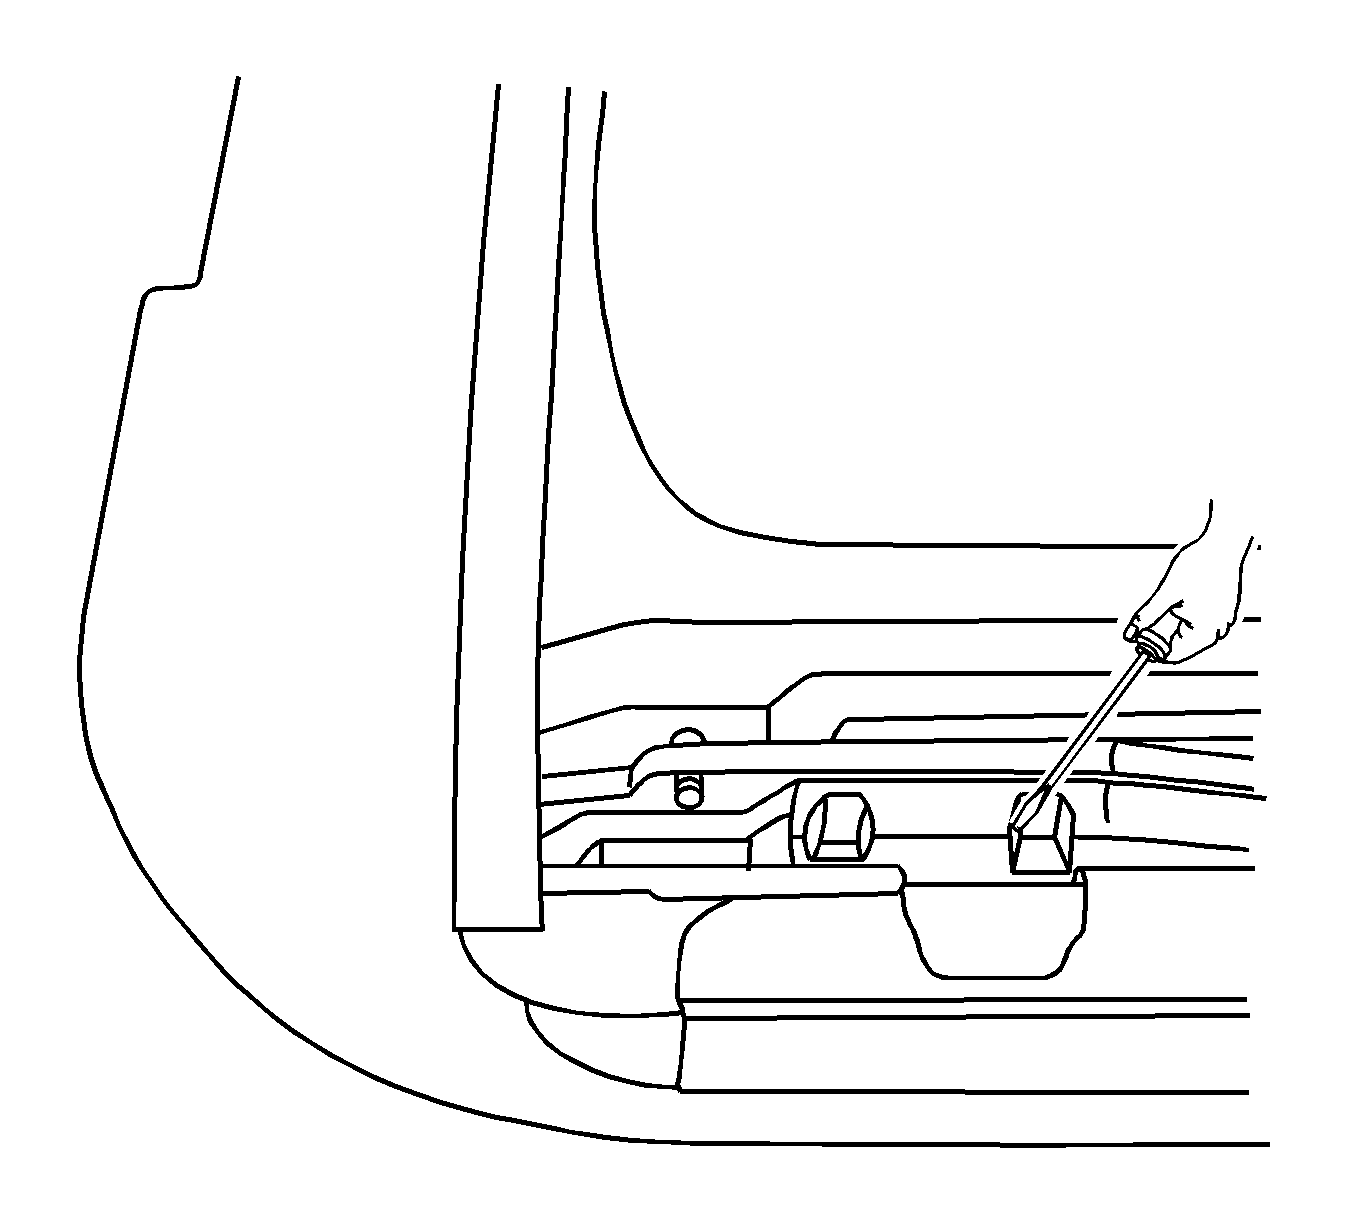
- If the arms are not aligned, push the arms with a screwdriver at the location shown. Refer to the illustration above.
- Verify that the original sunroof motor/actuator or the new sunroof motor/actuator is timed to the closed position by performing the following steps:
- Position the sunroof motor/actuator to the sunroof module.
- Install the sunroof motor/actuator.
- Connect the wire harness connectors to the express module. Slide the express module into the slots and lock it. Reconnect the power supply and the switch to the express module. Secure the wire harness to the drive tube and return tube with tie wraps.
- Install the headliner as necessary. Refer to Headliner Replacement in Interior Trim (SI Document ID #856974).
Notice: This sunroof system is timed from the factory so that the sunroof actuator automatically shuts off when the window panel reaches a certain position. Be careful not to disrupt this factory timing when removing the sunroof actuator from the sunroof module. Disrupting the factory timing may cause damage to the sunroof system. Close the window panel whenever you remove the sunroof actuator from the sunroof module assembly.


Important: Before you install a new sunroof motor/actuator or re-install the old actuator to the sunroof module, ensure that the actuator is timed to the closed position.

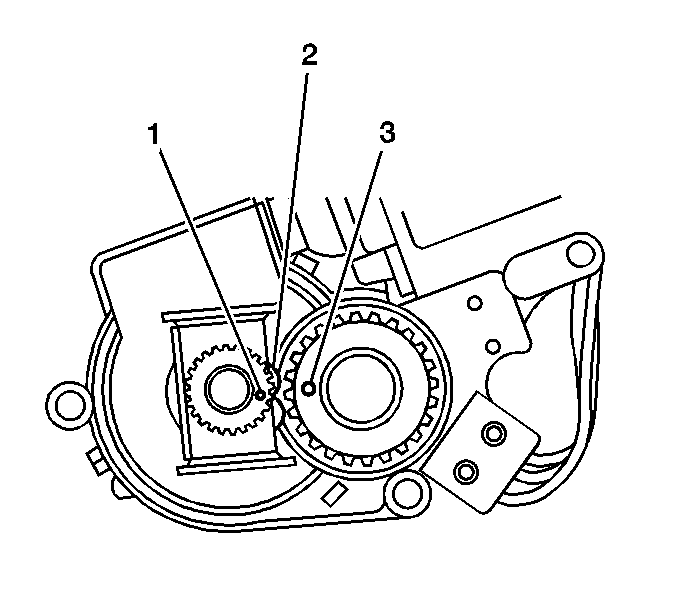
| 8.1. | The hole in the large timing gear (3), the notch in the disk (2) below the drive gear and the scribe mark (1) on the drive gear should all be in line with each other. |
Refer to the illustration above.
| 8.2. | If the actuator is not timed to the closed position, connect the switch, headliner harness and express module to the sunroof motor/actuator and run the actuator to the closed position. Verify that all timing marks are aligned. |
Notice: Use the correct fastener in the correct location. Replacement fasteners must be the correct part number for that application. Fasteners requiring replacement or fasteners requiring the use of thread locking compound or sealant are identified in the service procedure. Do not use paints, lubricants, or corrosion inhibitors on fasteners or fastener joint surfaces unless specified. These coatings affect fastener torque and joint clamping force and may damage the fasteners. Use the correct tightening sequence and specifications when installing fasteners in order to avoid damage to parts and systems.
Tighten
Tighten the sunroof motor/actuator to 3 N·m
(27 lb in).
Parts Information
Part Number | Description |
|---|---|
89023553 | Motor |
Parts are currently available from GMSPO.
Warranty Information
For vehicles repaired under warranty, use:
Labor Operation | Description | Labor Time |
|---|---|---|
N3360 | Motor, Sunroof Drive-Replace | 0.8 hr |
Add | Diagnosis Time | 0.3 hr |
