| Subject: | Timing Chain Tensioner Installation Procedure |
| Models: | 1996-1998 Buick Skylark |
| 1996-2002 Chevrolet Cavalier |
| 1997-1999 Chevrolet Malibu |
| 1996-1998 Oldsmobile Achieva |
| 1999-2001 Oldsmobile Alero |
| 1996-2001 Pontiac Grand Am |
| 1996-2002 Pontiac Sunfire |
| 1996-2001 Toyota Cavalier |
| with 2.4L Engine (VIN T -- RPO LD9) |
| Attention: | This bulletin is being issued to draw attention to the proper timing chain tensioner reset and installation procedure. Warranty claims have been generated due to confusion about the proper procedure. The service manual procedure has been updated
to provide clearer instructions. The proper procedure for resetting and installing the tensioner is included in the following text. |
This bulletin is being revised to include additional model years and models. Please discard Corporate Bulletin Number 00-06-01-010 (Section 06 -- Engine).
Procedure

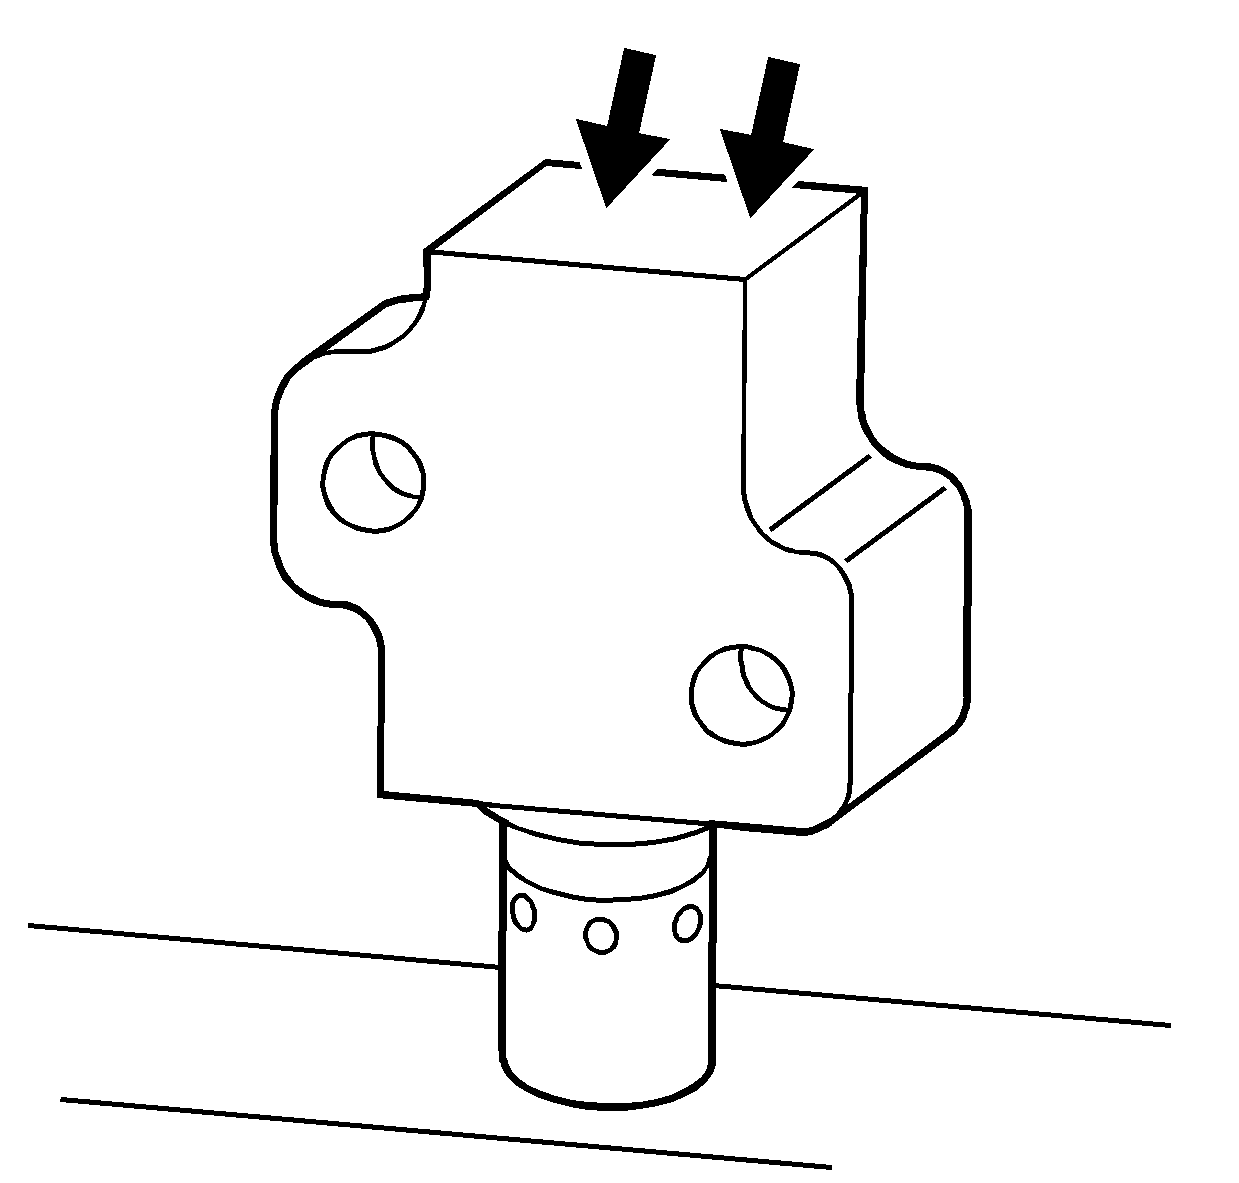
Important: Use the following steps in order to reset the timing chain tensioner assembly to the zero position.
- Reset the timing chain tensioner assembly.
| 1.1. | Insert the tensioner plunger assembly into the tensioner housing. |
| 1.2. | With the tensioner plunger fully extended, turn the complete assembly upside down on a bench or other flat surface. |
| 1.3. | With the plunger face against the workbench, press firmly on the bottom of the tensioner housing. |
| 1.4. | Compress the plunger until the plunger is seated flush in the tensioner. |

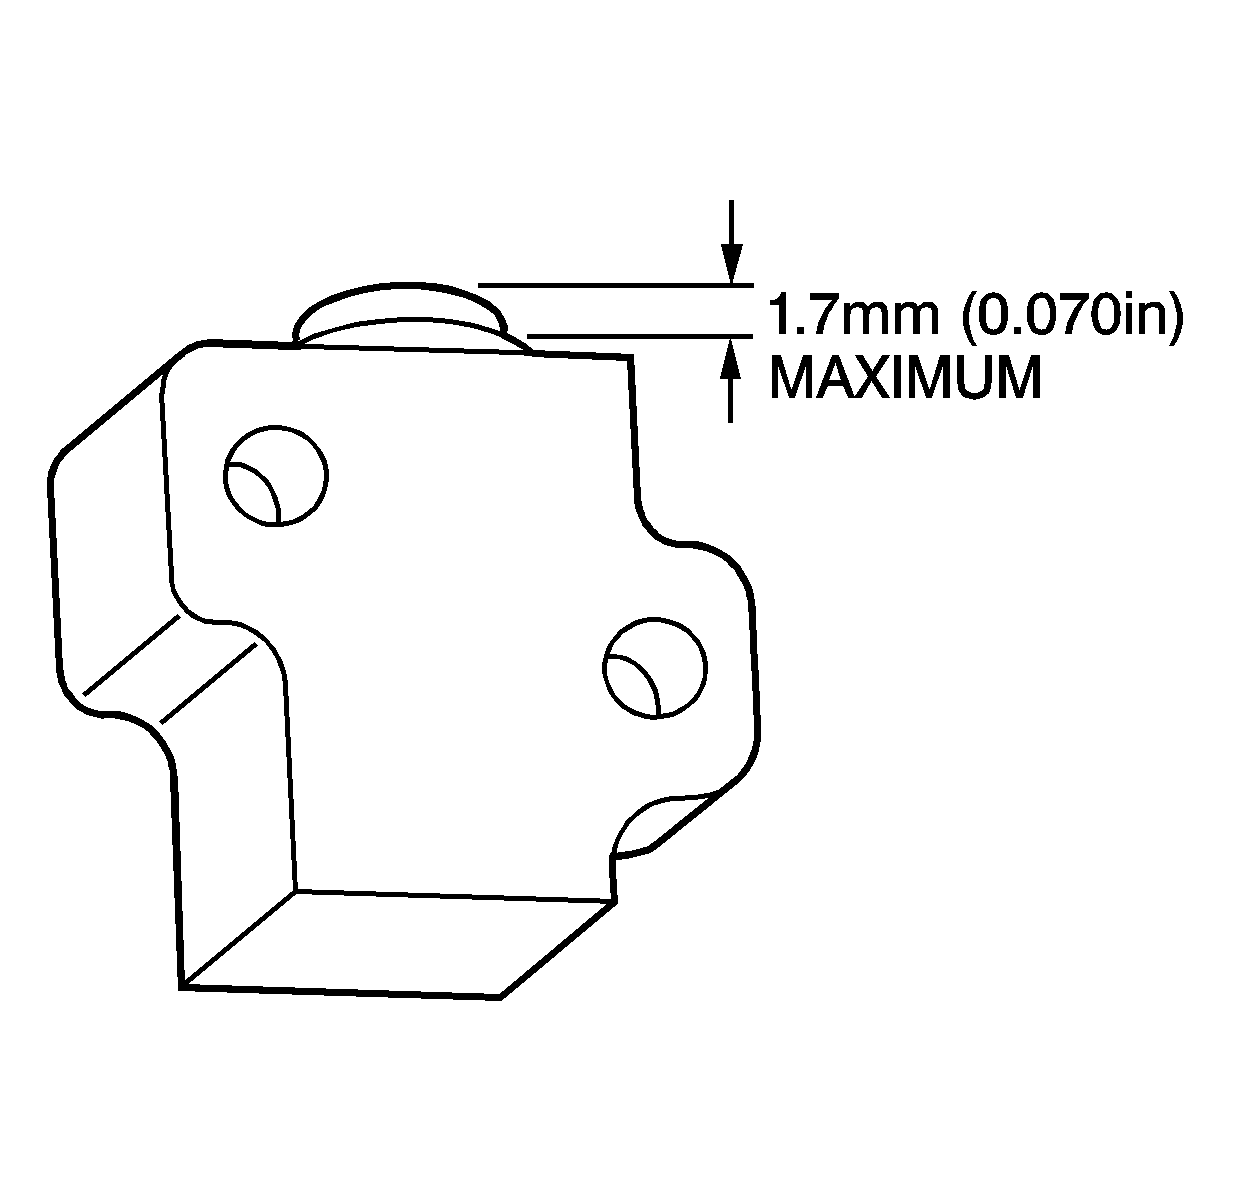
- Check the plunger to make sure that the plunger is out of the cylinder at the correct dimension. The correct dimension for the plunger to extend out of the cylinder is 1.7 mm (0.070 in) maximum.

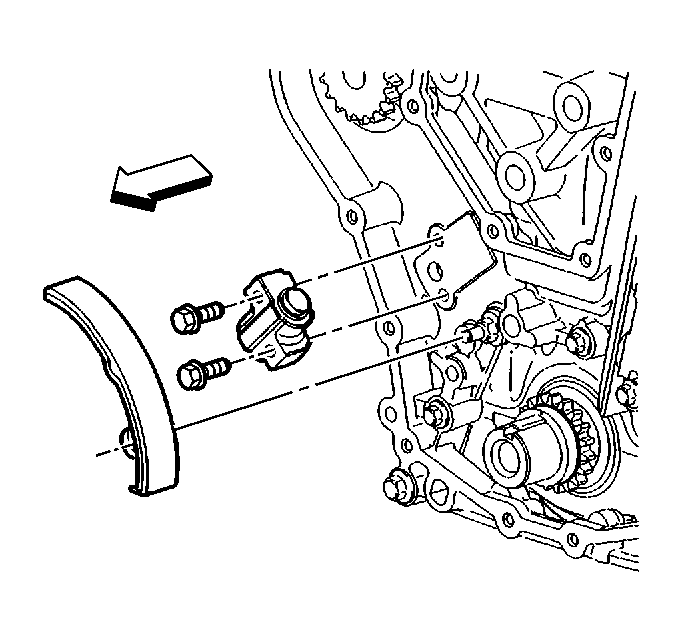
- Loosely install the tensioner assembly and bolts to the timing chain housing.
- Install the timing chain tensioner shoe on the stud.
- Apply hand pressure to the timing chain tensioner shoe until the locking tab seats in the groove in the stud.
Notice: Do not over tighten the bolts retaining the component or failure to the component may occur.
- Tighten the timing chain tensioner bolts.
Tighten
Tighten the bolts to 10 N·m (89 lb in).

Notice: If the timing chain tensioner plunger is not released from the installation position, engine damage will occur when the engine is started.
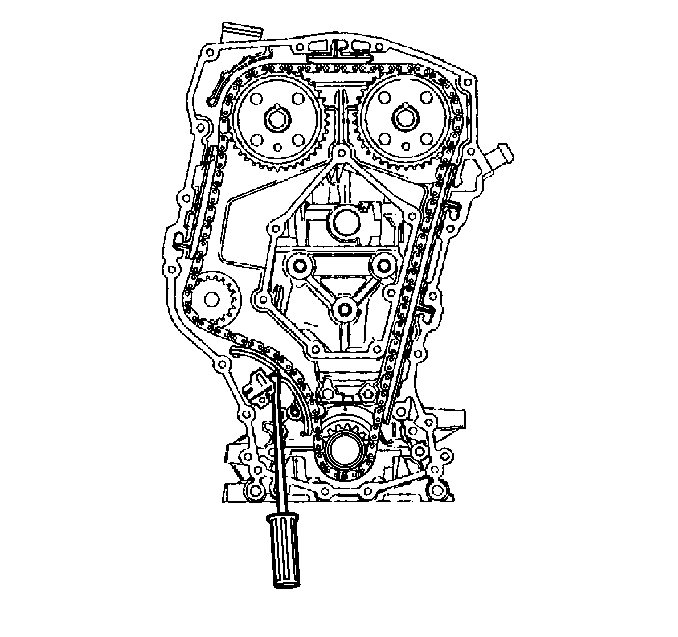
- Release the timing chain tensioner plunger.
| 7.1. | Using a flat blade screwdriver, cotter pin remover, or a similar tool, press firmly against the face of the timing chain tensioner plunger. |
| | Important: If the timing chain tensioner plunger cannot be depressed, the plunger is not properly reset and the procedure for resetting the timing chain tensioner should be repeated.
|
| 7.2. | Depress the timing chain tensioner plunger until the plunger is bottomed out in the bore of the timing chain tensioner. |
| 7.3. | Release the tensioner plunger. The plunger should press firmly against the back of the timing chain tensioner shoe. |


