
| Subject: | 4T40E or 4T45E Transmission Transaxle Changes for the
2002 Model Year |
| Models: | 2002 Chevrolet Cavalier, Malibu |
| 2002 Pontiac Grand Am, Sunfire |
Service Tools
The 2002 Kent-Moore tool shipment included two (2) new required tools
for servicing the 2002 4T40E/4T45E transaxle.
| • | The holding fixture template J 41230-temp, is to
be used to update the dealer's existing 4T40E/4T45E holding fixture J 41230.
Using the template, drill holes in the J 41230. This will allow the
tool to be used with transmission/transaxles in the L61, 2.2L, 4 cyl., VIN
Code F, engine. |
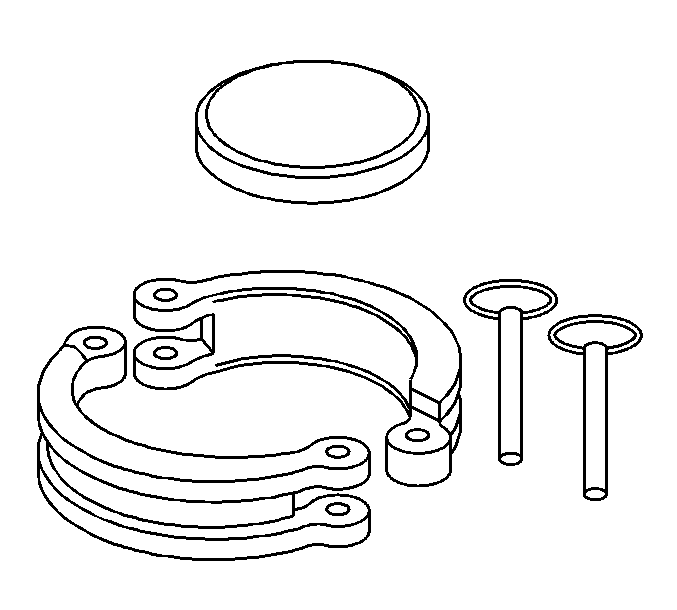
| | Notice: If the J 45398 tool is not used when attempting to remove the
forward clutch inner piston seal, the seal may become bent and distorted enough
so that the seal will not come off of the housing.
|
| • | The forward clutch inner piston seal tool, J 45398, is to be
used when removing the seal. This tool will wrap around the forward clutch
piston inner seal . |
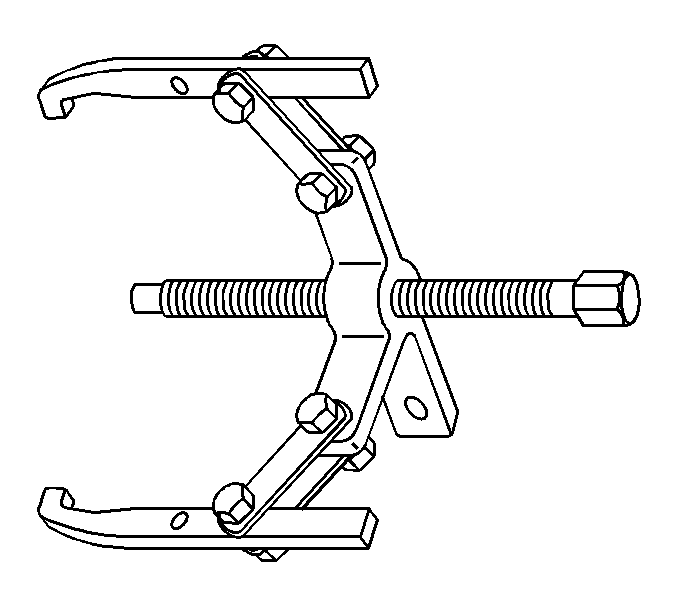
| • | Remove the seal from the housing using
the J 25031A tool. |
Changes to the Valve Body
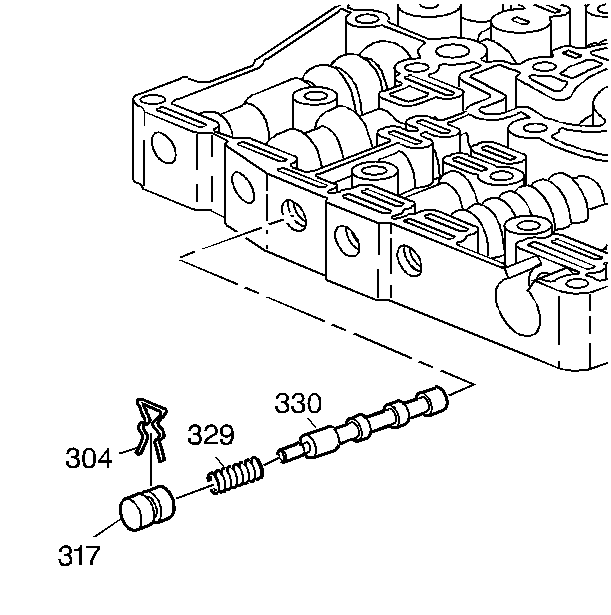
| • | The valve body 2 - 3 accumulator valve
(330), spring (329), bore plug (317), and the bore have been eliminated. |
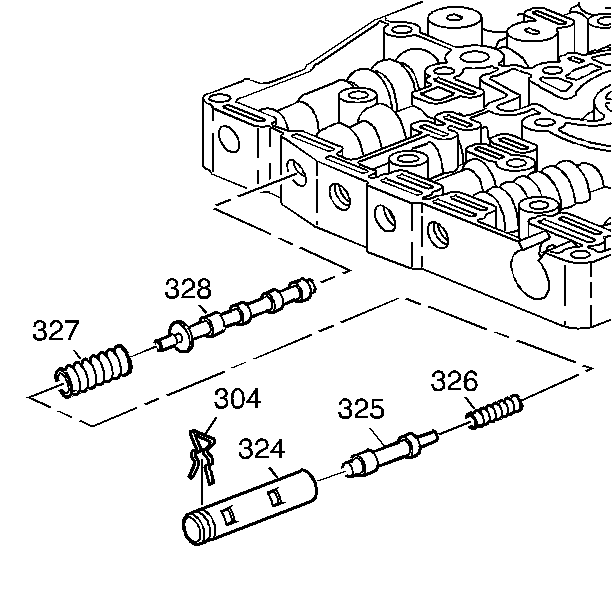
| • | The pressure regulator valve (328) has
changed for 2002 vehicles equipped with the 4T40E/4T45E transaxle. The past
model valve (1995 - 2001), was cross drilled; the 2002 valve is not. |
| | Important: The valve body, valve body spacer plate and gaskets cannot be used on
past model vehicles due to hydraulic changes in the valve body. Shift quality
will be effected if the incorrect spacer plate and/or gaskets are used.
|
| • | A new spacer plate and gasket are also required for 2002. |
Clearing Shift Adapts
| • | Clearing shift adapts are required after any major transaxle repair.
If the shift adapts are not cleared, harsh or slipping shifts may be felt
after major transaxle repairs. |
| • | To clear shift adapts, remember to disconnect the power (battery)
from the Powertrain Control Module for at least 35 minutes. Refer to Corporate
Bulletin Number 01-07-30-024 for additional information. |
Cooler Line Seals
The cooler line seals have changed for 2002. These seals have a Teflon®
coating added to the outside of the seal to assist in the installation and/or
the removal. The coating also assists in achieving a better seal to the cooler
line and the case. The seals are interchangeable with past model year seals.
Drive Sprocket Bolts
The drive sprocket support to case bolts have changed from a bolt/screw
to a heavy hex drive fastener.
One Additional Service Tool
A new tool will be sent to all dealers approximately November 20, 2001.
This tool, (J 45201), is designed to be used when removing the cooler
line seals. The tool may be used in either on-vehicle or on-the-bench removal
of the cooler line seal.
To use this tool, follow the steps provided below.
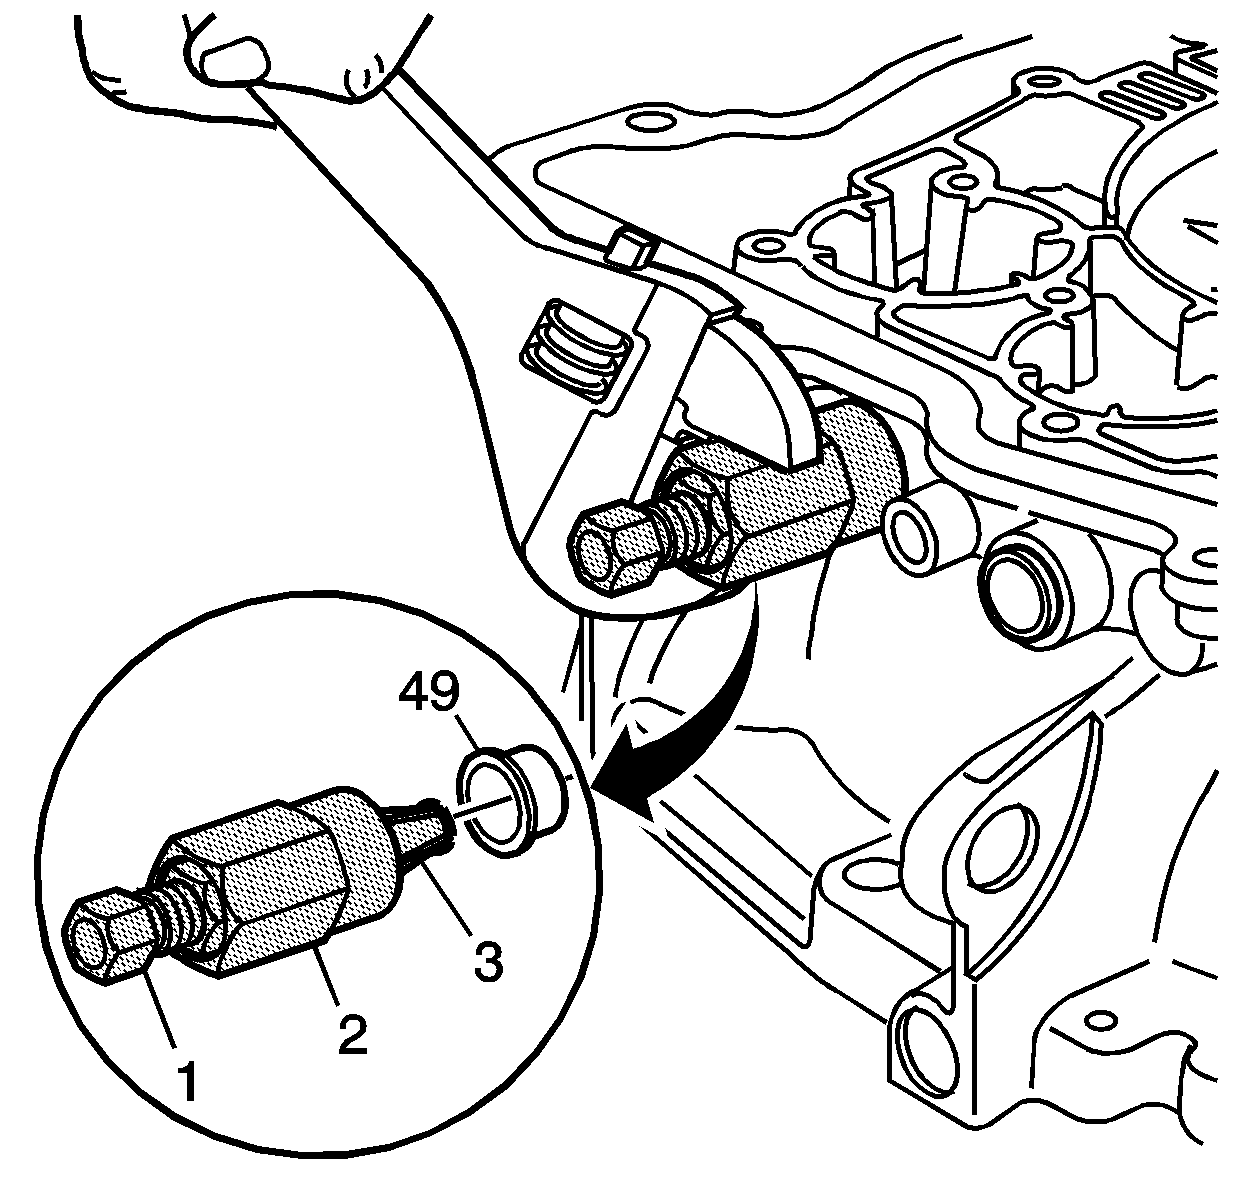
- Separate the J 45201 tool into
its three separate pieces.
- Insert the piece which has threads on the inside and outside surface
(3) fully into the cooler line seal bore.
- Insert (1) into (3) and tighten.
- Slide (2) over (3) and tighten until the tool has removed the
seal.
- Use a pair of pliers to remove the cooler line seal from the tool.


