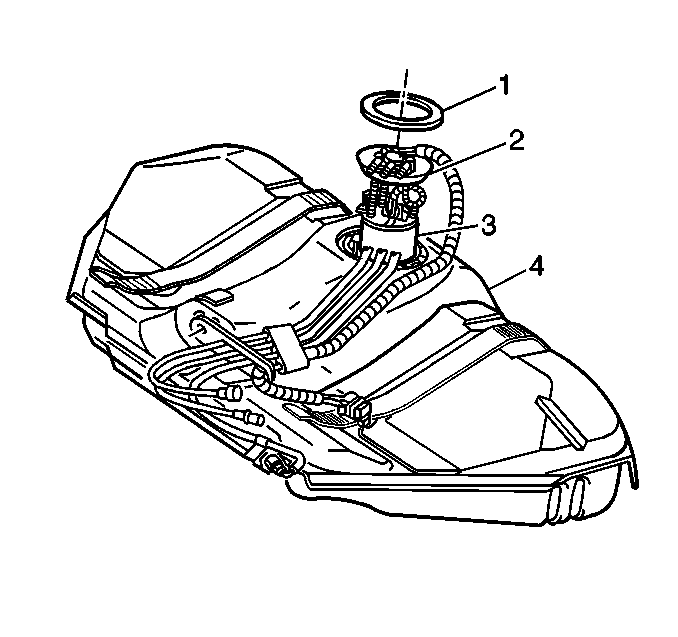
For 1990-2009 cars only
Tools Required
J 39765 Fuel Sender Lock Nut Wrench
Removal Procedure
Caution: In order to reduce the risk of fire and personal injury that may result from a fuel leak, always replace the fuel sender gasket when reinstalling the fuel sender assembly.
- Remove the fuel tank (4). Refer to Fuel Tank Replacement .
- Disconnect the wiring harness from the fuel pump module and the fuel tank pressure (FTP) sensor.
- Use the J 39765 in order to press down and rotate the retaining ring (1).
- Remove the fuel pump module assembly.
- Remove the fuel level sensor from the fuel pump module assembly. Refer to Fuel Level Sensor Replacement

Important:
• The modular fuel sender assembly may spring up. • When removing the modular fuel sender assembly from the fuel tank, be aware that the reservoir bucket is full of fuel. The reservoir must be tipped slightly during removal to avoid damage to the float. • Carefully discard the reservoir fuel into an approved container.
Installation Procedure
- Install the fuel level sensor to the fuel pump module assembly. Refer to Fuel Level Sensor Replacement
- Install the new seal on the fuel tank (4).
- Align the fuel pipes parallel with the mark on the fuel tank.
- Slowly apply pressure to the top of the spring loaded sender until the sender aligns flush with the retainer on tank.
- Install the retaining ring (1) using the J 39765 .
- Connect the wiring harness to the fuel pump module and the FTP sensor.
- Install the fuel tank. Refer to Fuel Tank Replacement .

Important: Be sure that the retaining ring is fully seated within the tab slots.
