For 1990-2009 cars only
Removal Procedure
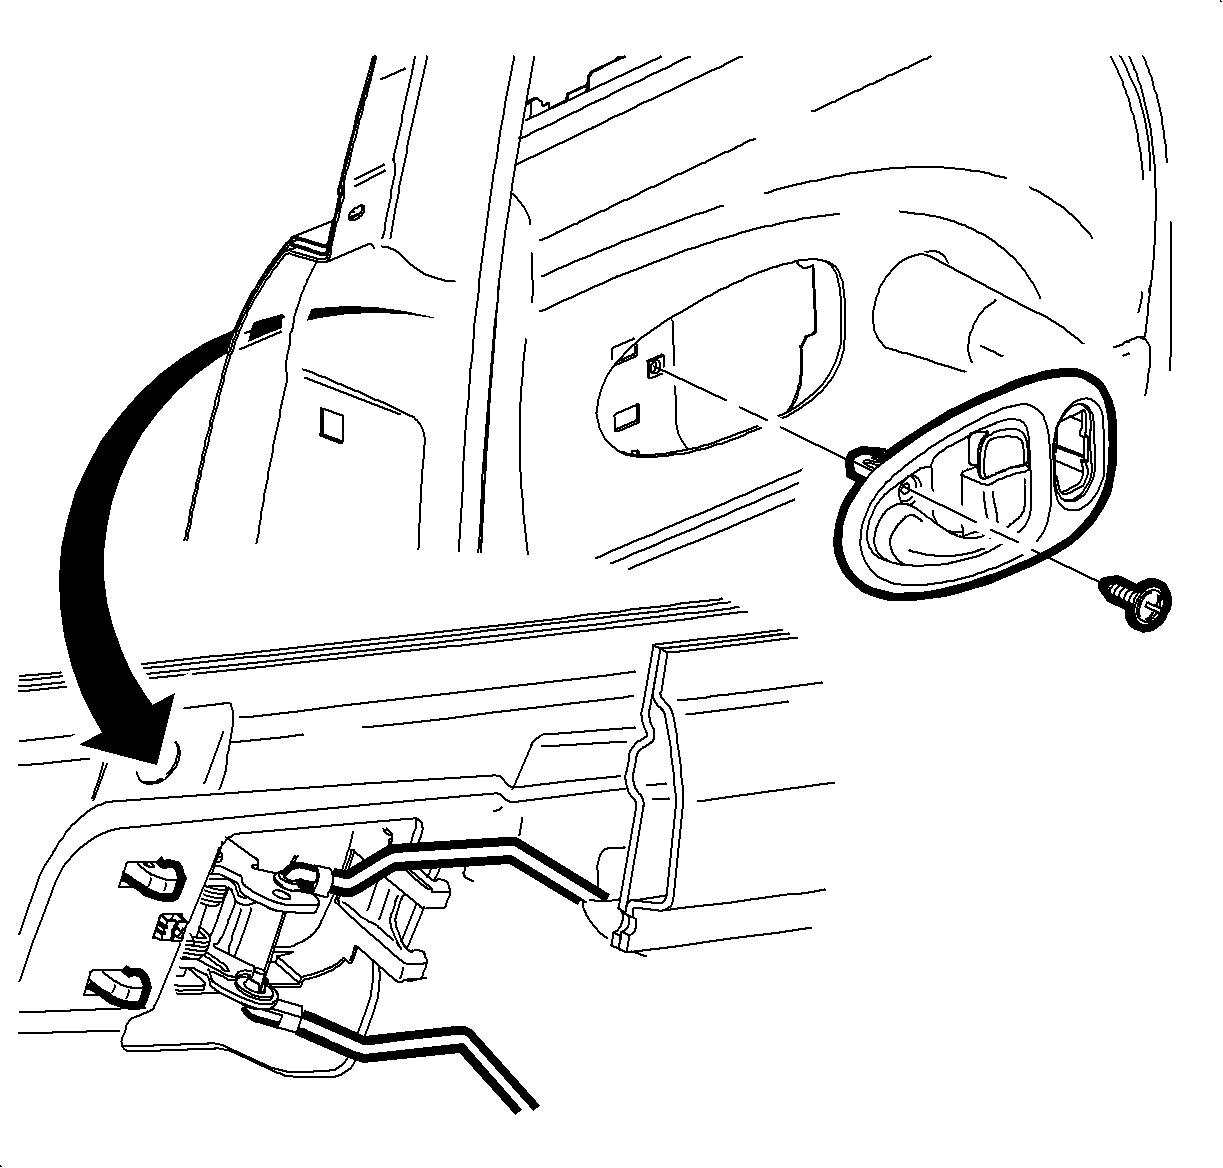
- Remove the inside handle fastener cover.
- Remove the screw from the center of the inside handle pocket.
- Slide the handle forward and pull outward to expose the lock rods.
- Using a thin-bladed tool, disengage the rods from the retaining clips.
- If the vehicle is equipped with power windows, disconnect the electrical connector from the switch by depressing the retaining tabs.

Installation Procedure
- Connect the electrical connector to the power window switch.
- Position the inside handle to the door trim and partially seat the rear tangs.
- Lift the lock rods into the retaining clips. Secure the rods into the handle by latching the clips over the rods.
- Push the handle into the trim panel and slide rearward to fully engage the tangs. Verify that the rods clear the water deflector.
- Install the screw in the handle.
- Install the inside handle fastener cover.
- Verify the correct installation of the lock rods by testing for smooth movement of the lock button and of the inside handle.

Notice: Refer to Fastener Notice in the Preface section.
Tighten
Tighten the screw to 2.5 N·m (22 lb in).
