For 1990-2009 cars only
Tools Required
| • | J 25031-A Three Jaw Puller |
| • | J 37872 Universal Spanner Wrench |
| • | GE-47849 Clutch Remover |
| • | GE-47850 Center Puller |
| • | GE-47851 Armature Replacer |
Removal Procedure
- Remove the compressor from the vehicle. Refer to Air Conditioning Compressor Replacement .
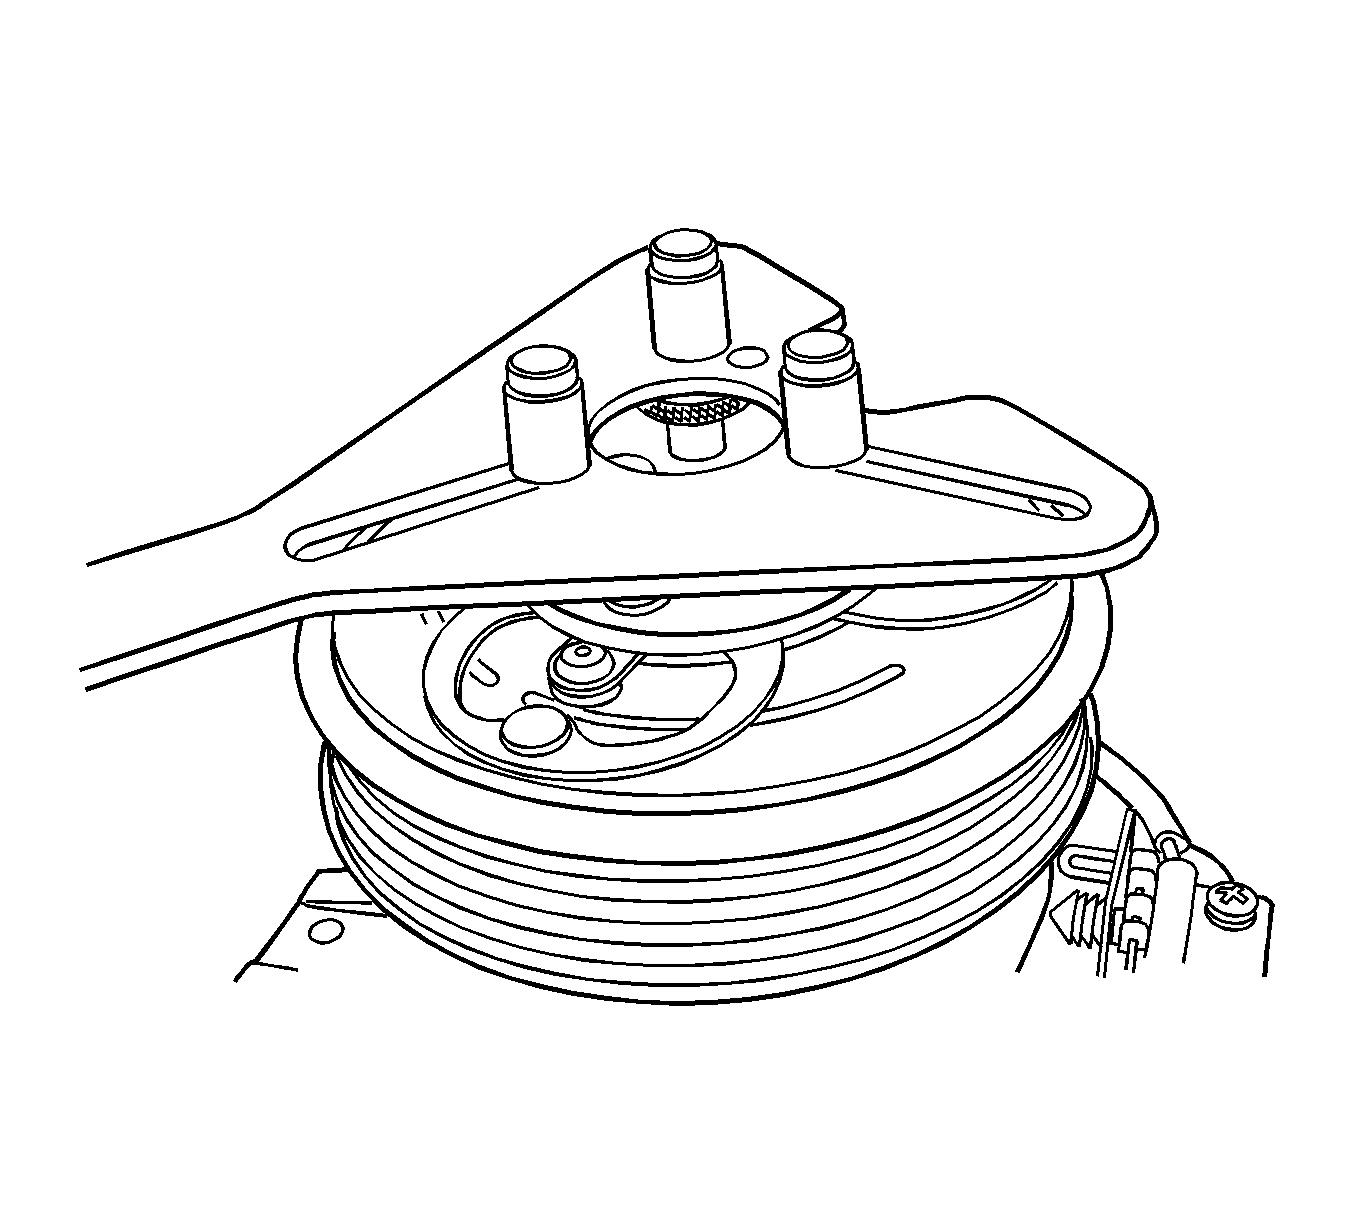
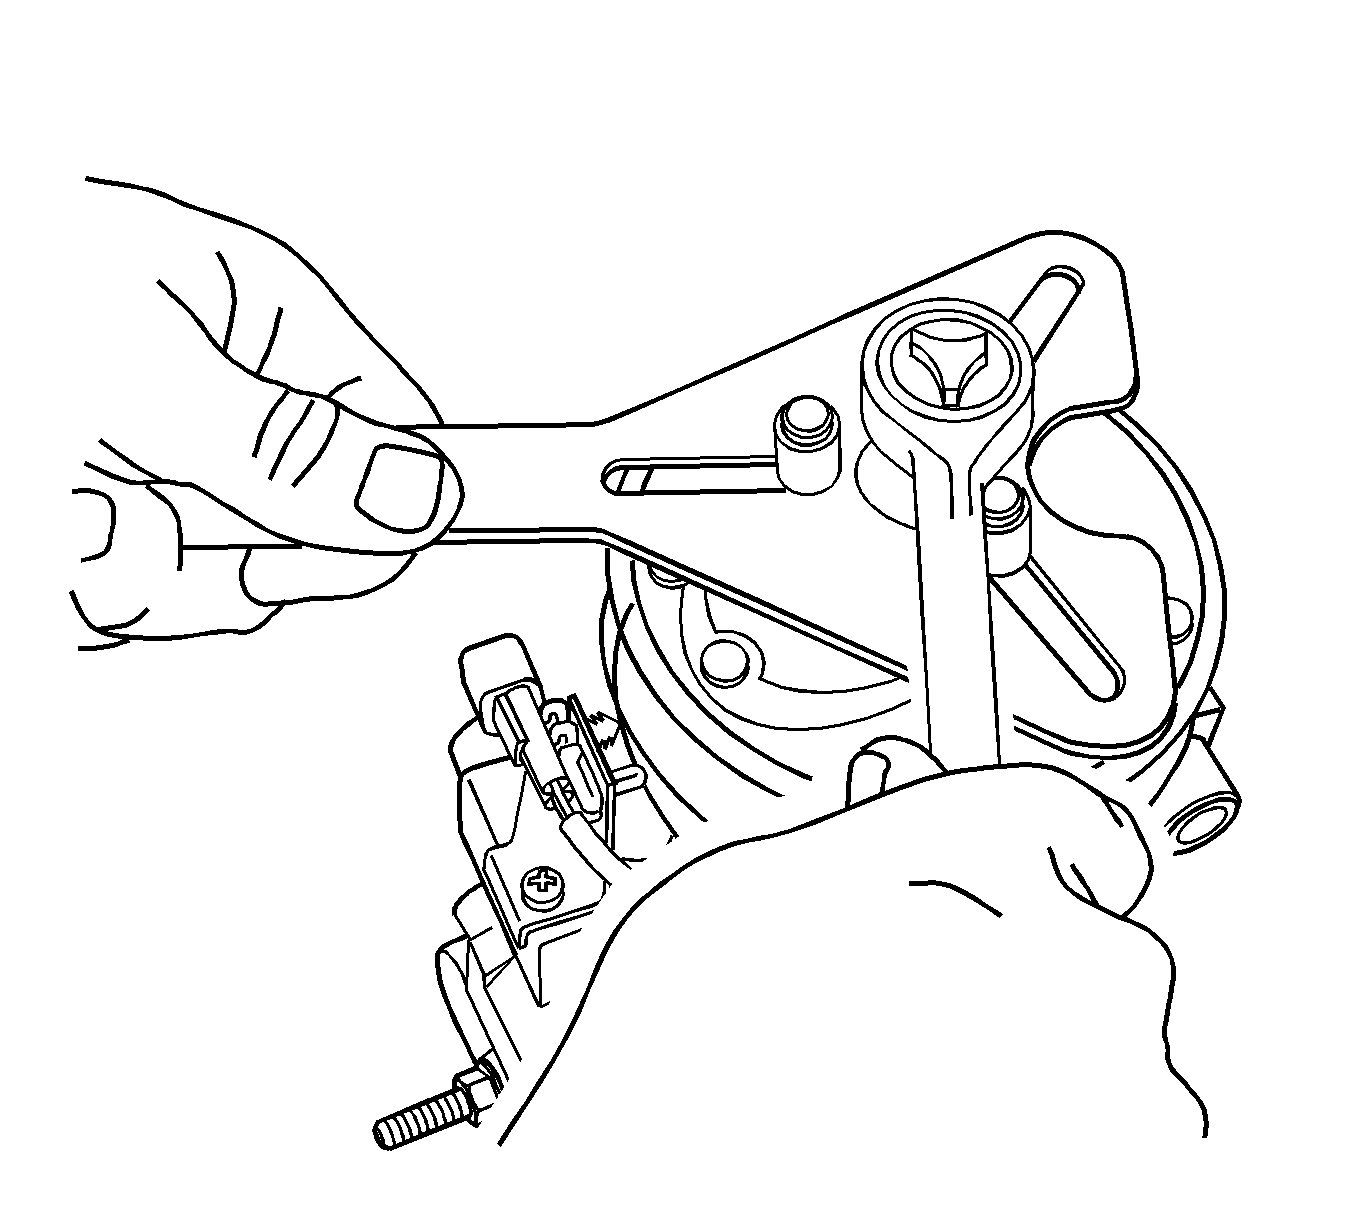
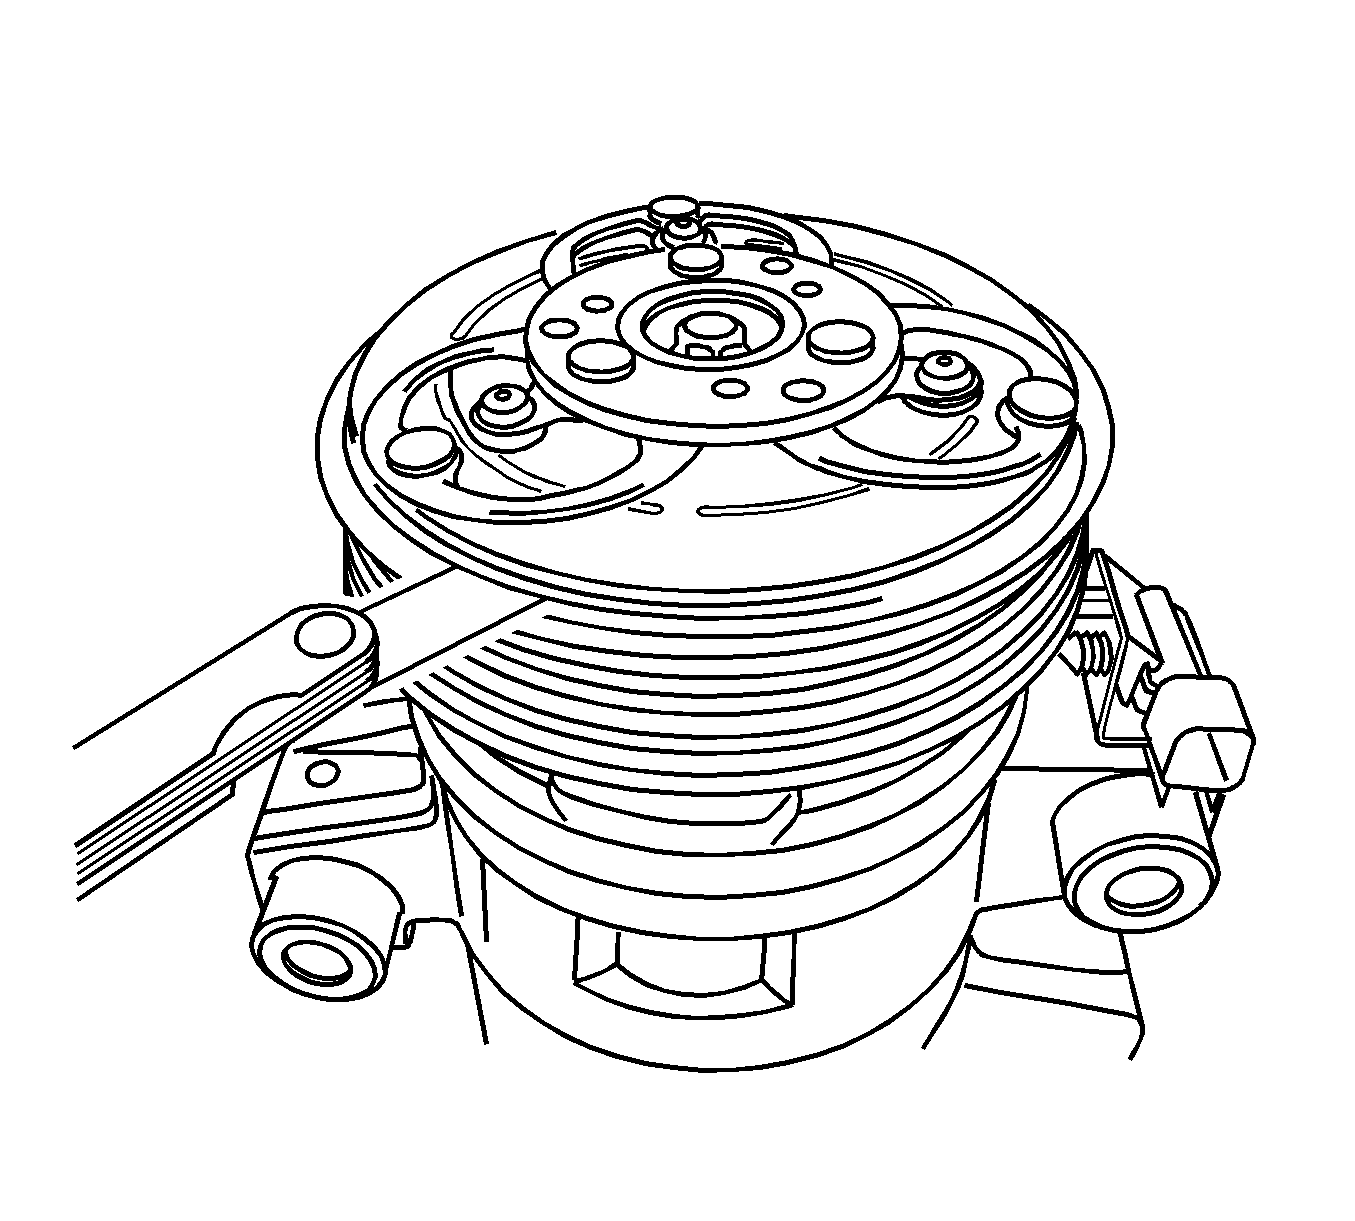
- Use J 37872 to hold the compressor clutch.
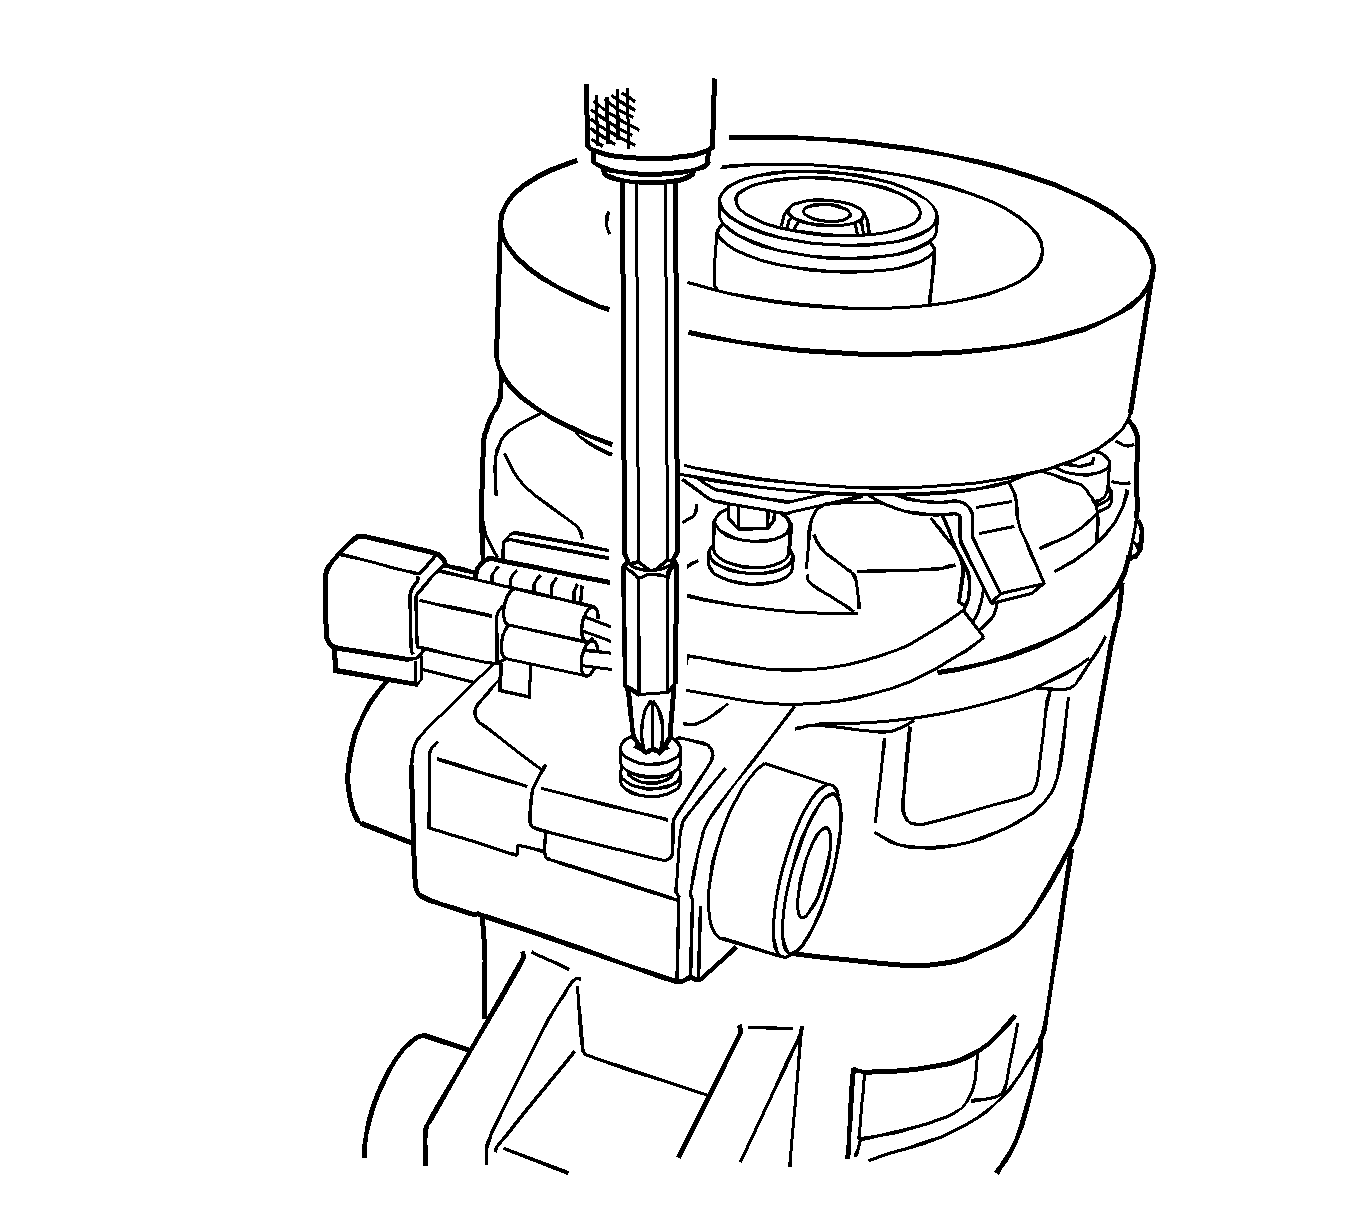
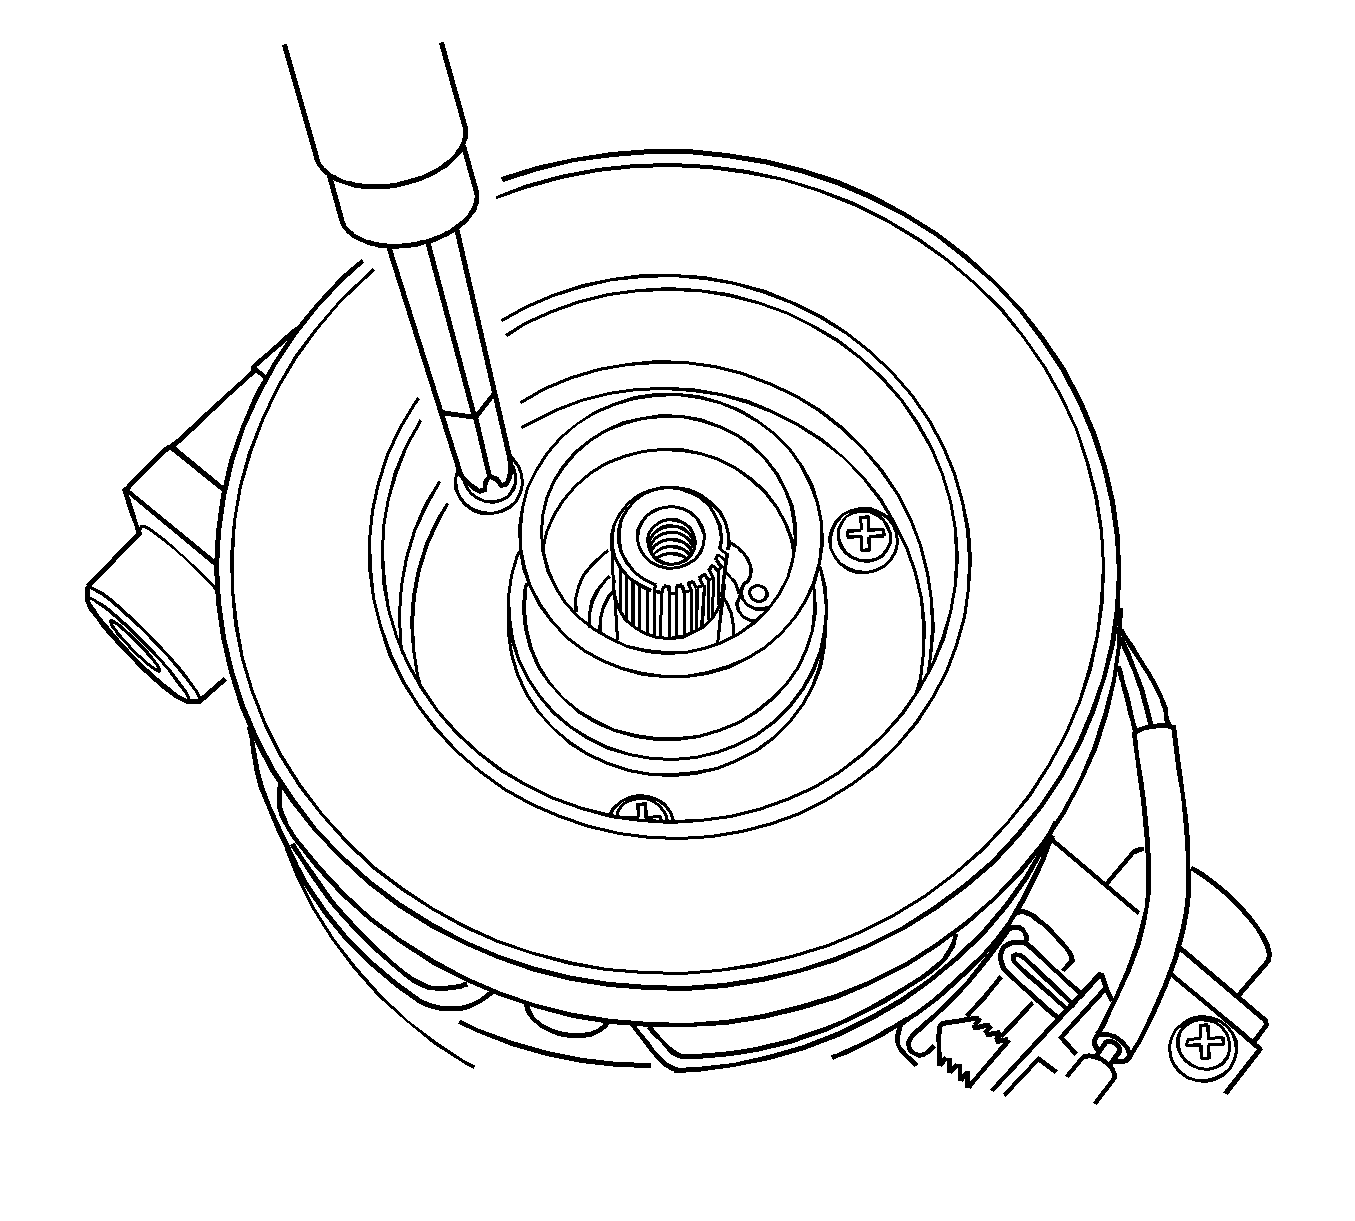
- Remove the bolt retaining the compressor clutch to the compressor.
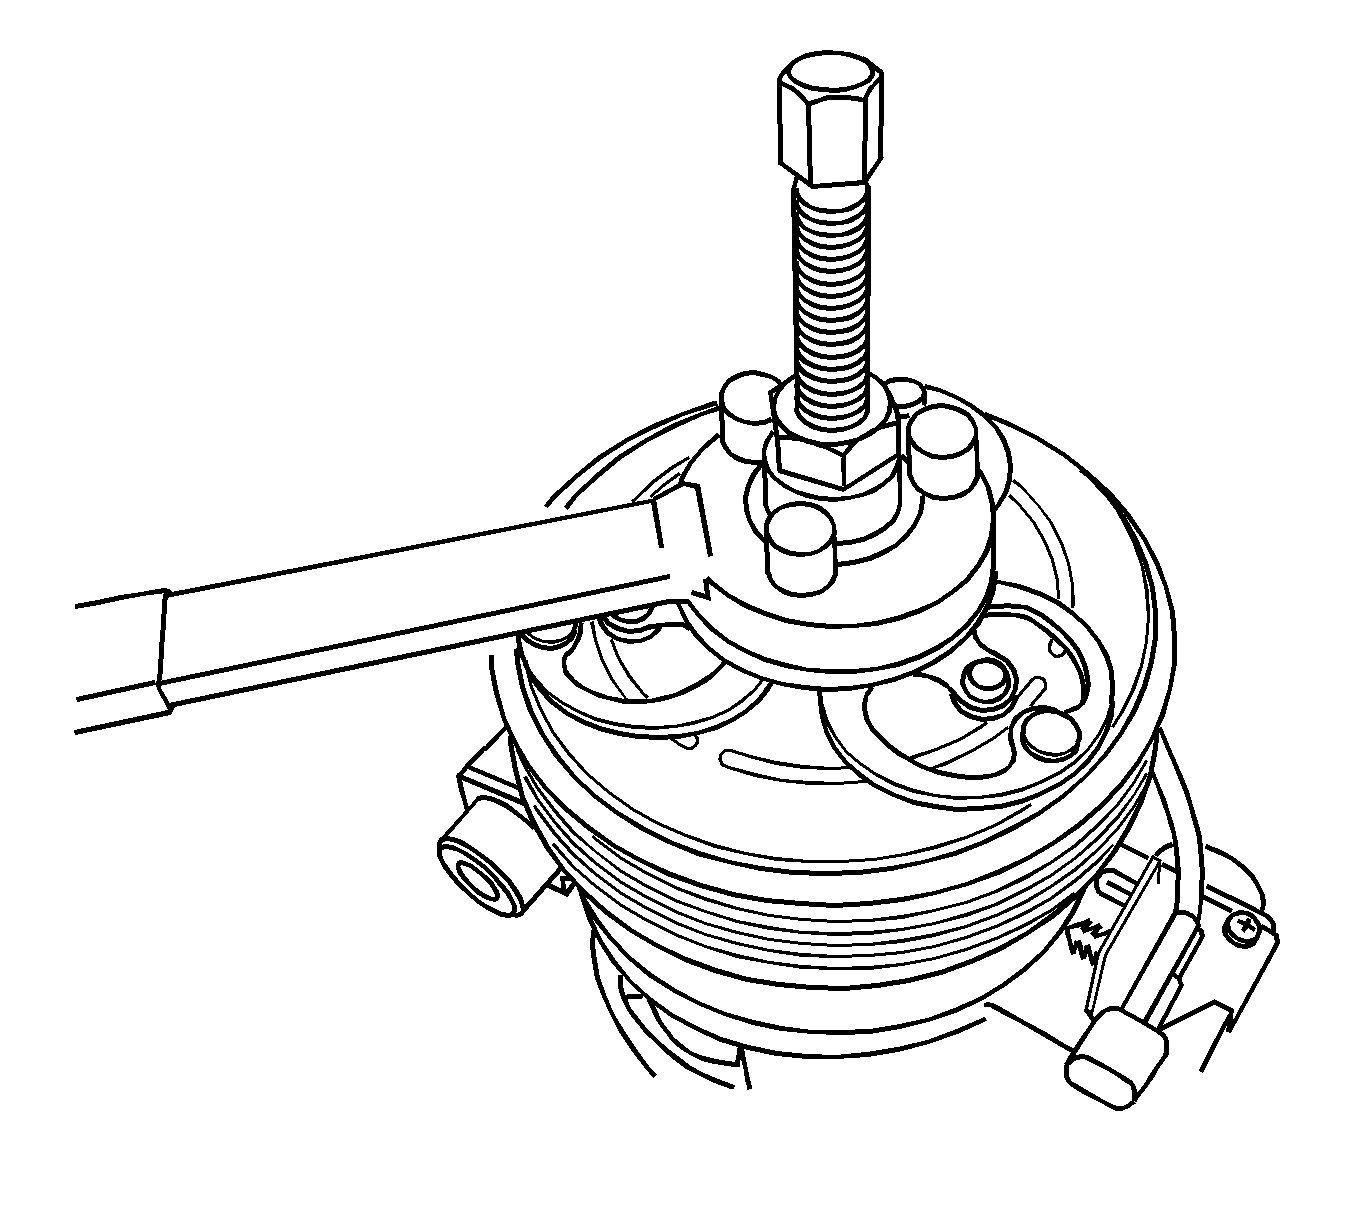
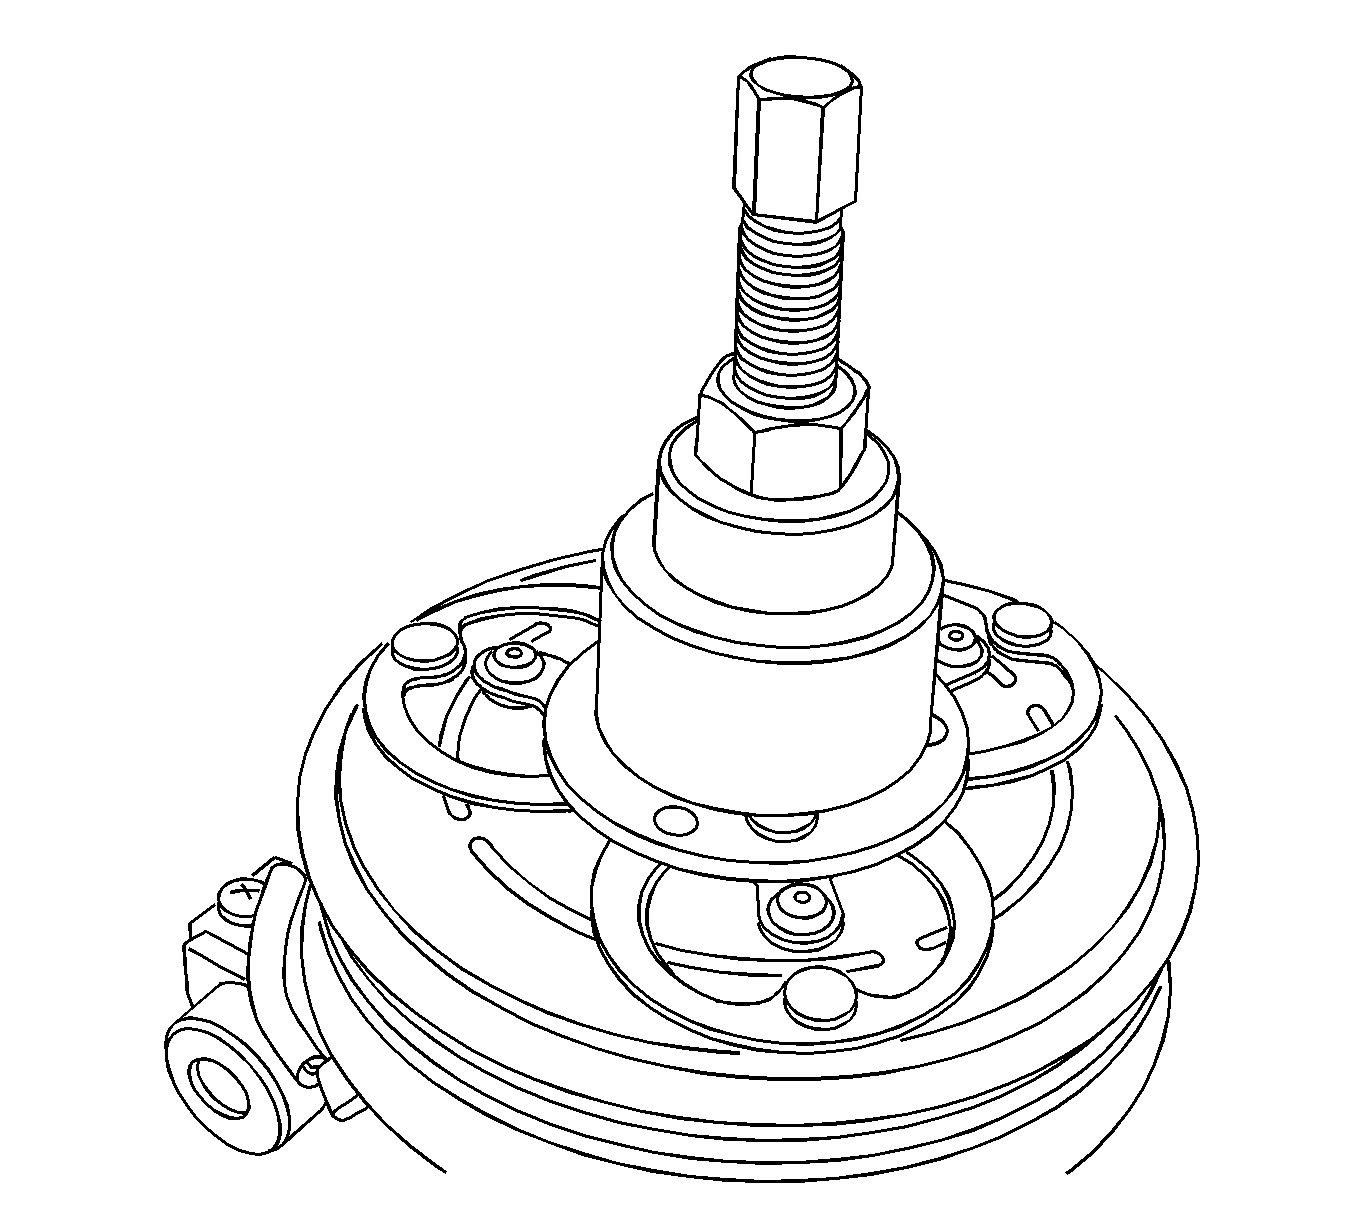
- Install GE-47849 to the compressor clutch.
- Using GE-47849 , remove the compressor clutch from the compressor.
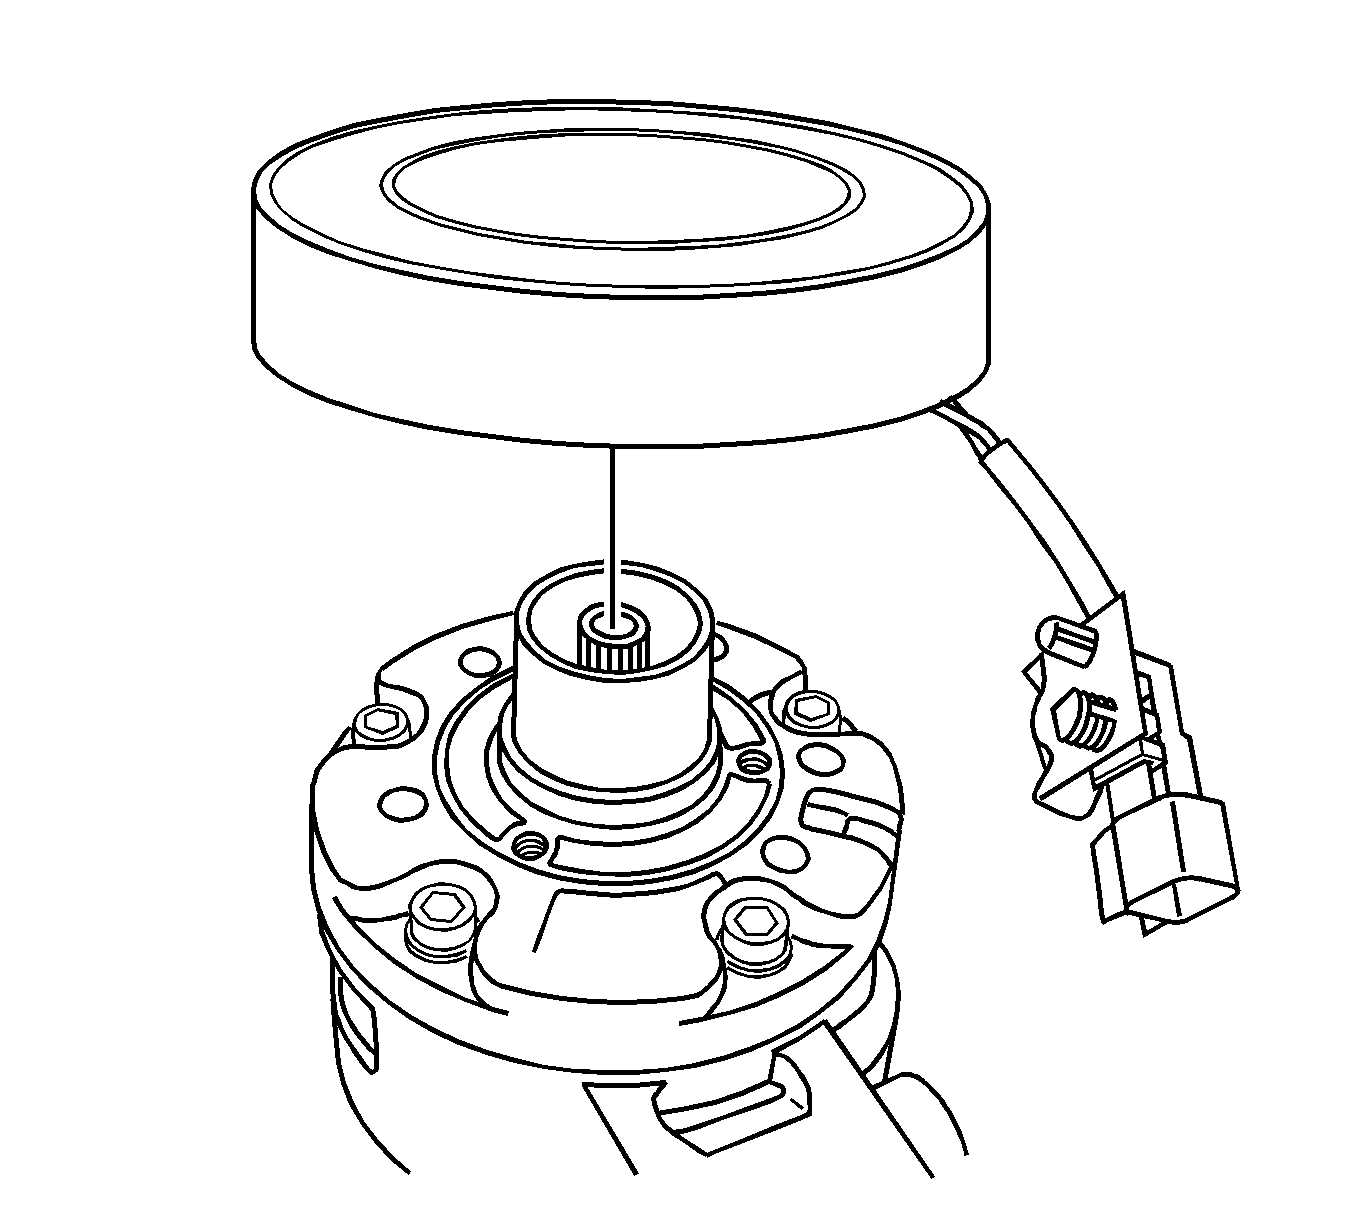
- Remove the compressor clutch shims from the compressor shaft.
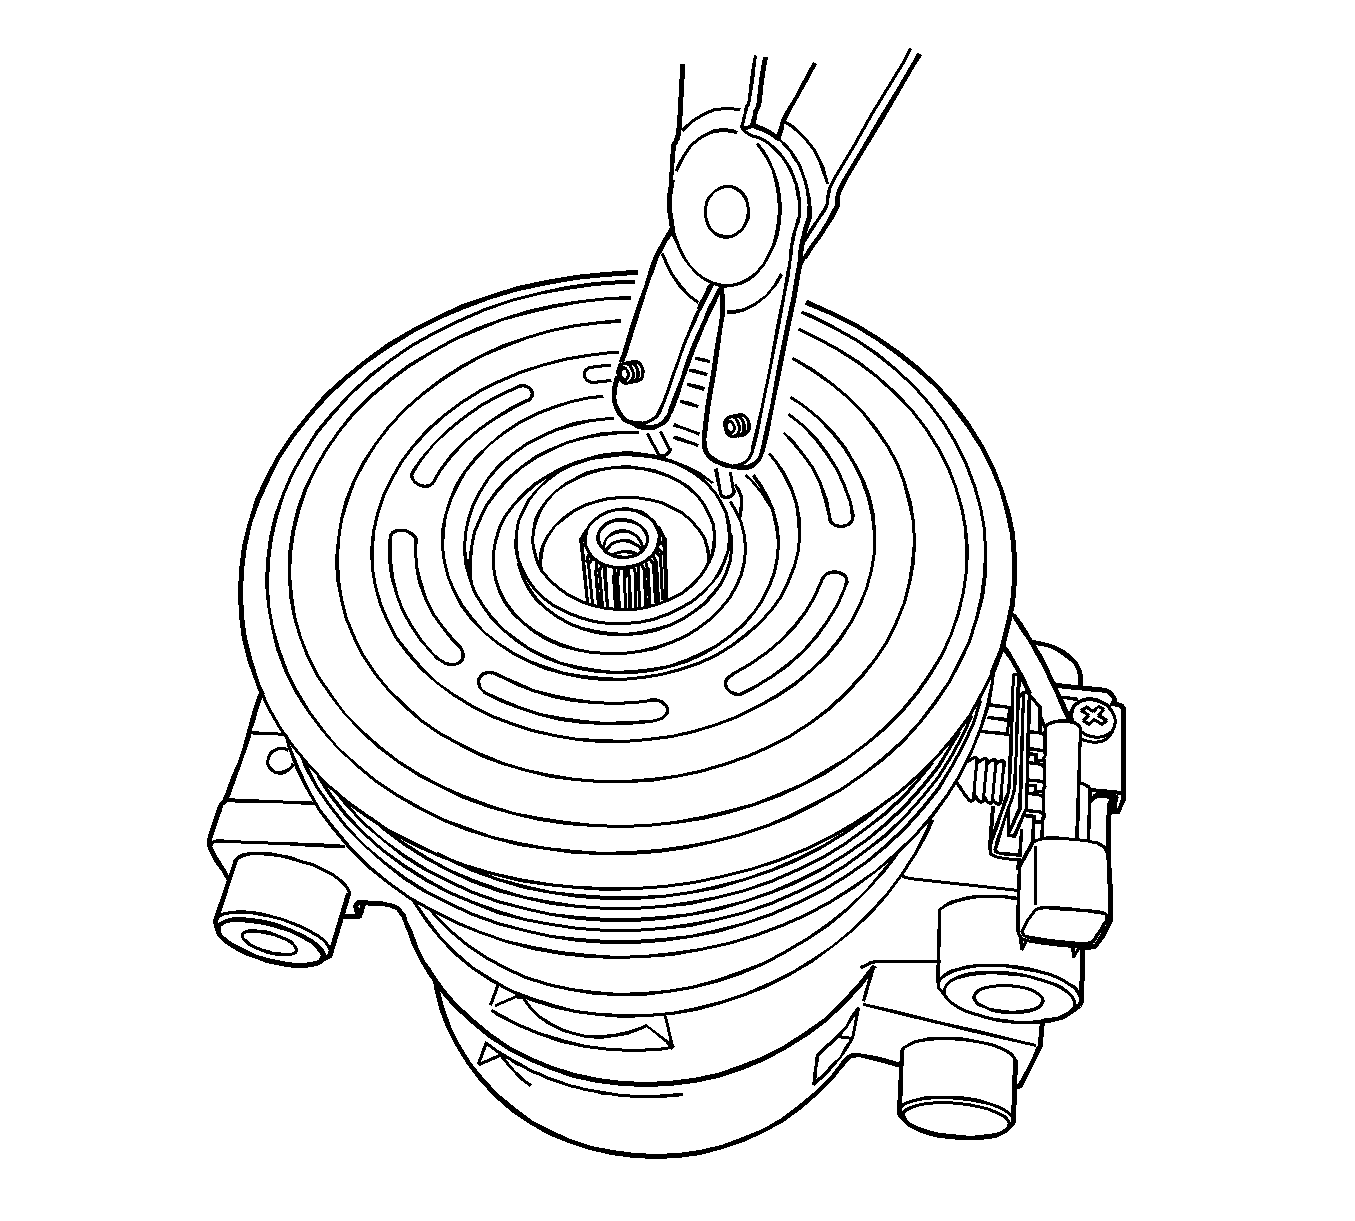
- Remove the snap ring from the compressor pulley.
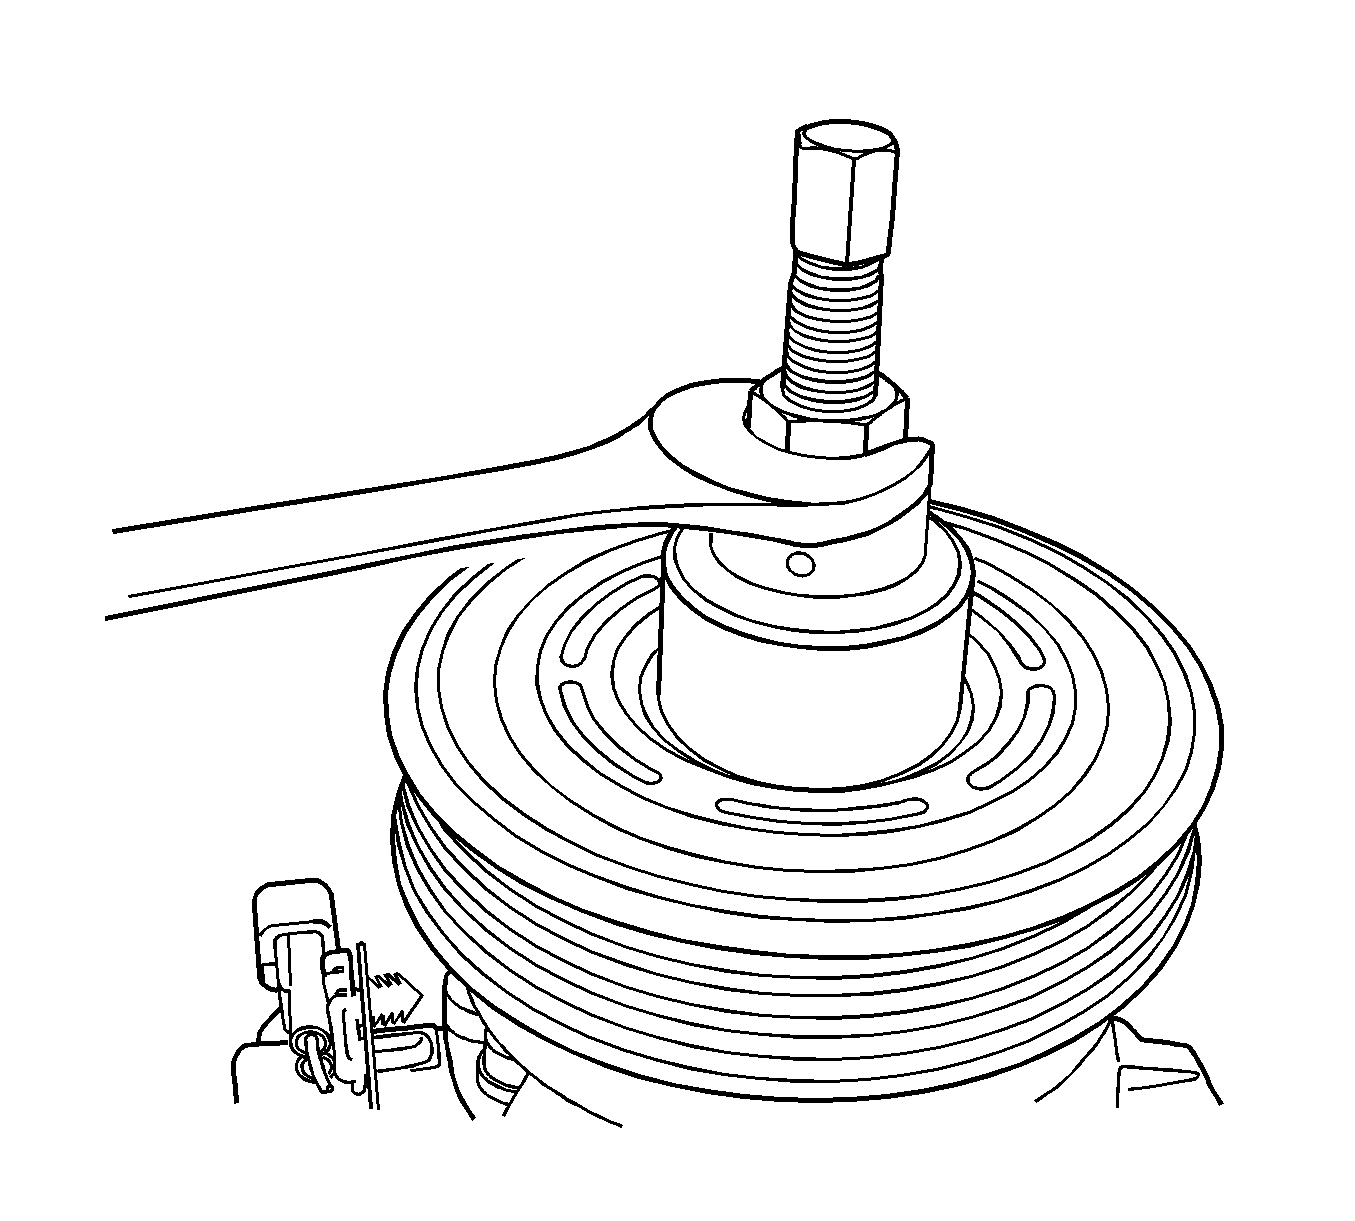
- Using GE-47850 with J 25031-A , remove the compressor pulley from the compressor.
- Remove the clutch field coil connector bracket screw from the compressor.
- Remove the clutch field coil screws from the compressor.
- Remove the clutch field coil from the compressor.
Installation Procedure
- Clean the clutch field coil and the pulley mounting surfaces.
- Install the clutch field coil to the compressor.
- Install the clutch field coil screws to the compressor.
- Install the clutch field coil connector bracket screw to the compressor.
- Using GE-47851 , install the compressor pulley to the compressor.
- Install the snap ring to the compressor pulley.
- Install the compressor clutch shims to the compressor shaft.
- Align the compressor clutch with the compressor shaft and install to the compressor.
- Using GE-47851 , install the compressor clutch to the compressor.
- Using a feeler gage, check the clearance between the compressor clutch and the compressor pulley. Ensure the clearance is 0.3 mm to 0.6 mm (0.012 in to 0.024 in).
- Once the correct air gap is obtained, install the new clutch bolt.
- Using J 37872 to hold the compressor clutch, tighten the clutch bolt.
- After the clutch bolt is installed, verify that the compressor pulley spins freely.
- Install the compressor to the vehicle. Refer to Air Conditioning Compressor Replacement .
Notice: Refer to Fastener Notice in the Preface section.
Tighten
Tighten the screws to 4.9 N·m (43 lb in).
Tighten
Tighten the screws to 4.3 N·m (38 lb in).
Important: Ensure that the compressor pulley snap ring is installed with the rounded edge face up.
Tighten
Tighten the bolt to 21 N·m (16 lb ft).
