For 1990-2009 cars only
Air Conditioning Compressor Replacement LNJ
Tools Required
J 39400-A Halogen Leak Detector
Removal Procedure
- Recover the refrigerant. Refer to Refrigerant Recovery and Recharging .
- Disconnect the negative battery cable. Refer to Battery Negative Cable Disconnection and Connection .
- Remove the accessory drive belt from the compressor pulley. Refer to Drive Belt Replacement .
- Raise and support the vehicle. Refer to Lifting and Jacking the Vehicle .
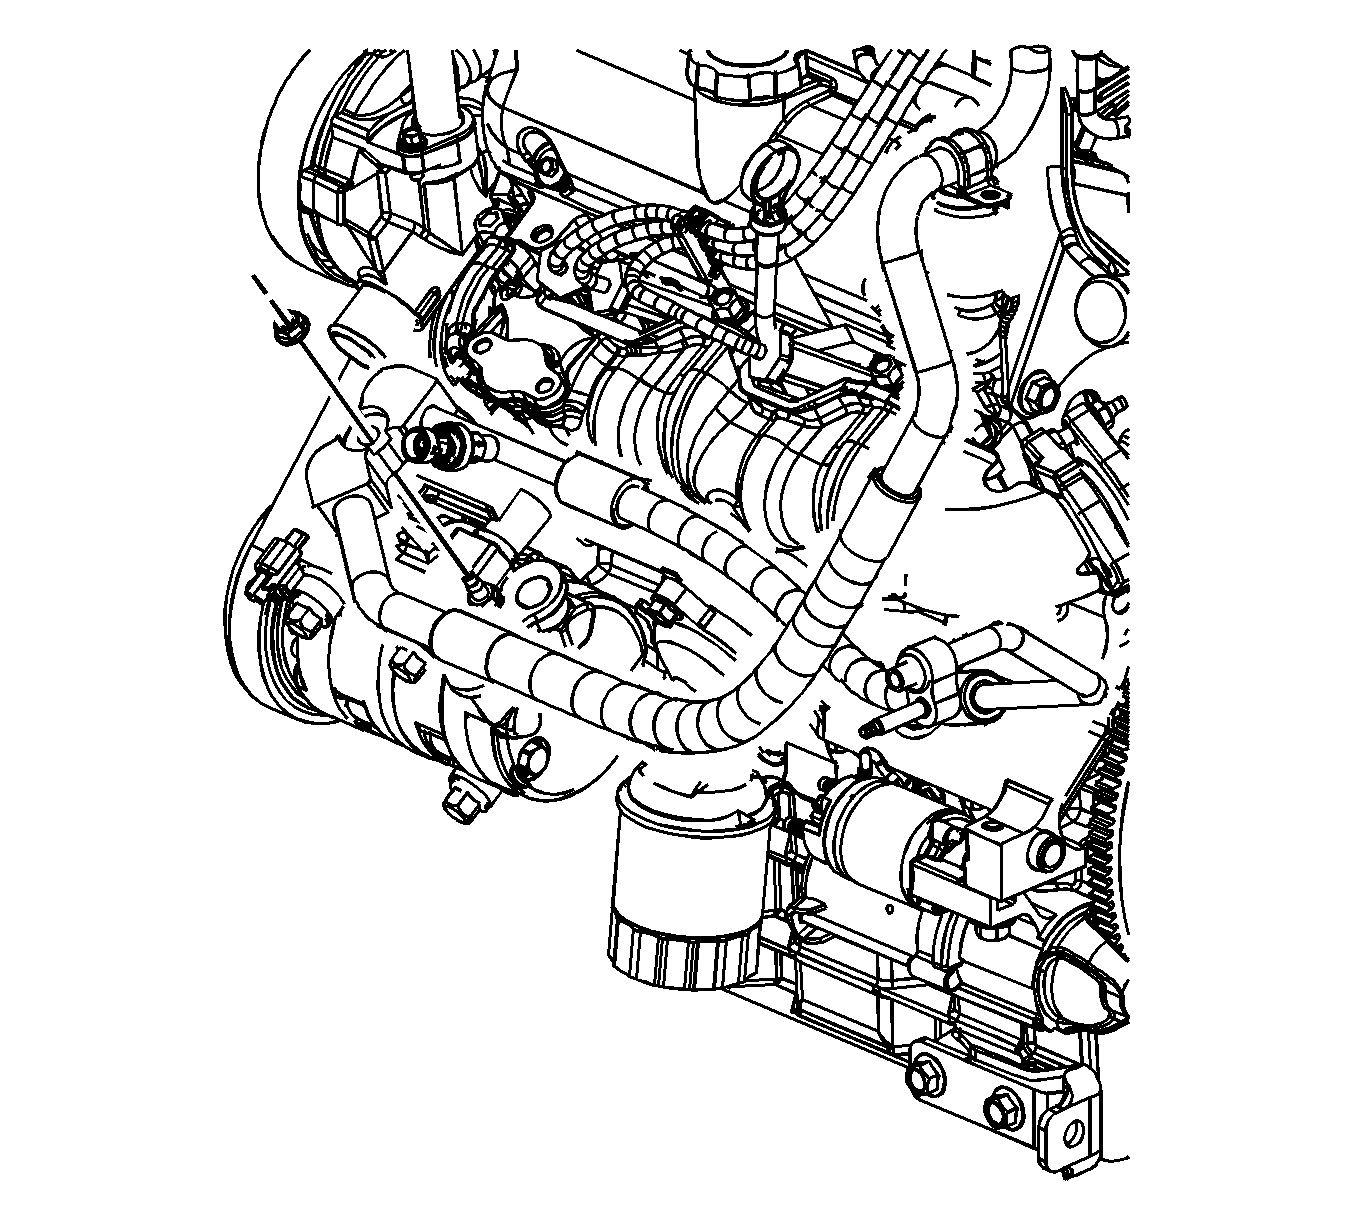
- Remove the compressor hose nut from the compressor.
- Remove the compressor hose from the compressor.
- Disconnect the electrical connector from the compressor.
- Remove and discard the seal washers from the compressor. Refer to Sealing Washer Replacement .
- Install a shipping cap on the compressor hose to prevent moisture/contamination.
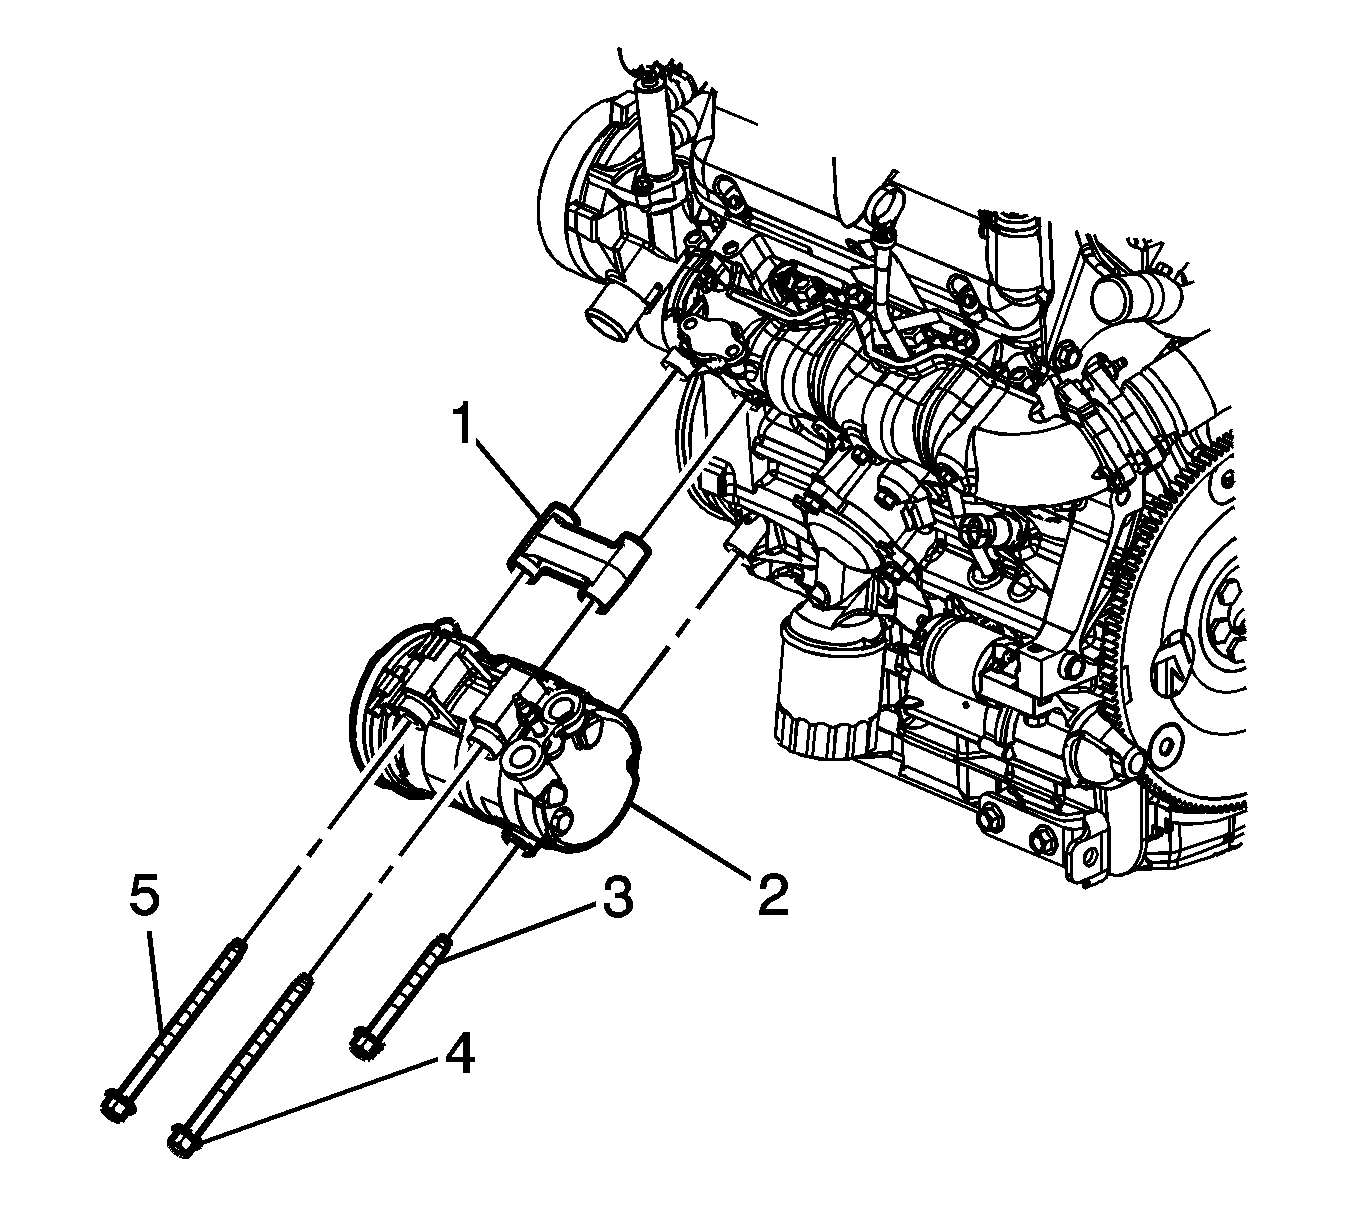
- Install shipping cap to the compressor (2) prior to removal to prevent spillage of oil and contamination.
- Remove the compressor bolts (3,4,5) from the compressor.
- Remove the spacer bracket (1) from the compressor.
- Remove the compressor (2) from the vehicle.
- If replacing the compressor (2), balance the oil. Refer to Air Conditioning Compressor Oil Balancing .


Installation Procedure
- Add the proper amount of polyalkylene glycol (PAG) oil to the compressor (2). Refer to Refrigerant System Capacities .
- Install caps on compressor (2) to prevent spillage during installation.
- Install the compressor (2) to the vehicle.
- Install the spacer bracket (1) between the engine and the compressor (2).
- Install the compressor bolts to the compressor (2). Tighten the bolts in sequence.
- Tighten the bolt (5) to 50 N·m (37 lb ft).
- Tighten the bolt (3) to 50 N·m (37 lb ft).
- Tighten the bolt (4) to 50 N·m (37 lb ft).
- Remove the shipping cap from the compressor (2) and the compressor hose.
- Connect the electrical connector to the compressor (2).
- Install new seal washers to the compressor. Refer to Sealing Washer Replacement .
- Install compressor hose to the compressor.
- Position the compressor hose to the compressor and tighten the nut.
- Lower the vehicle. Refer to Lifting and Jacking the Vehicle .
- Install the accessory drive belt to the compressor pulley. Refer to Drive Belt Replacement .
- Connect the negative battery cable. Refer to Battery Negative Cable Disconnection and Connection .
- Recharge the A/C system. Refer to Refrigerant Recovery and Recharging .
- Test the affected A/C joints for leaks using J 39400-A .

Notice: Refer to Fastener Notice in the Preface section.
Tighten

Notice: The compressor hose must maintain a minimum clearance of 20 mm (0.8 in) from the exhaust gas recirculation (EGR) pipe. If this minimum clearance is not maintained, damage to the compressor hose may result.
Tighten
Tighten the nut to 20 N·m (15 lb ft).
Air Conditioning Compressor Replacement LY7

Callout | Component Name |
|---|---|
Preliminary Procedure
| |
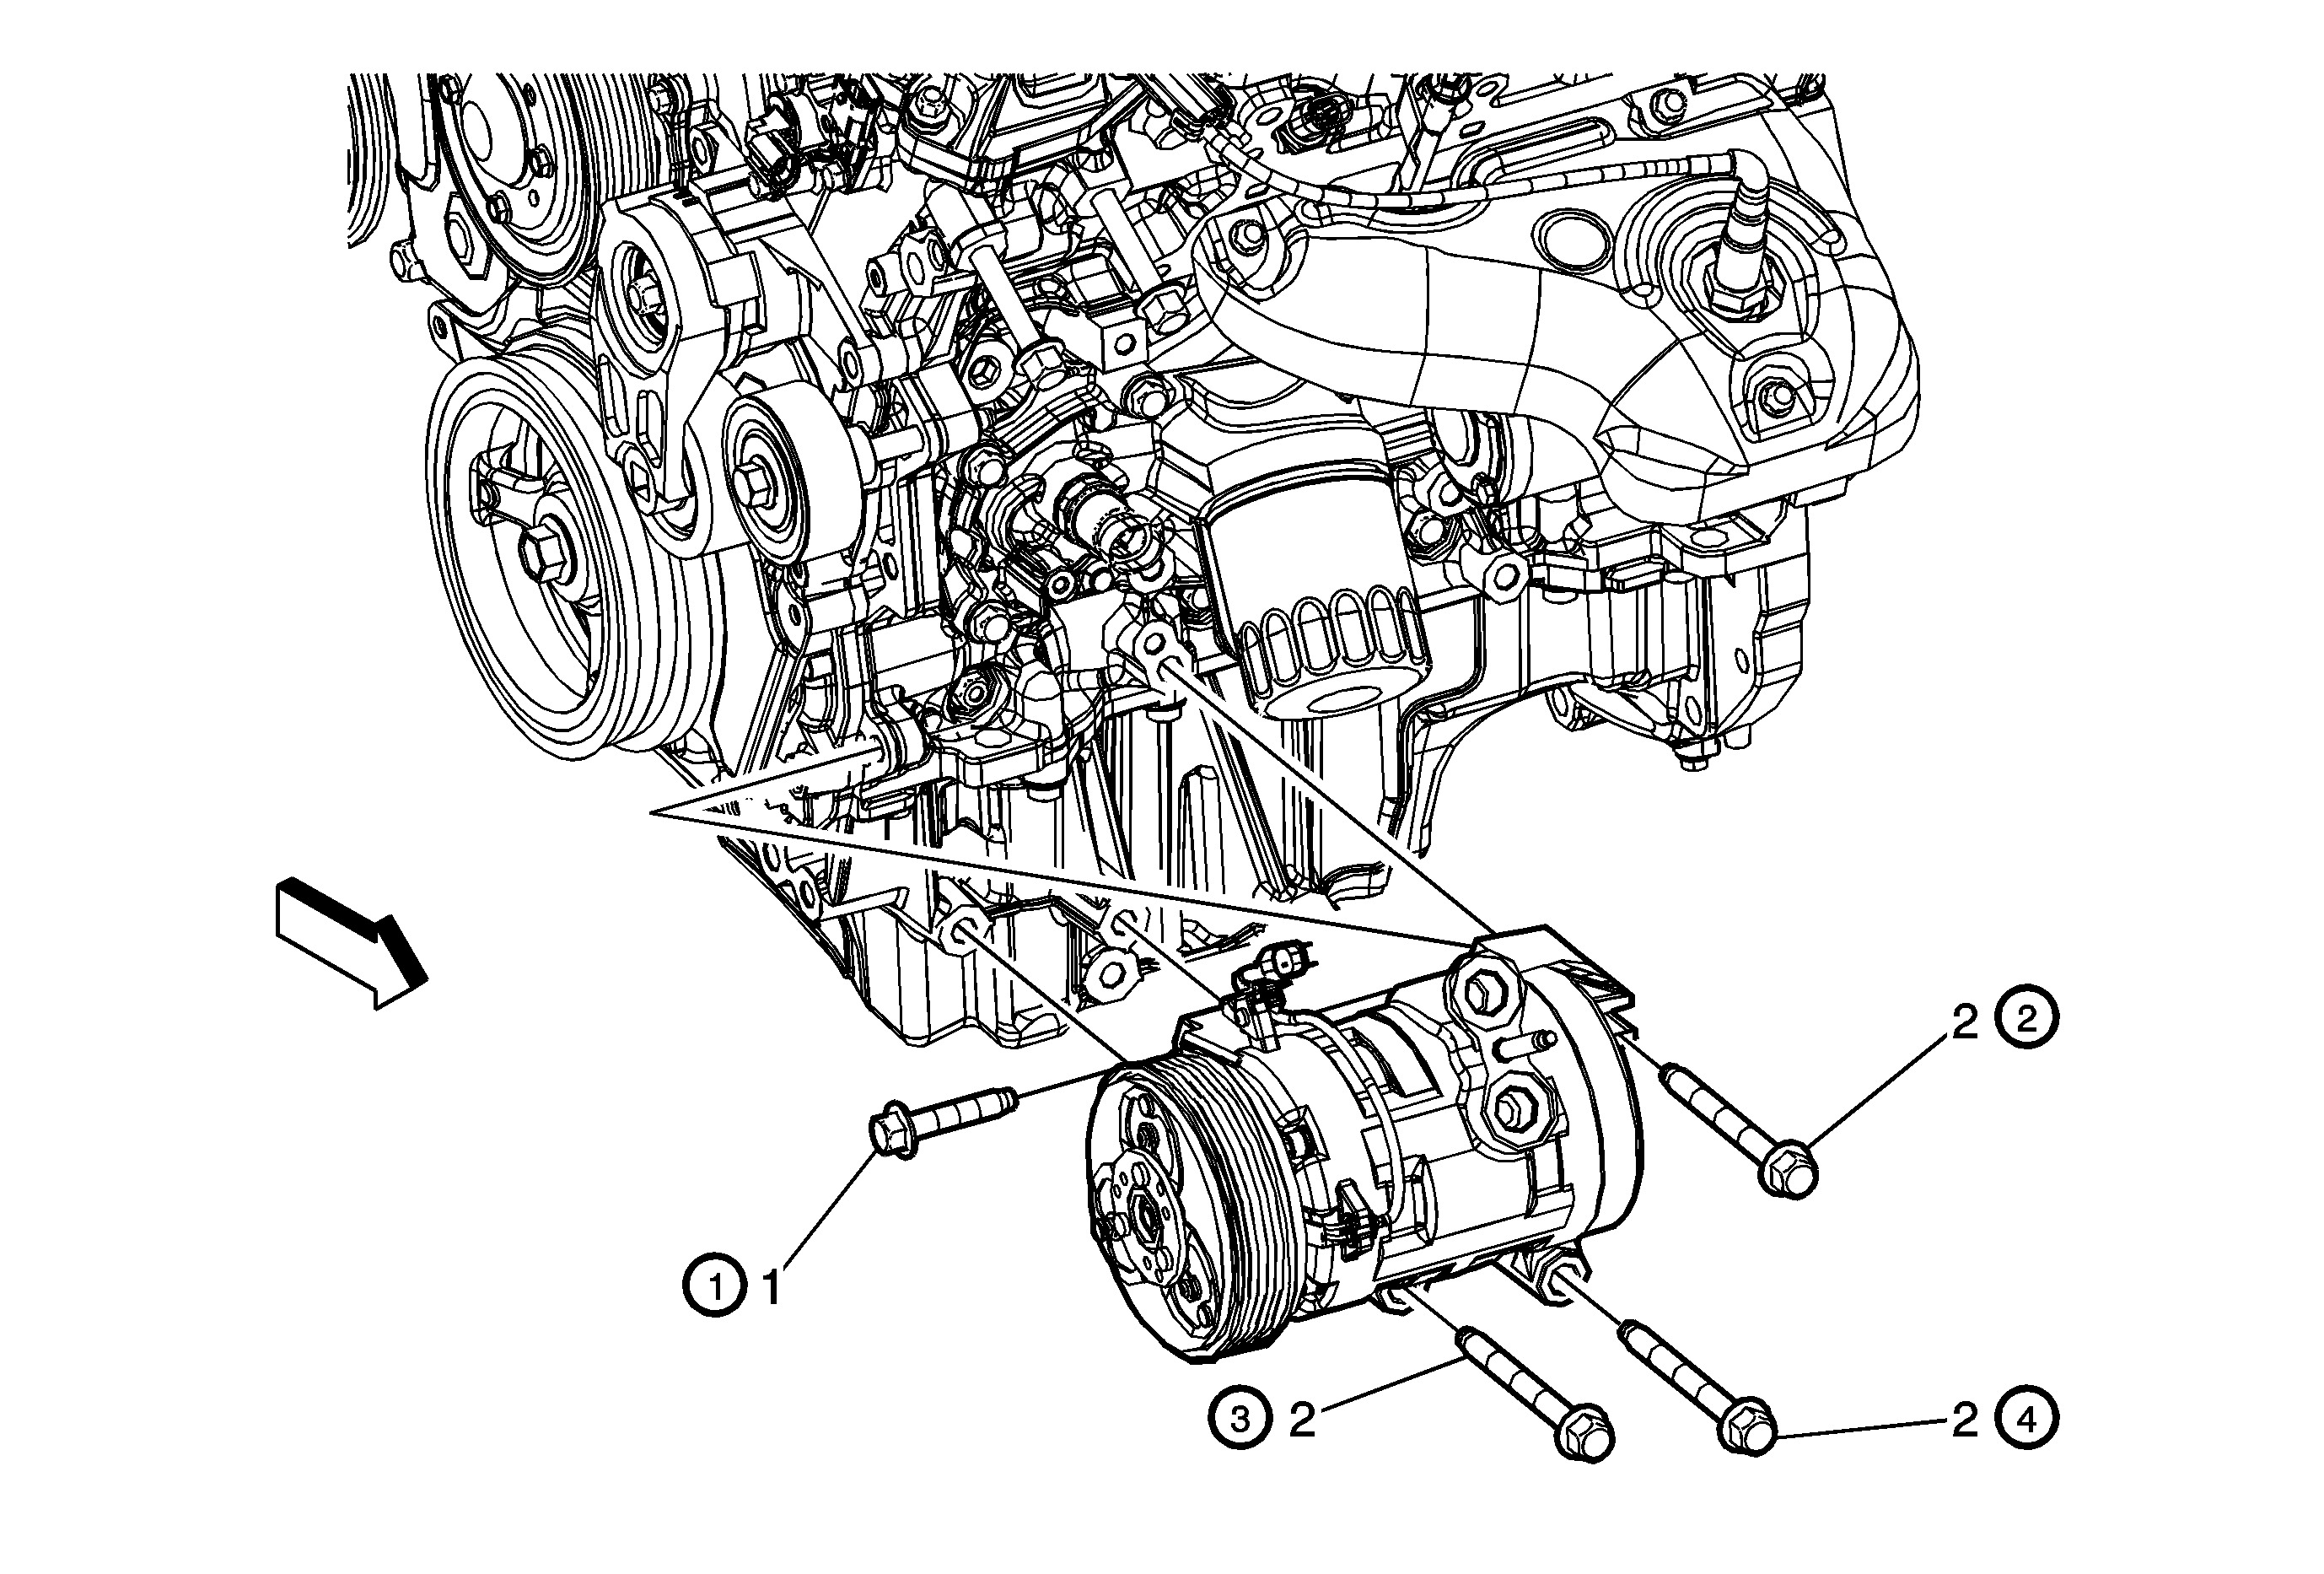
1 | A/C Compressor Bolts (Qty: 4) Notice: Refer to Fastener Notice in the Preface section. Tip Tighten |
2 | A/C Compressor Procedure
|
