Battery Negative Cable Replacement LNJ
Removal Procedure
Important:
• Always use replacement cables that are of the same type, diameter and length of the cables that you are replacing. • Always route the replacement cable the same way as the original cable.
- Remove the battery box. Refer to Battery Box Replacement .
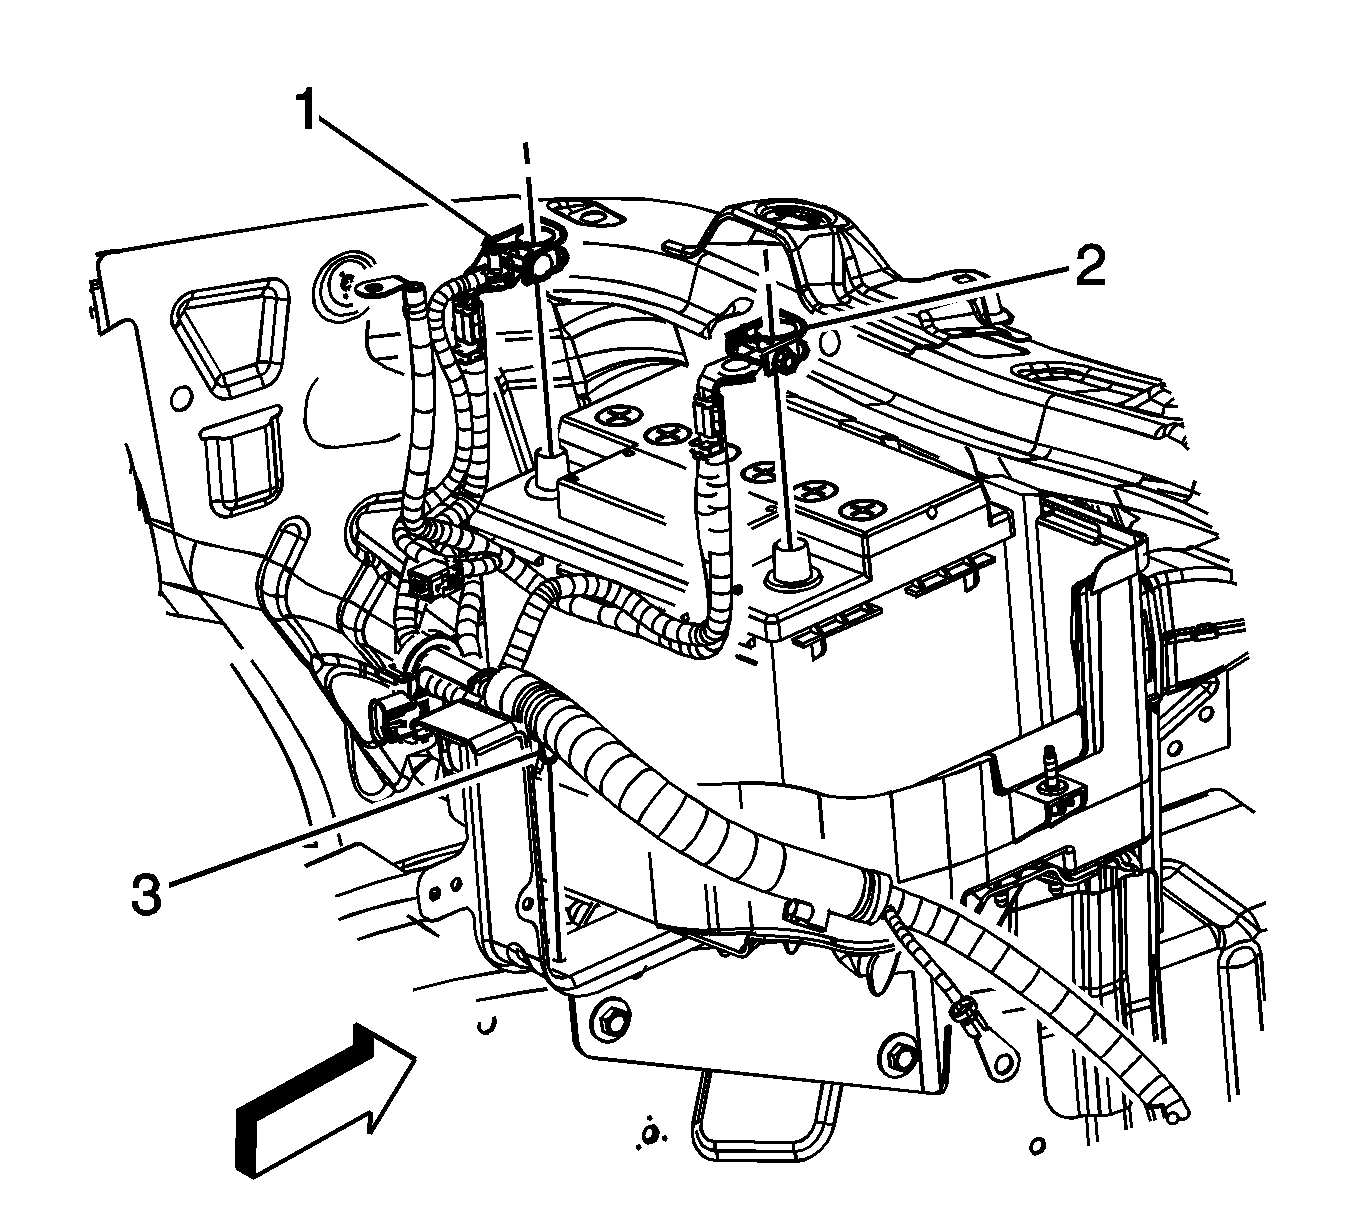
- Disconnect the positive and negative battery cable clip (3) from the battery tray support bracket.
- Disconnect the positive and negative battery cable clip on the side of the battery tray support bracket.
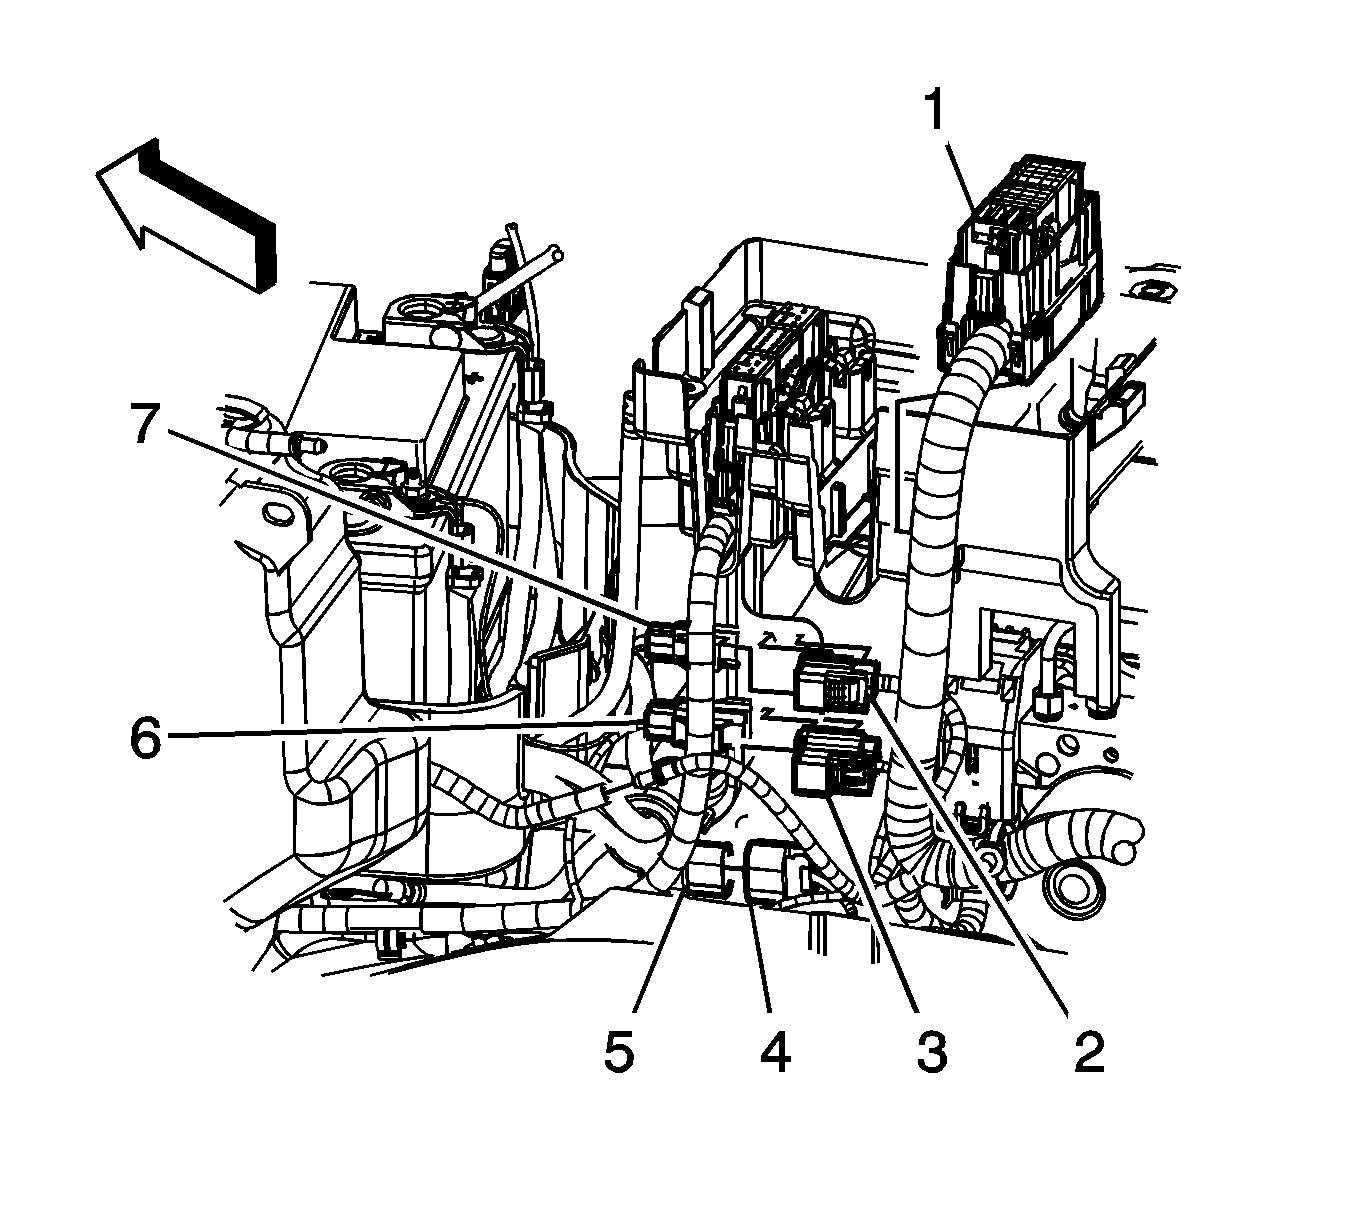
- Disconnect the negative battery cable electrical connector (7) from the body wiring harness electrical connector (2).
- Disconnect the body wiring harness electrical connector (4) from the battery current sensor (5).
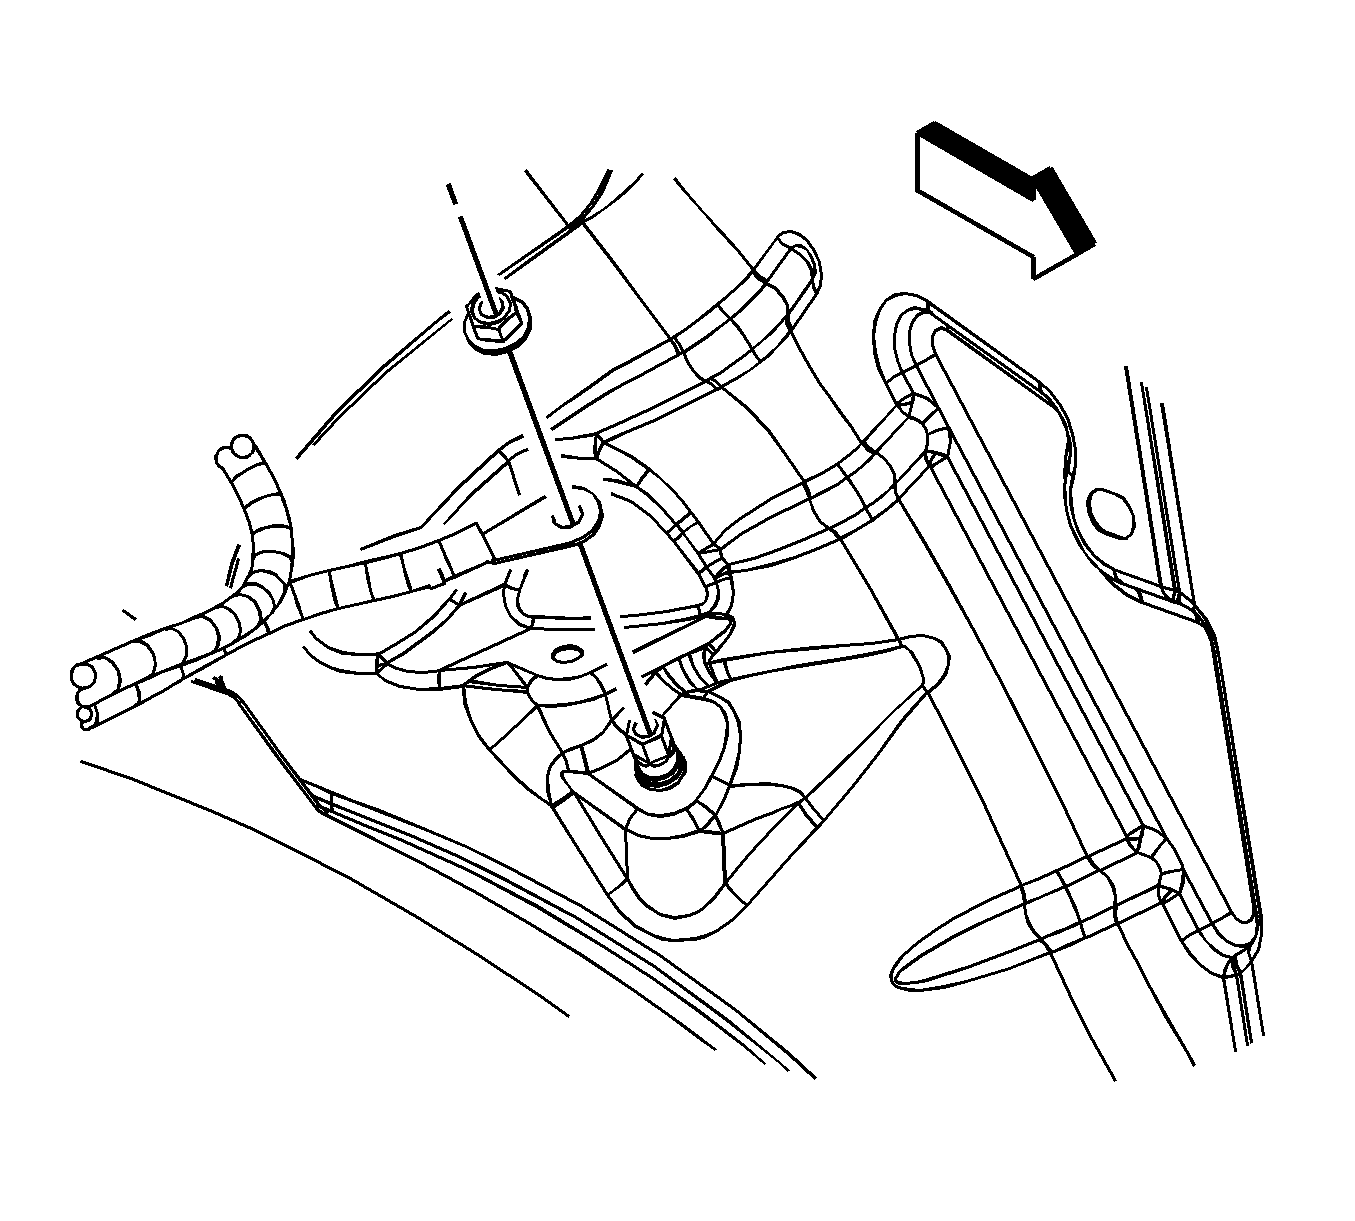
- Remove the negative battery cable ground terminal nut from the wheelhouse stud.
- Remove the negative battery cable ground terminal from the wheelhouse stud.
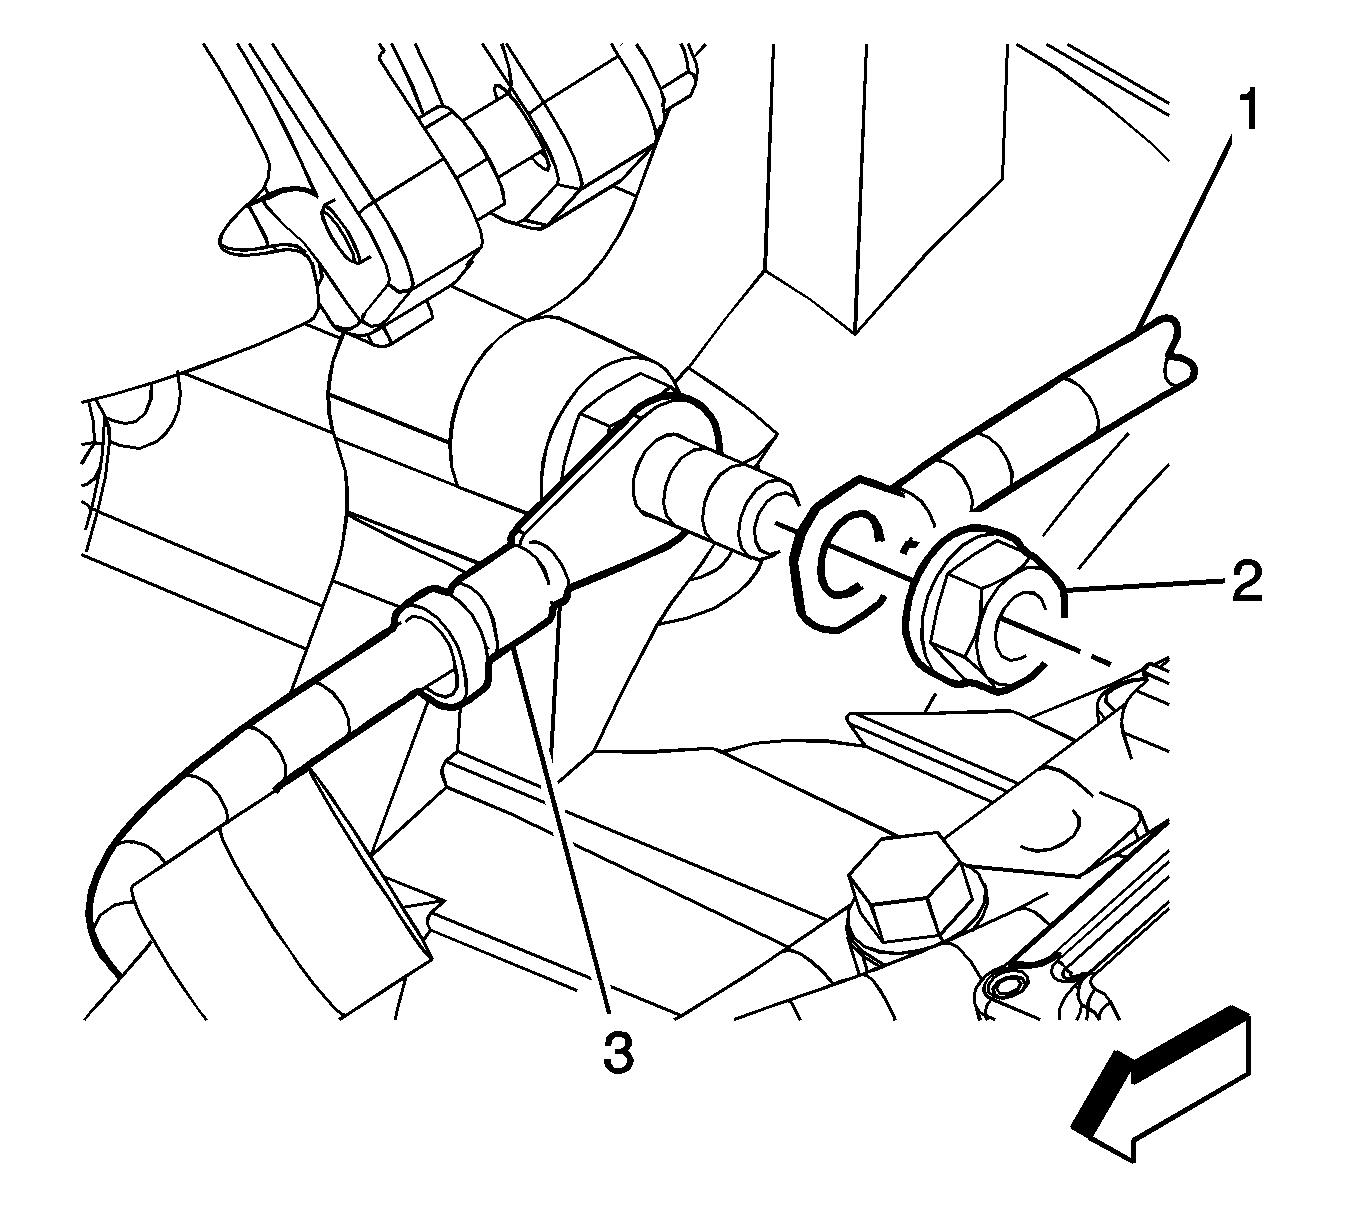
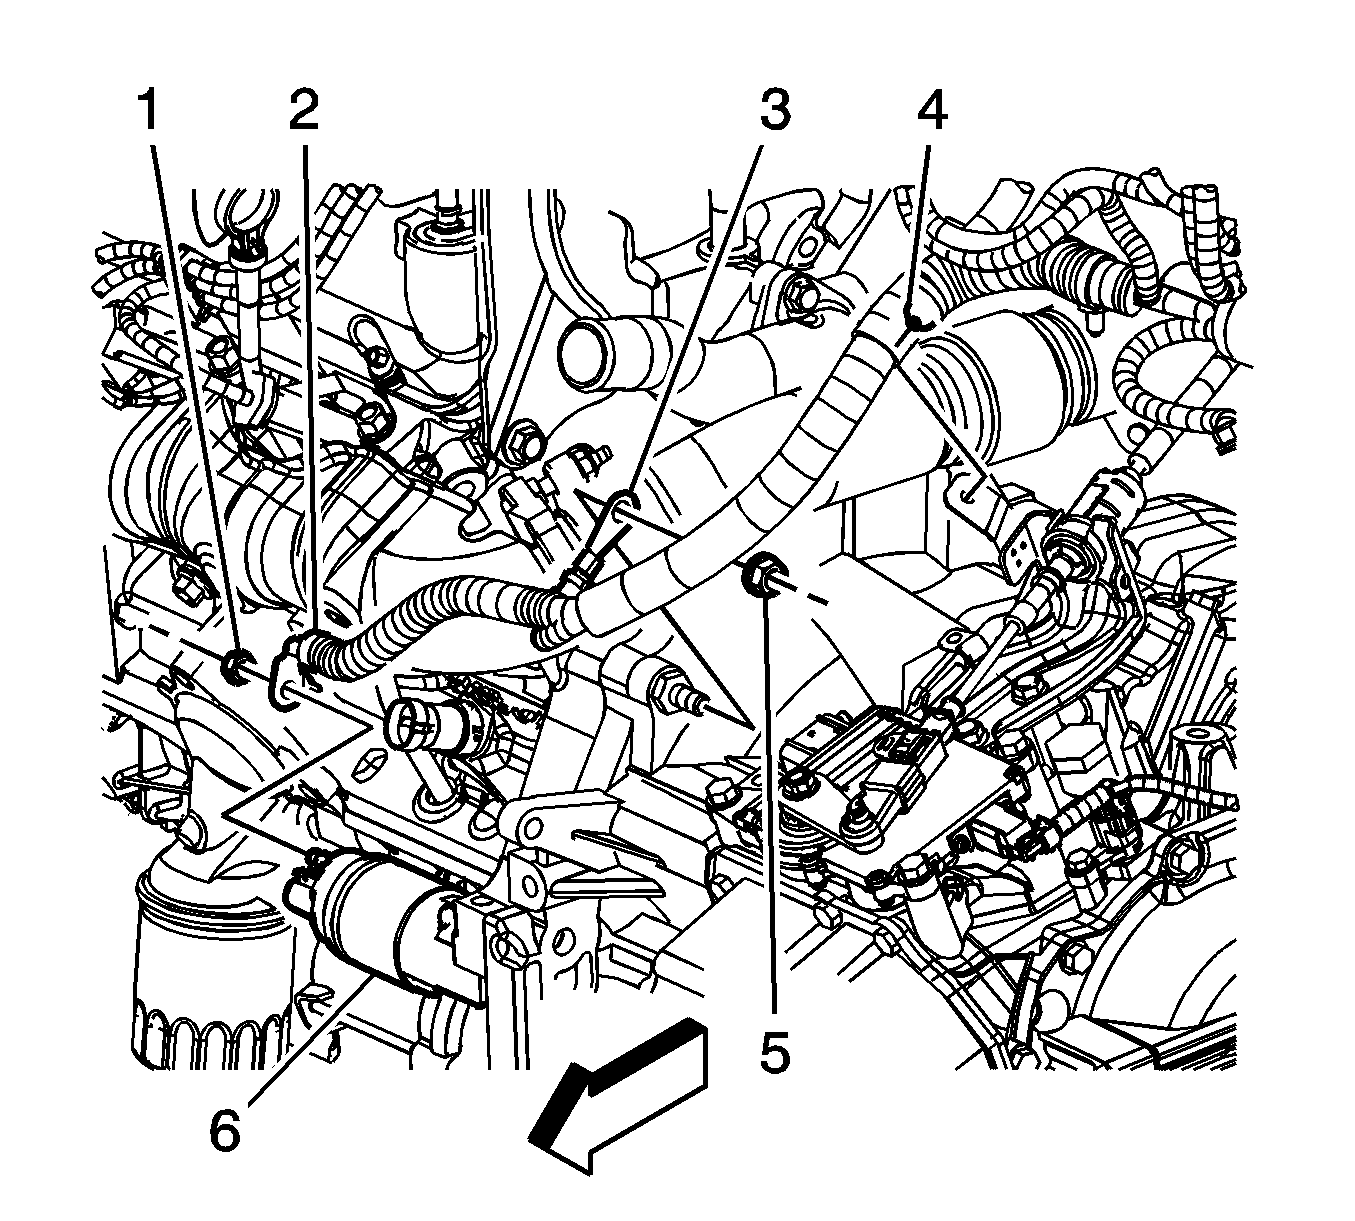
- Remove the negative battery cable ground terminal nut (2) from the transaxle stud.
- Remove the engine wiring harness ground lead (1) from the stud.
- Remove the negative battery cable (3) lead from the stud.
- Remove the battery cable retainer (4) from the transaxle selector cable bracket.
- Cut the tape and remove the negative battery cable from the wiring loom.
Installation Procedure
- Install the negative battery cable to the wiring loom and re-tape the loom.
- Install the battery cable retainer (4) to the transaxle selector cable bracket.
- Install the negative battery cable (3) lead to the stud.
- Install the engine wiring harness ground lead (1) to the stud.
- Install the negative battery cable ground terminal nut (2) to the transaxle stud.
- Install the negative battery cable ground terminal to the wheelhouse stud.
- Install the negative battery cable ground terminal nut to the wheelhouse stud.
- Connect the body wiring harness electrical connector (4) to the battery current sensor (5).
- Connect the negative battery cable electrical connector (7) to the body wiring harness electrical connector (2).
- Connect the positive and negative battery cable clip (3) to the battery tray support bracket.
- Connect the positive and negative battery cable clip to the side of the battery tray support bracket.
- Install the battery box. Refer to Battery Box Replacement .


Notice: Refer to Fastener Notice in the Preface section.
Tighten
Tighten the nut to 45 N·m (33 lb ft).

Tighten
Tighten the nut to 12 N·m (106 lb in).


Battery Negative Cable Replacement LY7
Removal Procedure
Important:
• Always use replacement cables that are of the same type, diameter and length of the cables that you are replacing. • Always route the replacement cable the same way as the original cable.
- Disconnect the negative battery cable. Refer to Battery Negative Cable Disconnection and Connection.
- Remove the battery box. Refer to Battery Box Replacement.
- Disconnect the positive and negative battery cable clip (3) from the battery tray support bracket.
- Disconnect the negative battery cable electrical connector (7) from the body wiring harness electrical connector (2).
- Disconnect the body wiring harness electrical connector (4) from the battery current sensor (5).
- Remove the nut retaining the negative battery cable ground terminal to the wheelhouse stud.
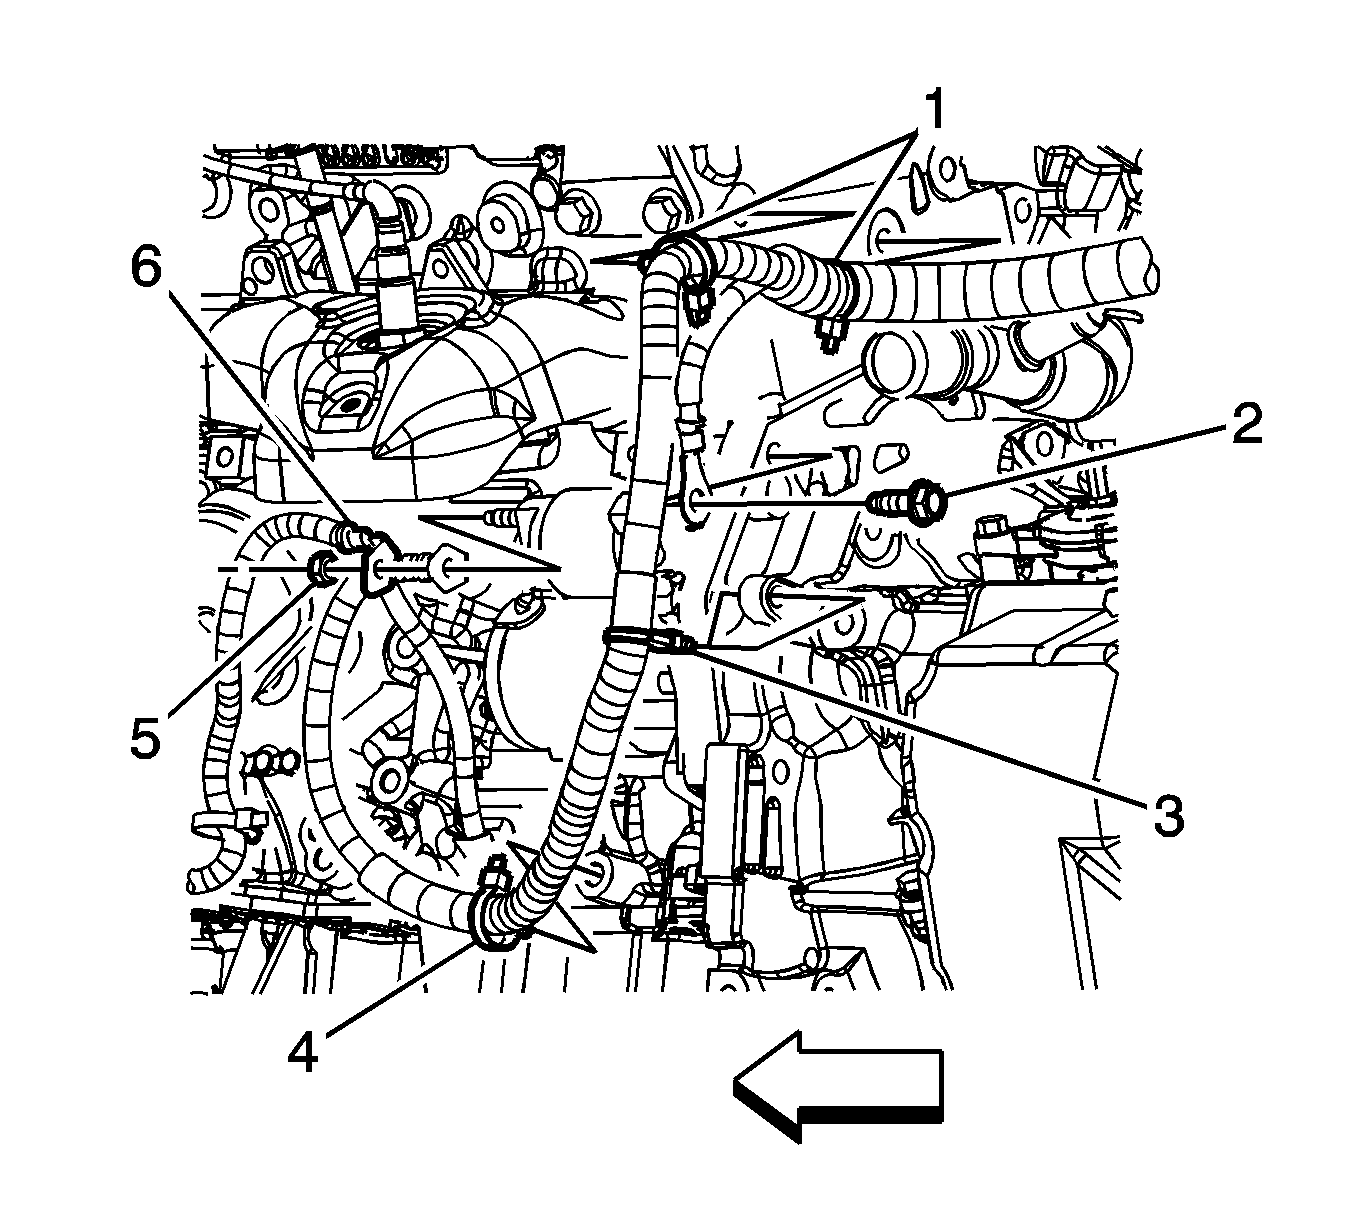
- Remove the bolt (2) retaining the negative battery cable ground terminal to the engine.
- Remove the battery cable retainers (1) from the engine.
- Cut the tape and remove the negative battery cable from the wiring loom.


Installation Procedure
- Install the negative battery cable to the wiring loom and re-tape the loom.
- Install the battery cable retainers (1) to the engine.
- Install the negative battery cable ground terminal to the transaxle.
- Install the negative battery cable ground terminal to the wheelhouse stud.
- Connect the body wiring harness electrical connector (4) to the battery current sensor (5).
- Connect the negative battery cable electrical connector (7) to the body wiring harness electrical connector (2).
- Connect the positive and negative battery cable clip (3) to the battery tray support bracket.
- Install the battery box. Refer to Battery Box Replacement.
- Connect the negative battery cable and install the upper battery box. Refer to Battery Negative Cable Disconnection and Connection.

Notice: Refer to Fastener Notice in the Preface section.
Tighten
Tighten the negative battery cable ground terminal bolt to 45 N·m (33 lb ft).

Tighten
Tighten the ground terminal nut to 12 N·m (106 lb in).


