For 1990-2009 cars only
Fuel Tank Pressure Sensor Replacement FWD
Removal Procedure
- Remove the two fasteners and swing the rear seat bottom cushion up and out of the way. Refer to Rear Seat Cushion Replacement in Seats.
- Remove the sill plate from the left side door opening.
- Fold back the carpet in order to maintain metal-to-metal contact while servicing the fuel sender assembly.
- Remove the access panel for the fuel sender assembly from the rear seat floor. The panel is held in place by a butyl caulk seal.
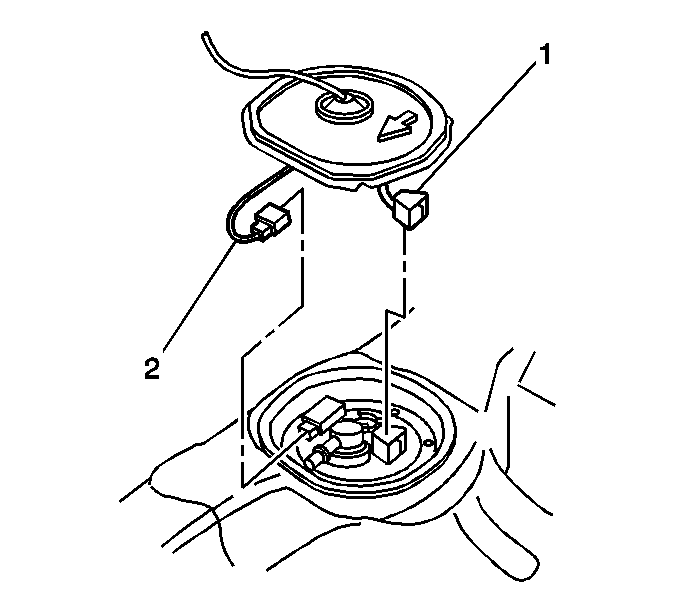
- Disconnect the fuel sender electrical connector (1) from the fuel sender assembly.
- Disconnect the electrical connector of the fuel tank pressure (FTP) sensor (2) from the fuel sender assembly.
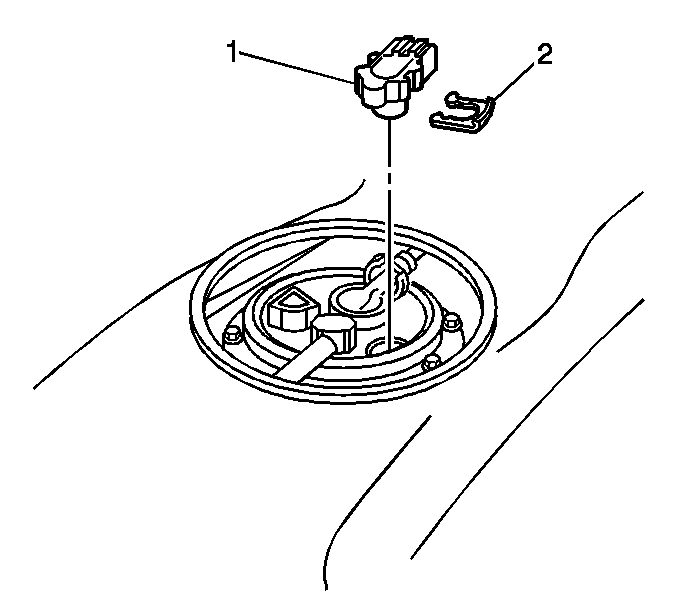
- Remove the retaining clip (2) from the FTP sensor.
- Remove the FTP sensor (1) from the fuel sender assembly.
Installation Procedure
- Install the FTP sensor (1) to the fuel sender assembly.
- Install the retaining clip (2) to the FTP sensor.
- Connect the fuel sender electrical connector (1).
- Connect the FTP sensor electrical connector (2).
- Inspect the butyl caulk seal for the fuel sender access panel (1) . Replace any missing butyl caulk as necessary.
- Install the access panel to the rear seat floor.
- Relocate the carpet under the seat and the left sill plate area.
- Install the sill plate to the left side door opening .
- Install the rear seat bottom cushion.
- Secure the seat cushion with the two fasteners. Refer to Rear Seat Cushion Replacement in Seats.
Fuel Tank Pressure Sensor Replacement AWD
Removal Procedure
- Remove the two fasteners and swing the rear seat bottom cushion up and out of the way. Refer to Rear Seat Cushion Replacement in Seats.
- Remove the sill plate from the left side door opening.
- Fold back the carpet in order to maintain metal-to-metal contact while servicing the fuel sender assembly.
- Remove the access panel for the fuel sender assembly from the rear seat floor. The panel is held in place by a butyl caulk seal.
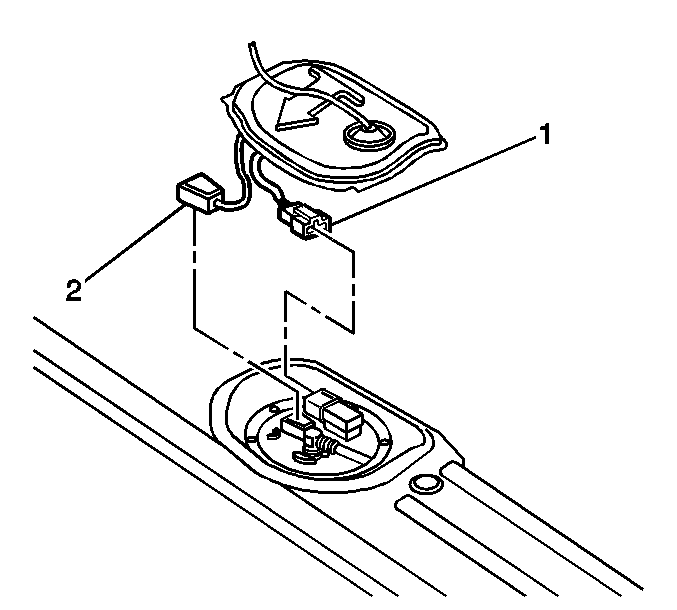
- Disconnect the fuel sender electrical connector (2) from the fuel sender assembly.
- Disconnect the electrical connector of the fuel tank pressure (FTP) sensor (1) from the fuel sender assembly.
- Remove the retaining clip (2) from the FTP sensor.
- Remove the FTP sensor (1) from the fuel sender assembly.
Installation Procedure
- Install the FTP sensor (1) to the fuel sender assembly.
- Install the retaining clip (2) to the FTP sensor.
- Connect the fuel sender electrical connector (2).
- Connect the FTP sensor electrical connector (1).
- Inspect the butyl caulk seal for the fuel sender access panel (1) . Replace any missing butyl caulk as necessary.
- Install the access panel to the rear seat floor.
- Relocate the carpet under the seat and the left sill plate area.
- Install the sill plate to the left side door opening .
- Install the rear seat bottom cushion.
- Secure the seat cushion with the two fasteners. Refer to Rear Seat Cushion Replacement in Seats.
