For 1990-2009 cars only
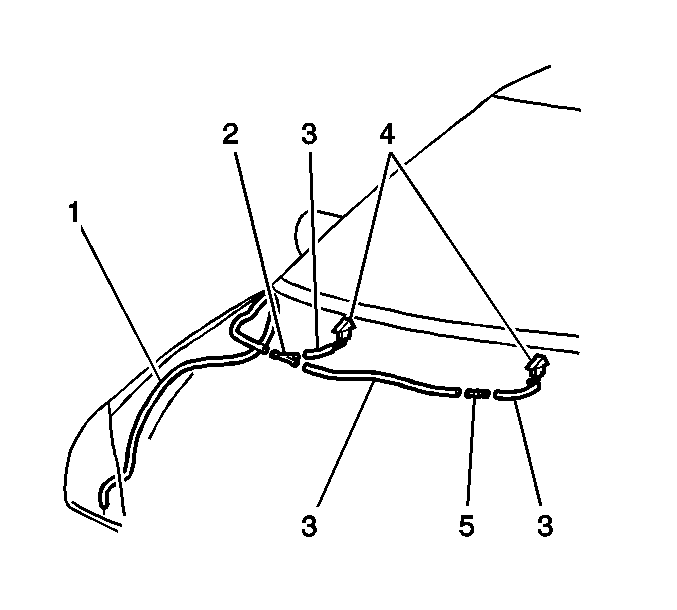
Hose Replacement Hose Connector to Washer Container
Removal Procedure
- Remove the right front wheelhouse panel liner. Refer to Wheelhouse Panel Replacement in Body Front End.
- Remove the 3 lower retainers from the hood insulator.
- Fold back the hood insulator.
- Disconnect the washer hose (1) from the Y-shaped hose connector (2).
- Perform one of the following actions in order to prevent the washer fluid from being lost:
- Remove the washer hose (1) from the vehicle.
| • | Plug the open of the hose connector |
| • | Position the hose connector higher than washer solvent container |
| • | Drain the washer solvent |
| • | Disconnect the washer hose (1) from the washer pump. |
Installation Procedure
- Install the washer hose (1) to the vehicle and connect to the washer pump.
- Connect the washer hose (1) to the Y-shaped hose connector (2).
- Install the right front wheelhouse panel liner. Refer to Wheelhouse Panel Replacement in Body Front End.
- Fill the washer solvent container with washer solvent, as necessary.
Hose Replacement Hose Connector to Washer Nozzle
Removal Procedure
- Remove the 3 lower plastic retainers that retain the hood insulator.
- Fold back the bottom of the hood insulator in order to gain access to the windshield washer nozzle hose.
- Disconnect the washer hose (3) from the following components:
- Position the hose connector higher than washer solvent container, if necessary in order to prevent the washer fluid from being lost.
- Remove the washer hose (3) from the vehicle.
| • | The washer nozzle (4) |
| • | The hose connector (2) |
Installation Procedure
- Install the washer hose (3) to the vehicle and connect the hose to the following components:
- Reposition the hood insulator back to its original position. Secure the insulator with the 3 plastic retainers.
| • | The hose connector (2) |
| • | The washer nozzle (4) |
