For 1990-2009 cars only
Removal Procedure
- Raise the vehicle. Support the vehicle. Refer to Lifting and Jacking the Vehicle in General Information.
- Place a drain pan under the engine oil pan in order to catch the oil.
- Remove the engine oil drain plug and the gasket in order to drain the engine oil.
- Remove the left side engine splash shield. Refer to Engine Splash Shield Replacement - Left Side in Body Front End.
- Remove flywheel inspection cover on manual transaxle equipped vehicles.
- Remove the following fasteners from the lower cylinder block:
- Carefully remove the engine oil pan.
- Clean the following components:
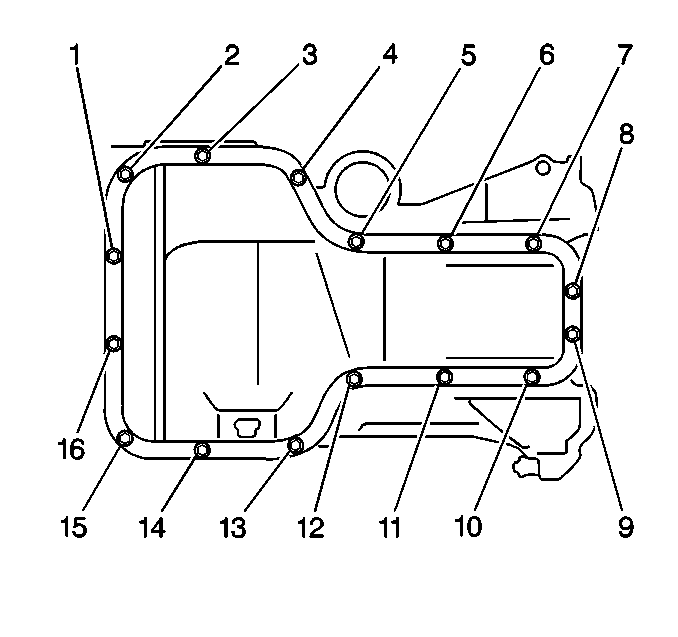
| • | 12 bolts (2, 4-13, 15) |
| • | 4 nuts (1, 3, 14, 16) |
Notice: Do not damage the oil pan contact surface of the lower cylinder block when removing the oil pan.
| • | The inside of the engine oil pan. |
| • | The mating surfaces of the engine oil pan and the lower cylinder block. |
Installation Procedure
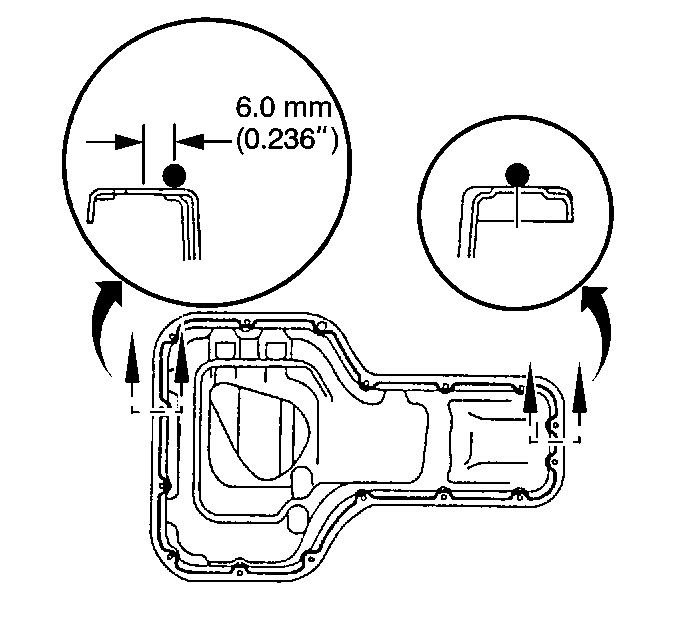
- Apply a continuous bead of silicon sealant GM P/N 12346240 (Canadian P/N 10953493) or an equivalent, to the engine oil pan mating surface.
- Install the engine oil pan.
- Use the following components to secure the engine oil pan:
- Install flywheel cover.
- Install the left side engine splash shield. Refer to Engine Splash Shield Replacement - Left Side in Body Front End.
- Install the engine oil drain plug and the gasket.
- Lower the vehicle.
- Fill the engine oil.
- Inspect the oil pressure.
Notice: Refer to Fastener Notice in the Preface section.
| • | 12 bolts (2, 4-13, 15) |
| • | 4 nuts (1, 3, 14, 16) |
Tighten
Tighten the engine oil pan bolts and the nuts to 9 N·m (80 lb in).
Tighten
Tighten the engine oil drain plug to 35 N·m (26 lb ft).
Refer to Fluid and Lubricant Recommendations in Maintenance and Lubrication.
