For 1990-2009 cars only
Removal Procedure
- Raise and support the vehicle. Refer to Lifting and Jacking the Vehicle .
- Use a jack in order to support the front suspension crossmember.
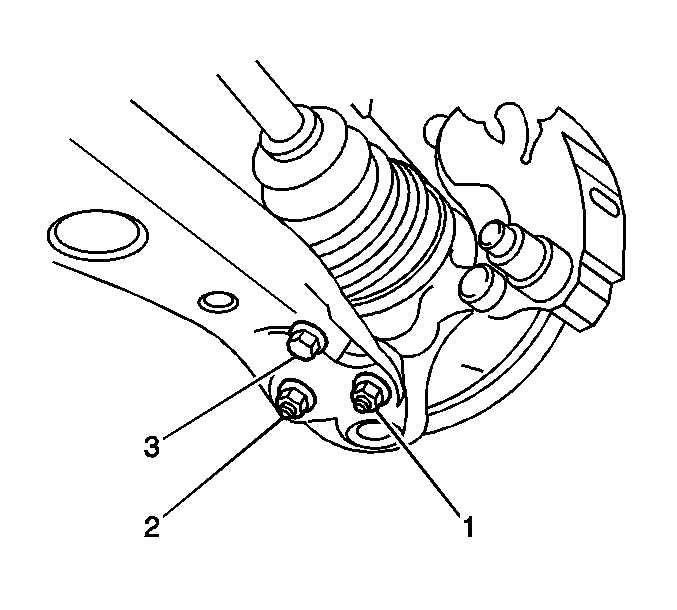
- Remove the 2 nuts (1, 2) and the bolt (3).
- Remove the lower control arm from the ball joint.
- Remove the cotter pin from the ball joint stud.
- Remove the nut from the ball joint stud.
- Use the appropriate ball joint remover in order to remove the ball joint from the knuckle.
Important: Remove the weight of the vehicle from the tires and the lower control arms.
Installation Procedure
- Install the lower ball joint and the nut to the knuckle.
- Install a NEW cotter pin to the ball joint stud. Bend the cotter pin ends in order to retain the nut.
- Install the lower control arm to the ball joint.
- Install the bolt (3) and the 2 nuts (1, 2).
- Lower the vehicle.
- Measure the alignment. Adjust if necessary. Refer to Wheel Alignment Measurement .
Notice: Refer to Fastener Notice in the Preface section.
Important: Do not loosen the nut in order to insert the cotter pin.
Tighten
Tighten the nut to 103 N·m (76.0 lb ft). Tighten the nut up to 1/6 additional turn in order to insert the cotter pin.
Tighten
Tighten the nuts and the bolt to 89 N·m (65.6 lb ft).
