Diagnostic Instructions
Test Description
The evaporative emission (EVAP) canister and vacuum leak pump assembly has many internal air and vapor passages. Flow through these passages is controlled by valves, calibrated orifices, pressure relief devices and check balls. Performing the tests in
this procedure will verify the correct operation of the EVAP canister and component parts.
Reference Information
Special Tools
System Testing
EVAP Canister Inspection
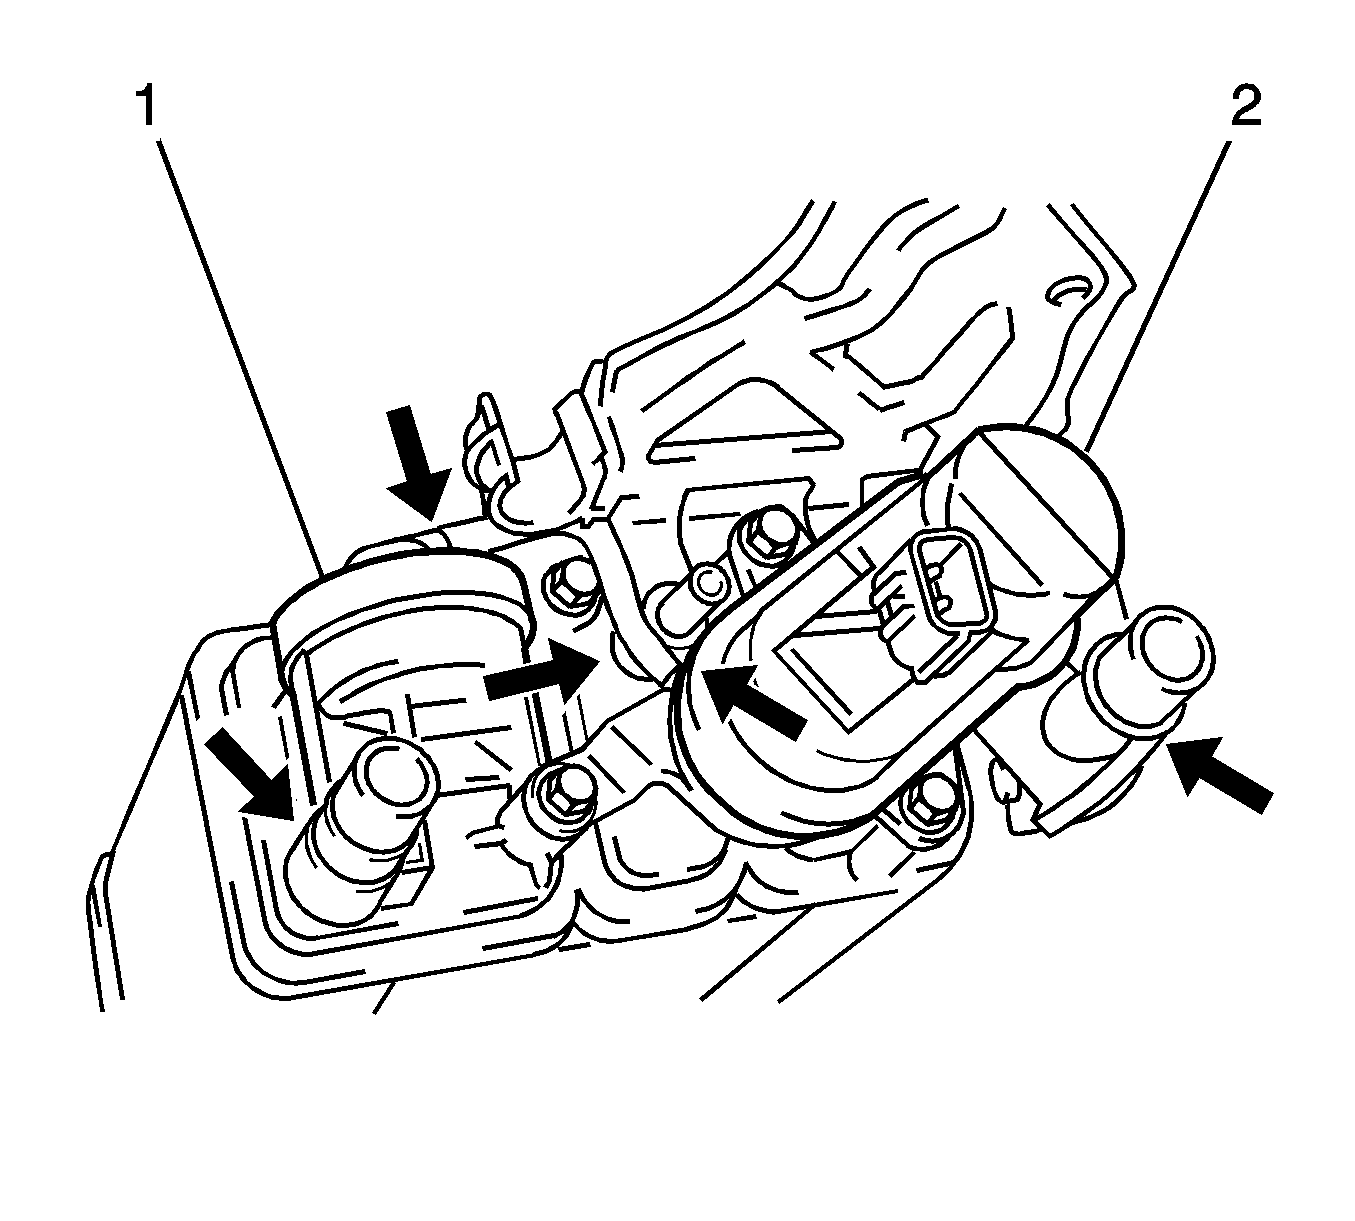
- Remove the evaporative emission (EVAP) canister.
- Verify there are no cracks or damage to the EVAP canister (1) and the vacuum pump assembly (2), especially at the arrows.
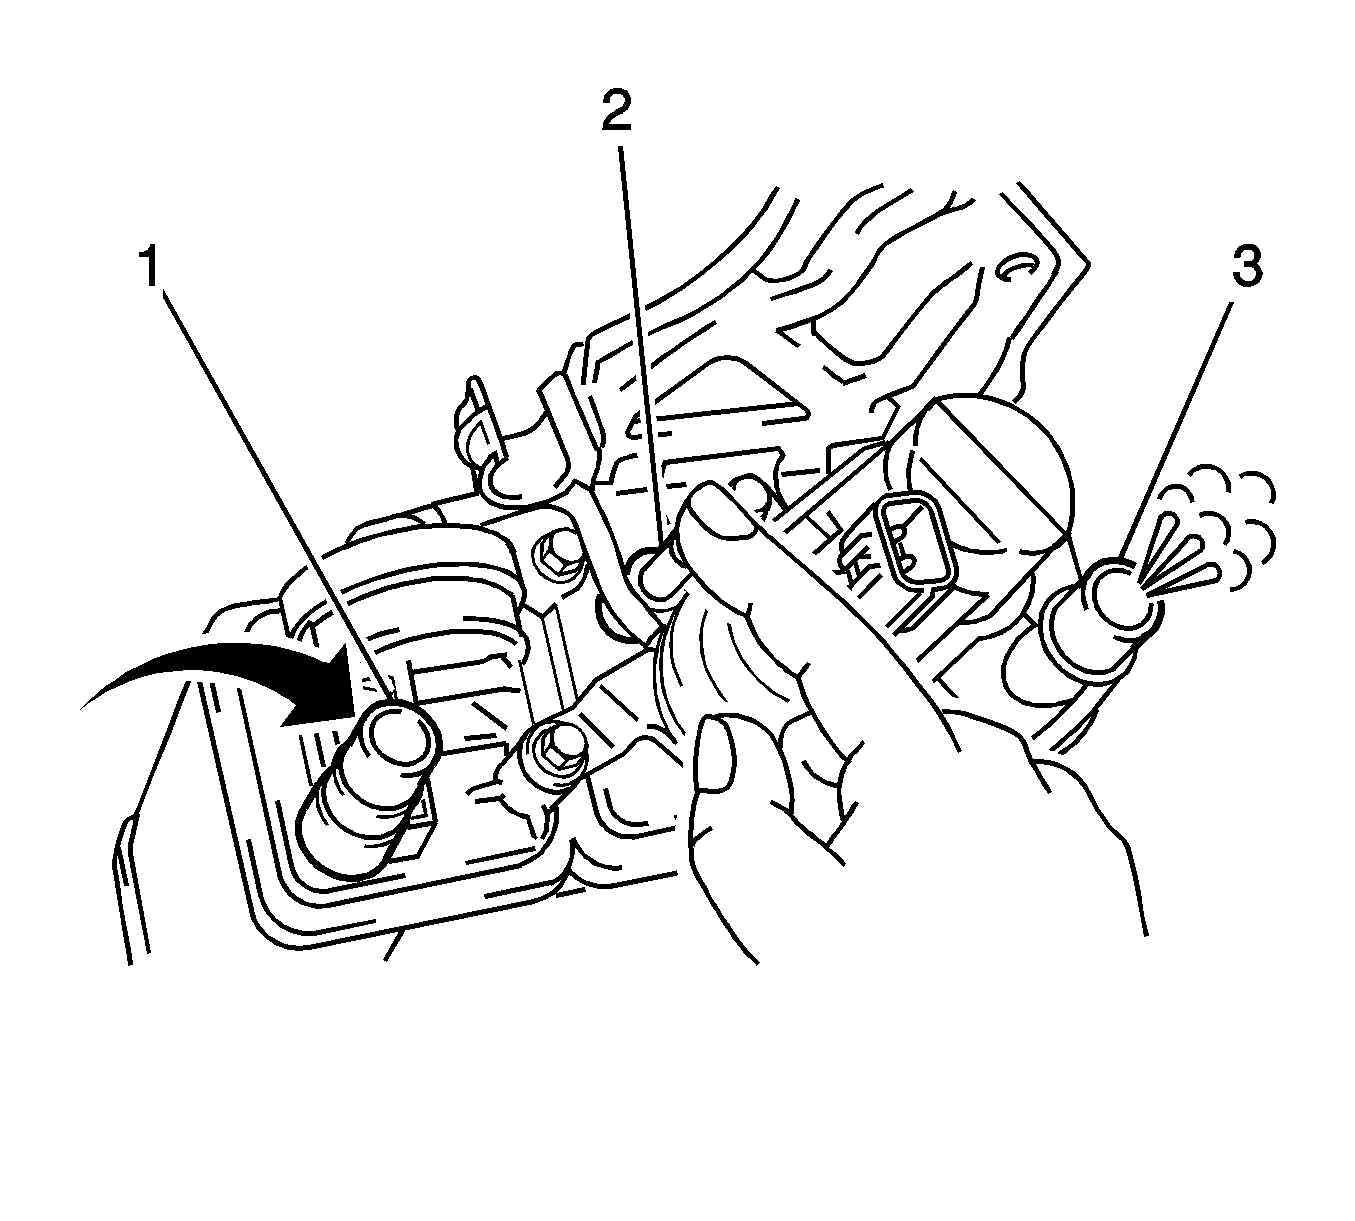
Warning: Do not breathe the air through the EVAP component tubes or hoses. The fuel vapors inside the EVAP components may cause personal injury.
- Seal the EVAP canister purge port (2) closed with the
J 41413-300
.
- Blow air with a pressure of 1.7 kPa (0.5 in Hg/0.25 psi) into the ORVR vent port (1).
- Verify that air flows out of inlet air port (3).
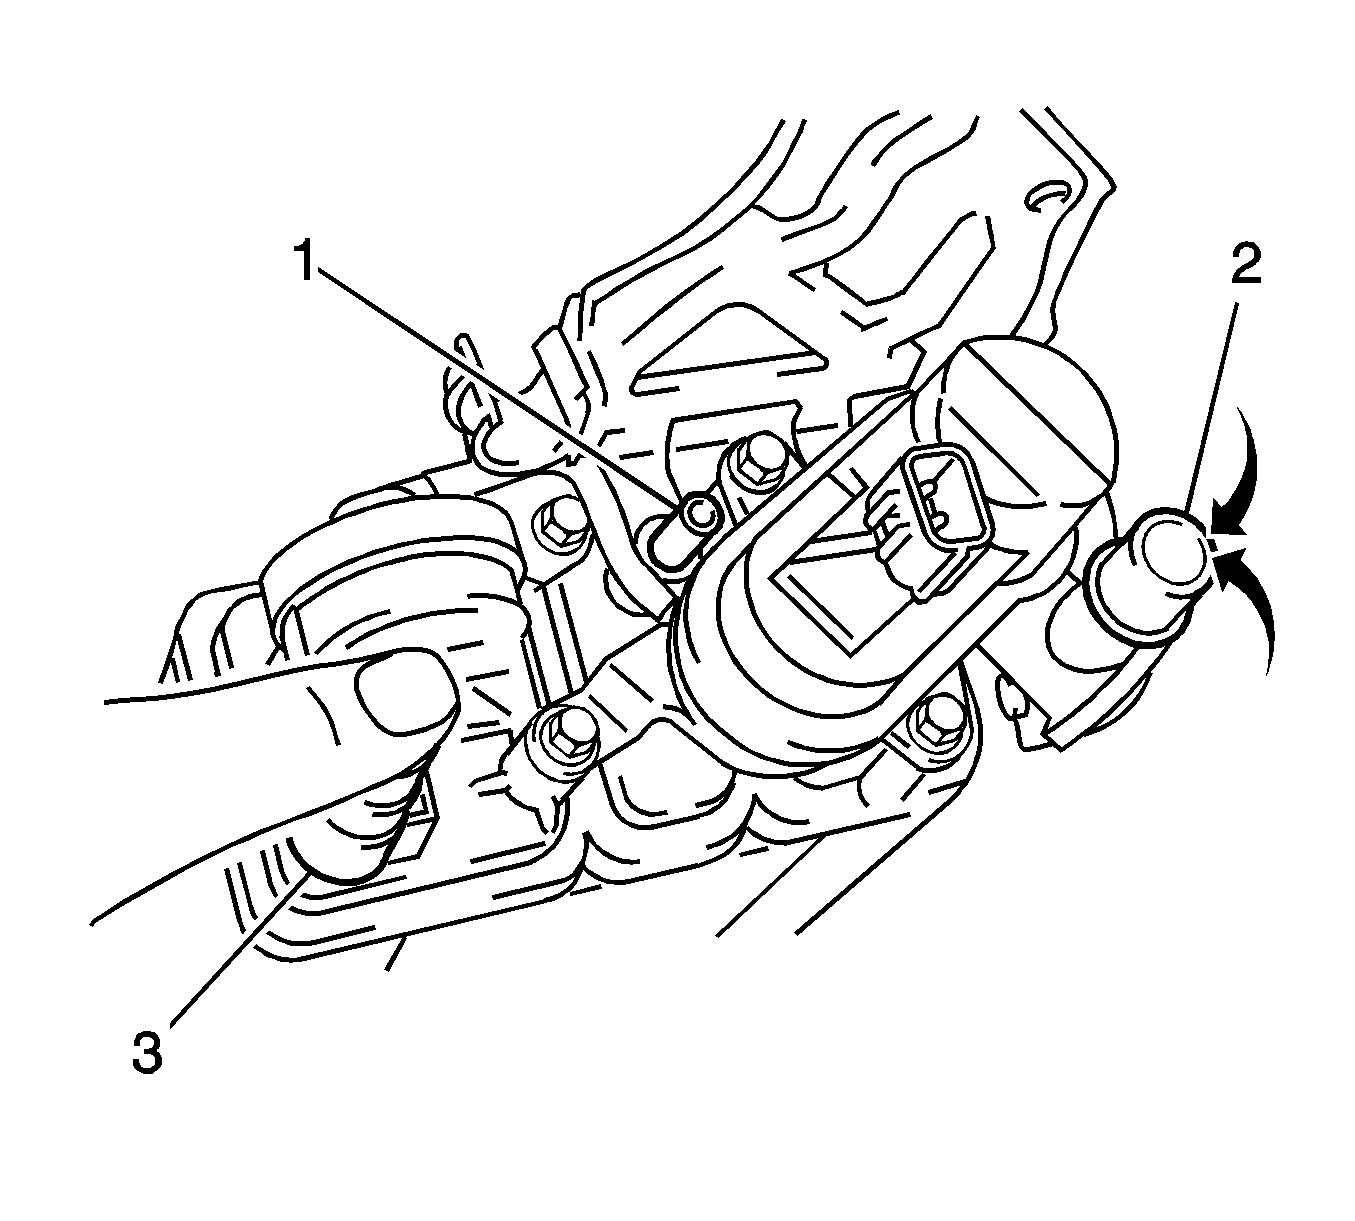
- Seal the on-board refueling vapor recovery (ORVR) vent port (3) closed with the
J 41413-300
.
- Connect the
J 23738-A
to the purge port (1).
- Apply a vacuum of 0.85 kPa (0.25 in Hg/0.18 psi) into the purge port (1).
- Verify that air is drawn into the air inlet port (2).
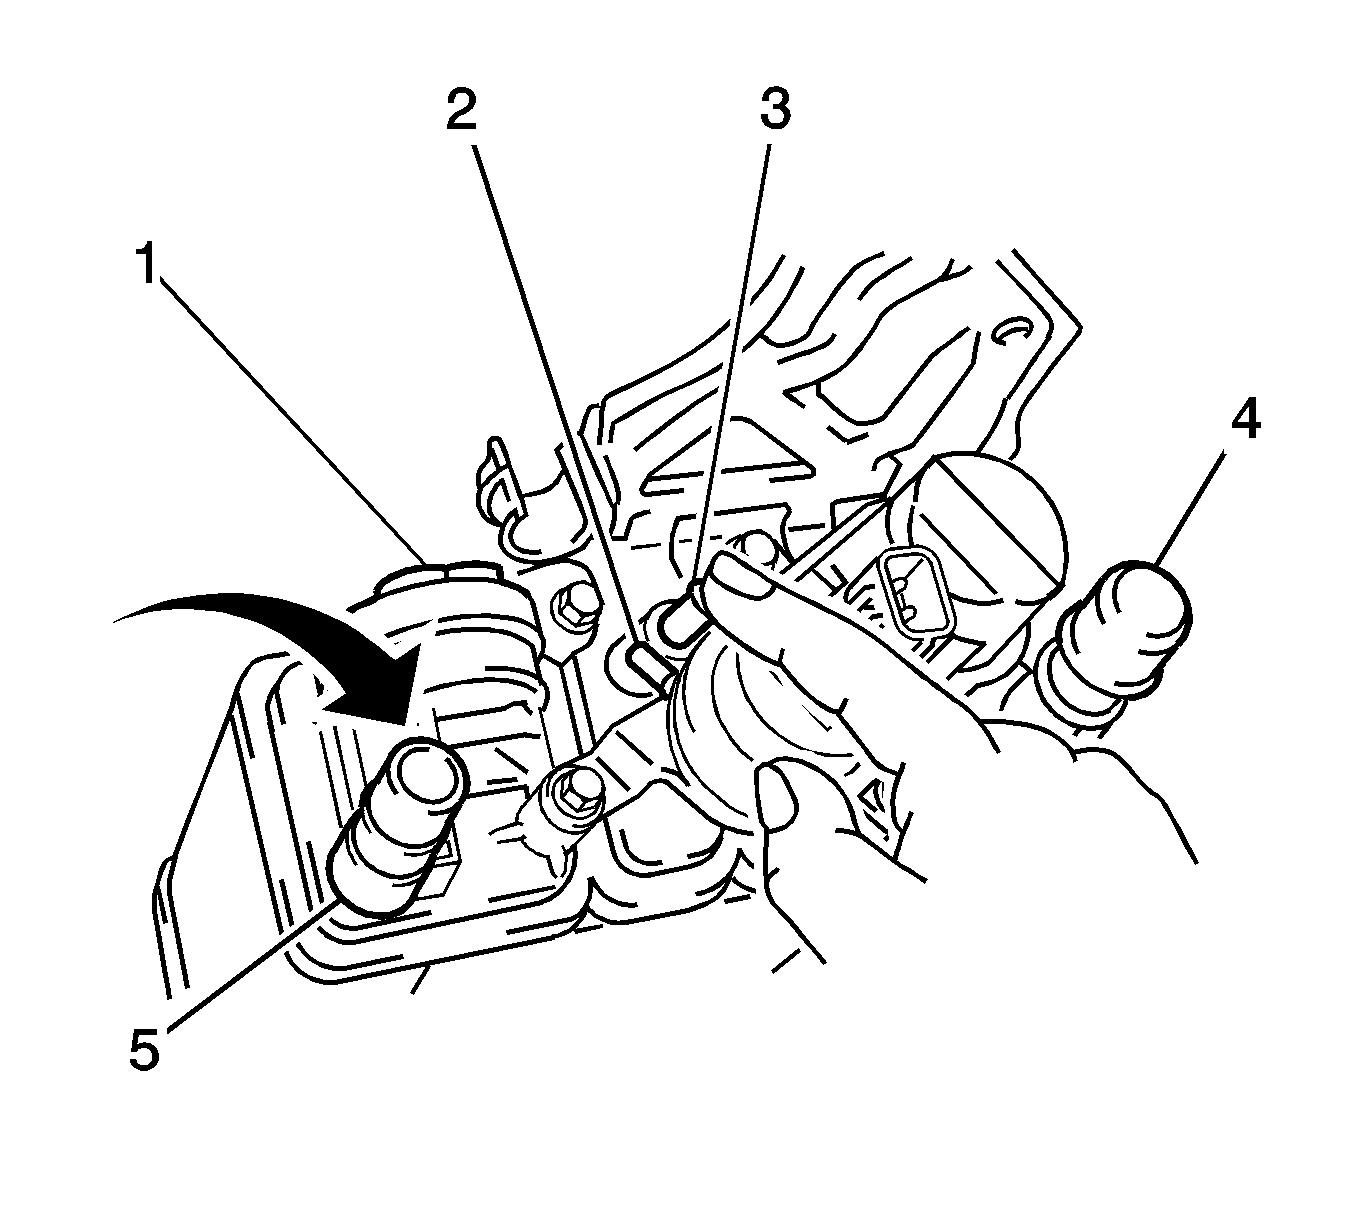
- Seal the air inlet port (4) closed, with the
J 41413-300
.
- Seal the purge port (3) closed, with the
J 41413-300
.
- Remove the small vacuum hose between the fill limiter vent valve (FLVV) port (1) and the EVAP vacuum leak pump port (2).
- Seal the vacuum leak pump port (2) closed, with the
J 41413-300
.
- Apply a pressure of 19.6 kPa (5.8 in Hg/2.81 psi) to the ORVR vent port (5).
- Verify that the pressure holds and does not leak out the small vacuum port (1).
| ⇒ | If the EVAP canister failed any of the tests, replace the EVAP canister. |
EVAP Canister Vacuum Leak Pump Assembly Inspection
Warning: Do not breathe the air through the EVAP component tubes or hoses. The fuel vapors inside the EVAP components may cause personal injury.
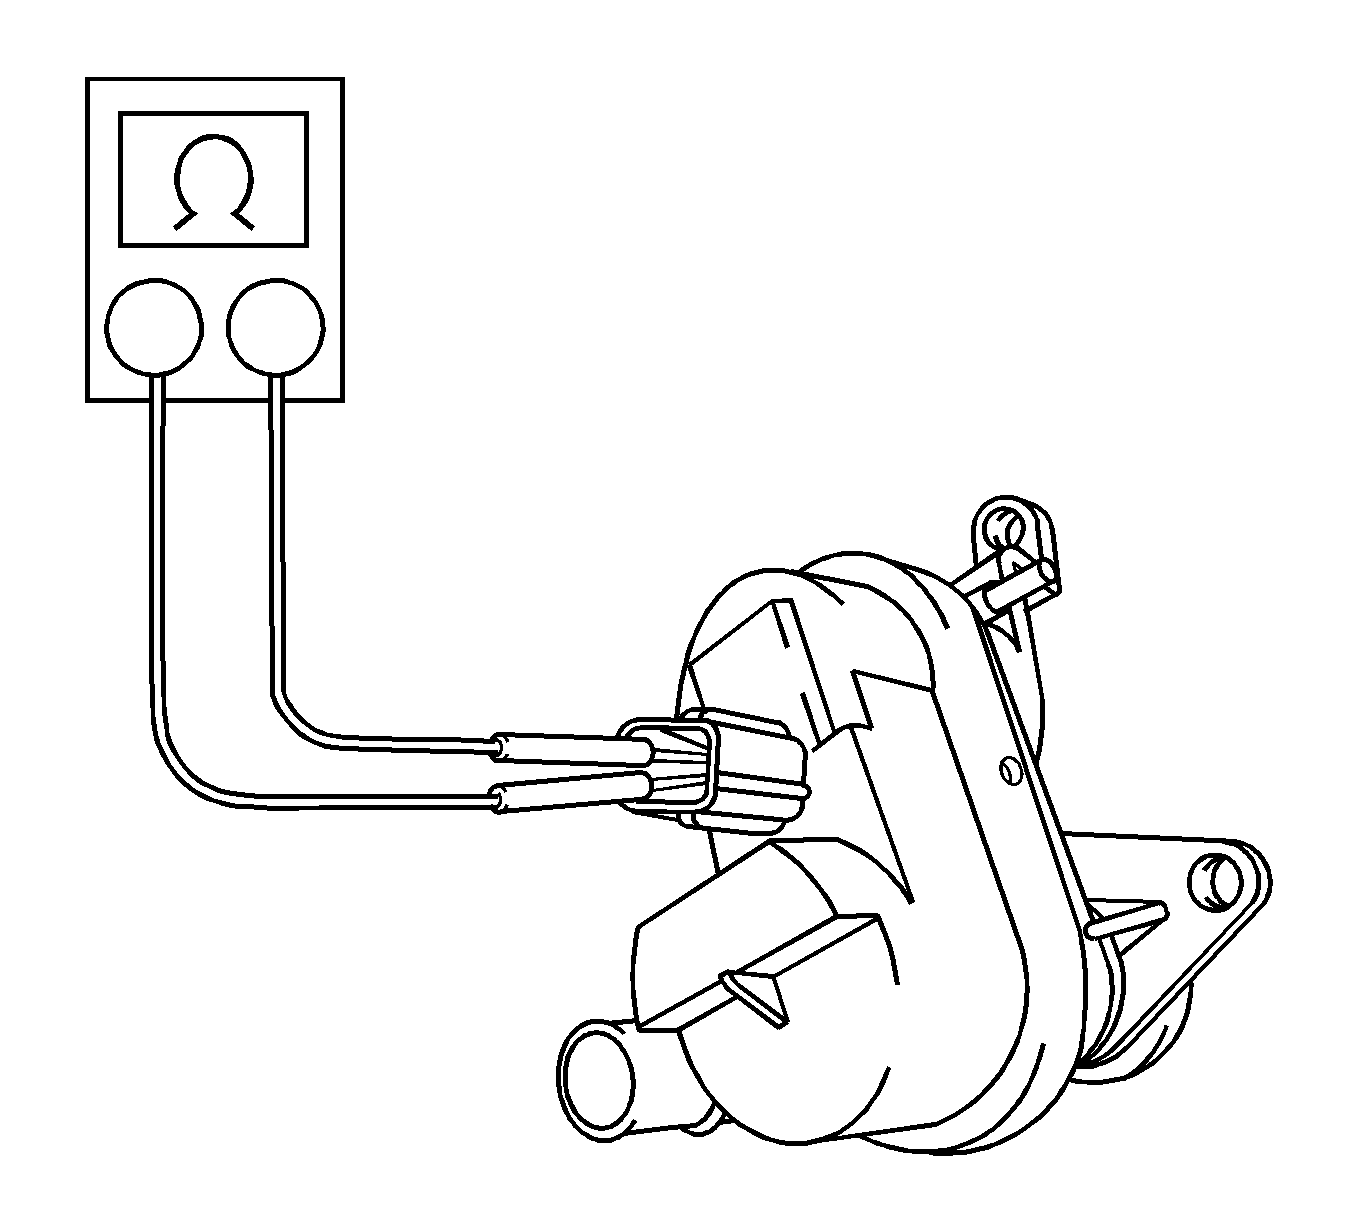
- Remove the EVAP canister vacuum leak pump.
- Test for 25-30 ohms at 20°C (68°F) between the vent solenoid ignition voltage circuit terminal 9 and the vent solenoid control circuit terminal 8.
| ⇒ | If the resistance is not within the specified value, replace the EVAP canister leak pump assembly. If the vent solenoid resistance value is less than 25 ohms, the powertrain control module (PCM) may be damaged. If the replacement vent solenoid
can not be commanded ON and OFF with the scan tool, replace the PCM. |
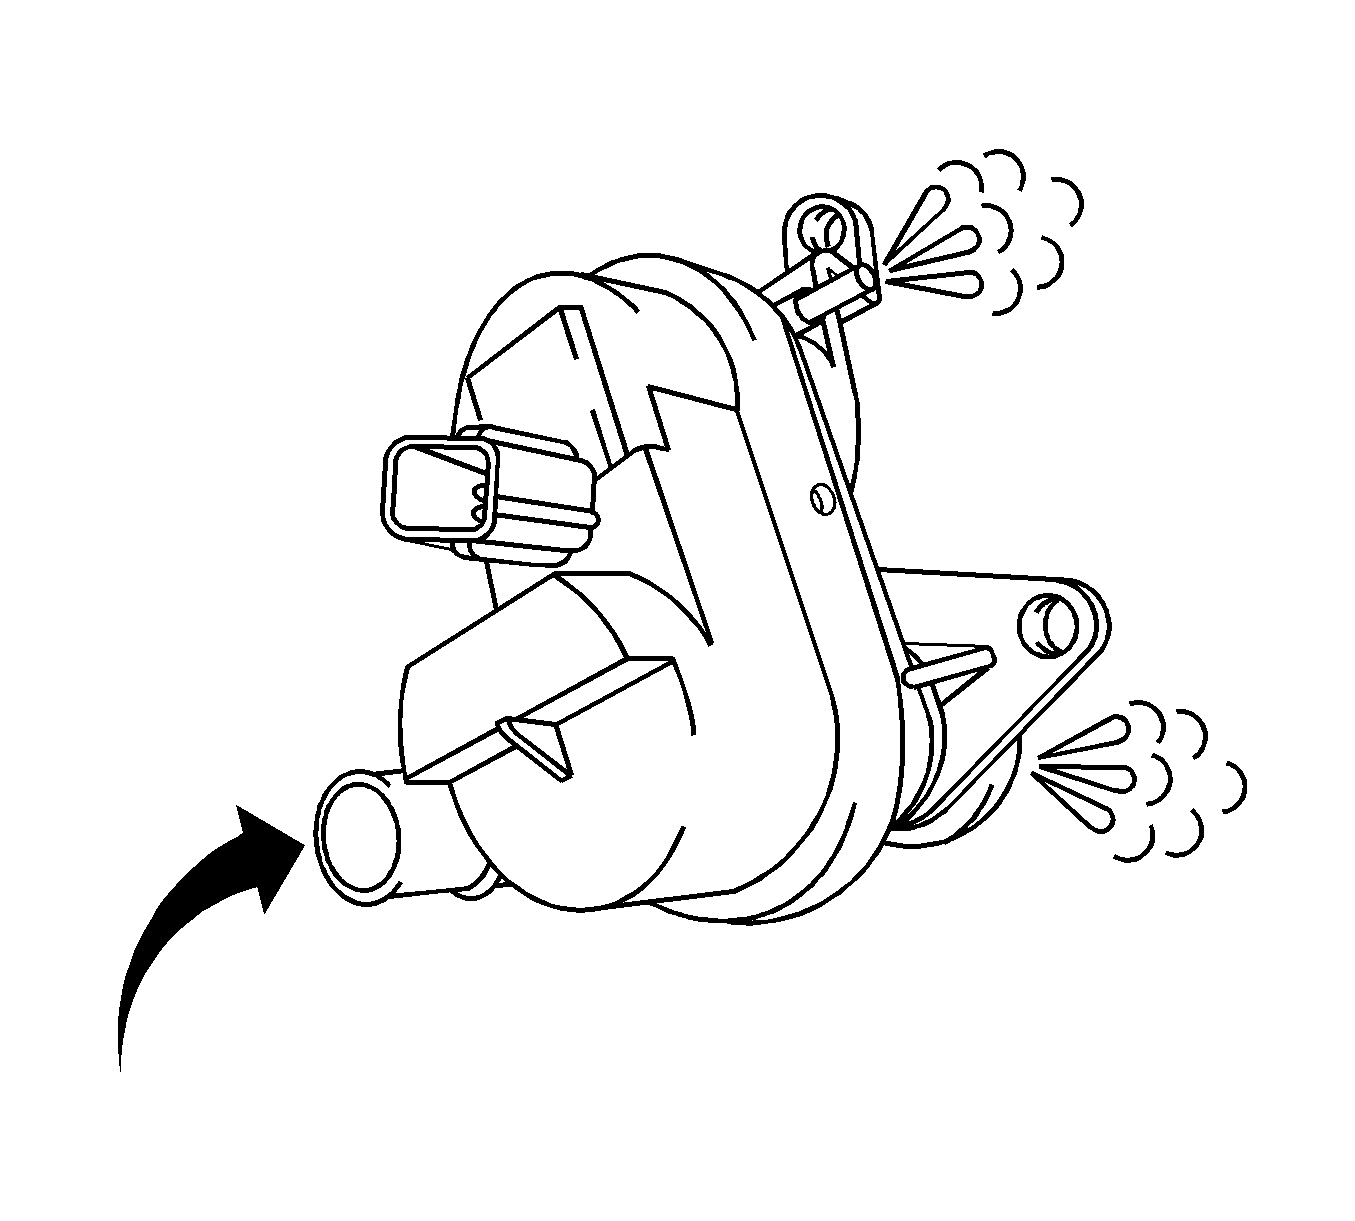
- Blow air into the air inlet port. The air should flow through the assembly and out of both ports.
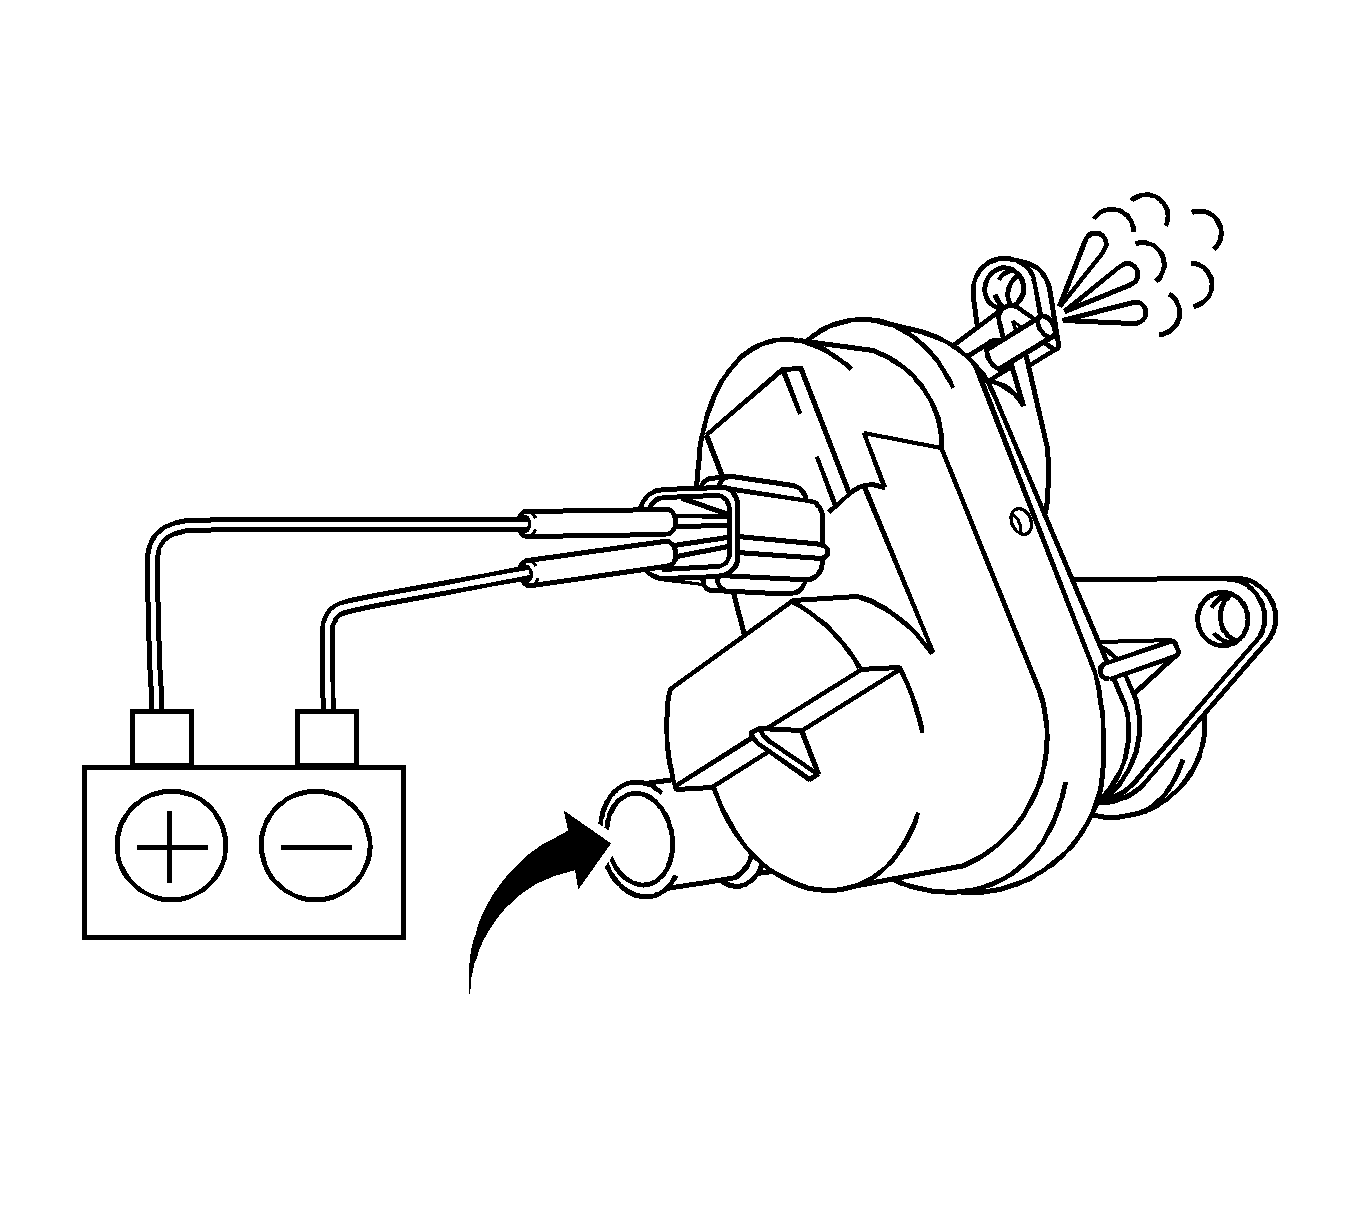
- Connect a 20A fused jumper between B+ and the vent solenoid ignition voltage circuit terminal 9.
- Connect a jumper wire between the vent solenoid control circuit terminal 8 and ground.
- Blow air into the air inlet port. Air should flow only through small port and NOT the large canister port.
| ⇒ | If the solenoid failed any of the tests, replace the EVAP vacuum leak pump assembly. |
Repair Instructions
Perform the
Diagnostic Repair Verification after completing the diagnostic procedure.


