Special Tools
| • | J-46001 Differential Drive Pinion Holding Tool |
| • | J-46003 Output Shaft Bearing Locknut Wrench |
- Install transfer driven pinion rear bearing.
- Using a press (1), press the driven pinion rear bearing (2) (outer race) into the case.
- Apply gear oil to the driven pinion rear bearing (outer race).
- Install a transfer output washer to the transfer case. Install the same washer as the previous one.
- Apply gear oil to the transfer output washer.
- Apply gear oil to the inner surface of the transfer case.
- Install the transfer driven pinion front bearing (outer race) to the transfer case using a suitable tool (1, 2).
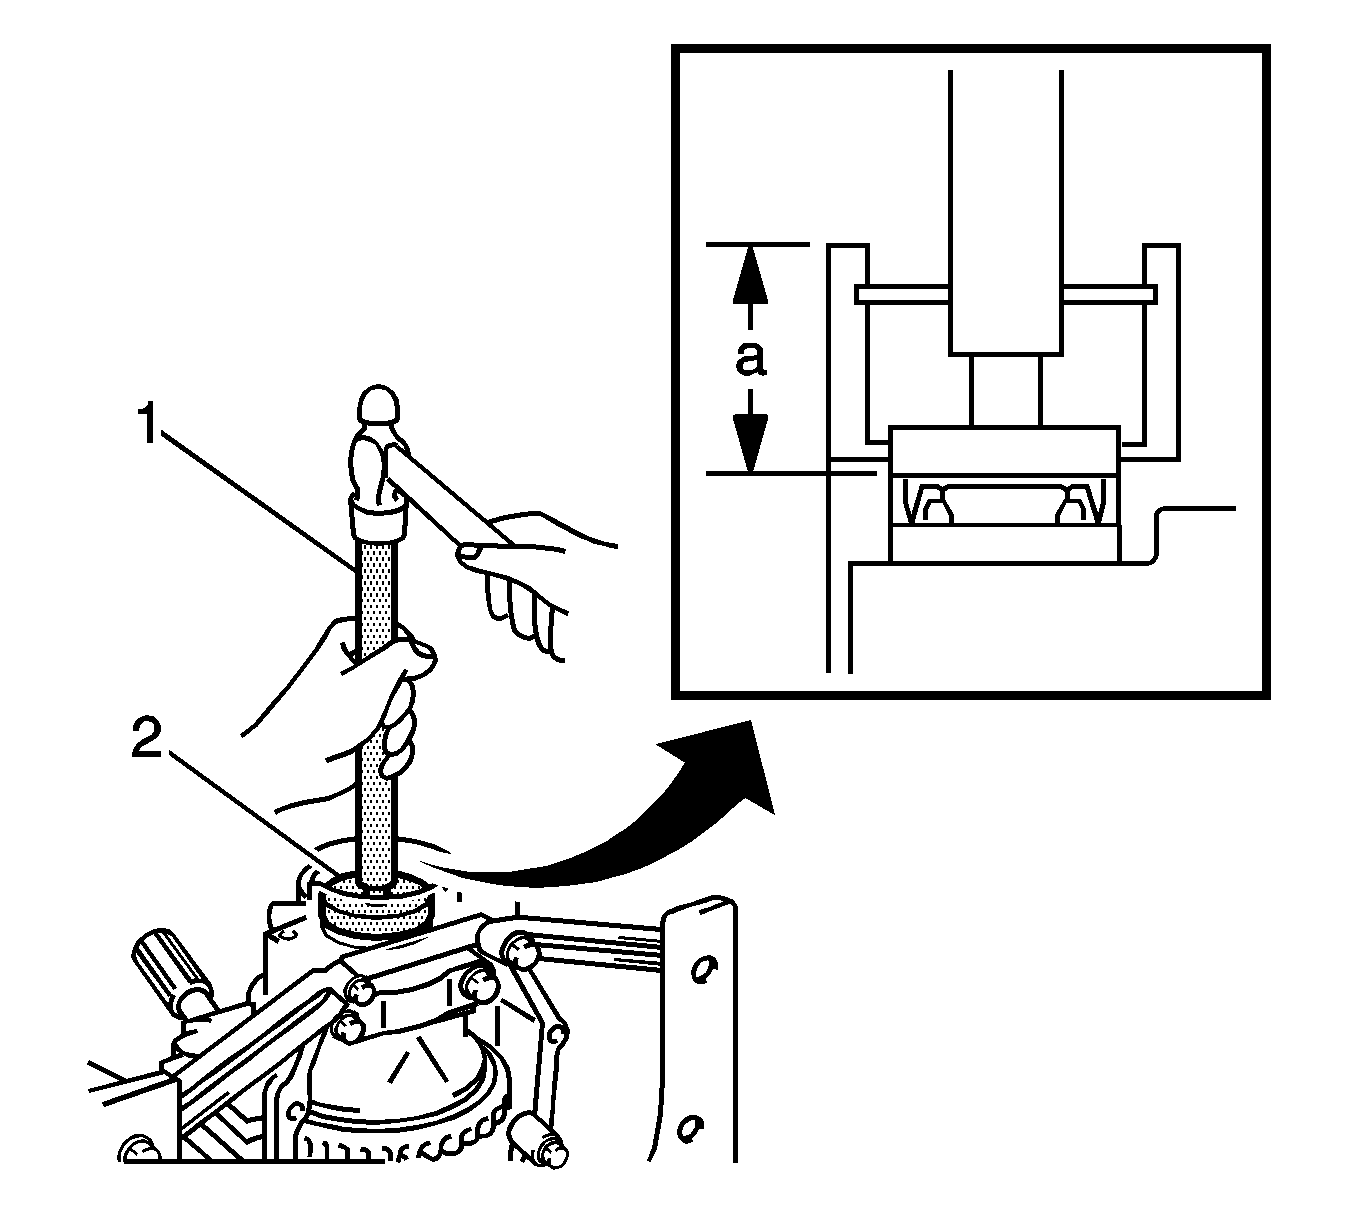
- Using a press, press the driven pinion front bearing (inner race) (1) into the driven pinion.
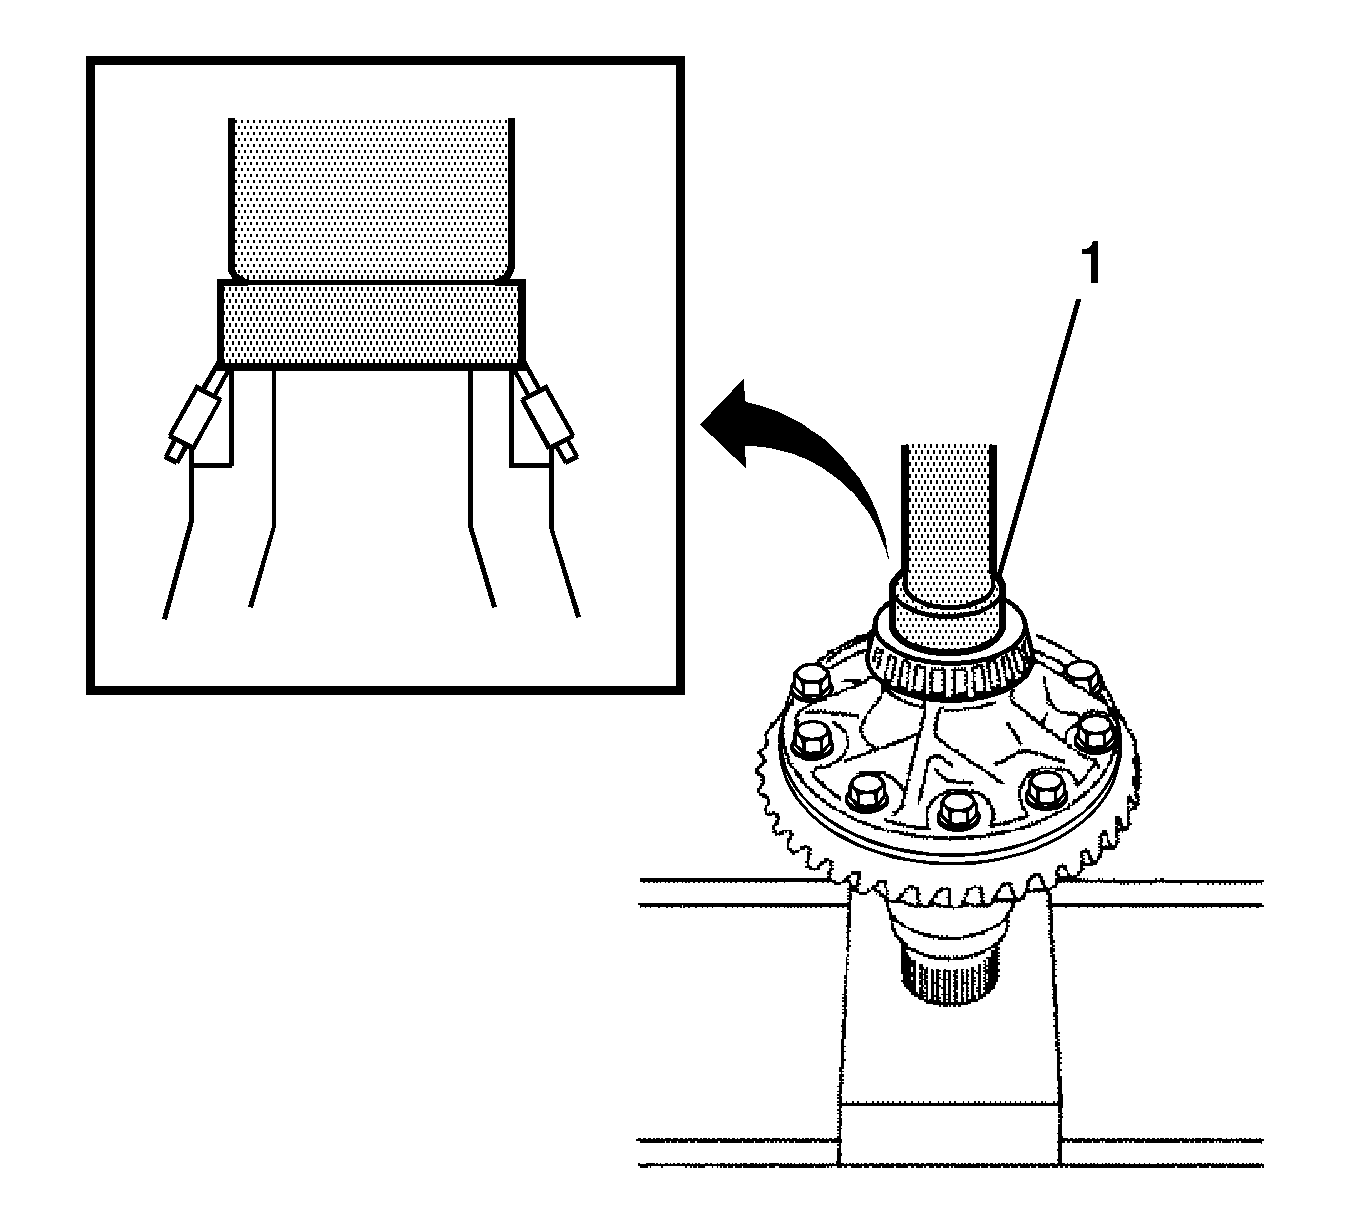
- Install the driven pinion to the transfer case.
- Install a new transfer pinion bearing spacer and driven pinion rear bearing (inner race) to the driven pinion.
- Install the pinion bearing spacer with the larger inner diameter facing forward.
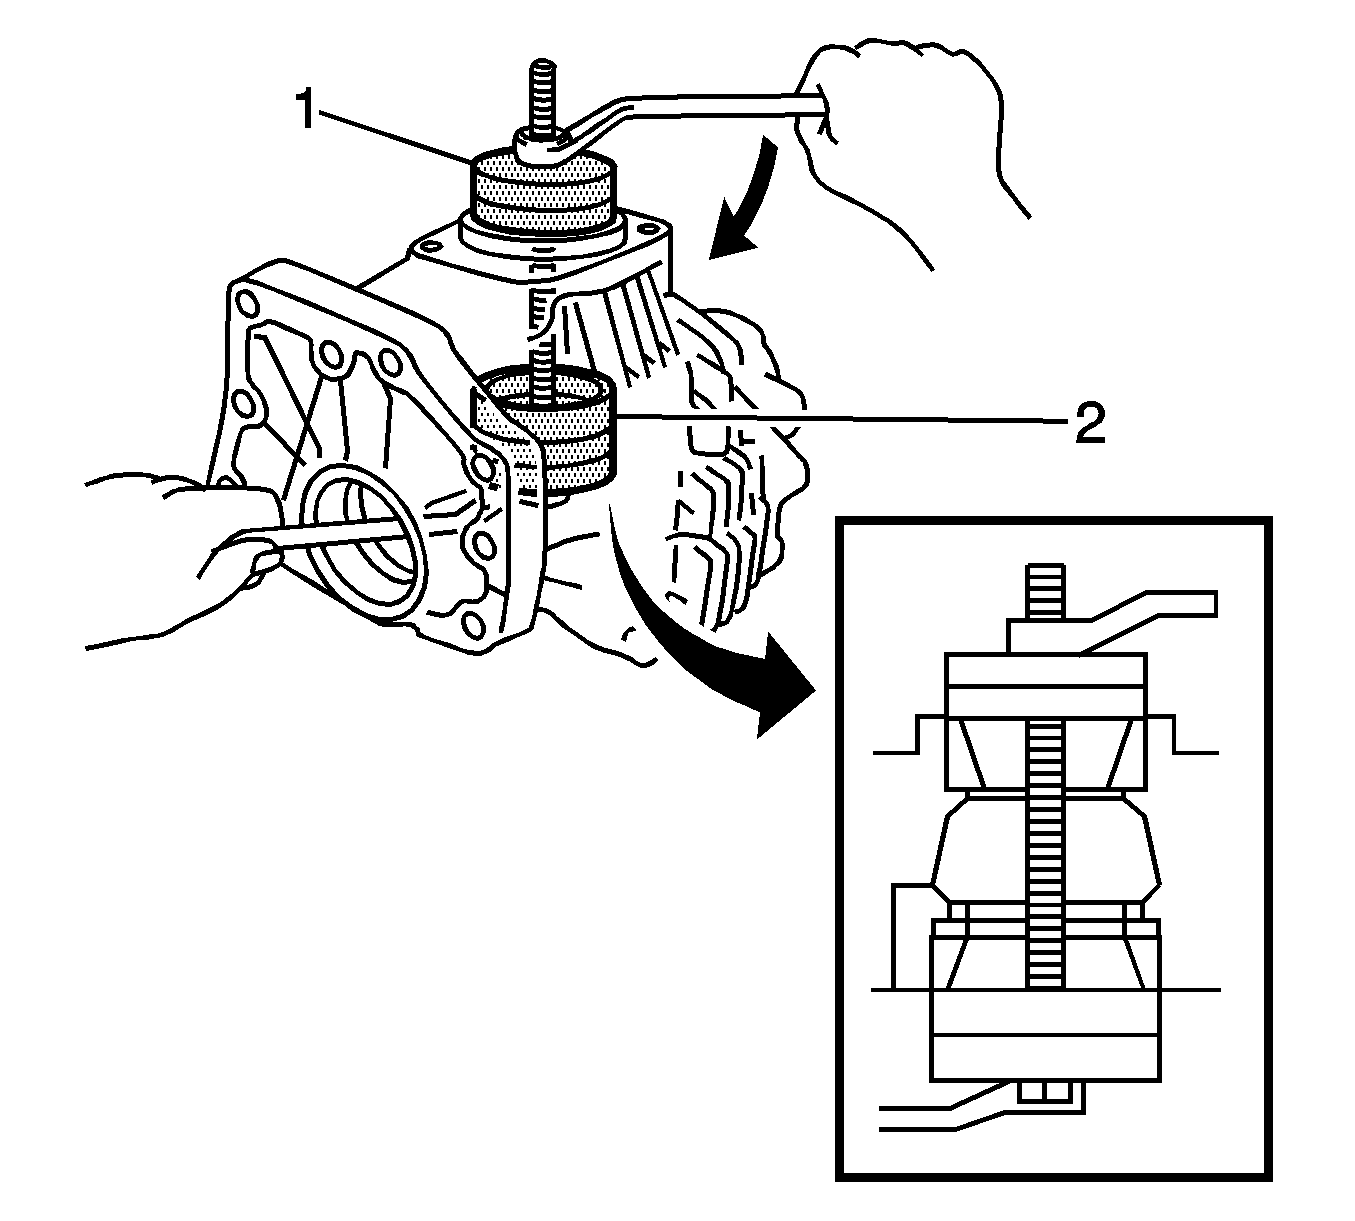
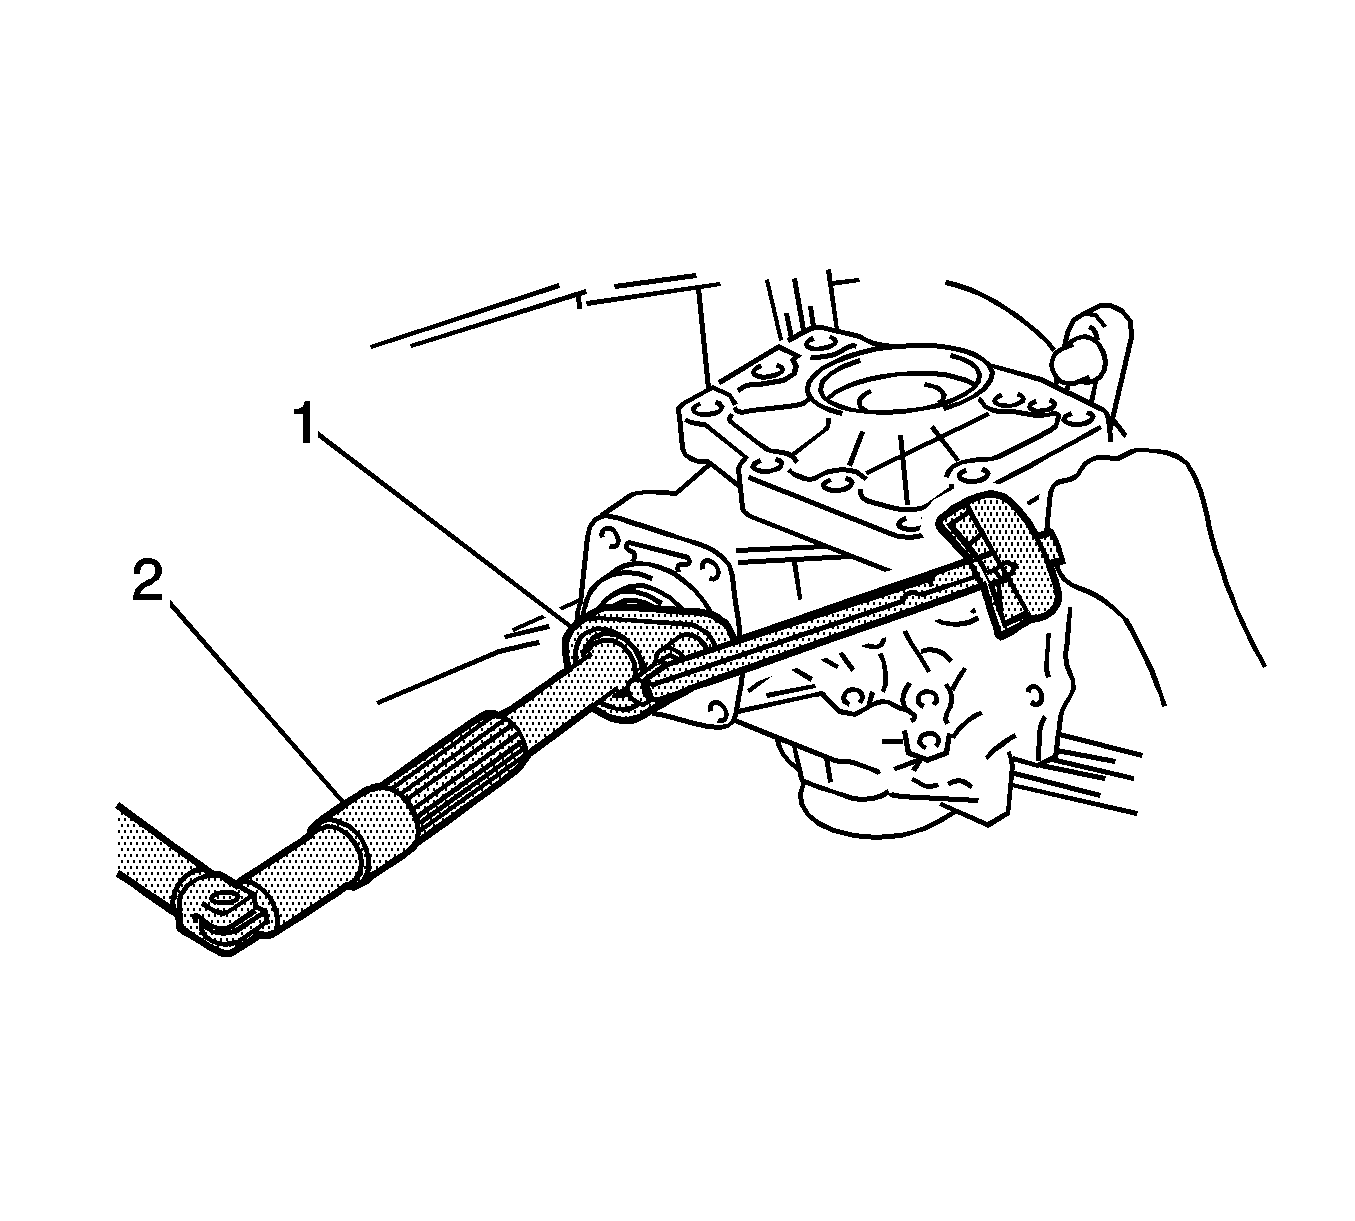
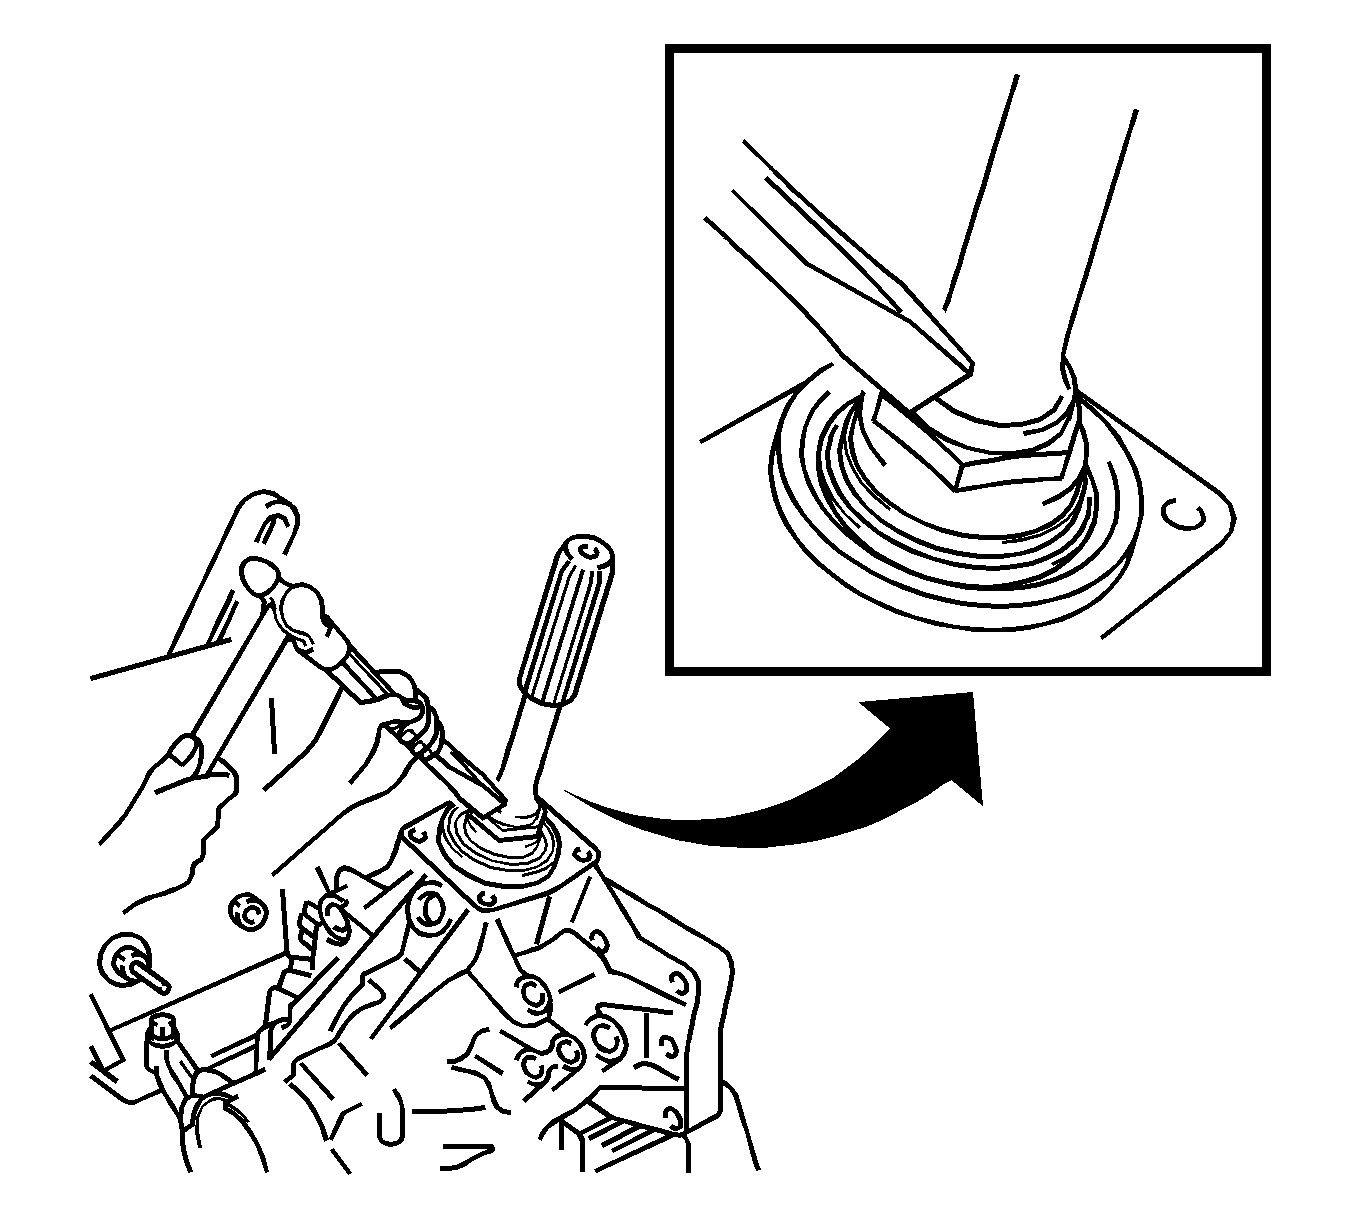
- Using J-46003 output shaft bearing locknut wrench and J-46001 differential drive pinion holding tool (2), install a new gear nut.
- Use a torque wrench with a fulcrum length of 750 mm (29.53 in).
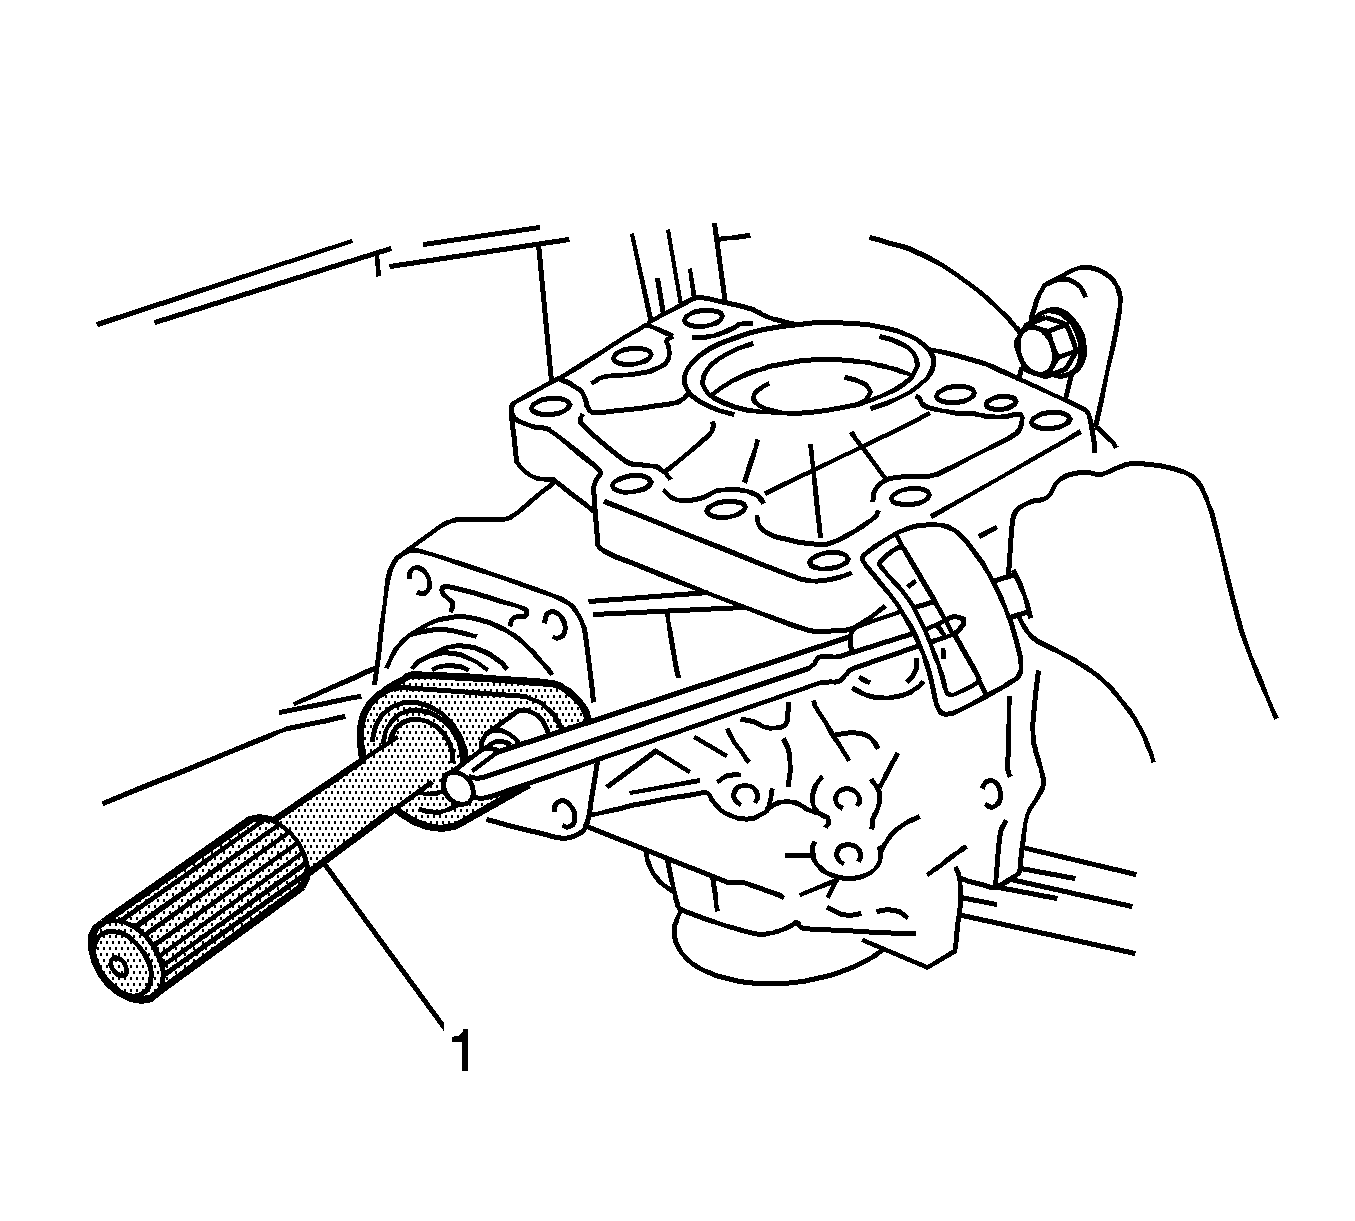
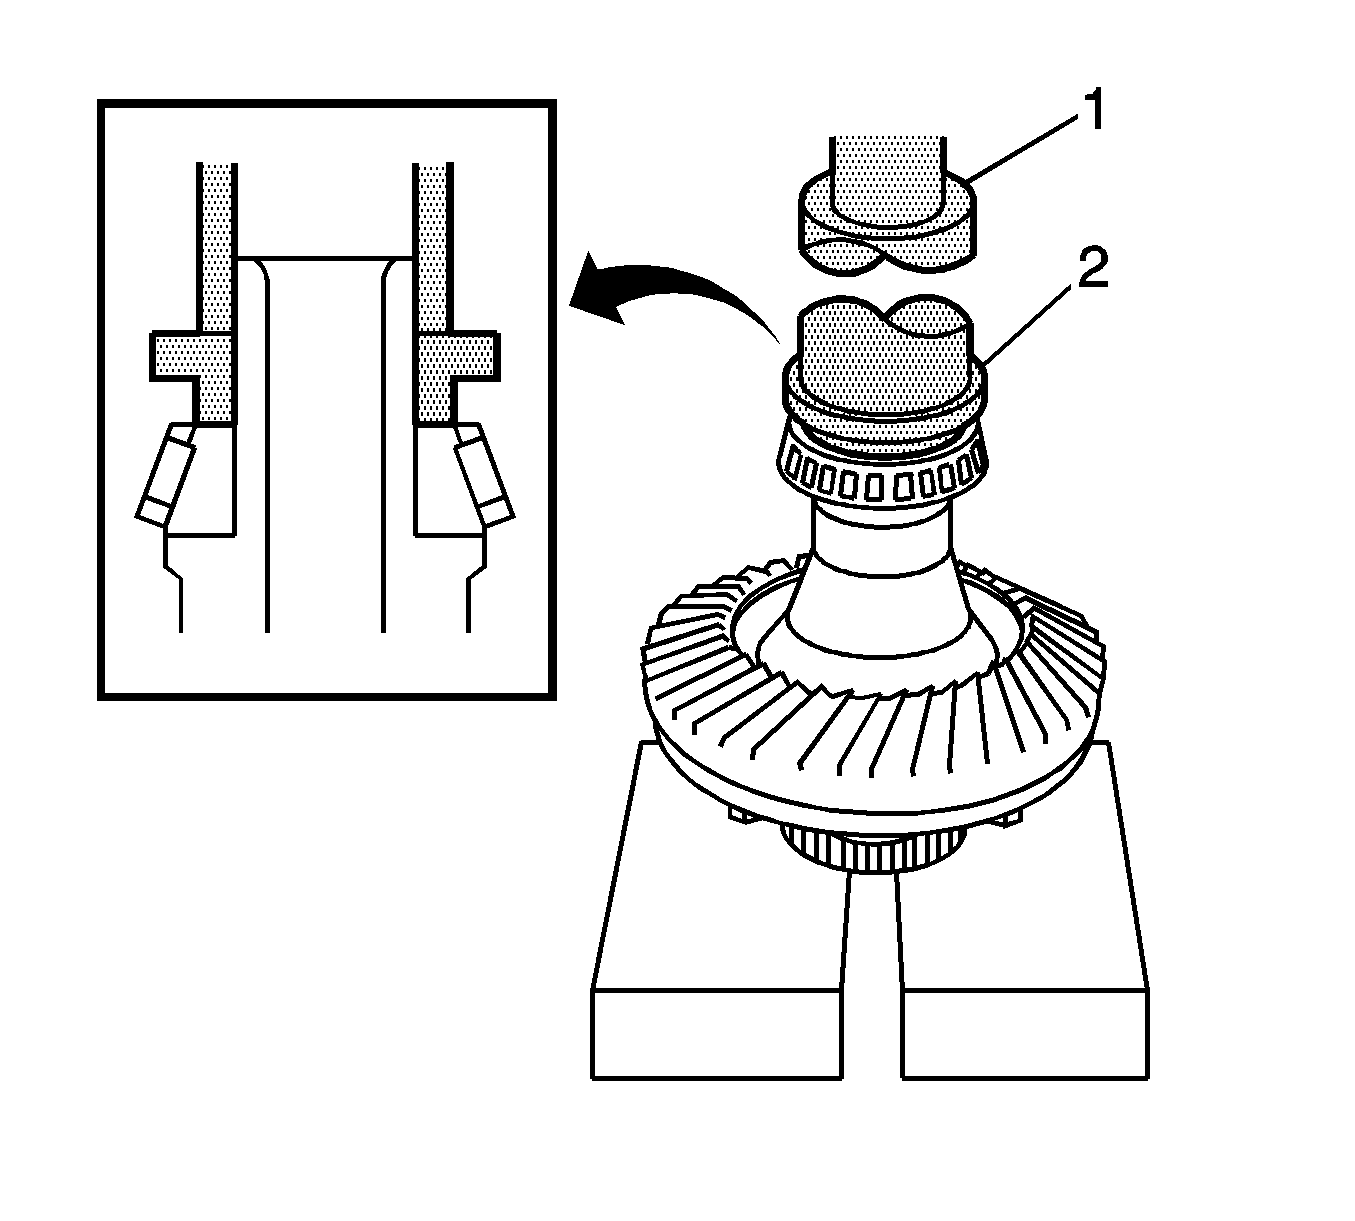
- Adjust the driven pinion (1) preload.
- Using J-46003 wrench , measure the driven pinion preload.
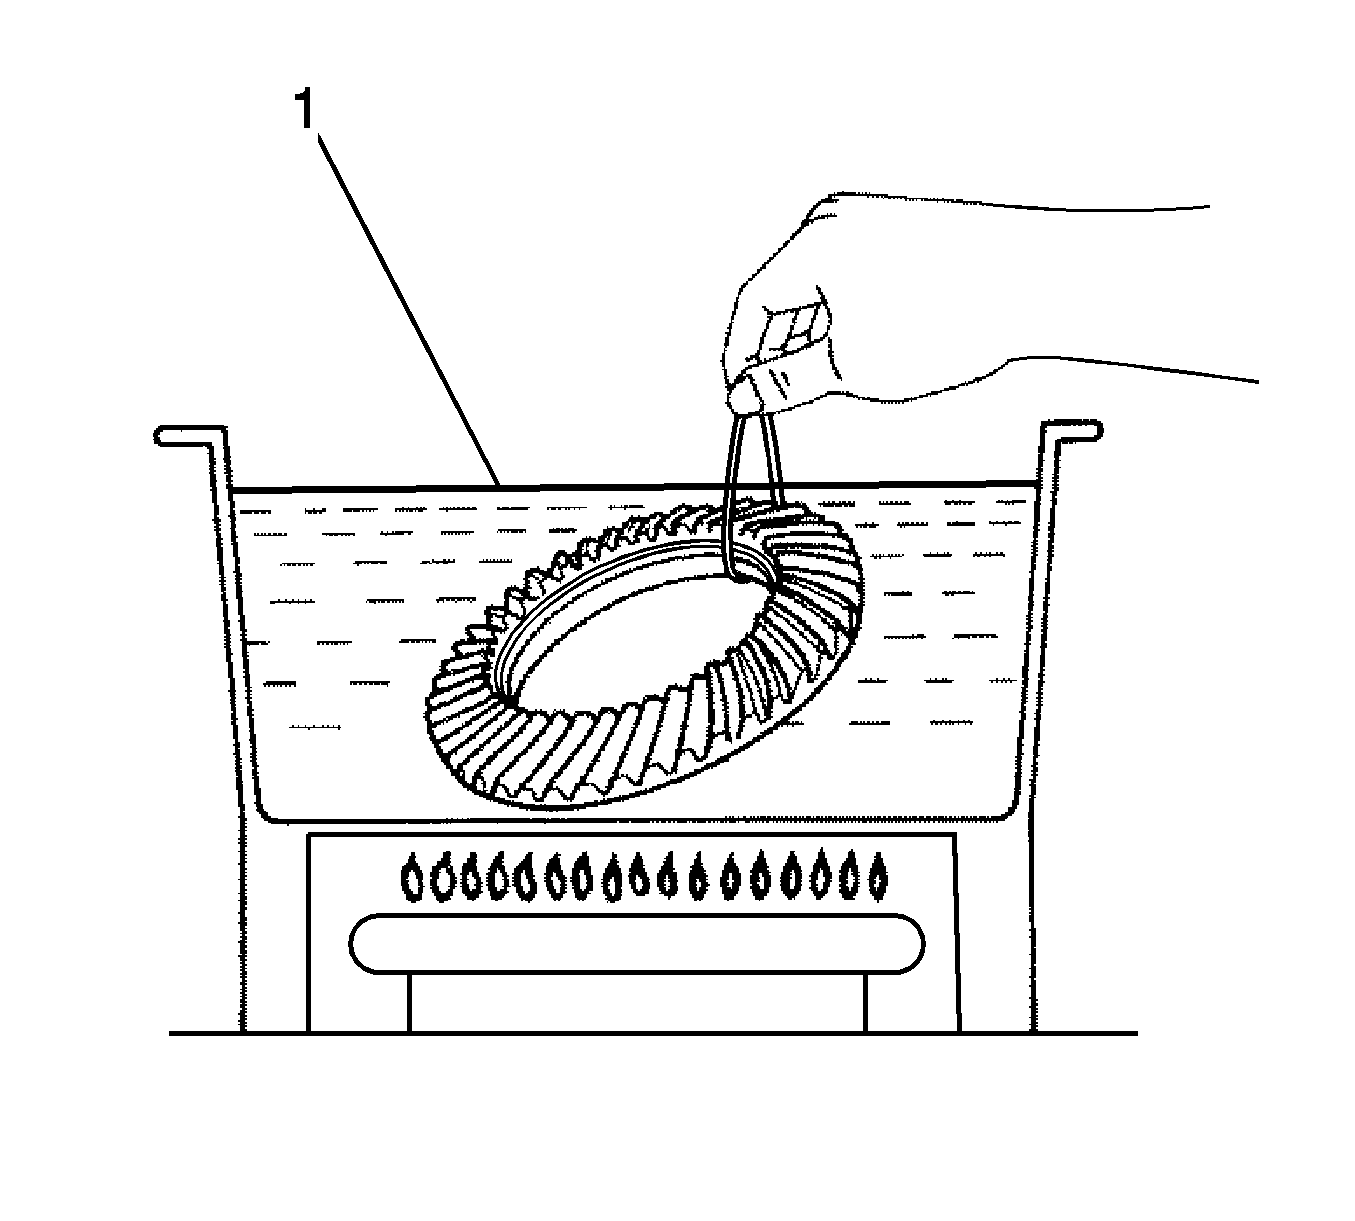
- Clean the contact surface of the ring gear and transfer ring gear mounting case.
- Heat the ring gear in boiling water.
- Carefully remove the ring gear from the water (1).
- Align the matchmarks and quickly install the ring gear to the transfer ring gear mounting case.
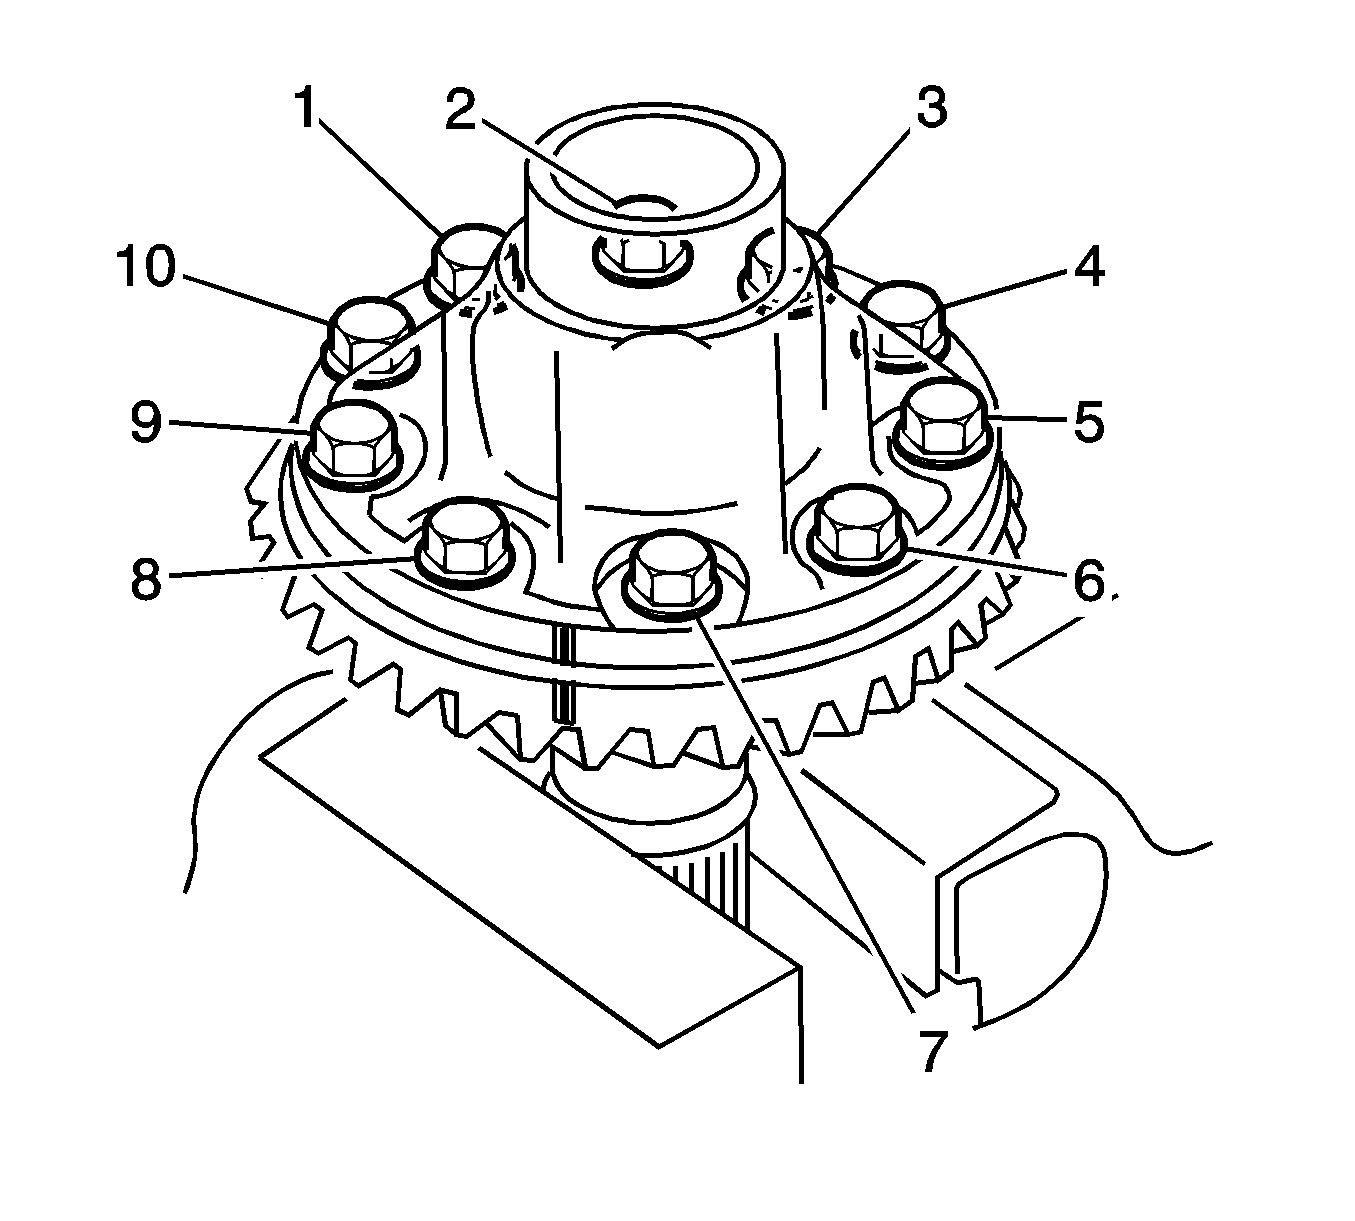
- After the moisture on the ring gear has completely evaporated, install the bolts (1-10) and tighten to 78 N·m (57 lb ft).
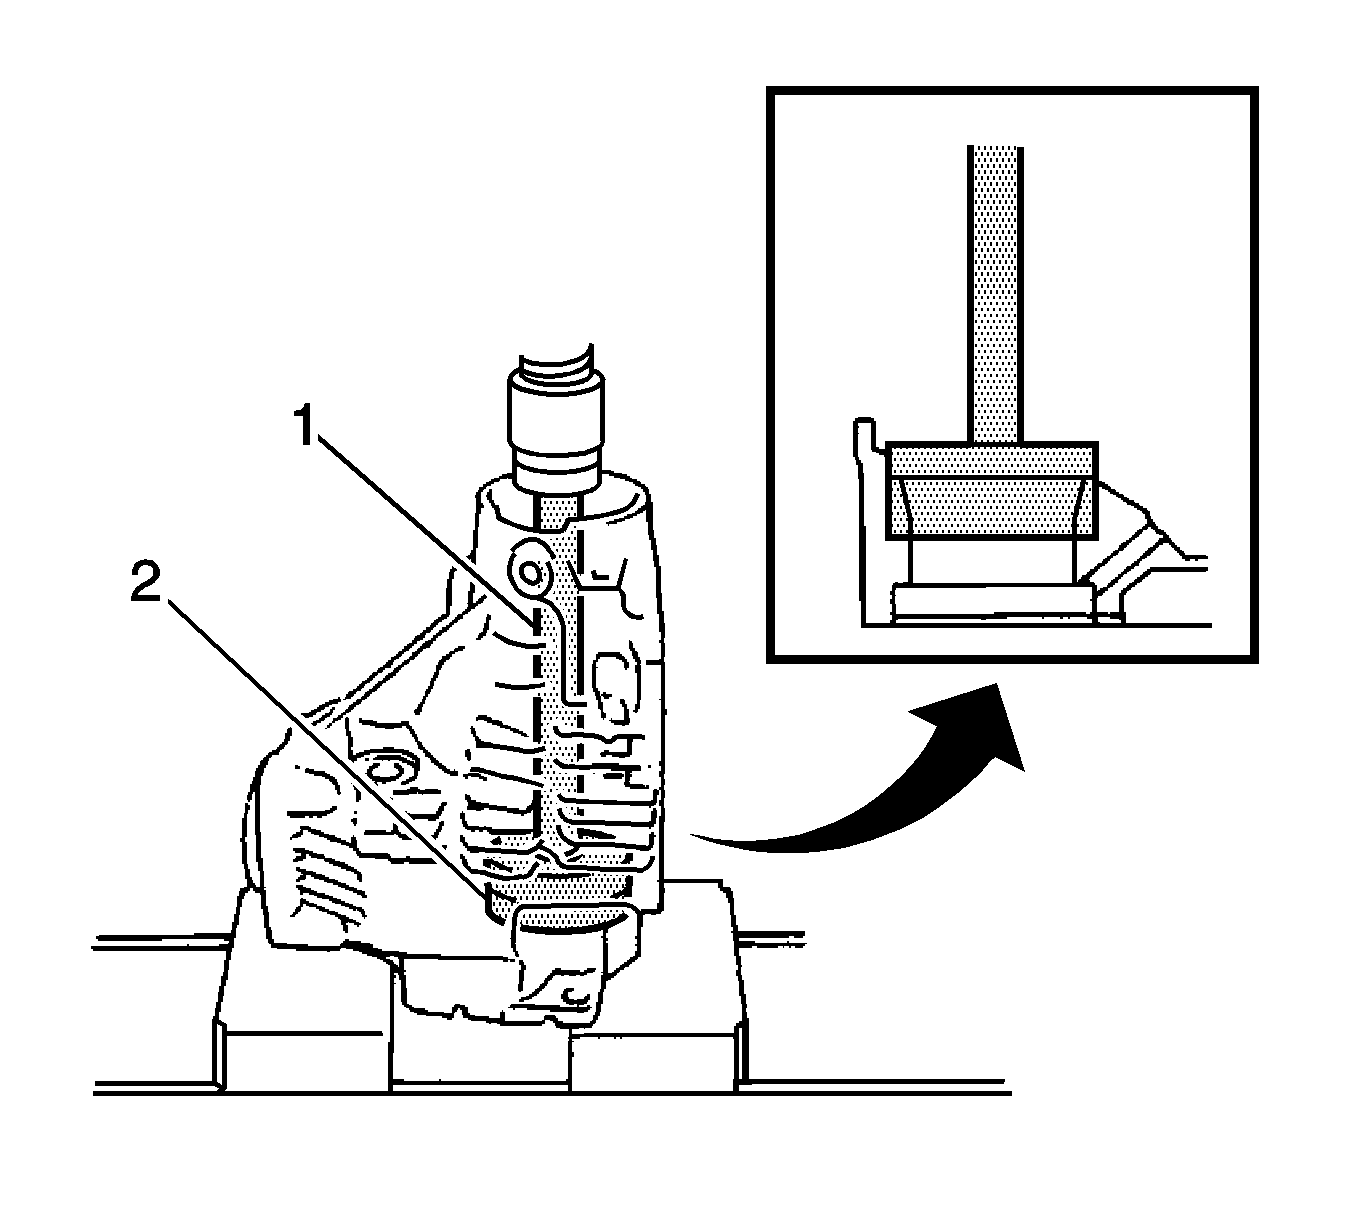
- Using a press (1), press the ring gear mounting case bearing right side (inner race) into the transfer ring gear mounting case.
- Install the ring gear mounting case bearing right side (outer race) to the transfer ring gear mounting case.
- Apply gear oil to the ring gear mounting case right side bearing.
- Using a press (1), press the ring gear mounting case bearing left side (inner race) into the transfer ring gear mounting case.
- Install the ring gear mounting case plate washer to the case.
- Using a press (1), press the ring gear mounting case bearing left side outer race into the transfer case.
- Apply gear oil to the ring gear mounting case bearing.
- Apply gear oil to the transfer ring gear mounting case.
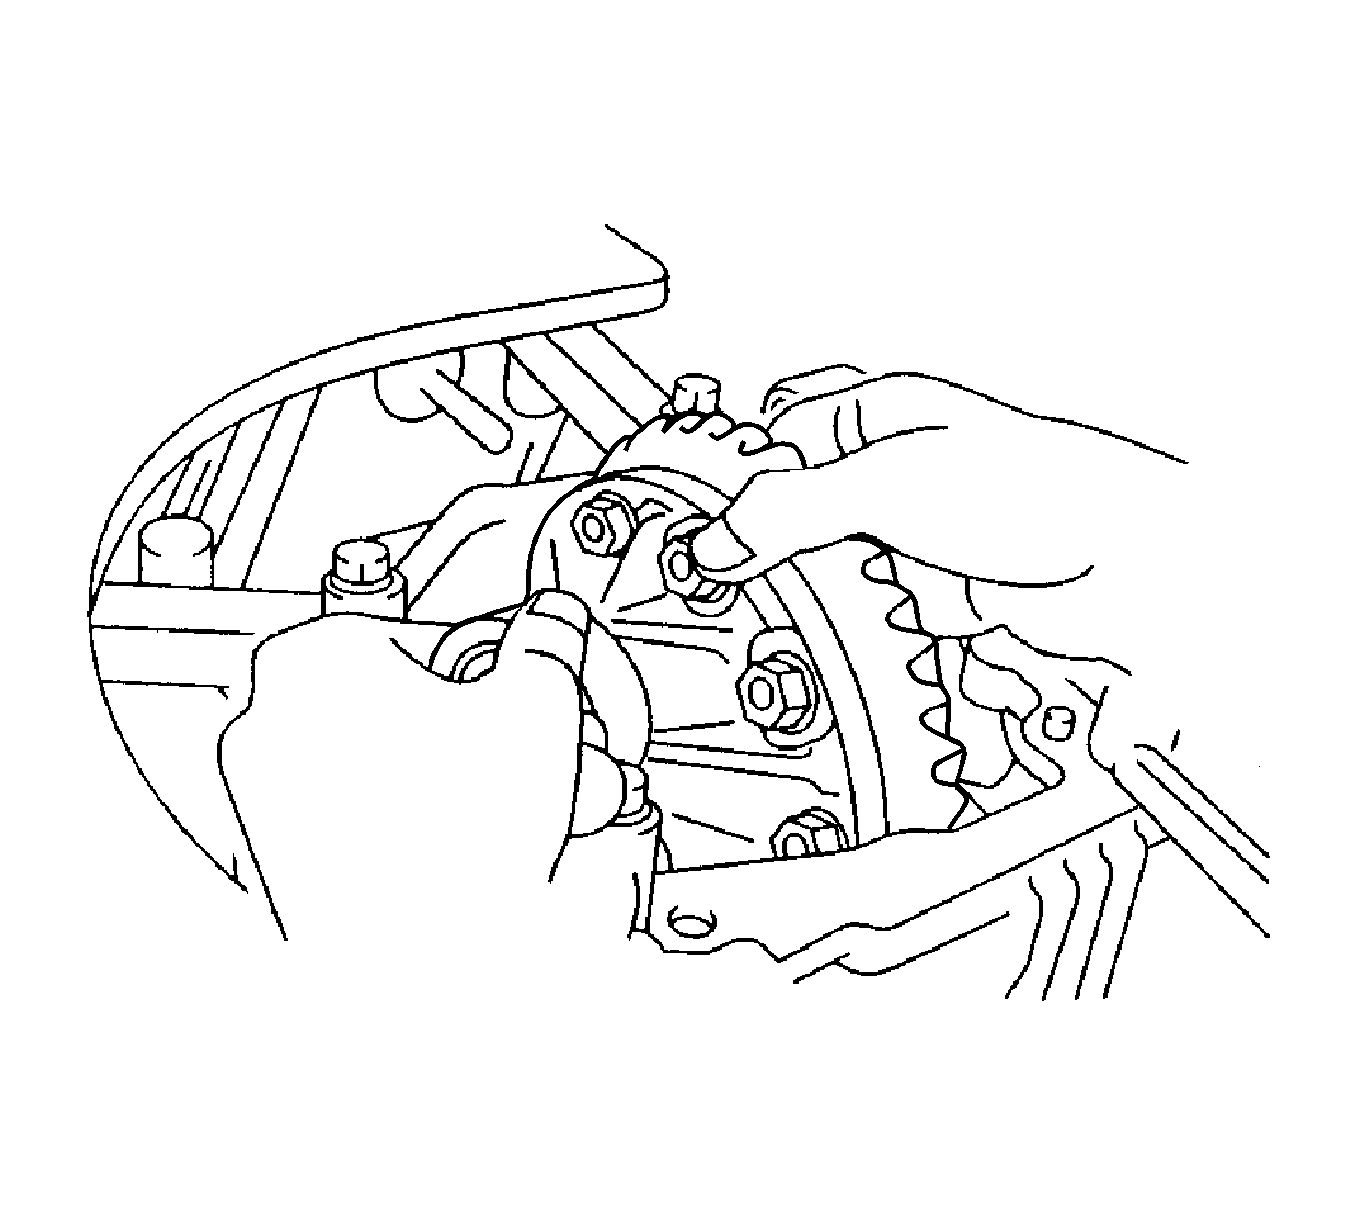
- Install the transfer ring gear mounting case to the transfer case.
- Install the number 1 transfer output shaft spacer. To install a new number 1 transfer output shaft spacer, align the cutouts (1-3) on it with the hole of the transfer case.
- Using a brass bar and a hammer, install a new number 2 transfer ring gear mounting case washer.
- Install a new number 2 washer with the same thickness as the removed one.
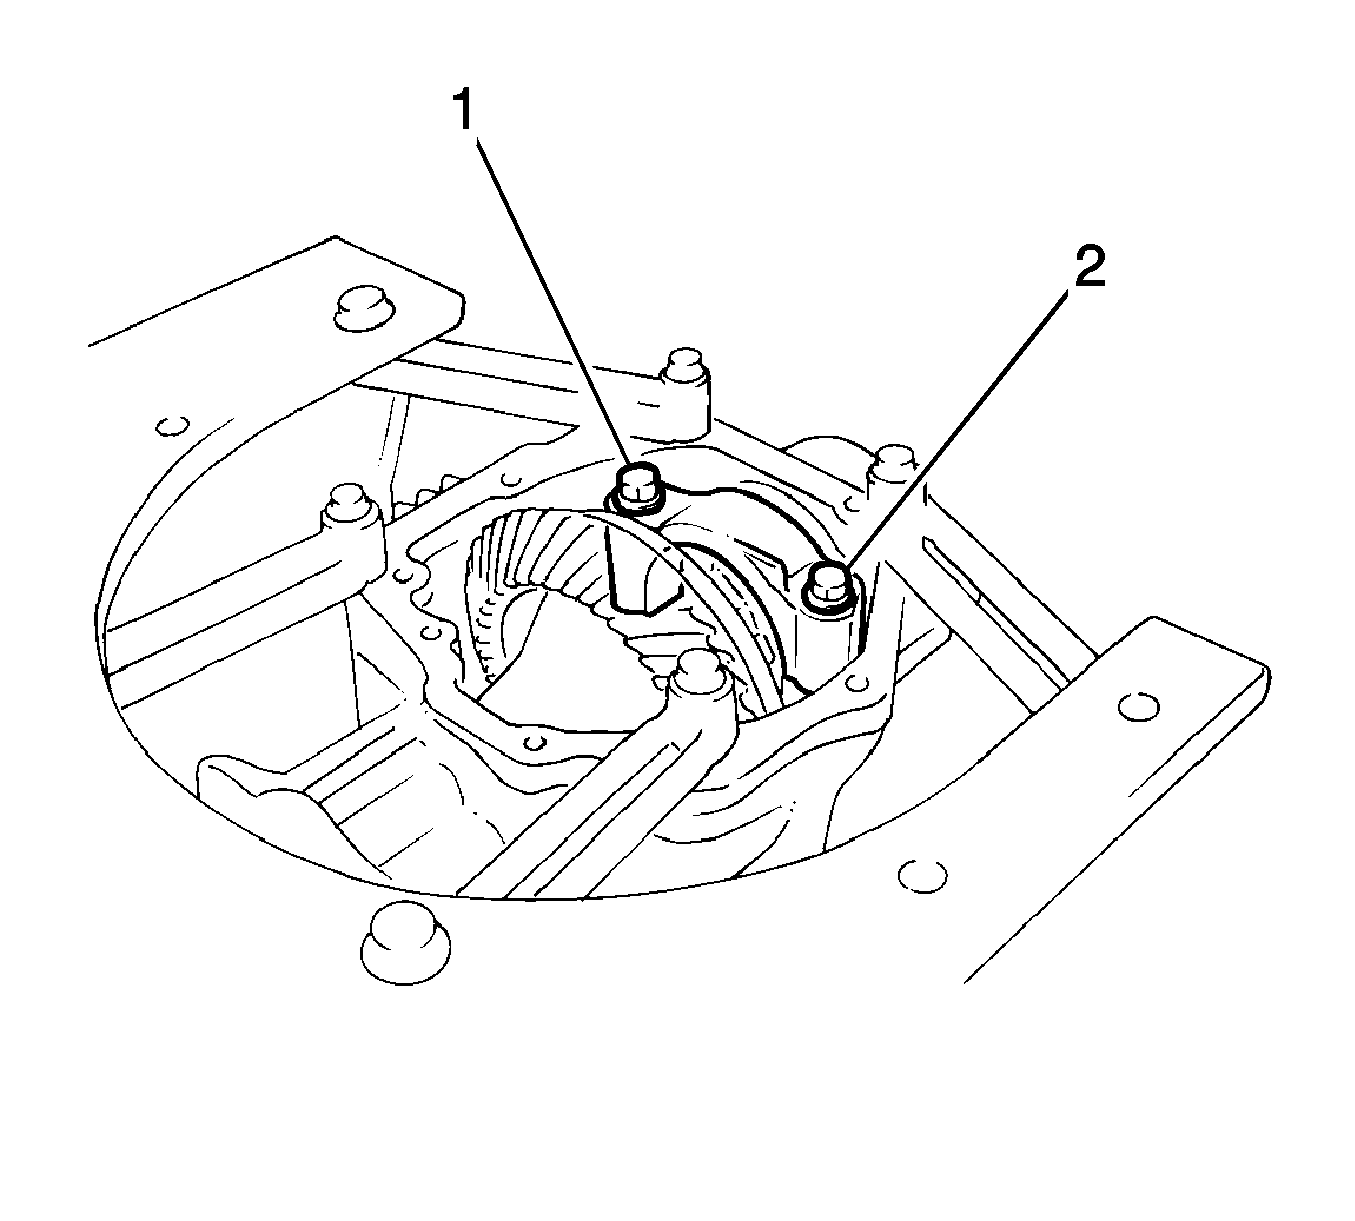
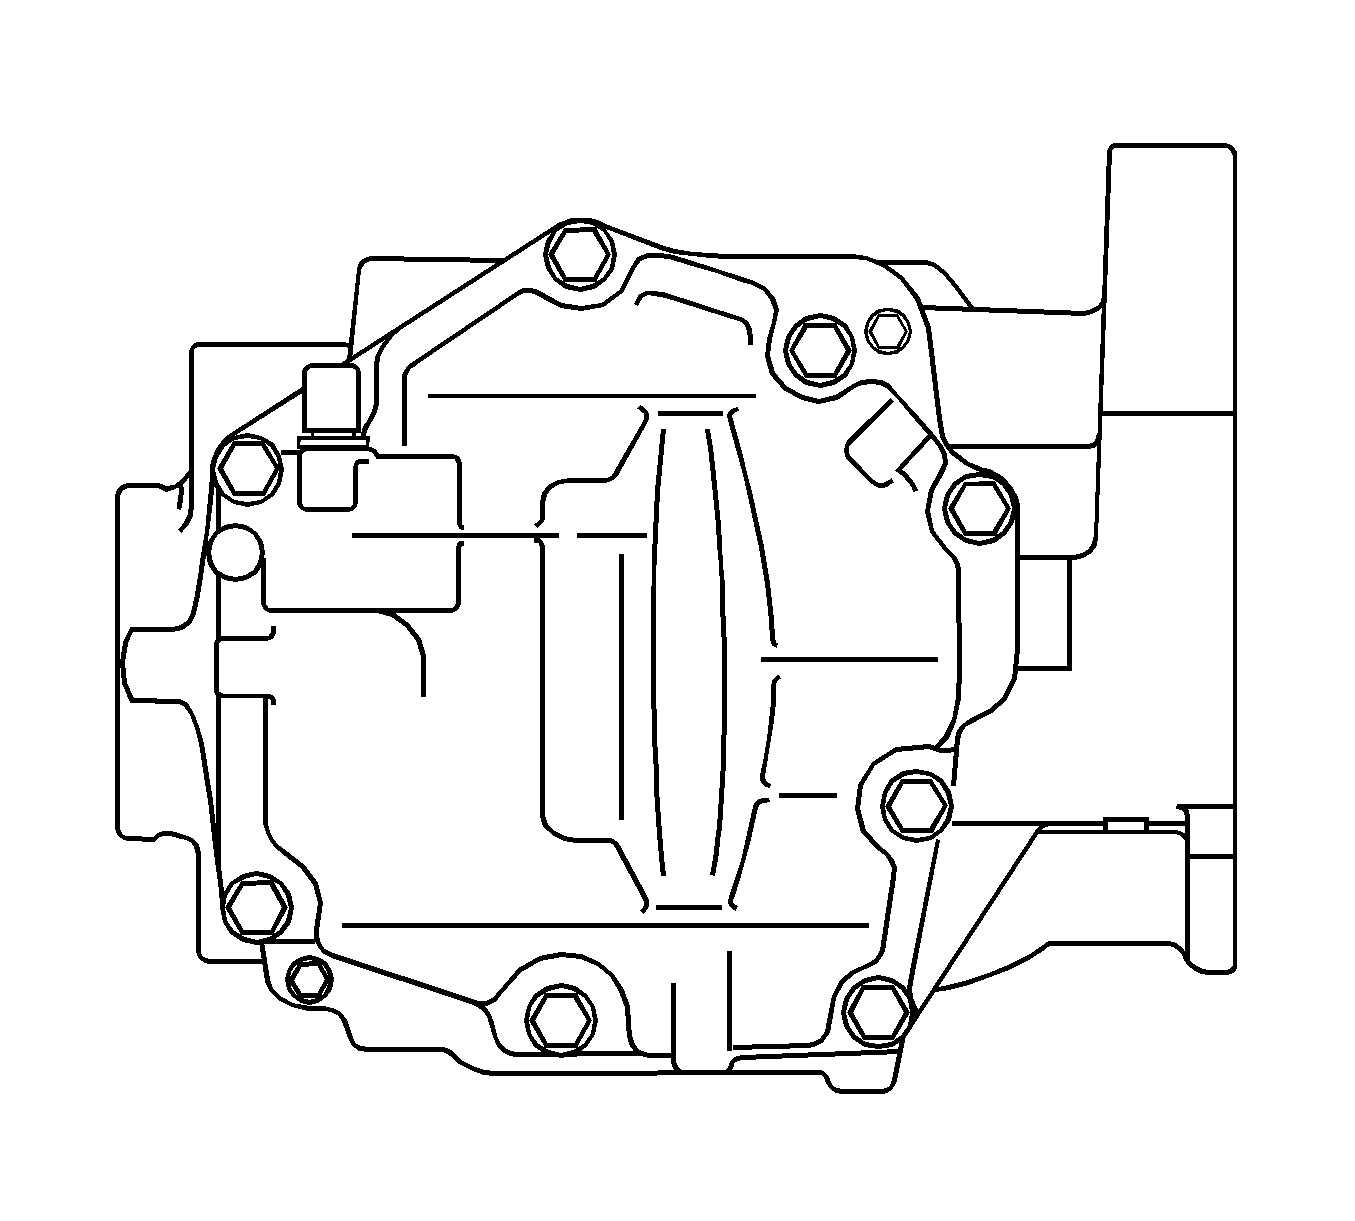
- Install the bearing cap with the bolts (1, 2) and tighten to 63 N·m (47 lb ft).
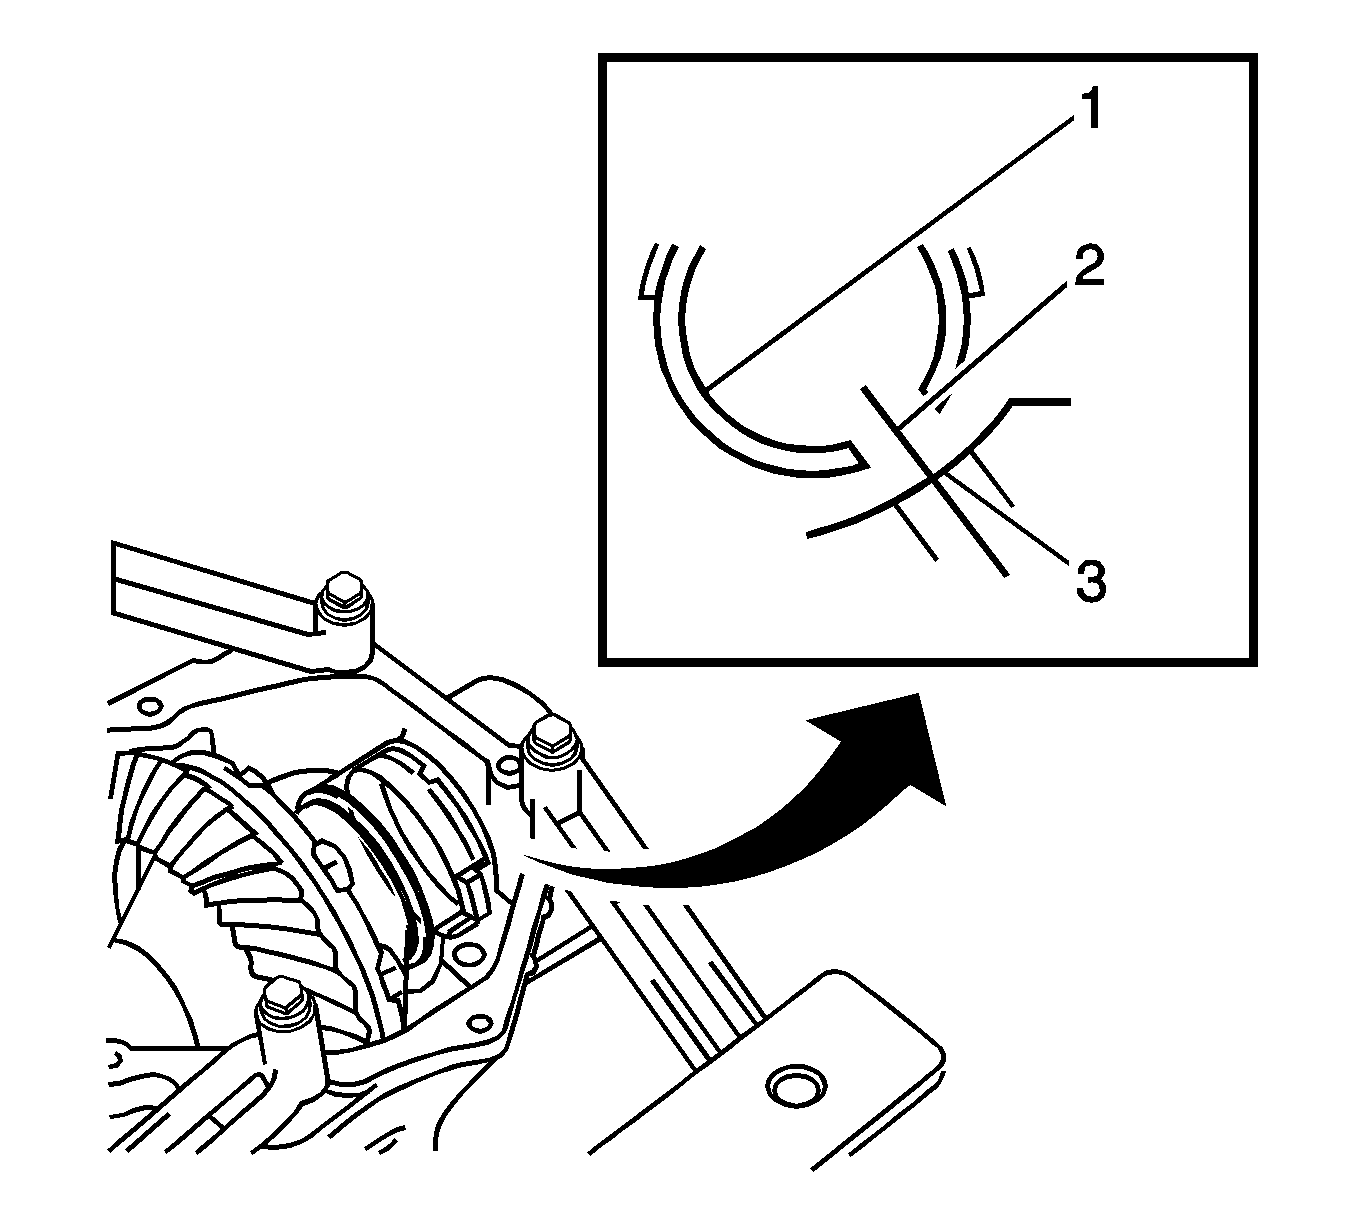
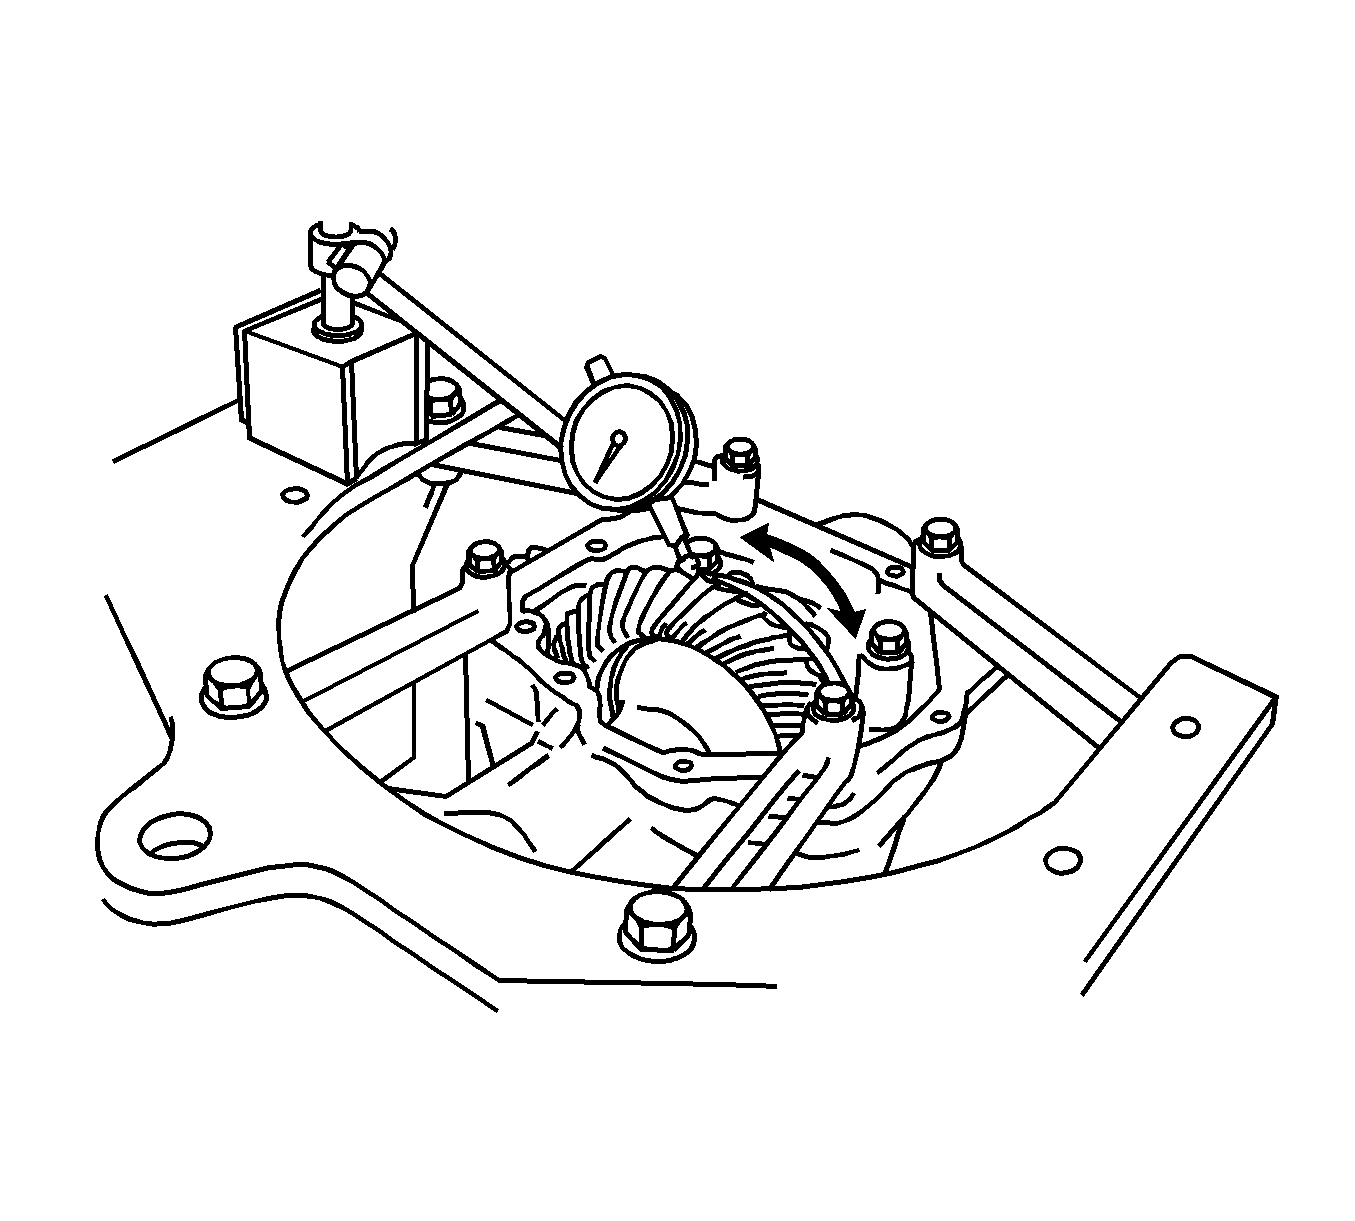
- Place a dial gauge on the teeth surface on the ring gear vertically. While fixing the driven pinion, move the ring gear and measure the backlash.
- If the backlash is not in the range of specified value, select the ring gear mounting case bearing left side washer (1) from the table and install it to meet the specified value. Refer to Transfer Case Specifications for Washer Thickness - 1.
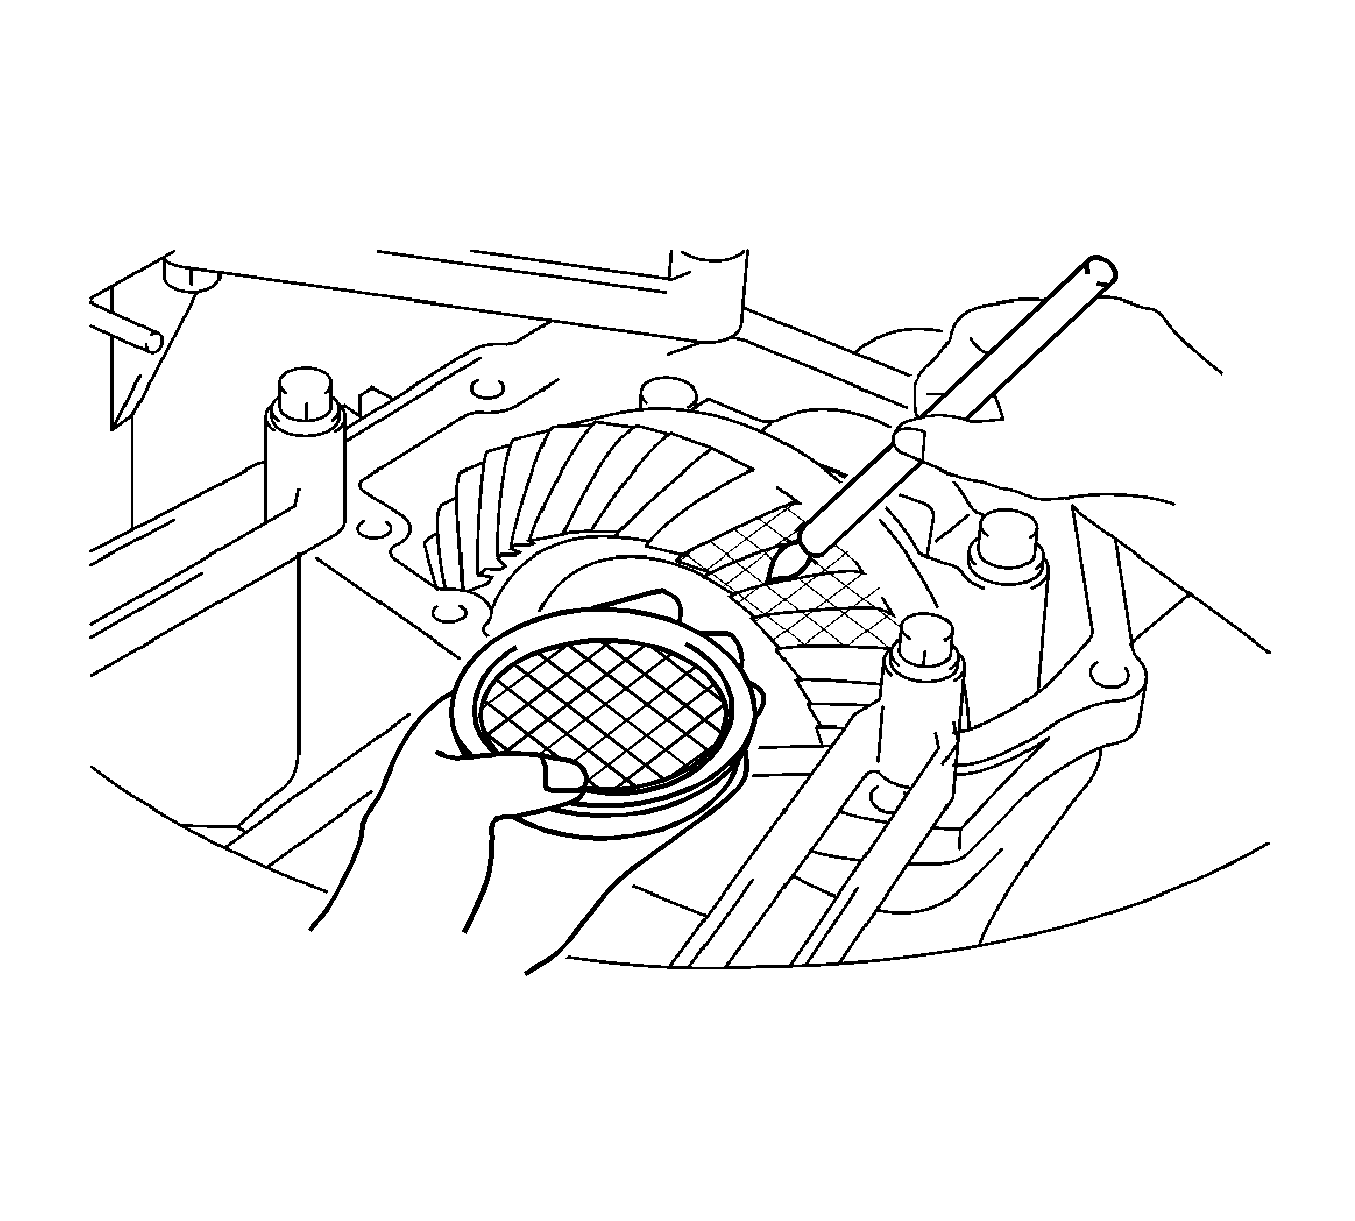
- Install tooth contact between ring gear and drive pinion.
- Coat 3 or 4 teeth at the 4 different positions on the ring gear with red lead.
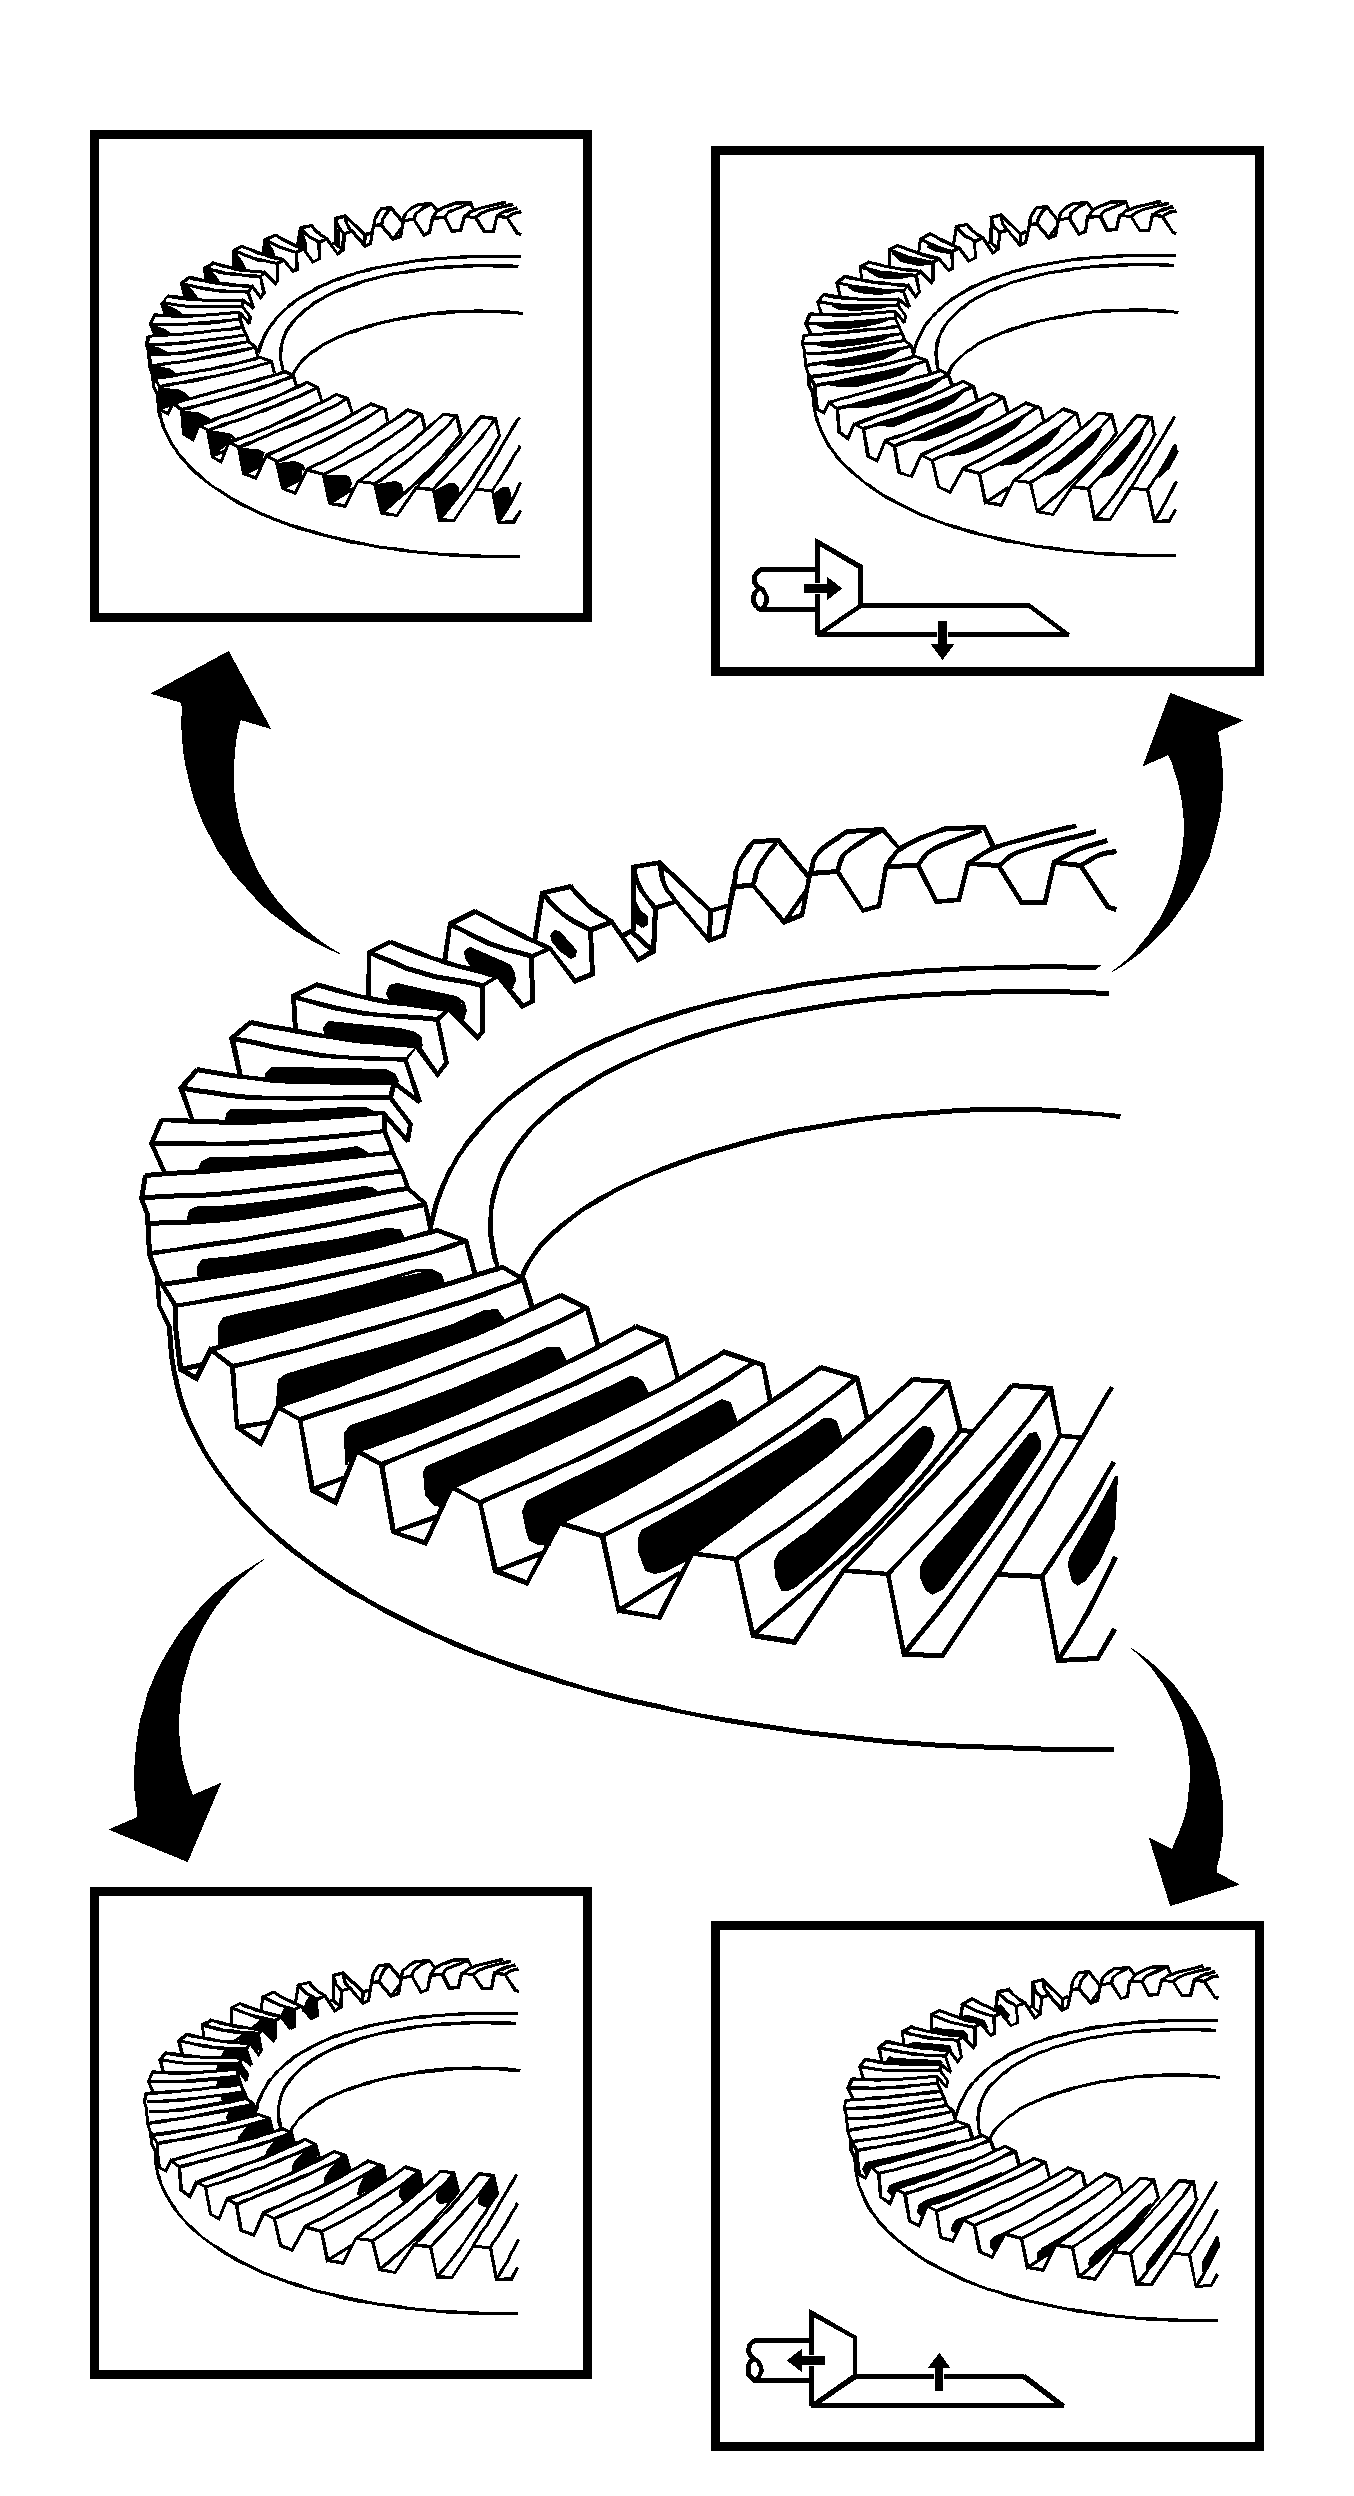
- Rotate the ring gear to inspect the teeth pattern.
- If the teeth are not contacting properly, select the proper washer (1) again. Refer to Transfer Case Specifications for Washer Thickness - 2.
- Using J-46003 wrench and a torque wrench, measure the total preload.
- If the preload is out of the specifications, replace the number 2 Transfer Ring Gear Mounting Case Washer (1). Refer to Transfer Case Specifications for Washer Thickness - 3.
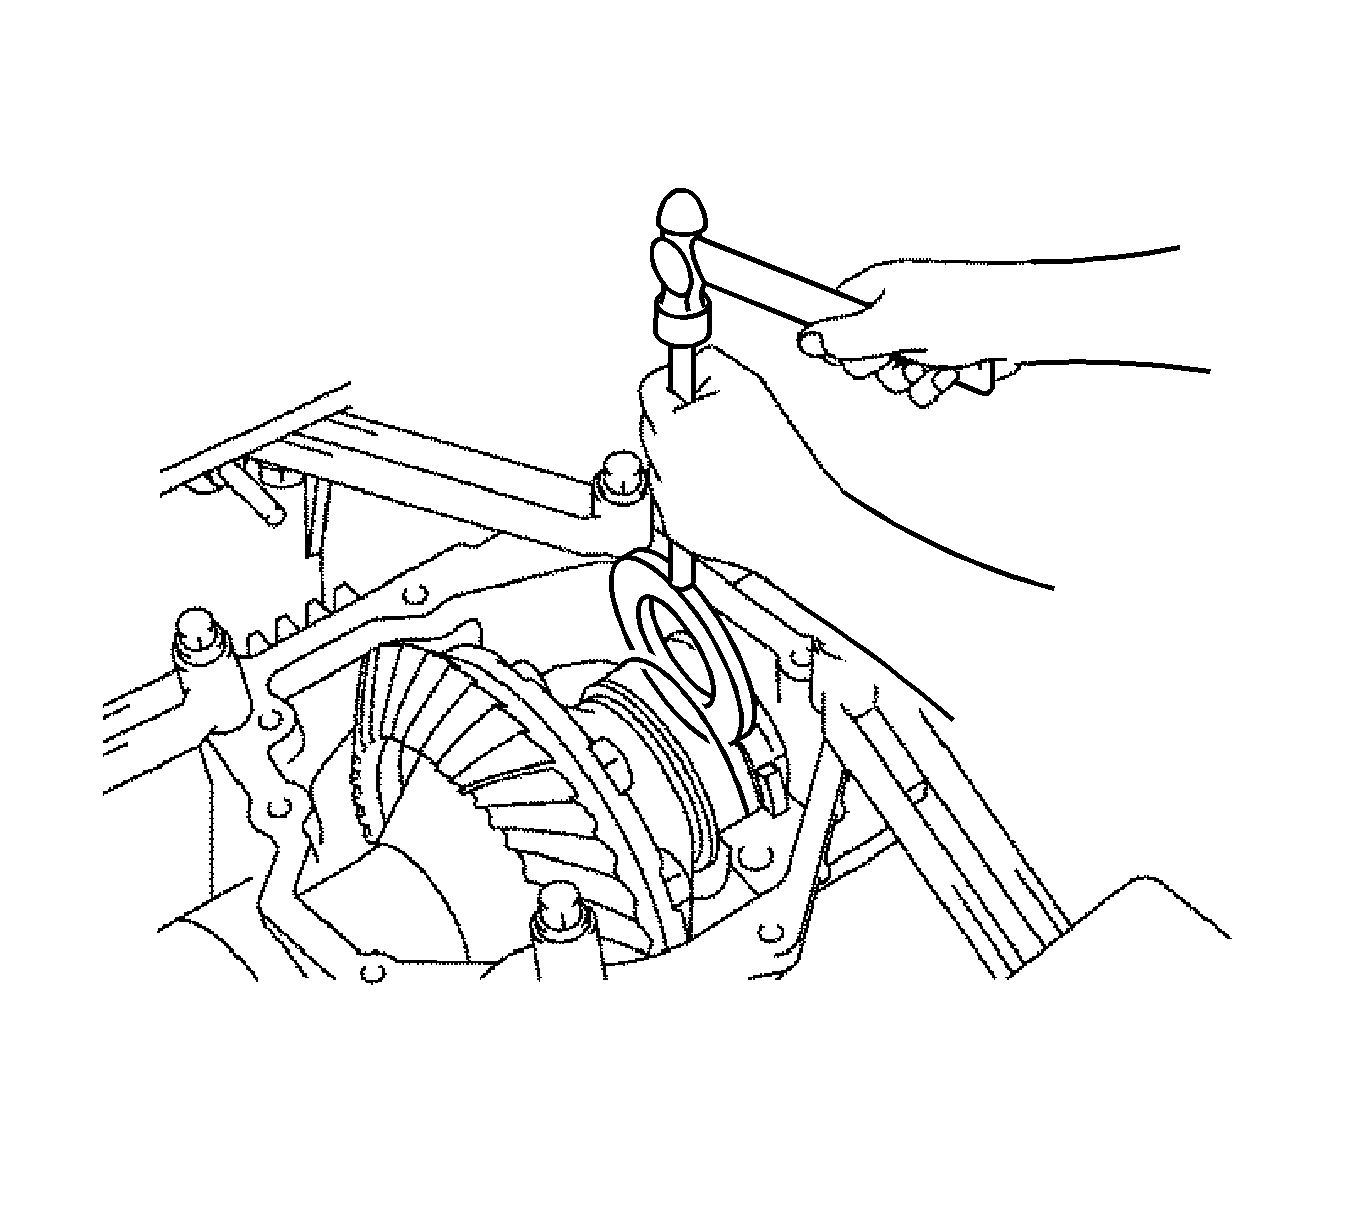
- Using a chisel and a hammer, stake the gear nut.
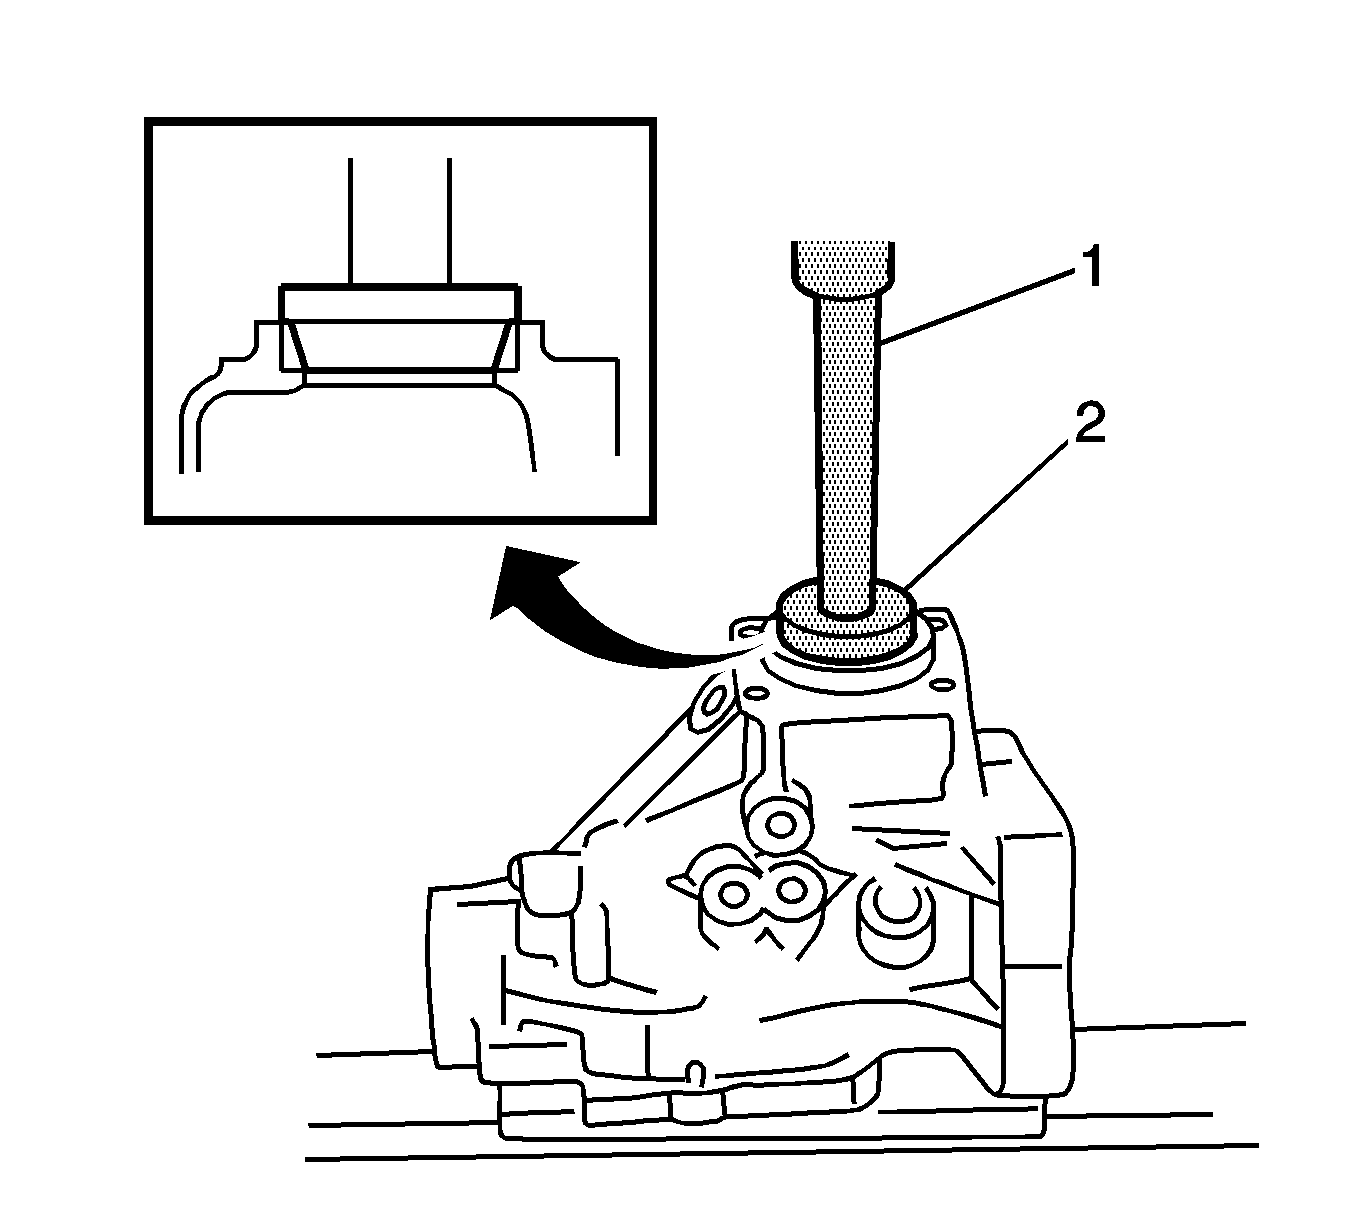
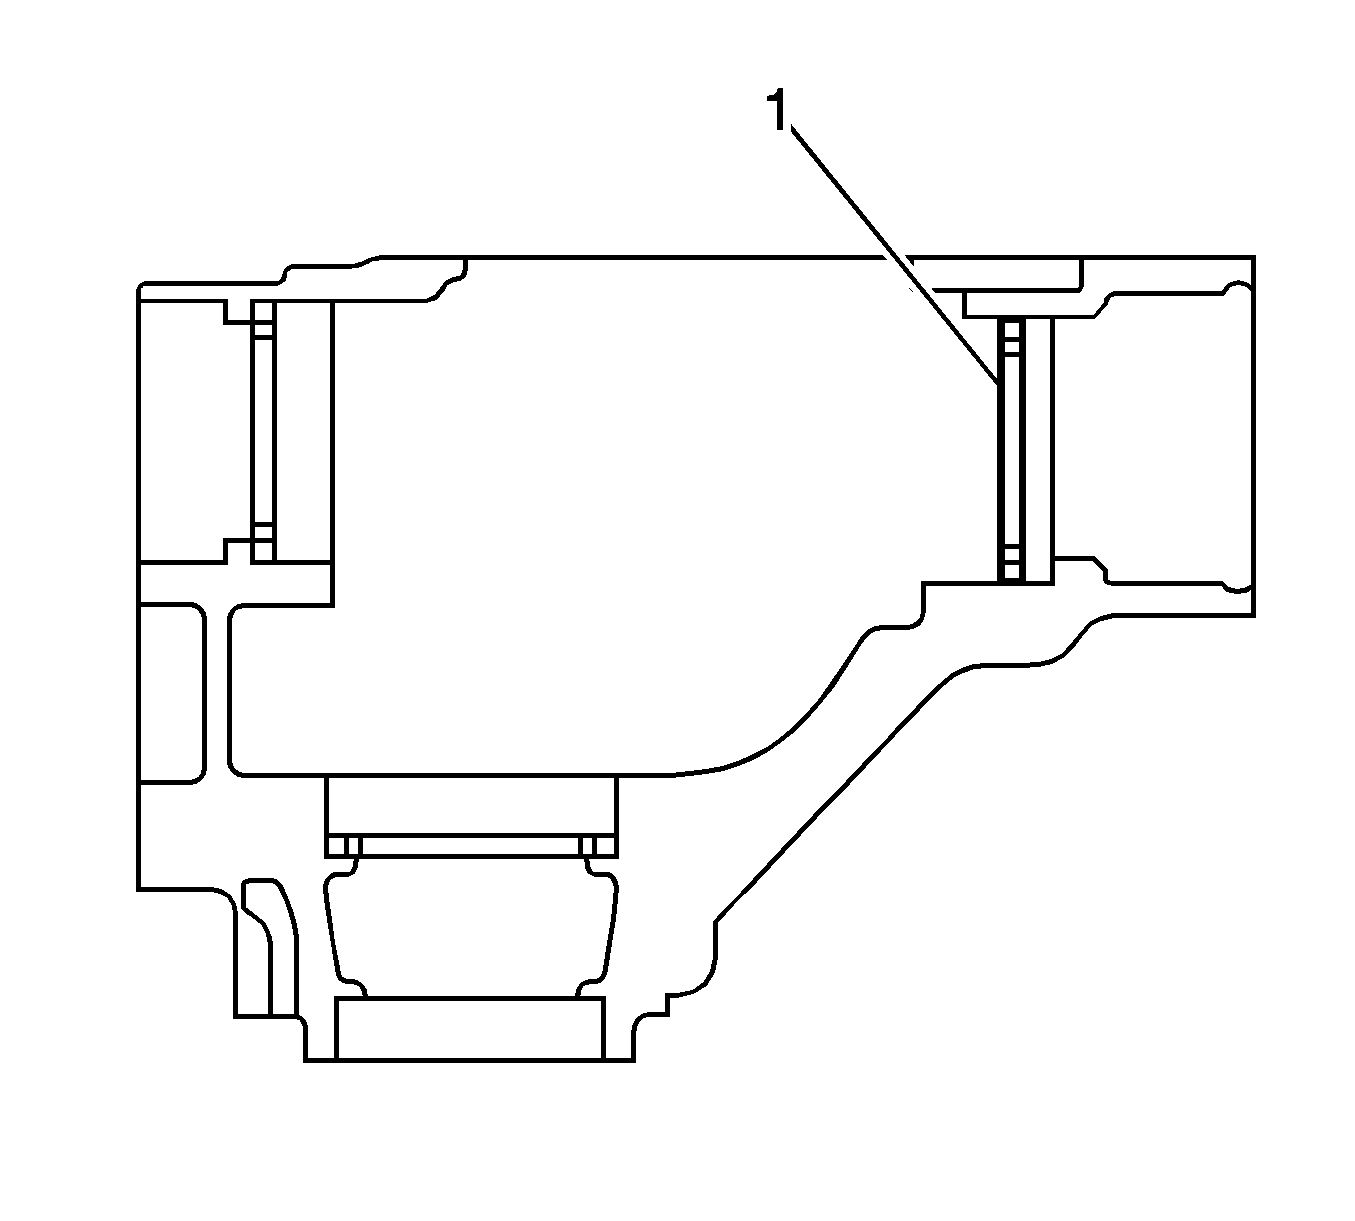
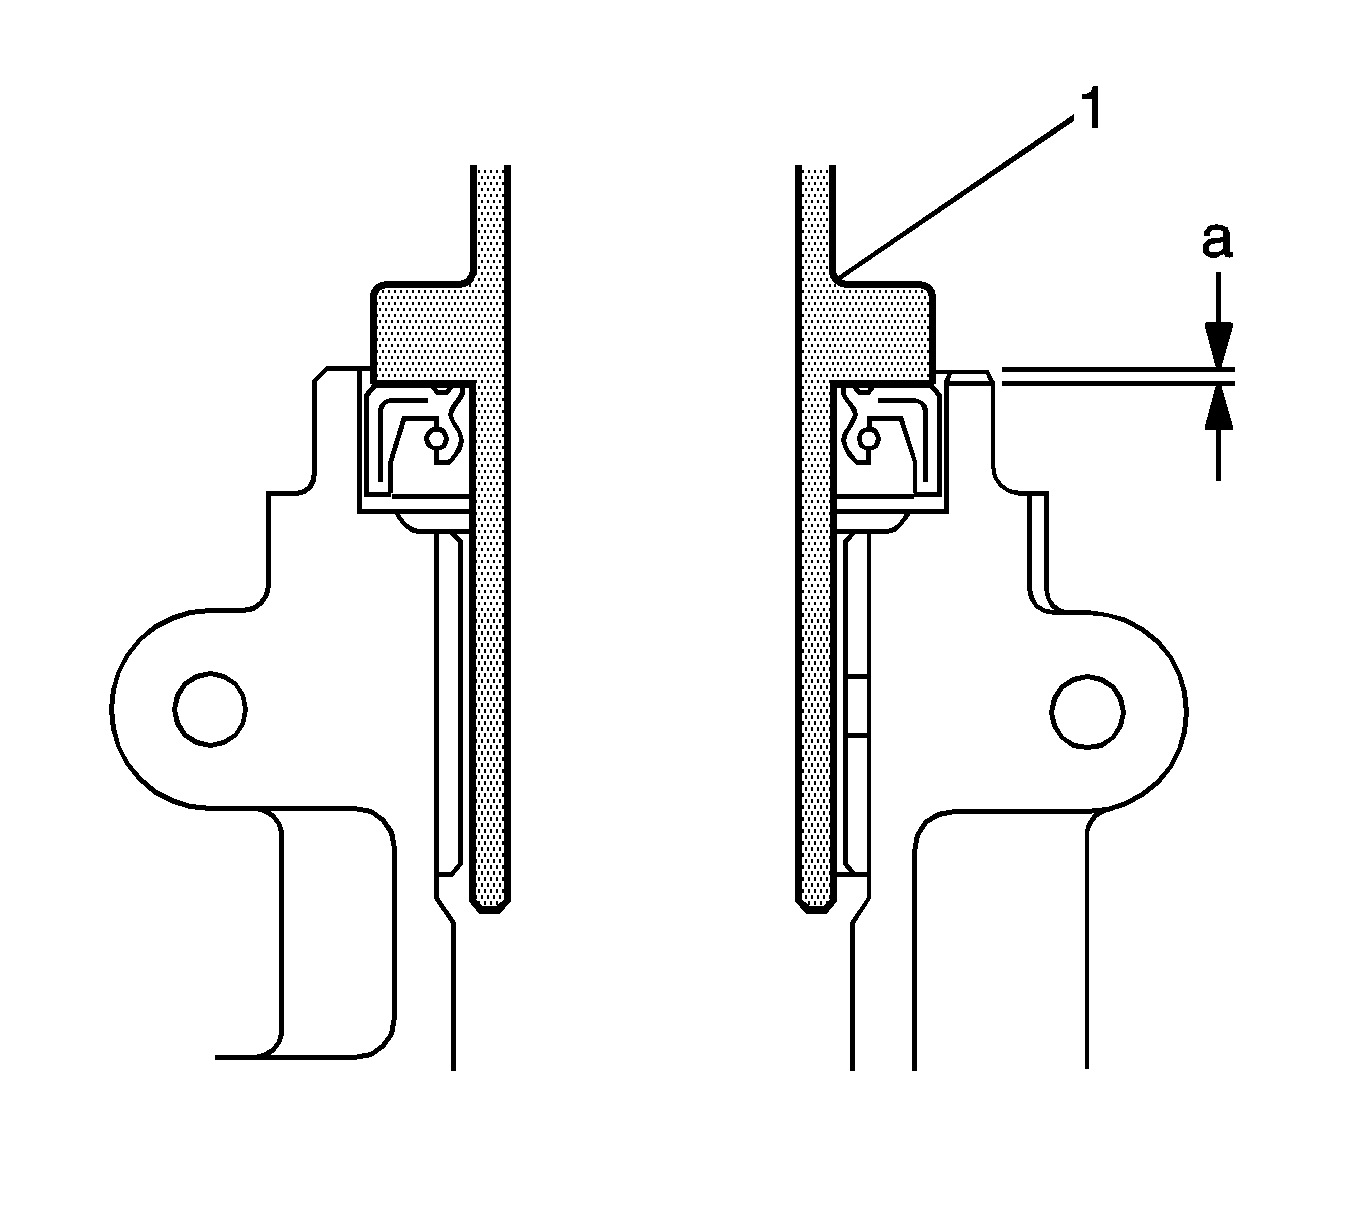
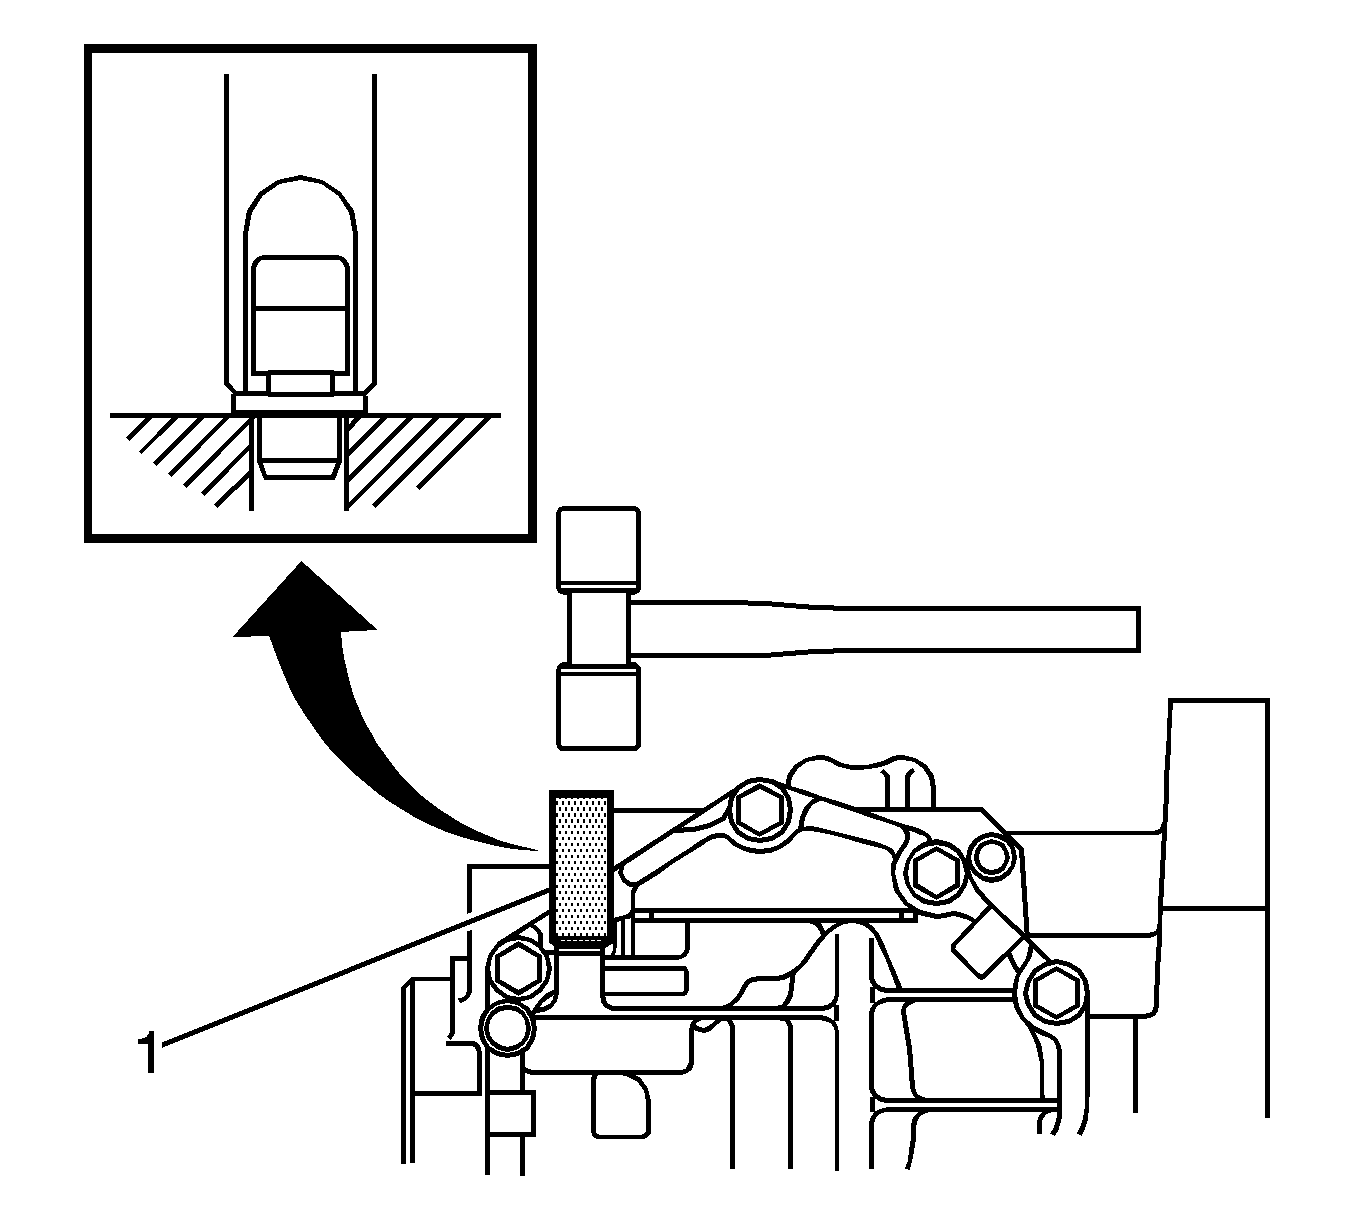
- Install a new transfer case front oil seal (for right side) into the case until it reaches the position shown using a suitable tool (1, 2).
- Apply a small amount of MP grease to the lip of the transfer case front oil seal.
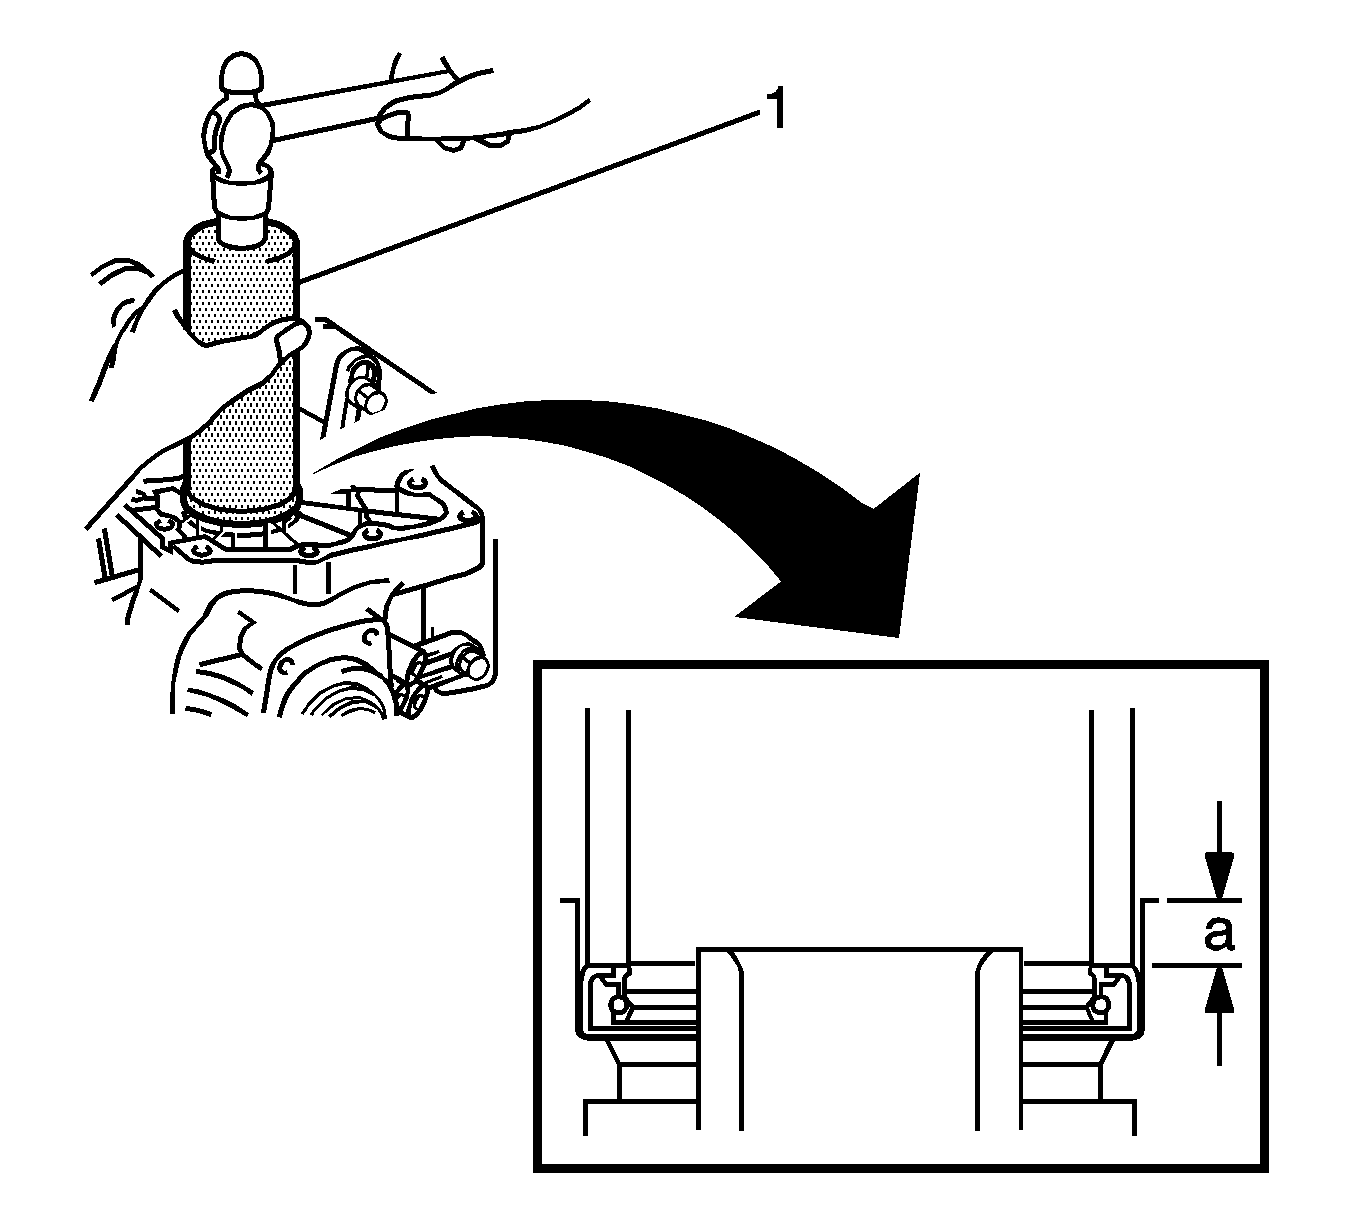
- Install a new transfer case front oil seal into the case using a suitable tool (1).
- Apply a small amount of MP grease to the lip of the transfer case front oil seal.
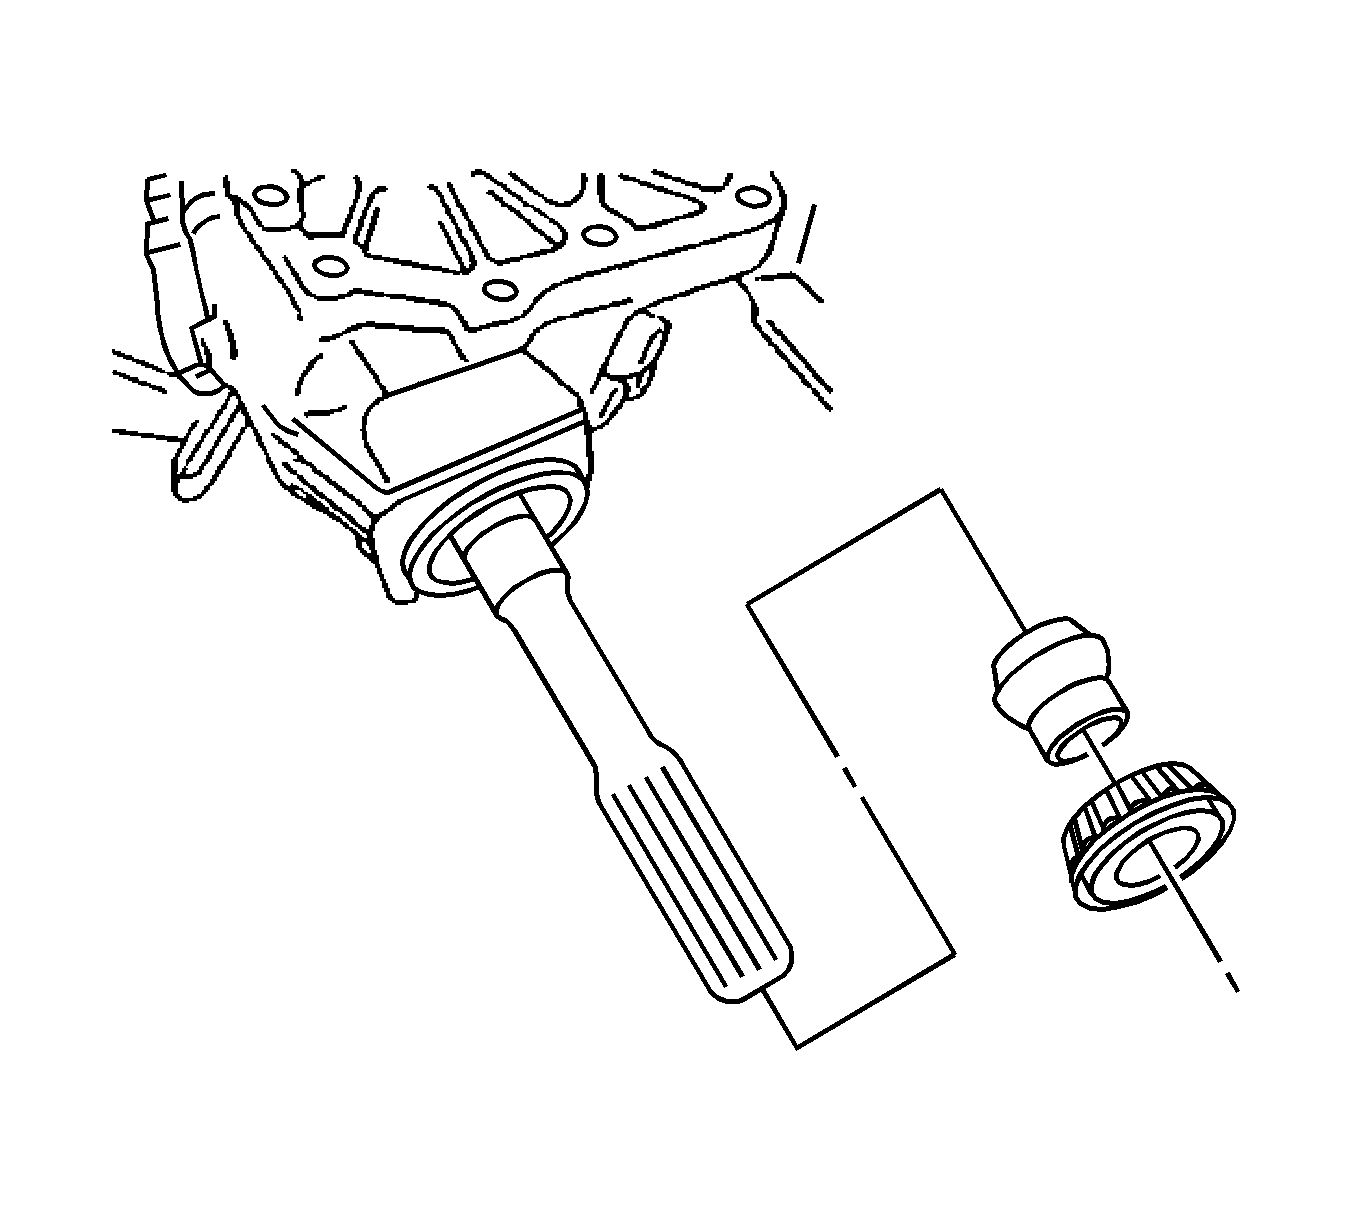
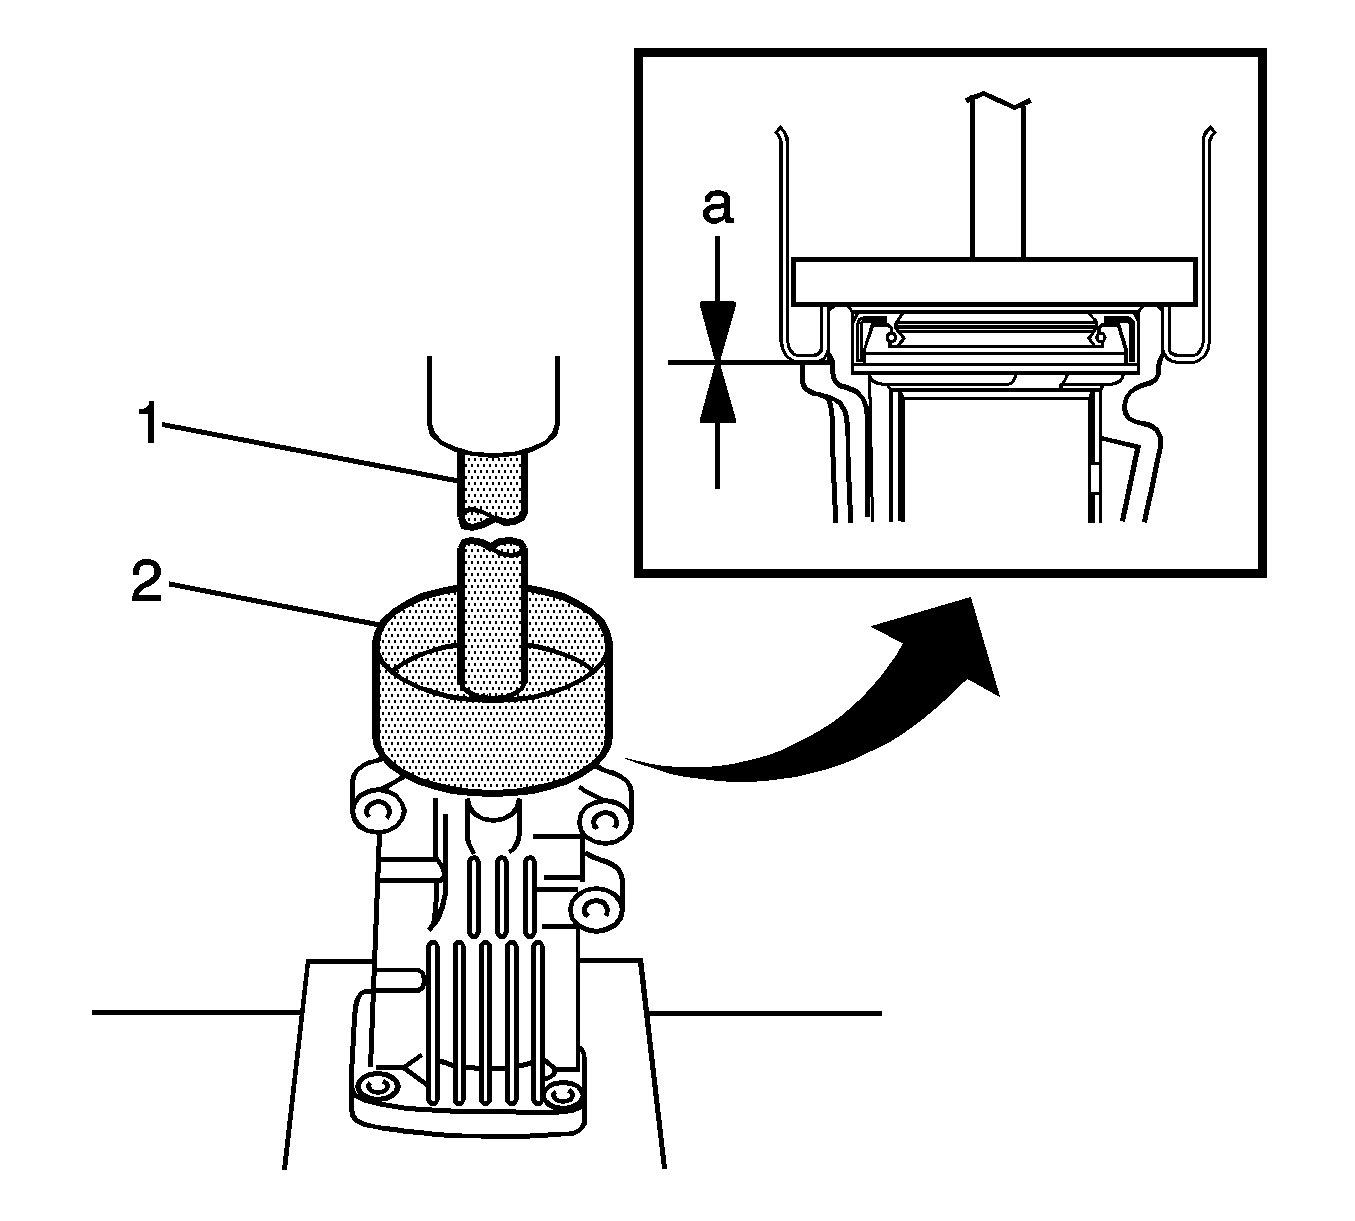
- Install a new transfer case rear oil seal into the extension housing using a suitable tool (1).
- Apply a small amount of MP grease to the lip of the transfer case rear oil seal.
- Using a press (1), press the extension housing dust deflector until it contacts the installation surface.
- Remove any sealant material and be careful not to drop oil on the contacting surfaces of the transfer extension housing sub-assembly and the transfer case.
- Degrease the surface with non-residue solvent.
- Apply Three Bond 1281 sealant or equivalent to the transfer extension housing subassembly (1).
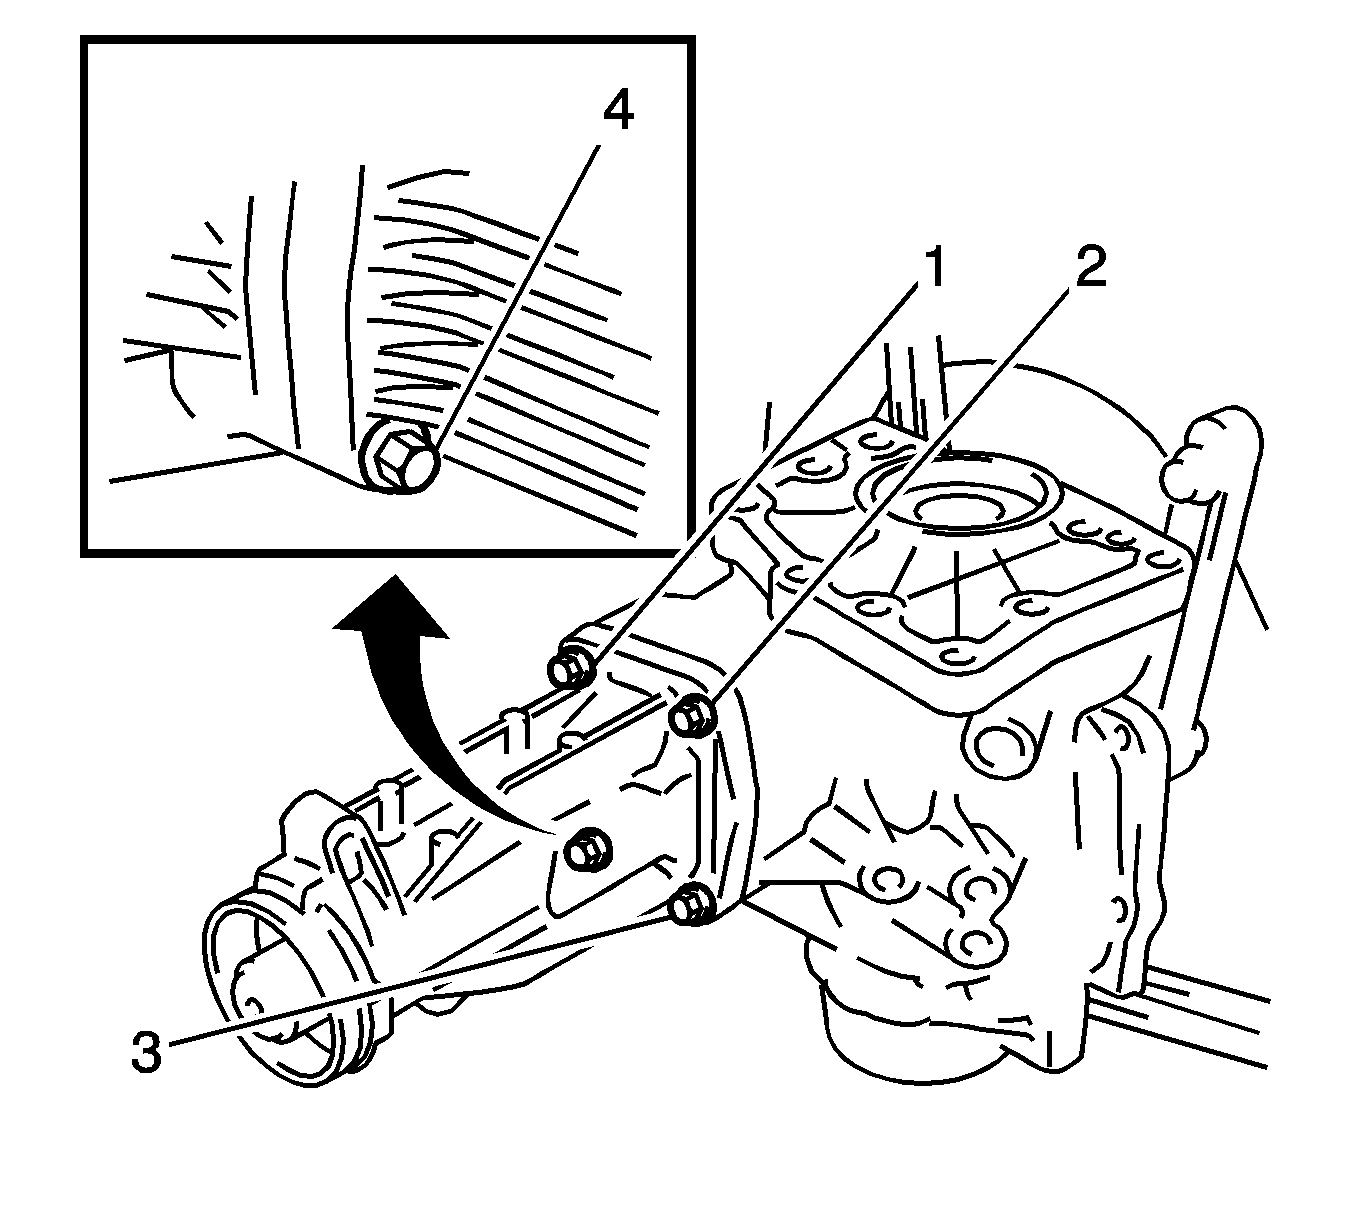
- Install the transfer extension housing sub-assembly with the bolts (1-4) to the transfer case and tighten to 26 N·m (19 lb ft).
- Separate transfer assembly.
- Remove the transfer case from the holding fixture.
- Install the transfer case straight pin.
- Using a plastic hammer, drive the transfer case straight pins into position.
- Install the transfer dynamic damper with the bolts (1-3) to the transfer extension housing sub-assembly and tighten to 26 N·m (19 lb ft).
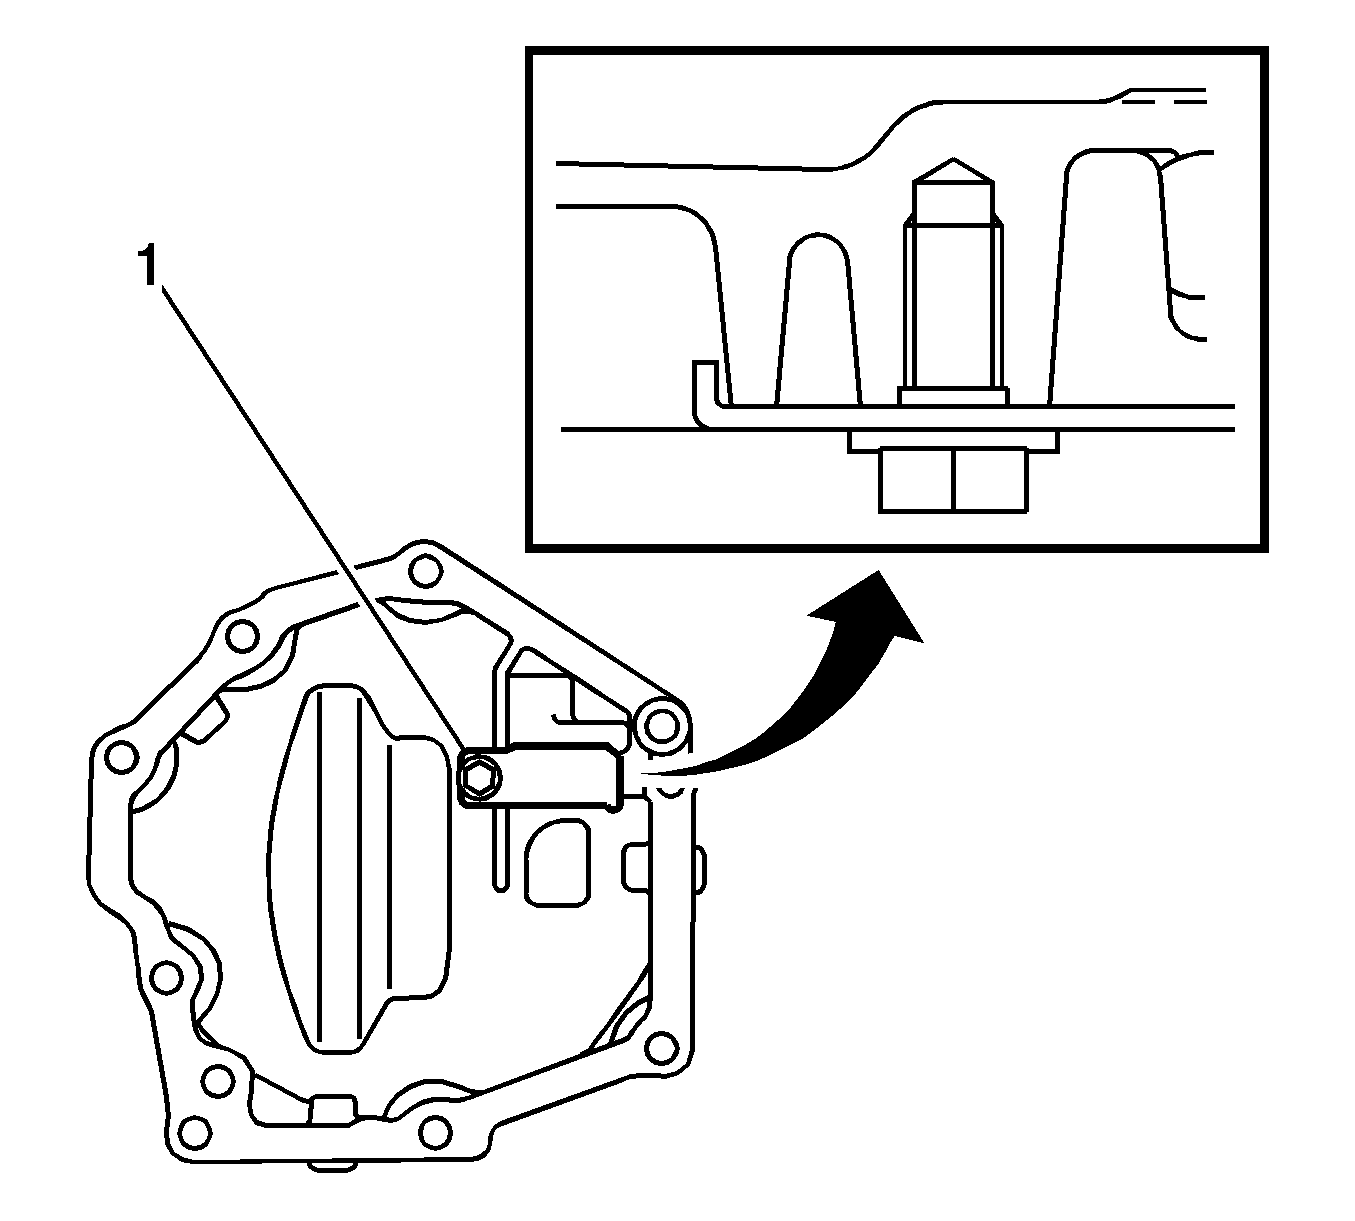
- Using a hammer, tap in a new breather plug (1).
- Install the breather oil deflector with the bolt (1) and tighten to 7 N·m (62 lb in).
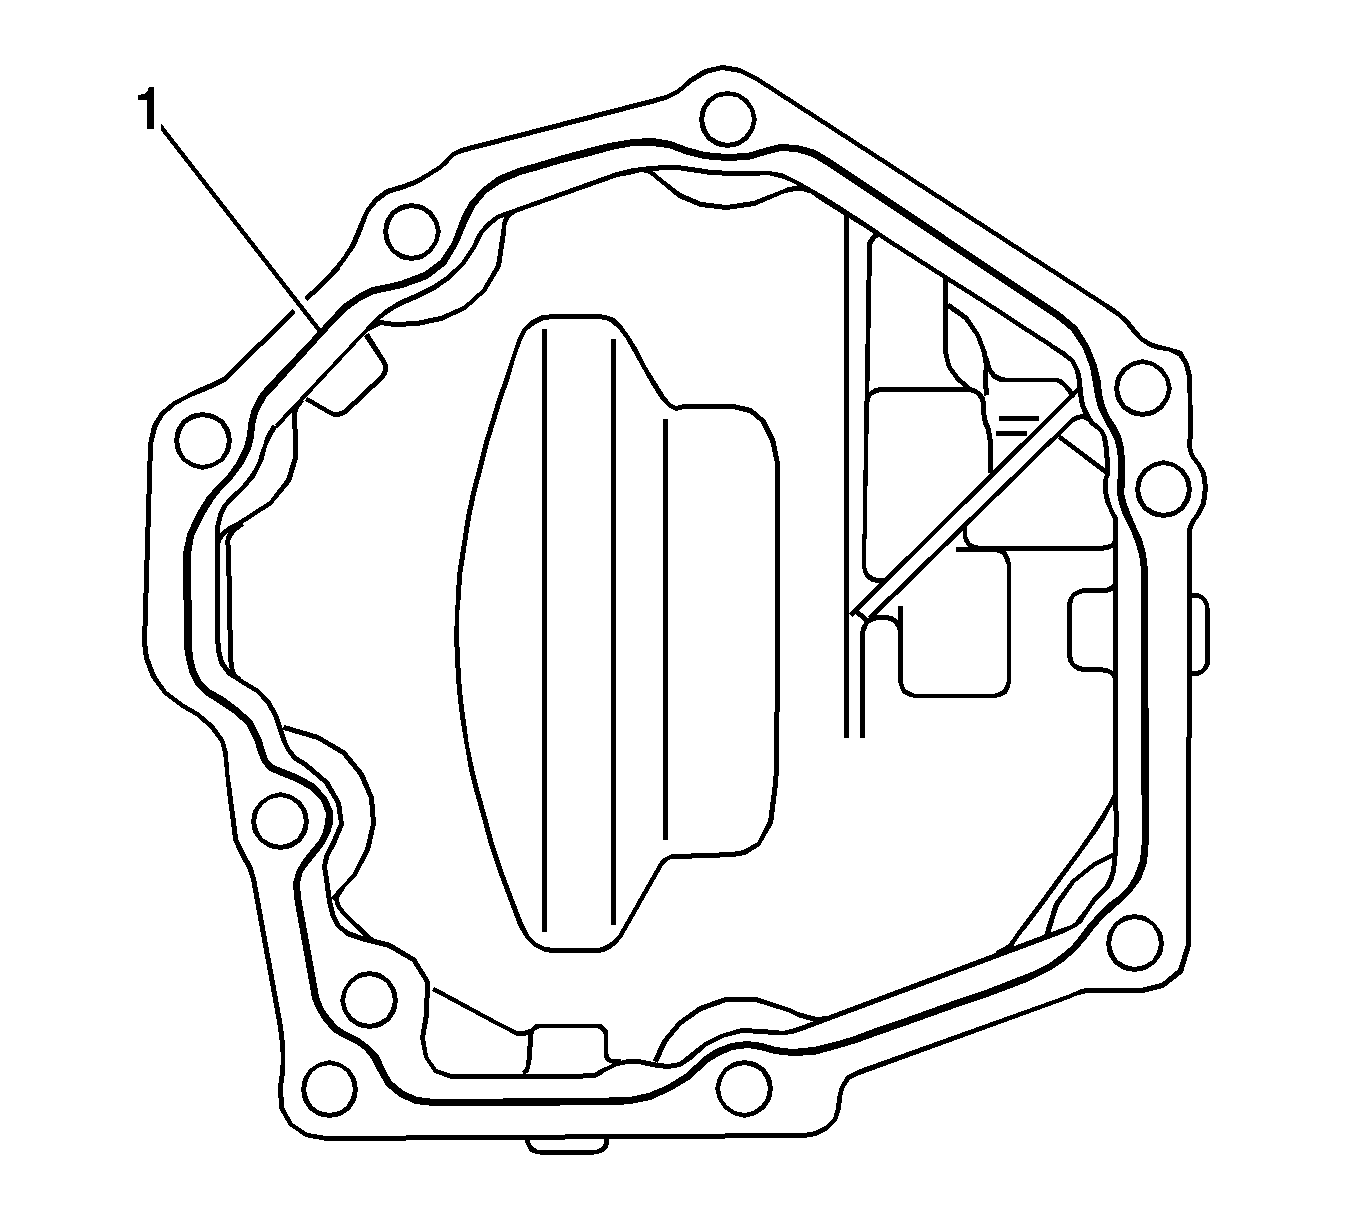
- Remove any old sealant material and be careful not to drop oil on the contacting surfaces of the number 1 transfer case cover and the transfer case.
- Degrease the surface with non-residue solvent.
- Apply Three Bond 1281 sealant or equivalent to the number 1 transfer case cover (1).
- Install the number 1 transfer case cover with the bolts and tighten to 20 N·m (14 lb ft).
- Install a new gasket to the transfer drain plug (1).
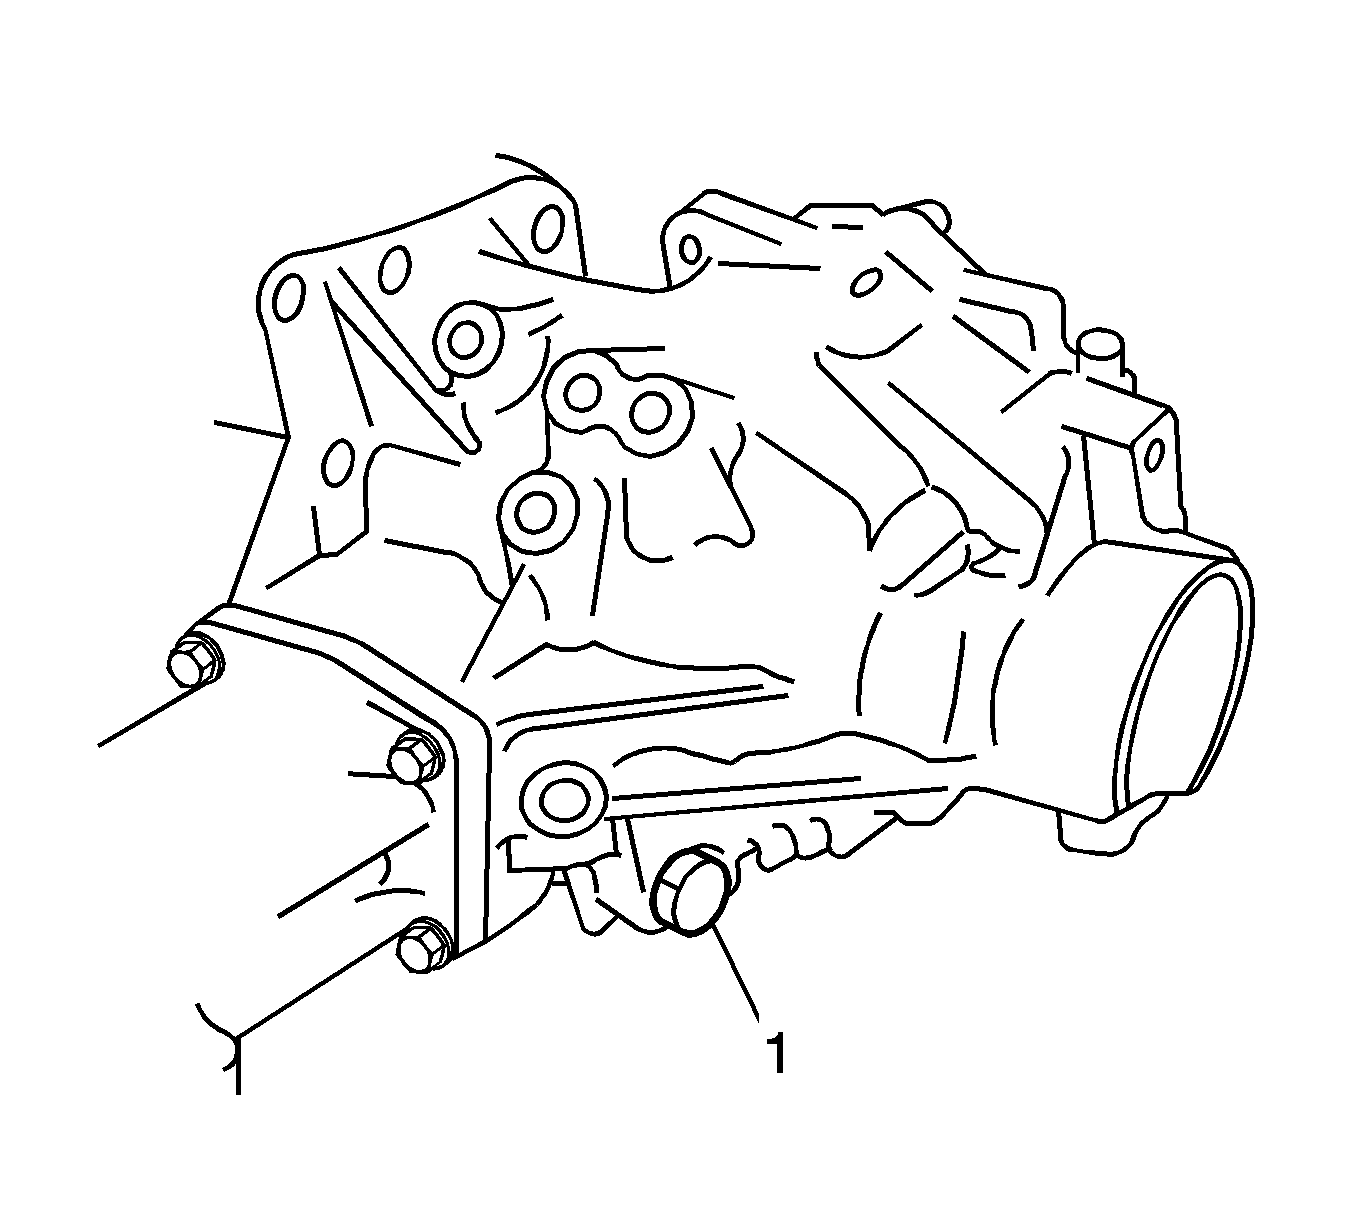
- Install the transfer drain plug to the transfer assembly and tighten to 49 N·m (36 lb ft).
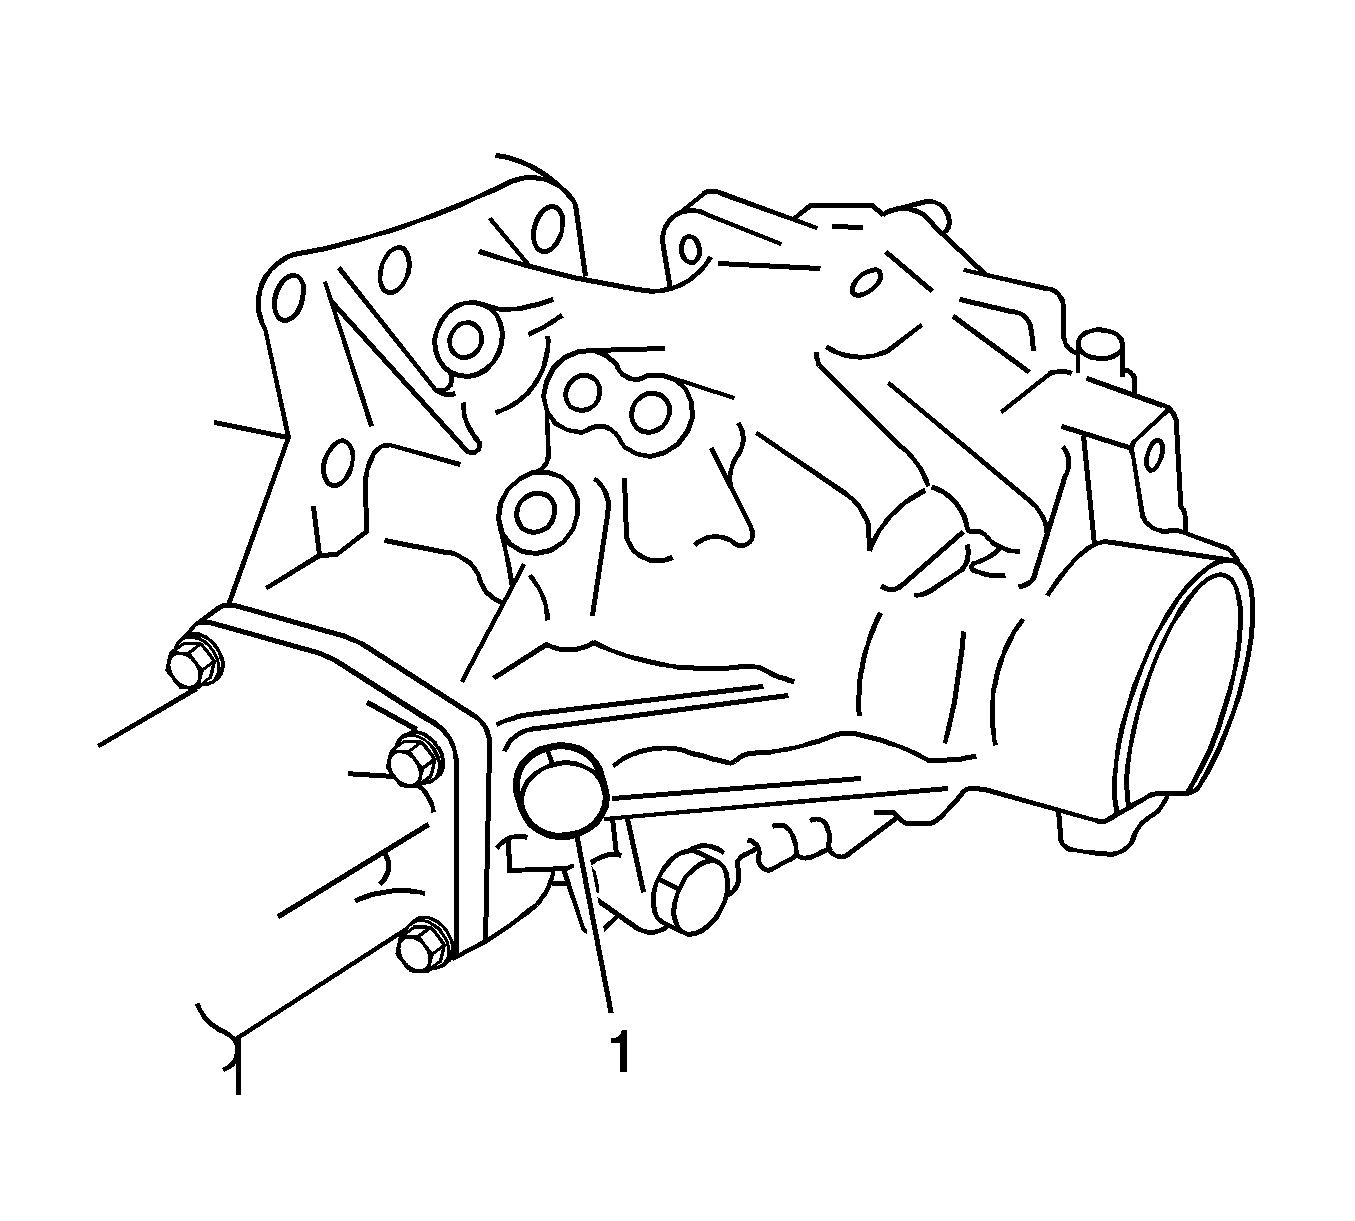
- Install a new gasket to the number 1 transfer case plug (1).
- Install the number 1 transfer case plug to the transfer assembly and tighten to 49 N·m (36 lb ft).
- Install a new gasket to the number 2 transfer case plug.
- Install the number 2 transfer case plug (1) to the transfer assembly and tighten to 49 N·m (36 lb ft).
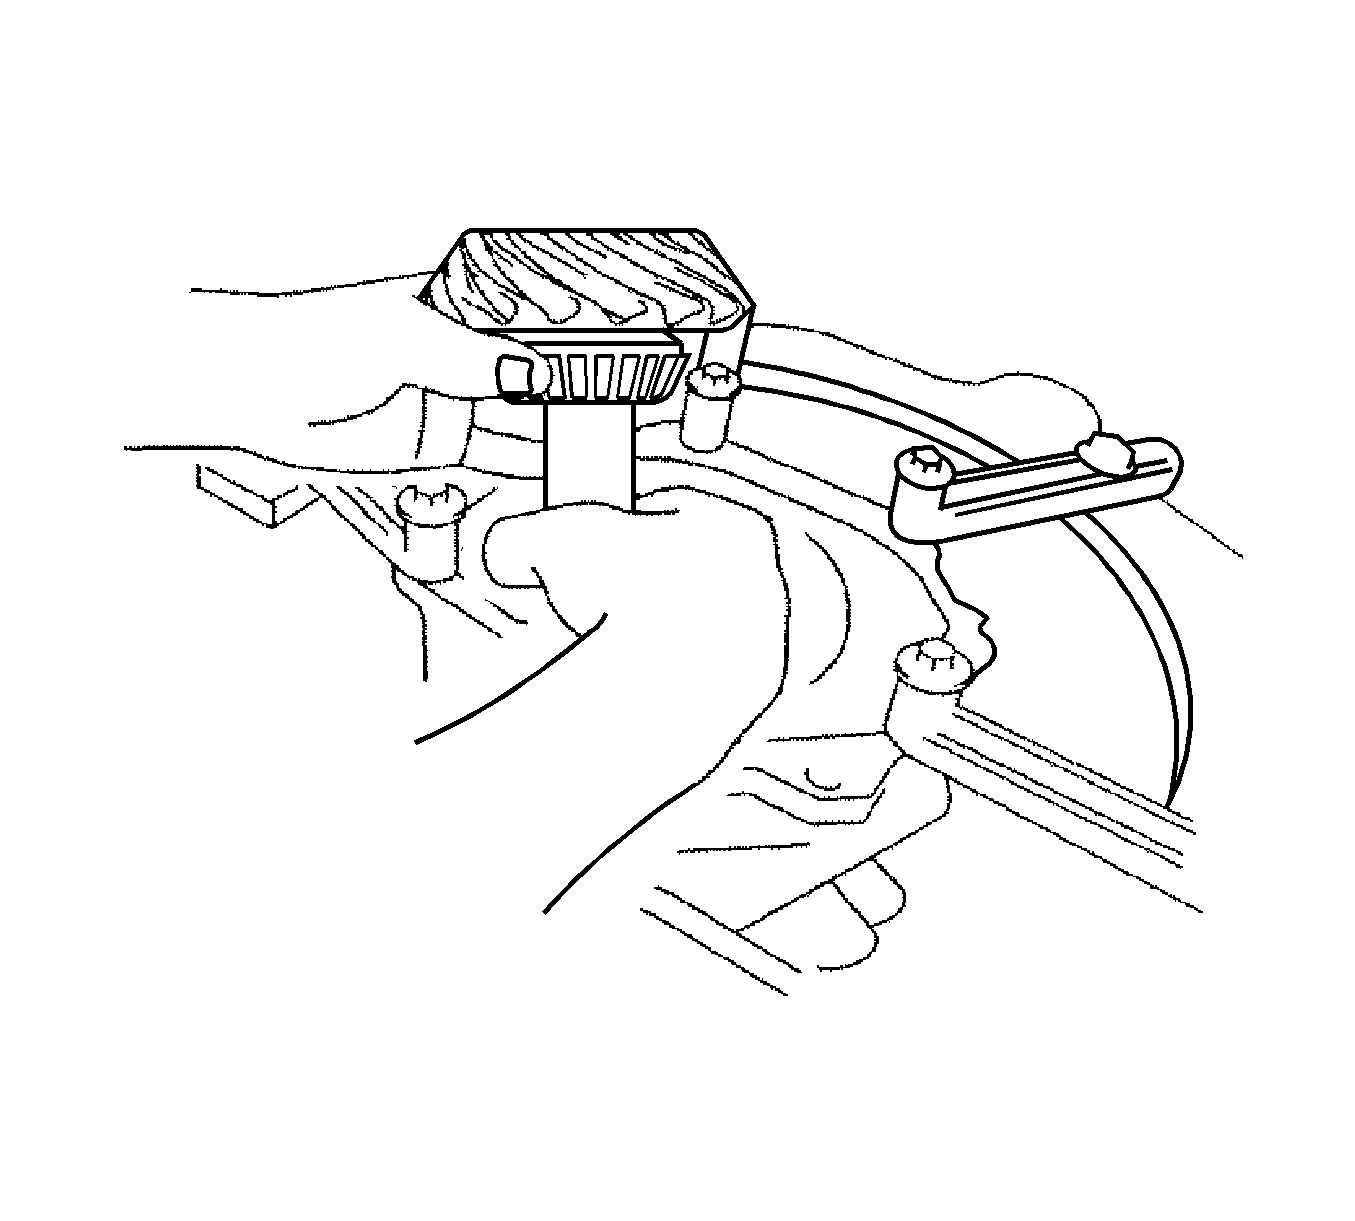
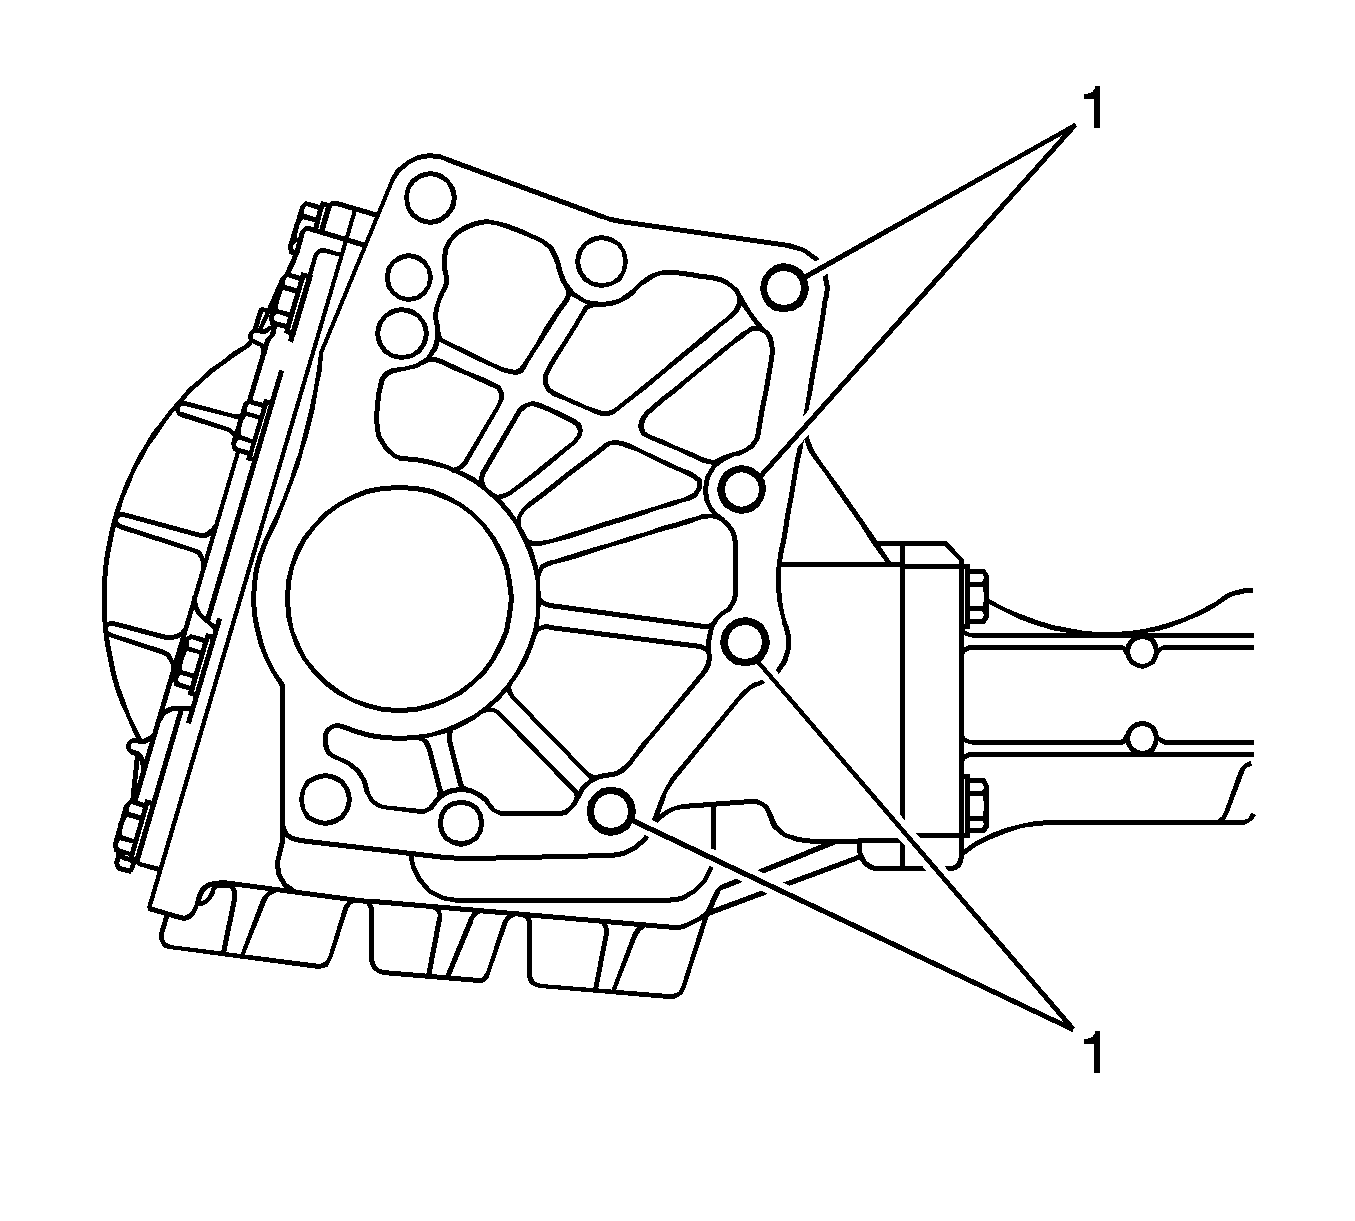
- Install the transfer and transaxle setting stud bolts (1) and tighten to 39 N·m (29 lb ft).
Note: Keep the transfer case horizontally using wooden blocks, etc.

Note: Do not stake the nut until the final adjustment of the preload, tooth contact and backlash is completed.
Preload (at starting)
| • | Without J-46003 wrench and J-46001 tool : 295 N·m (217 lb ft) |
| • | With J-46003 wrench and J-46001 tool : 279 N·m (205 lb ft) |
Note:
• Use a torque wrench with a fulcrum length of 130 mm (5.12 in). • If the preload is more than the specification, replace the spacer with a new one. • If the preload is not sufficient, adjust the driven pinion by tightening the lock nut by 5-10 degrees and measuring the preload until the preload is within the specification. • Even if the tightening torque of gear nut exceeds the specified torque, if the preload is not enough, loosen the gear nut once and apply rust preventive oil or gear oil to the gear nut and bearing surface of driven pinion. Then perform the procedure
again. If the tightening torque is smaller than the specification, replace the pinon bearing spacer with a new one and retest. • Do not loosen the pinion nut to reduce the preload.
Preload (at starting)
| • | New bearing without J-46003 wrench : 0.69-1.27 N·m (6.1-11.2 lb in) |
| • | New bearing with J-46003 wrench : 0.53-0.97 N·m (4.7-8.6 lb in) |
| • | Reused bearing without J-46003 wrench : 0.39-0.69 N·m (3.5-6.1 lb in) |
| • | Reused bearing with J-46003 wrench : 0.28-0.50 N·m (2.5-4.4 lb in) |
Caution: Refer to Fastener Caution in the Preface section.
Note:
• Tighten the bolts in diagonal order in splitting several times. • After the ring gear has well cooled down, tighten the bolts.
Note: Use a new washer with the same thickness as the removed one when installing the bearing.
Note: Check at least 3 positions on the circumference of the ring gear.
Backlash
0.10-0.18 mm (0.0039-0.007 in)
Note: When the thickness is changed, readjust the backlash.
Specification
Driven Pinion (1) Preload: 0.28-0.43 N·m (2.5-3.8 lb in)
Note:
• Use a torque wrench with a fulcrum length of 130 mm (5.12 in). • Turn the driven pinion counterclockwise and clockwise several times.
Specification
Drive in depth (a): 33.7-34.3 mm (1.328-1.350 in)
Note: Do not install the oil seal at an angle.
Specification
Drive in depth (a): 9.7-10.3 mm (0.382-0.406 in)
Specification
Drive in depth (a): 1.1-1.9 mm (0.0433-0.0748 in)
Note: Assemble transfer extension housing subassembly within 10 minutes after the sealant application.

Note: Before pouring transfer oil, leave it at least an hour. Assemble the number 1 transfer case cover within 10 minutes after the sealant application.

Stud Bolt Length
| • | a: 30 mm (1.1811 in) |
| • | b: 12 mm (0.4724 in) |
| • | c: 22 mm (0.8661 in) |
