For 1990-2009 cars only
Removal Procedure
- Remove the luggage carrier, if equipped. Refer to Luggage Carrier Replacement.
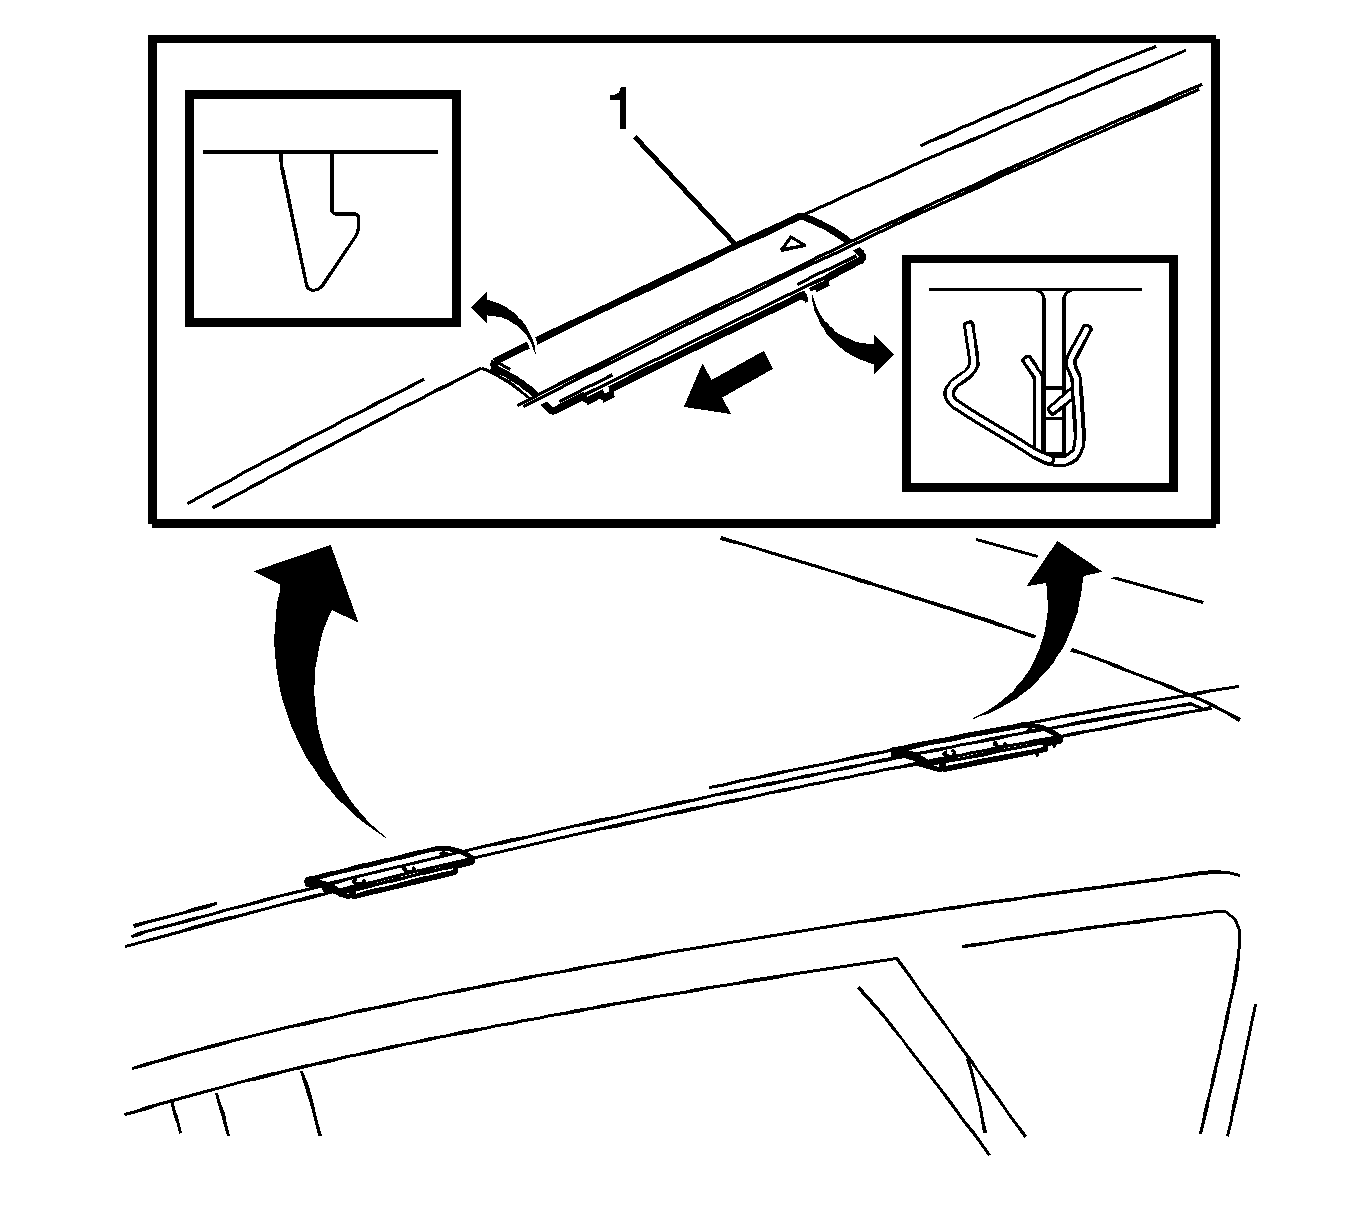
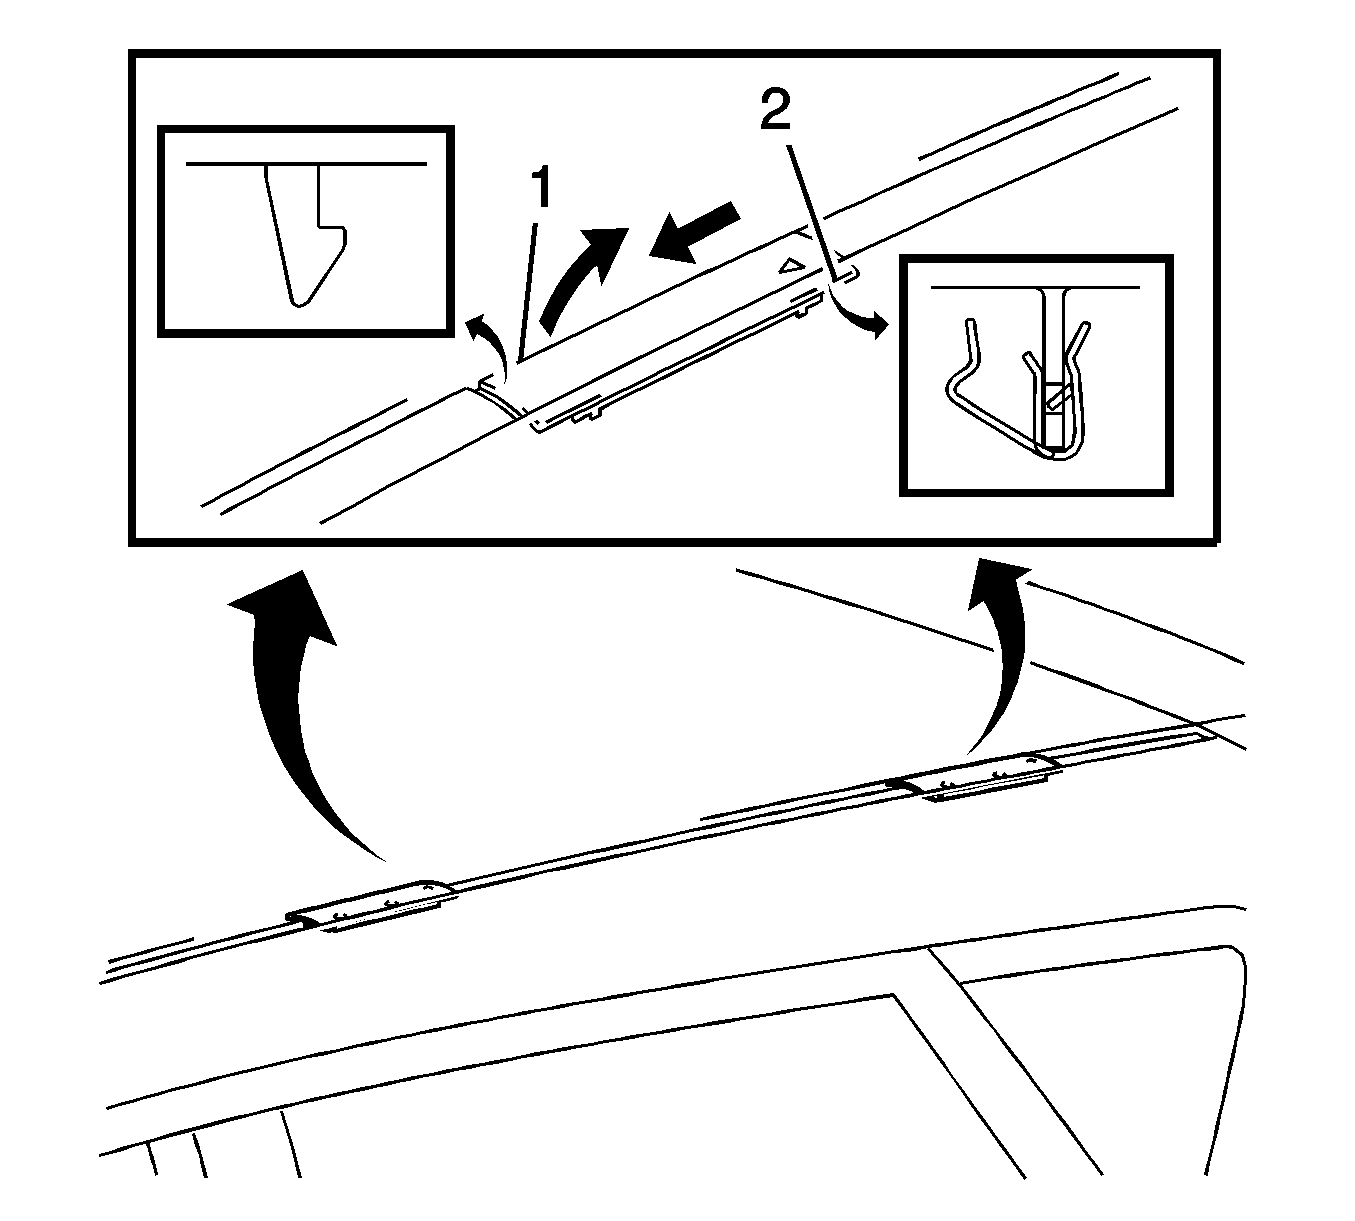
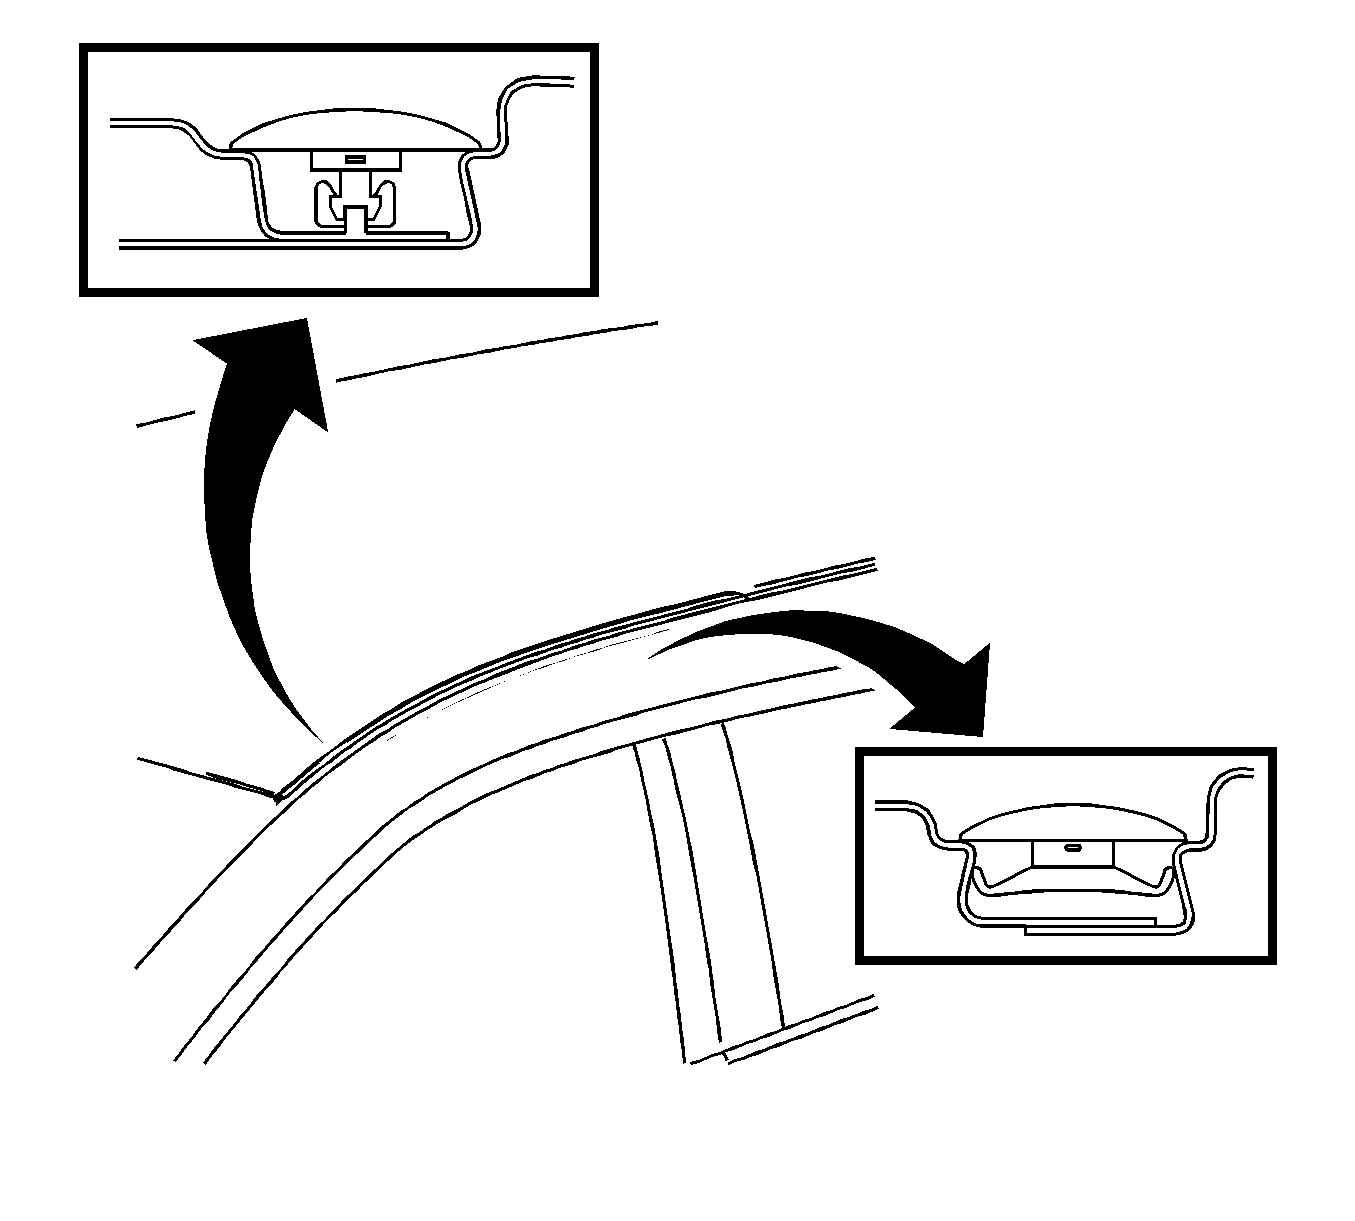
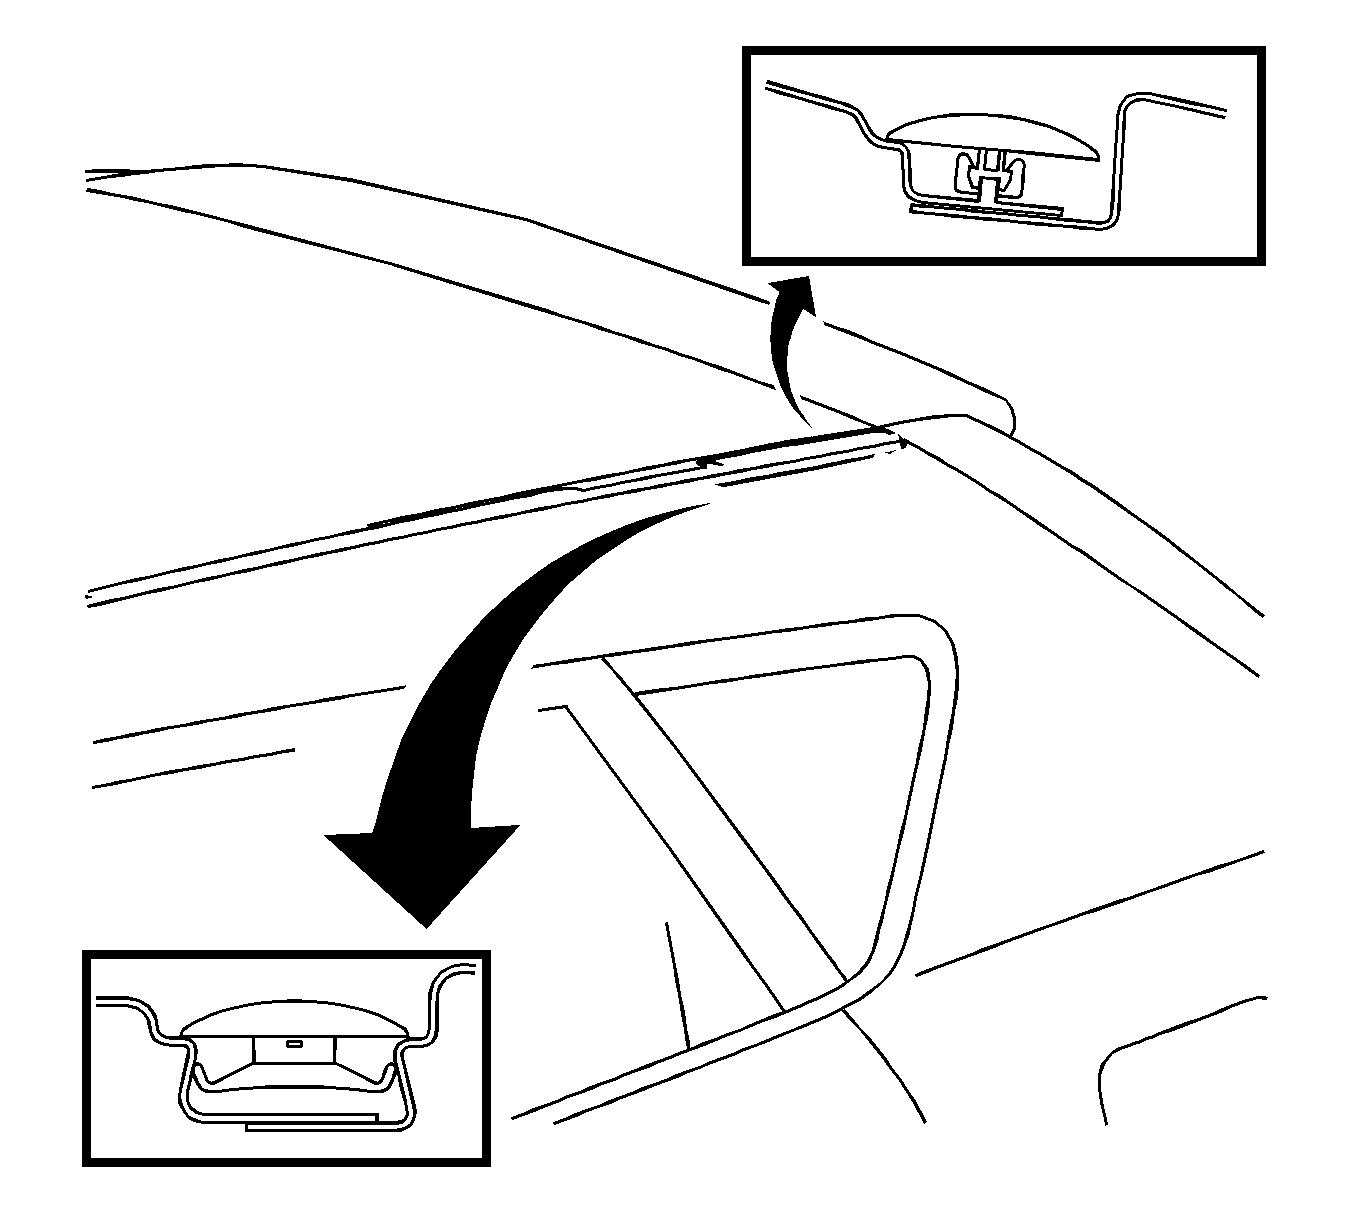
- Disengage the clip (2) and the claw (1) and remove the roof drip side molding cover.
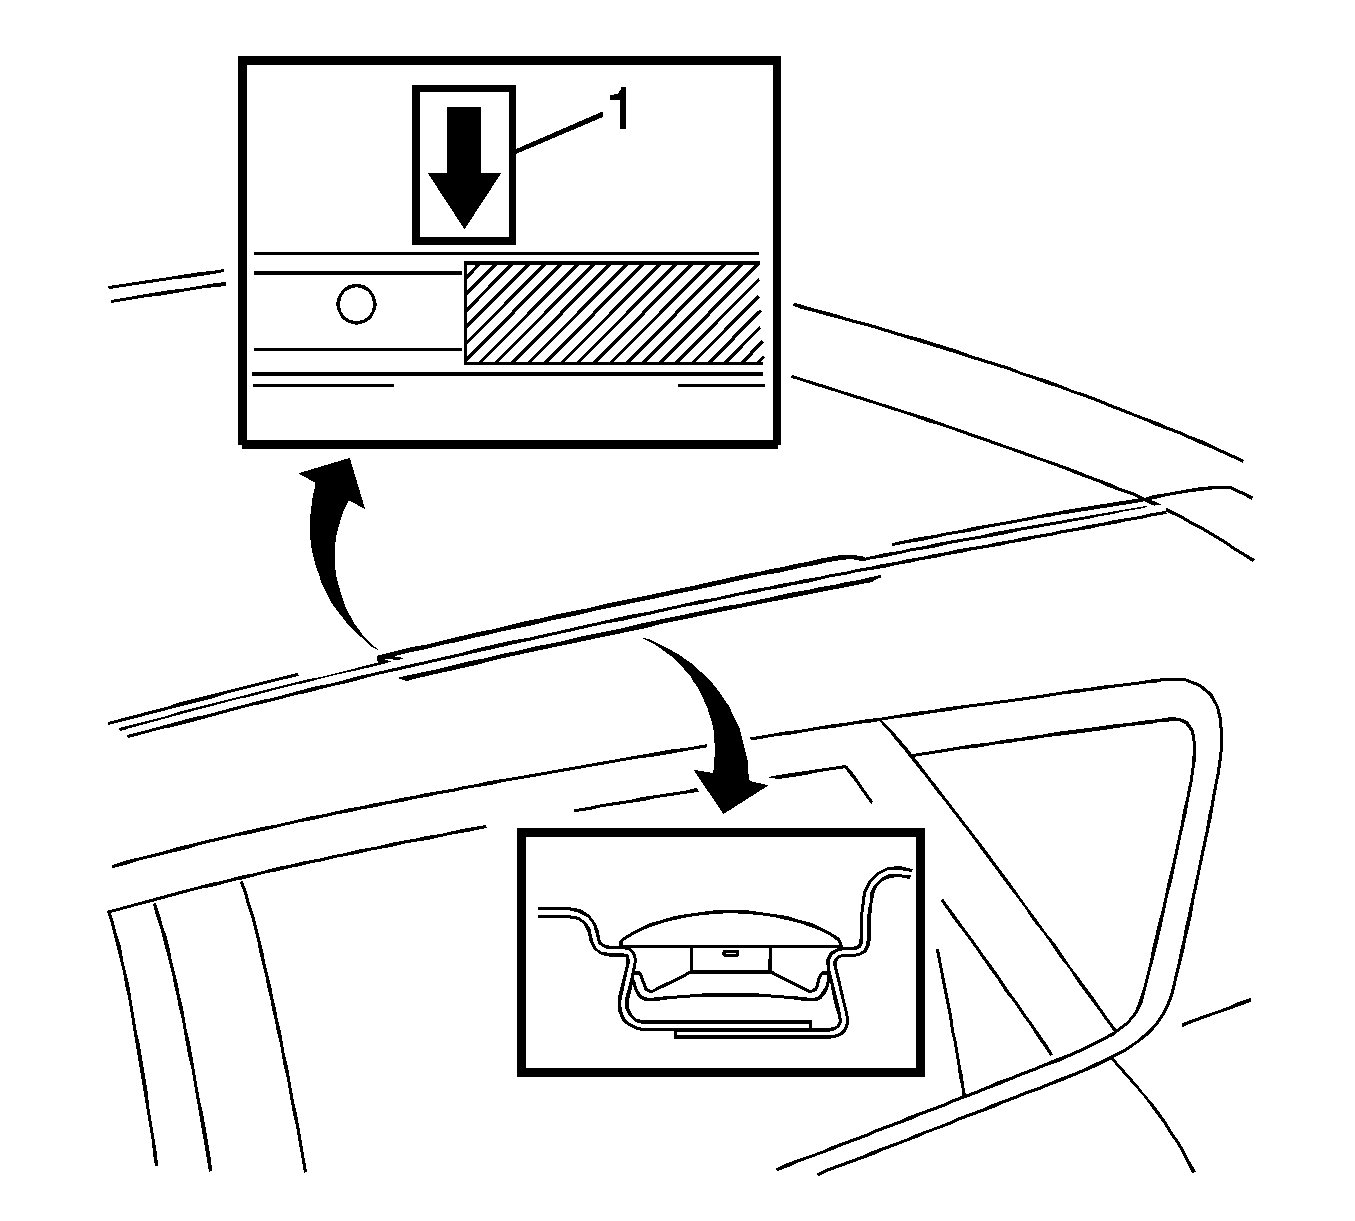
- Place a matchmark (1) on the vehicle body on the location indicated in the illustration.
- Remove the center roof drip side molding.
- Disengage the clip remove the front roof drip side molding.
- Disengage the clip and remove the rear roof drip side molding.
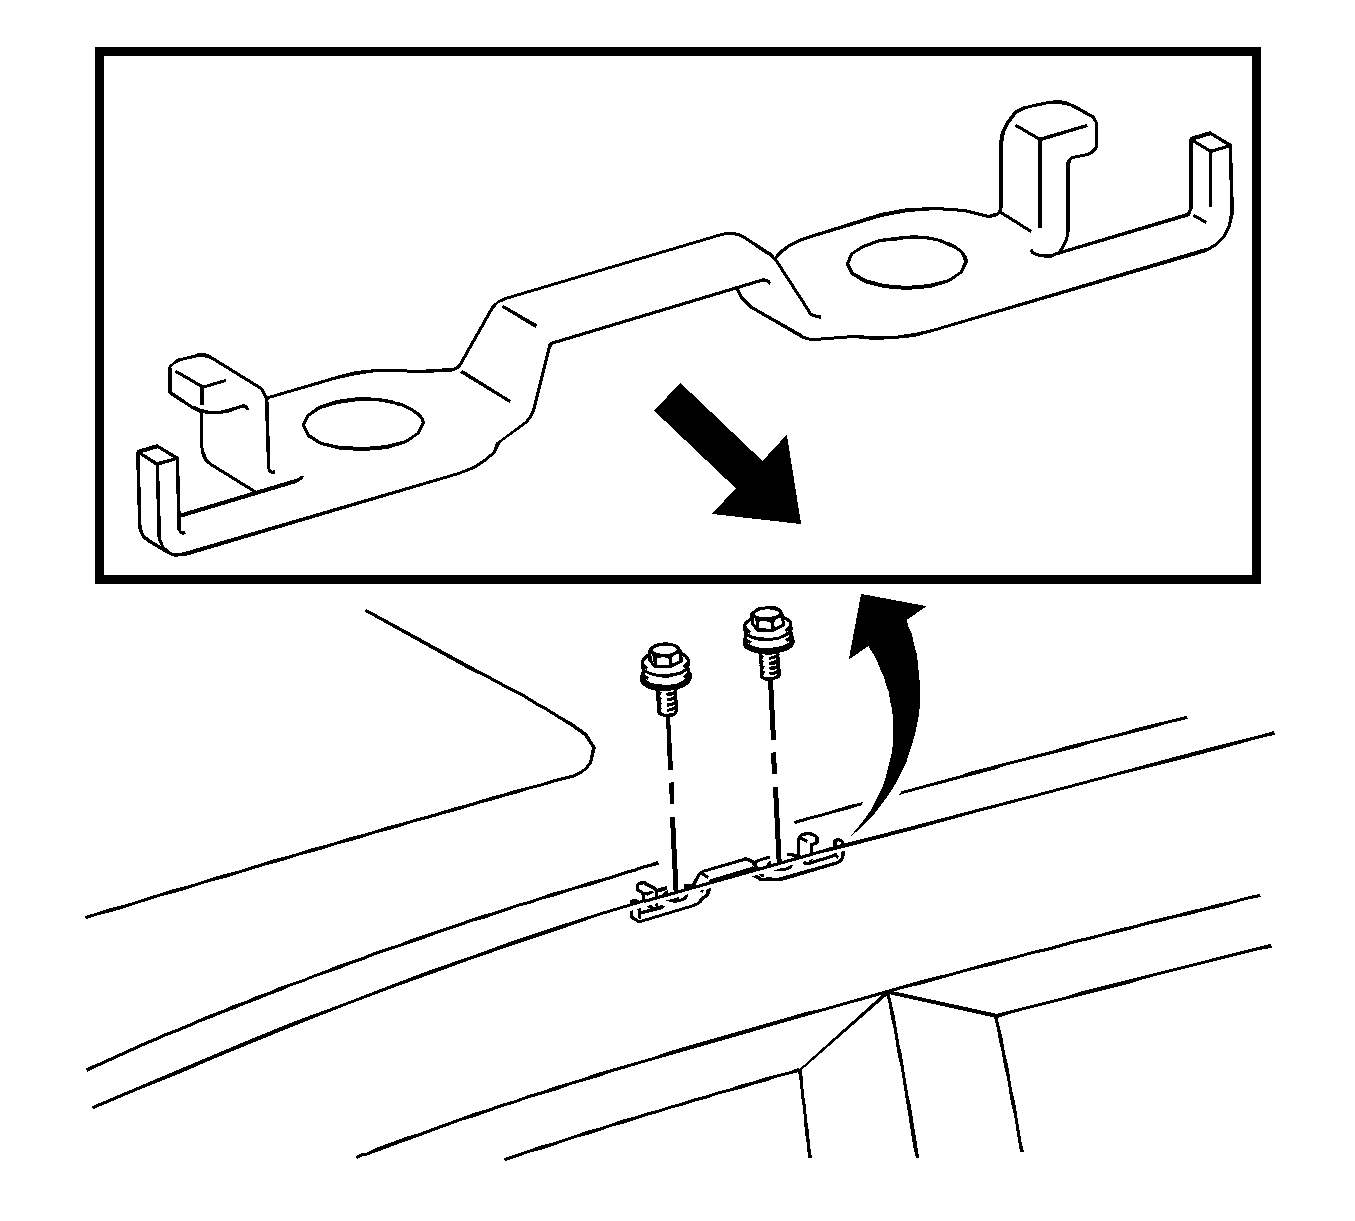
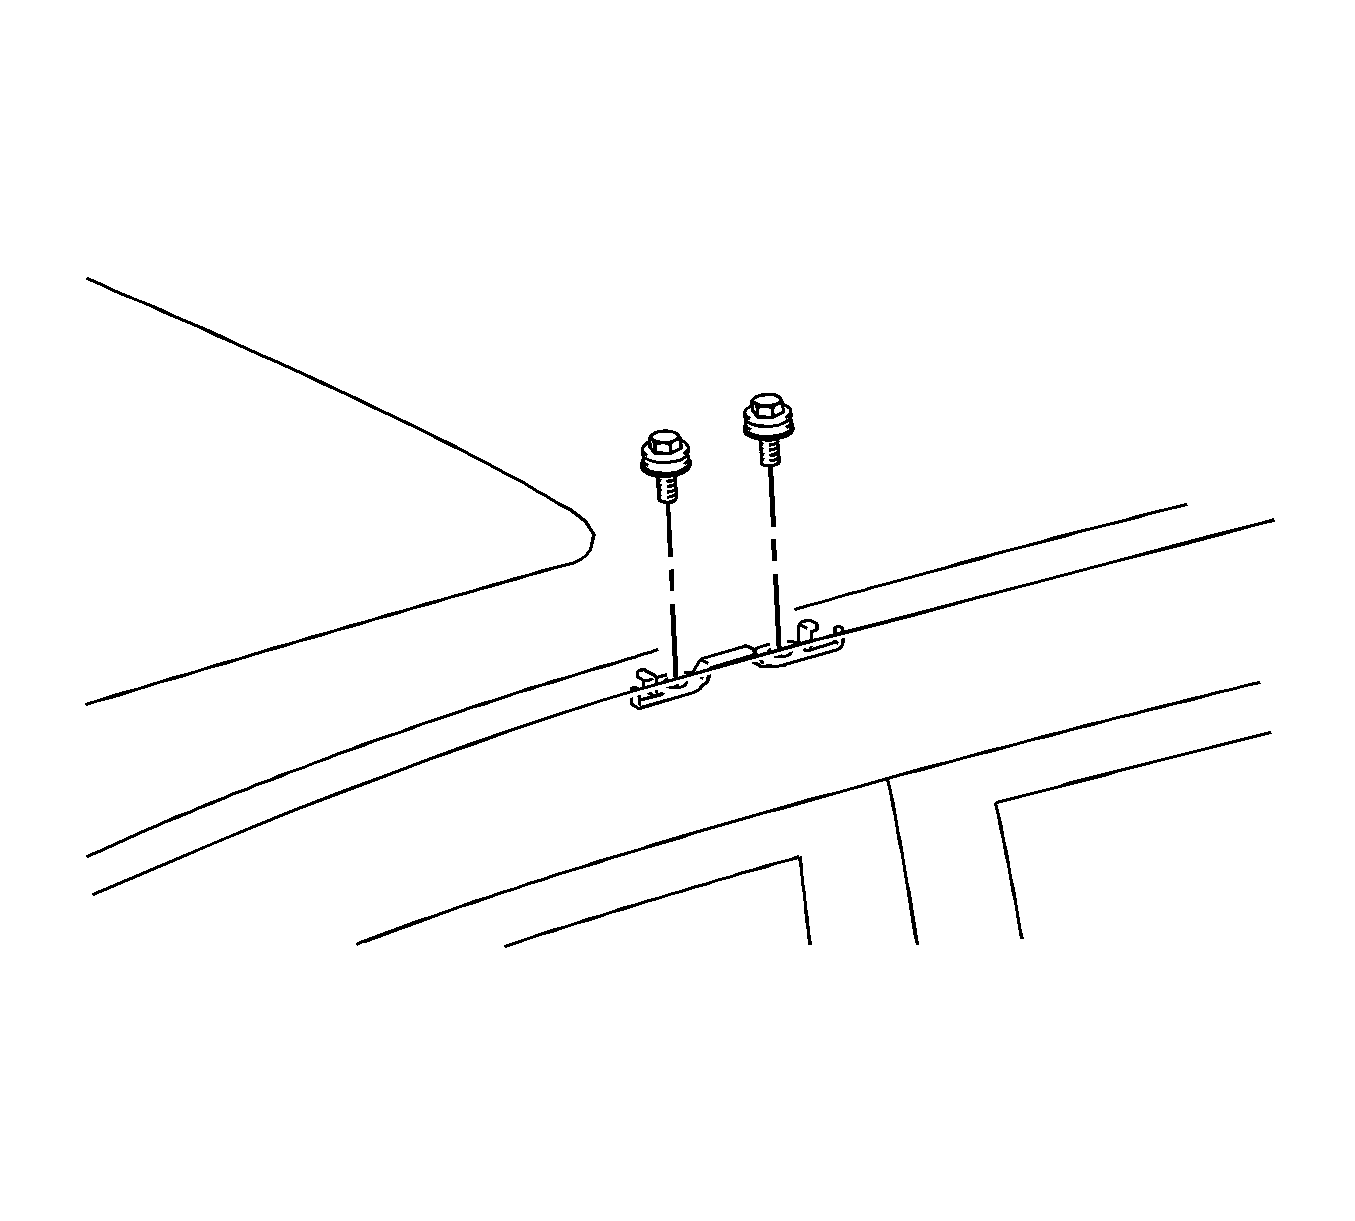
- Remove the bolts and the luggage carrier bracket, if necessary.
Installation Procedure
- Install the luggage carrier bracket with the two bolts if removed and tighten to 10 N·m (7 ft lb)
- Engage the clip and install the rear roof drip side molding.
- Engage the clip and install the front roof drip side molding.
- Position the center roof drip side molding by aligning it with the matchmark (1) on the vehicle body as shown in the illustration.
- Install the center roof drip side molding.
- Engage the claw and the clip (1) and install the roof drip side finish molding cover.
- Install the luggage carrier, if removed. Refer to Luggage Carrier Replacement.
Caution: Refer to Fastener Caution in the Preface section.
