For 1990-2009 cars only
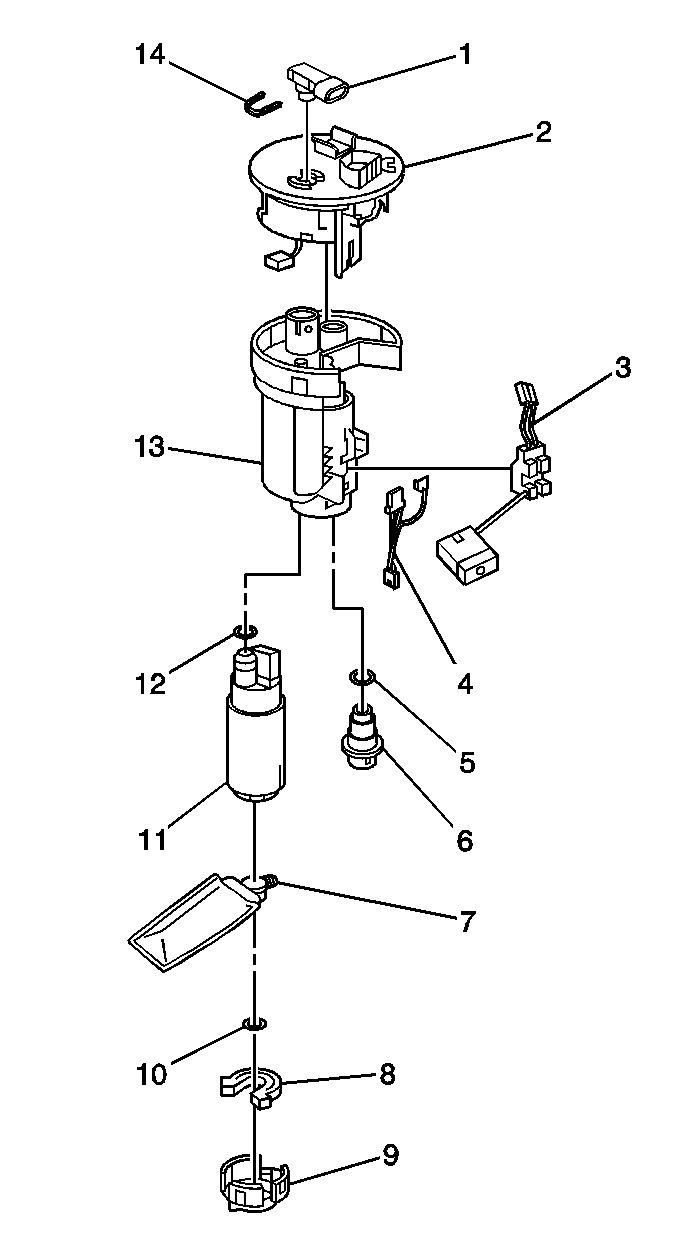
Fuel Pump and Fuel Filter Assembly Replacement with FWD
Removal Procedure
- Remove the fuel sender assembly. Refer to Fuel Sender Assembly Replacement .
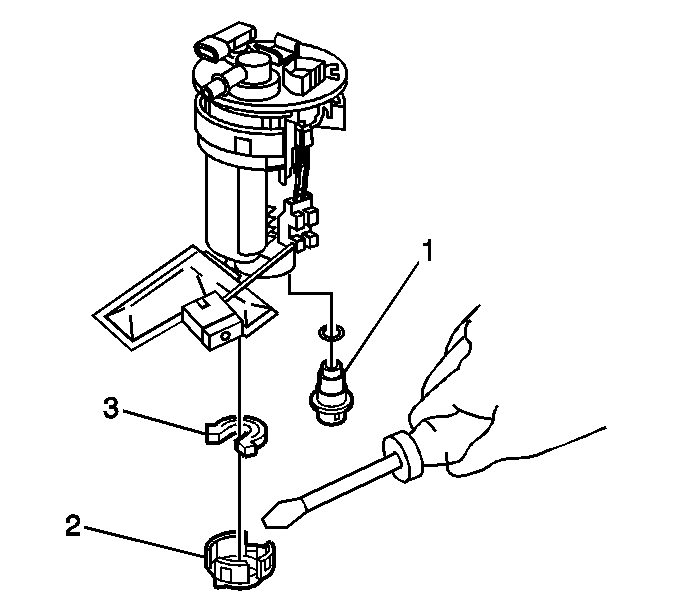
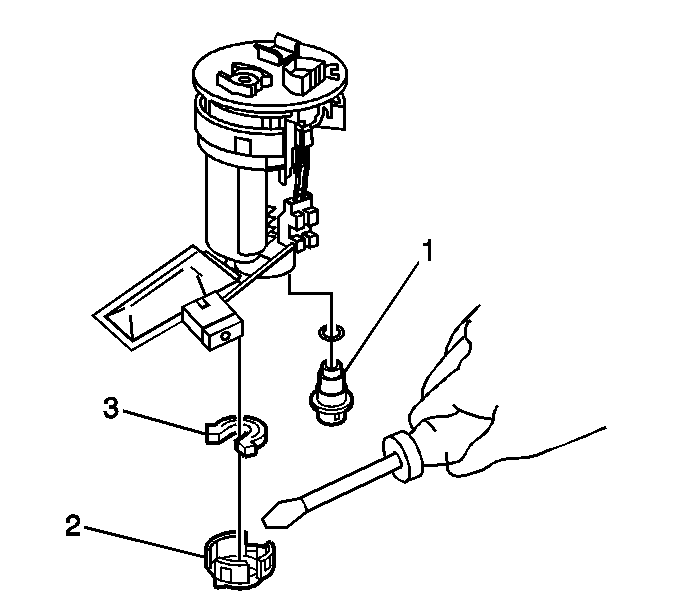
- Remove the bottom cap (2) and the lower cushion (3) from the fuel sender assembly .
- Remove the fuel pressure regulator (1).
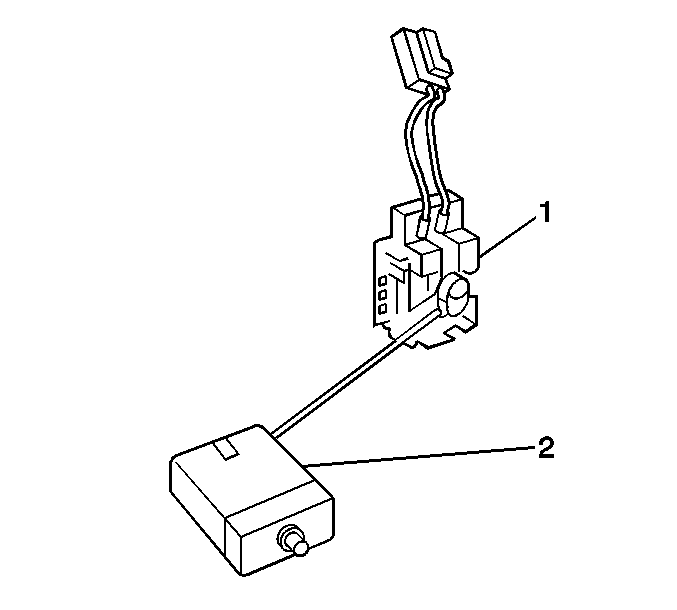
- Disconnect the fuel level sensor electrical connector.
- Remove the fuel level sensor (2).
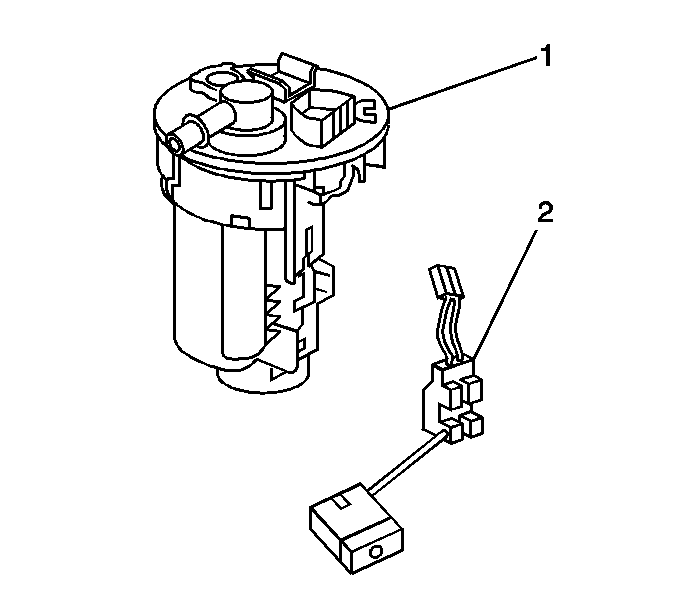
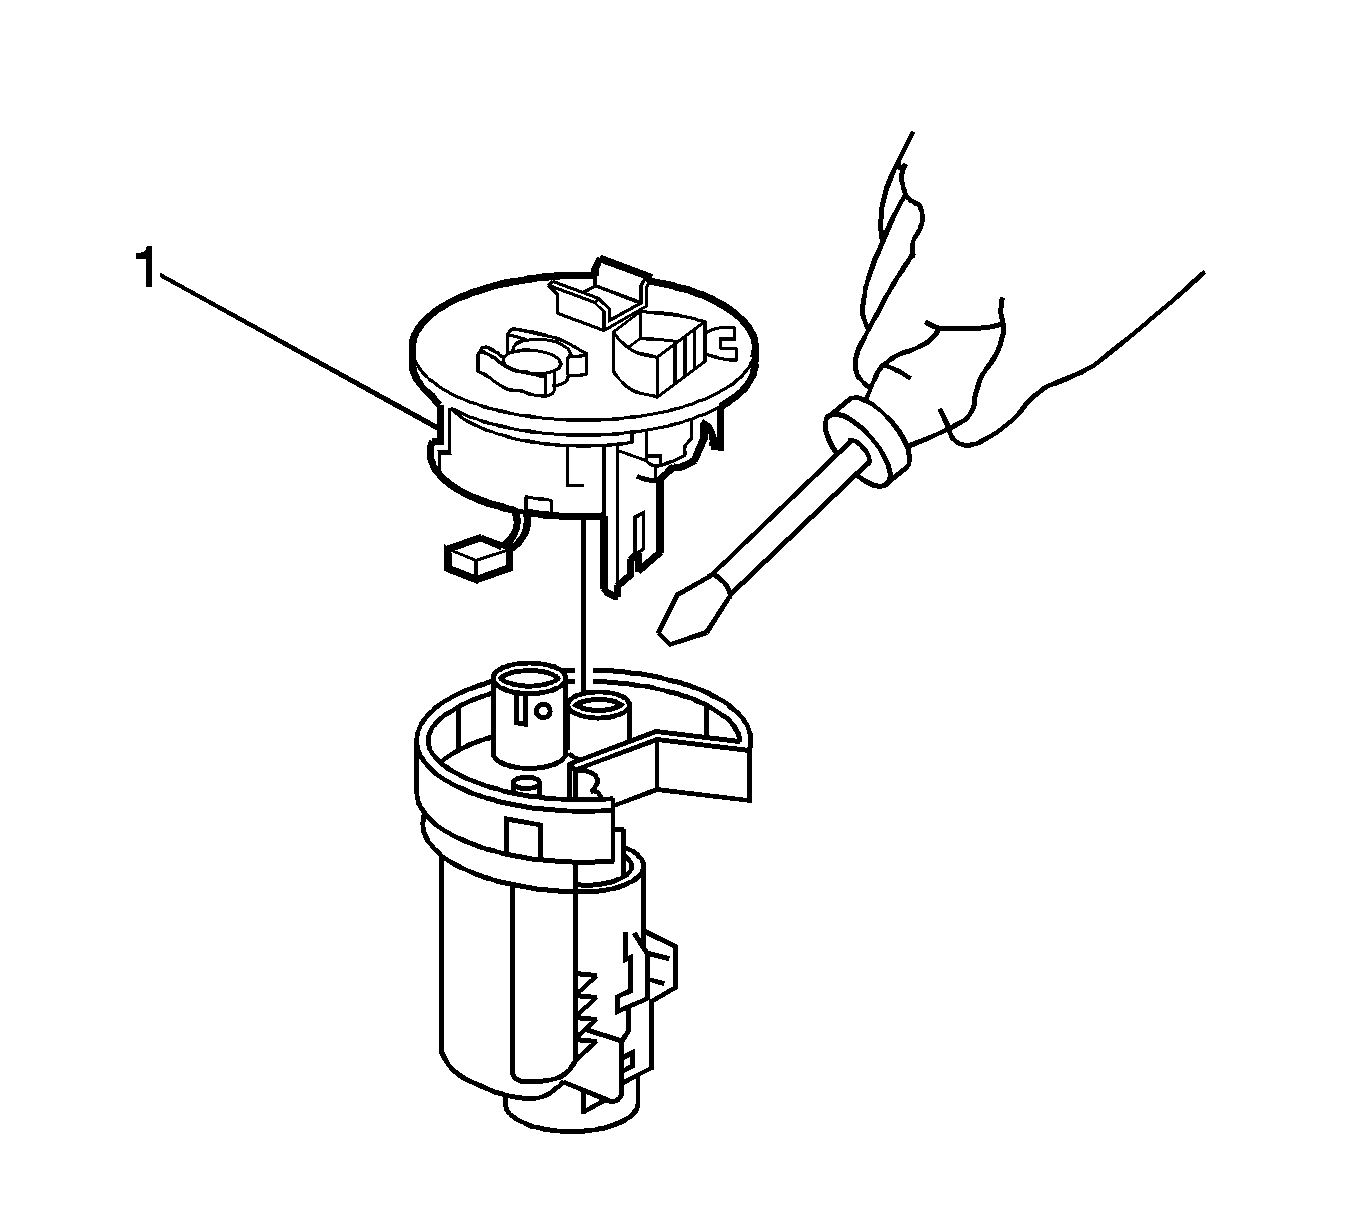
- Remove the fuel sender top cap (1) from the fuel filter assembly.
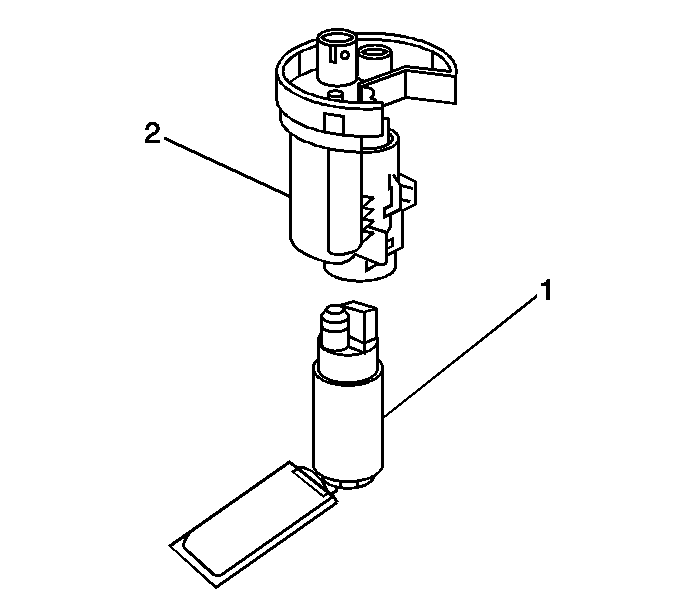
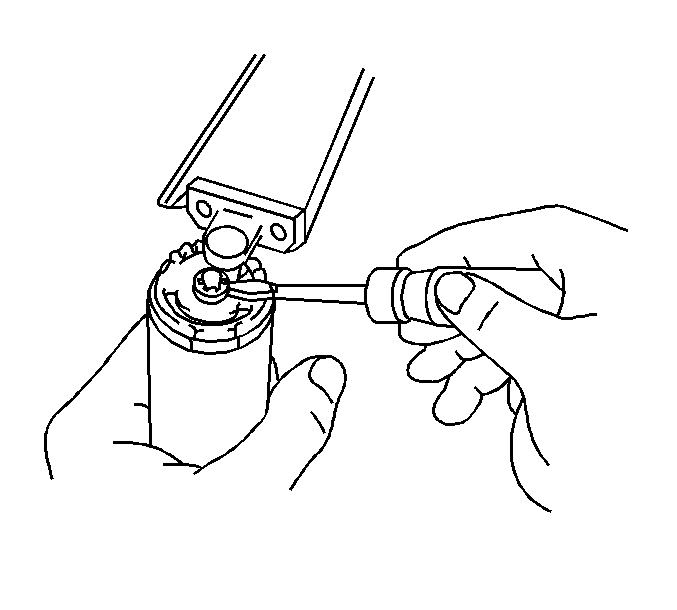
- Disconnect the fuel pump electrical connector.
- Remove the fuel pump (1) from the fuel filter assembly (2).
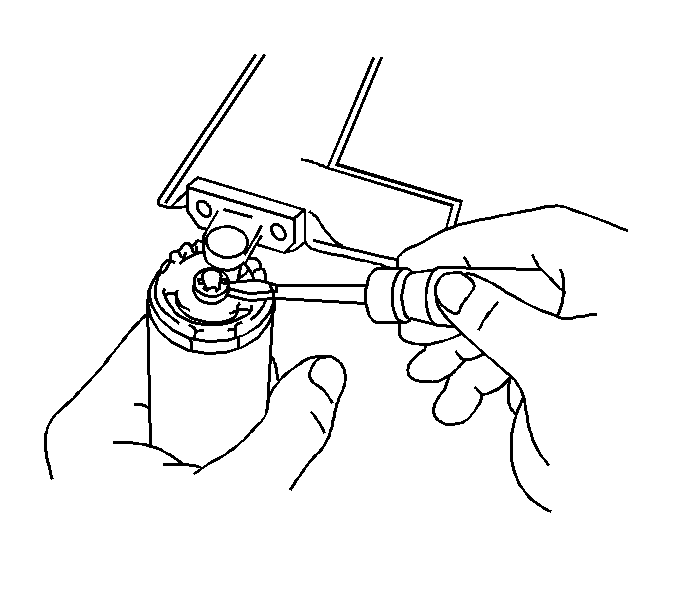
- Remove the retaining ring for the fuel strainer from the fuel pump.


Installation Procedure
- Install the fuel pump strainer (7) to the fuel pump (11). Use a new locking ring (10).
- Apply gasoline to fuel pump O-ring (12), and install to fuel pump.
- Install the fuel pump (11) to the fuel filter assembly (13).
- Apply gasoline to fuel pressure regulator O-ring (5), and install to fuel pressure regulator (6).
- Install the fuel pressure regulator into the fuel filter assembly.
- Connect the electrical connector (4) to the fuel pump . Ensure that connections are secure at the fuel pump and the top cap (2) of the sender assembly.
- Install the fuel sender assembly top cap (2) to the fuel filter assembly (13). The fuel sender assembly end caps snap into place.
- Install the fuel level sensor (3) to the fuel sender assembly.
- Connect the fuel level sensor electrical connector.
- Position lower cushion (8) on bottom of fuel pump and install lower cap (9) to fuel filter assembly.
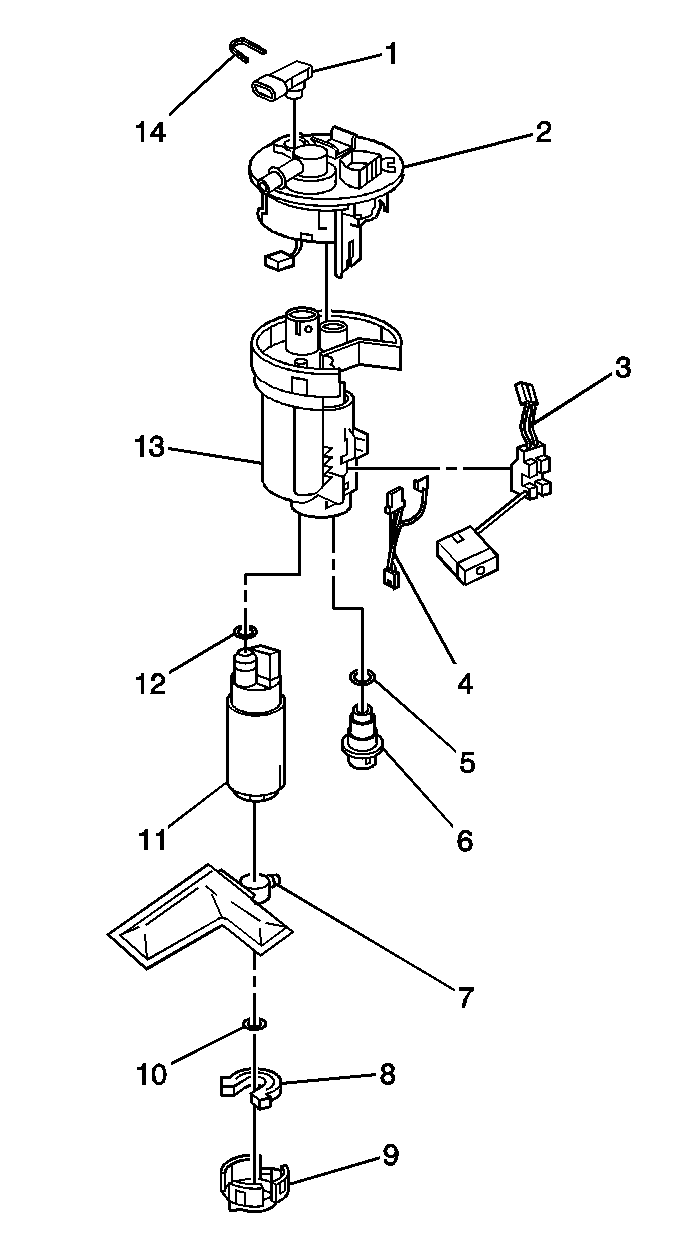
Fuel Pump and Fuel Filter Assembly Replacement AWD
Removal Procedure
- Remove the fuel sender assembly. Refer to Fuel Sender Assembly Replacement .
- Remove the bottom cap (2) and the lower cushion (3) from the fuel sender assembly .
- Remove the fuel pressure regulator (1).
- Disconnect the fuel level sensor electrical connector.
- Remove the fuel level sensor (1).
- Remove the fuel sender top cap (1) from the fuel filter assembly.
- Disconnect the fuel pump electrical connector.
- Remove the fuel pump (1) from the fuel filter assembly (2).
- Remove the retaining ring for the fuel strainer from the fuel pump.
Installation Procedure
- Install the fuel pump strainer (7) to the fuel pump (11). Use a new locking ring (10).
- Apply gasoline to fuel pump O-ring (12), and install to the fuel pump.
- Install the fuel pump (11) in to the fuel filter assembly (13).
- Apply gasoline to fuel pressure regulator O-ring (5), and install to the fuel pressure regulator (6).
- Install the fuel pressure regulator in to the fuel filter assembly.
- Connect the electrical connector (4) to the fuel pump . Ensure that connections are secure at the fuel pump and the top cap (2) of the sender assembly.
- Install the fuel sender assembly top cap (2) to the fuel filter assembly (13). The fuel sender assembly end caps snap into place.
- Install the fuel level sensor (3) to the fuel sender assembly.
- Connect the fuel level sensor electrical connector.
- Position lower cushion (8) on bottom of fuel pump and install lower cap (9) to fuel filter assembly.