Removal Procedure
- Drain the cooling system. Refer to
Cooling System Draining and Filling
.
- Remove the generator. Refer to
Generator Replacement
.

- Remove the following components from the cylinder block:
- Remove the following components from the thermostat housing:
- Clean the following materials from the thermostat cap:
- Clean the cylinder block mating surfaces.
- Inspect the thermostat. Refer to
Thermostat Diagnosis
.
Installation Procedure

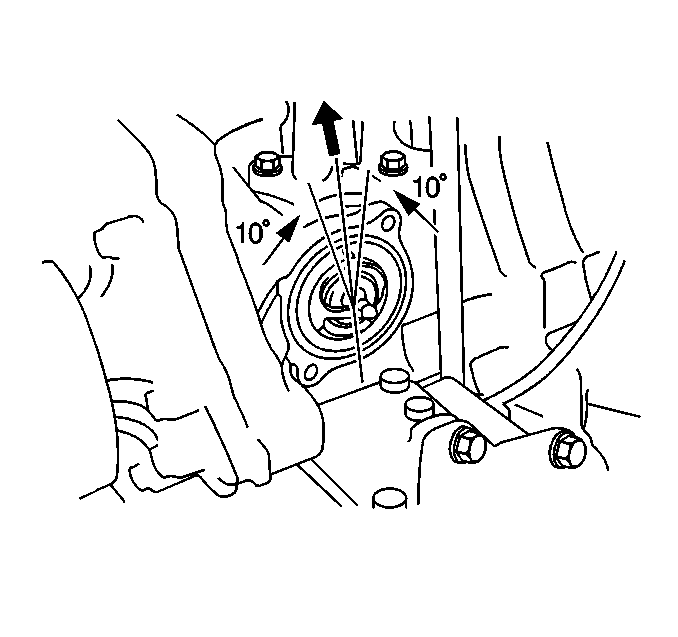
Important: Position the air bleed valve facing upward.
- Install the thermostat.
- Install a new thermostat O-ring.

- Install the thermostat housing to the cylinder block.
Notice: Use the correct fastener in the correct location. Replacement fasteners
must be the correct part number for that application. Fasteners requiring
replacement or fasteners requiring the use of thread locking compound or sealant
are identified in the service procedure. Do not use paints, lubricants, or
corrosion inhibitors on fasteners or fastener joint surfaces unless specified.
These coatings affect fastener torque and joint clamping force and may damage
the fastener. Use the correct tightening sequence and specifications when
installing fasteners in order to avoid damage to parts and systems.
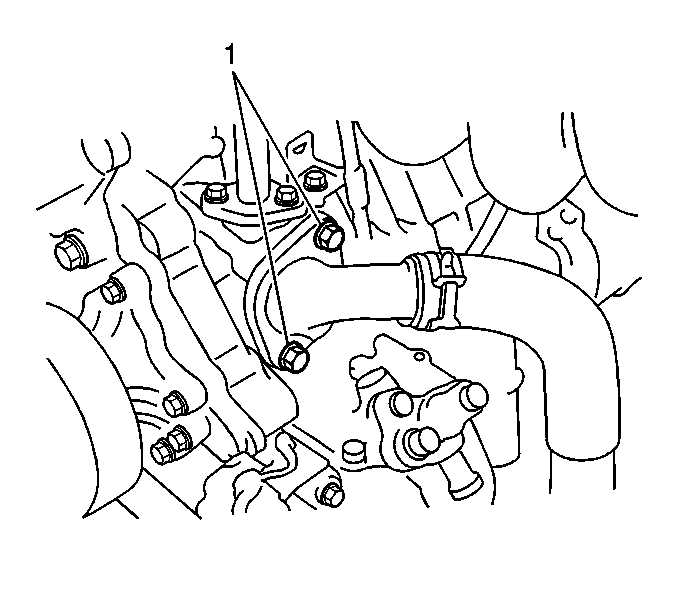
- Use the 2 nuts (1) in order to secure the thermostat cap.
Tighten
| • | On low output engine, tighten the thermostat cap nuts to 11 N·m (8 lb ft). |
| • | On high output engine, tighten the thermostat cap nuts to 10 N·m (7 lb ft). |
- Install the generator. Refer to
Generator Replacement
.
- Fill the radiator using approved coolant. Refer to
Cooling System Draining and Filling
.
- Start the engine.
- Run the engine until the coolant is at operating temperature. The coolant is at operating temperature when the following conditions exist:
| • | The coolant is flowing through the radiator. |
- Inspect for leaks in the cooling system.
- Turn off the engine.
- Install the radiator cap.


