EVAP Canister Inspection
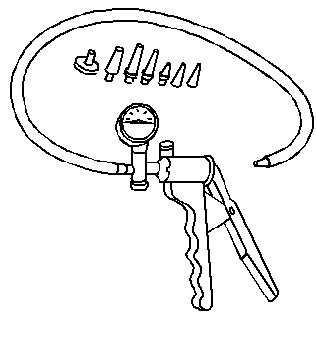
Tools Required
| • | J 23738-A Hand Vacuum Pump |
| • | J 41413-300 EVAP Cap and Plug Kit |
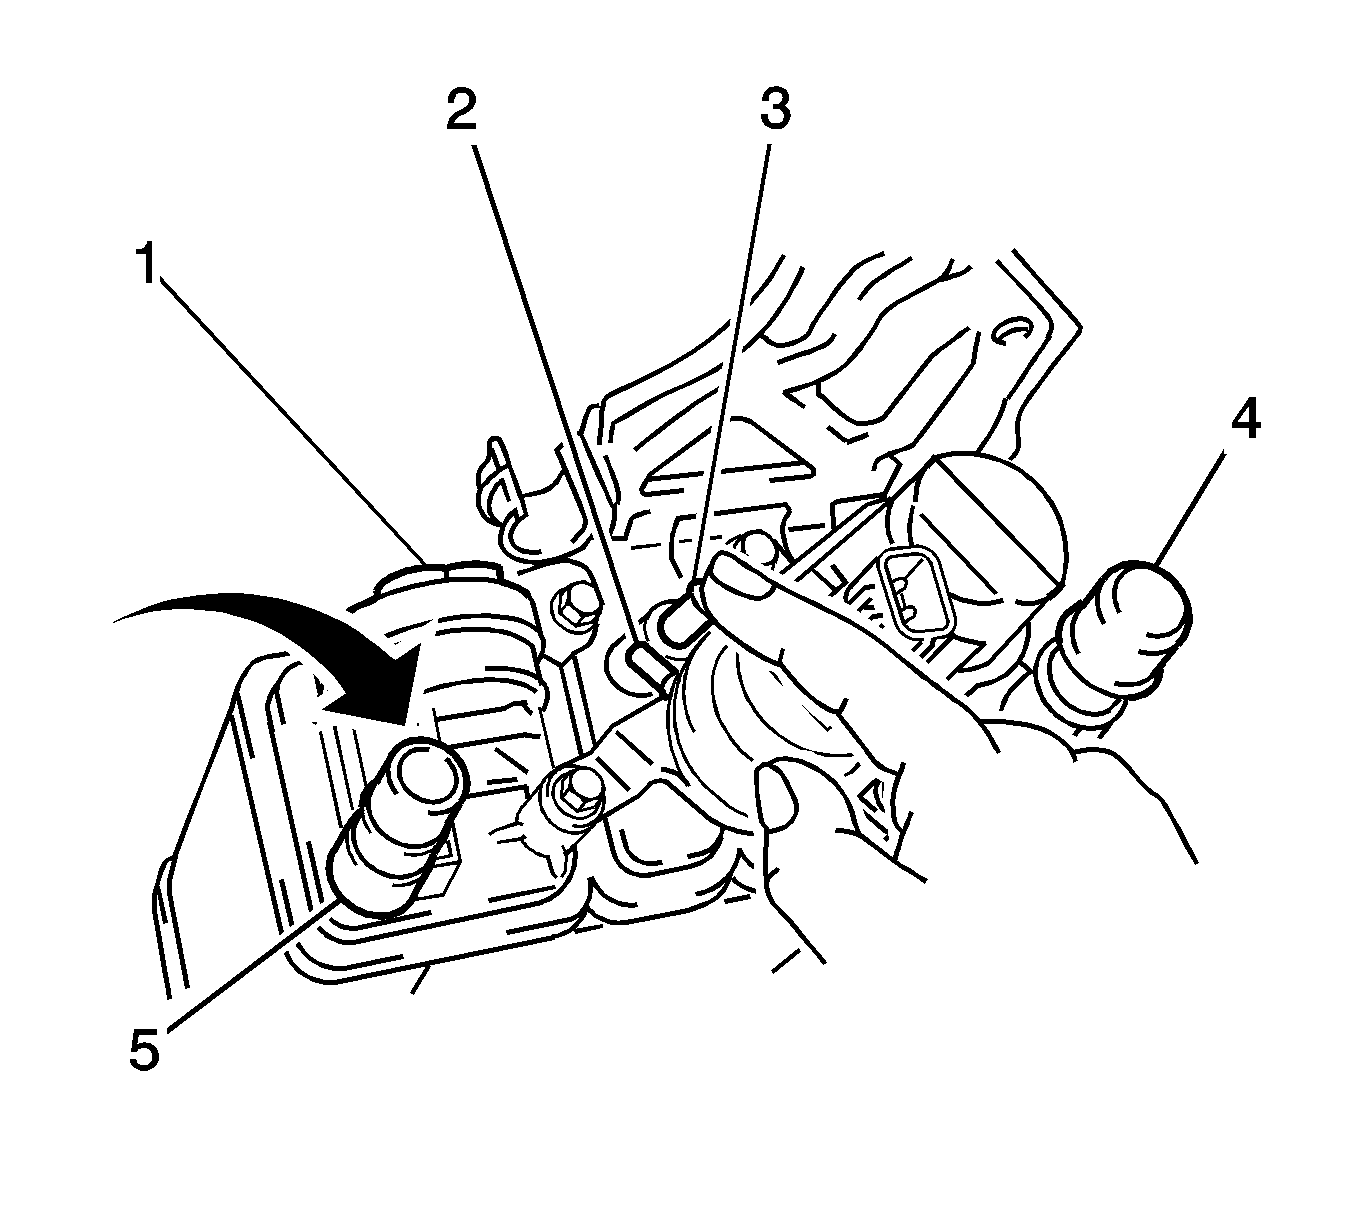
- Remove the evaporative emission (EVAP) canister. Refer to Evaporative Emission Canister Replacement.
- Visually inspect the EVAP canister, especially at the arrows, for any cracks or damage.
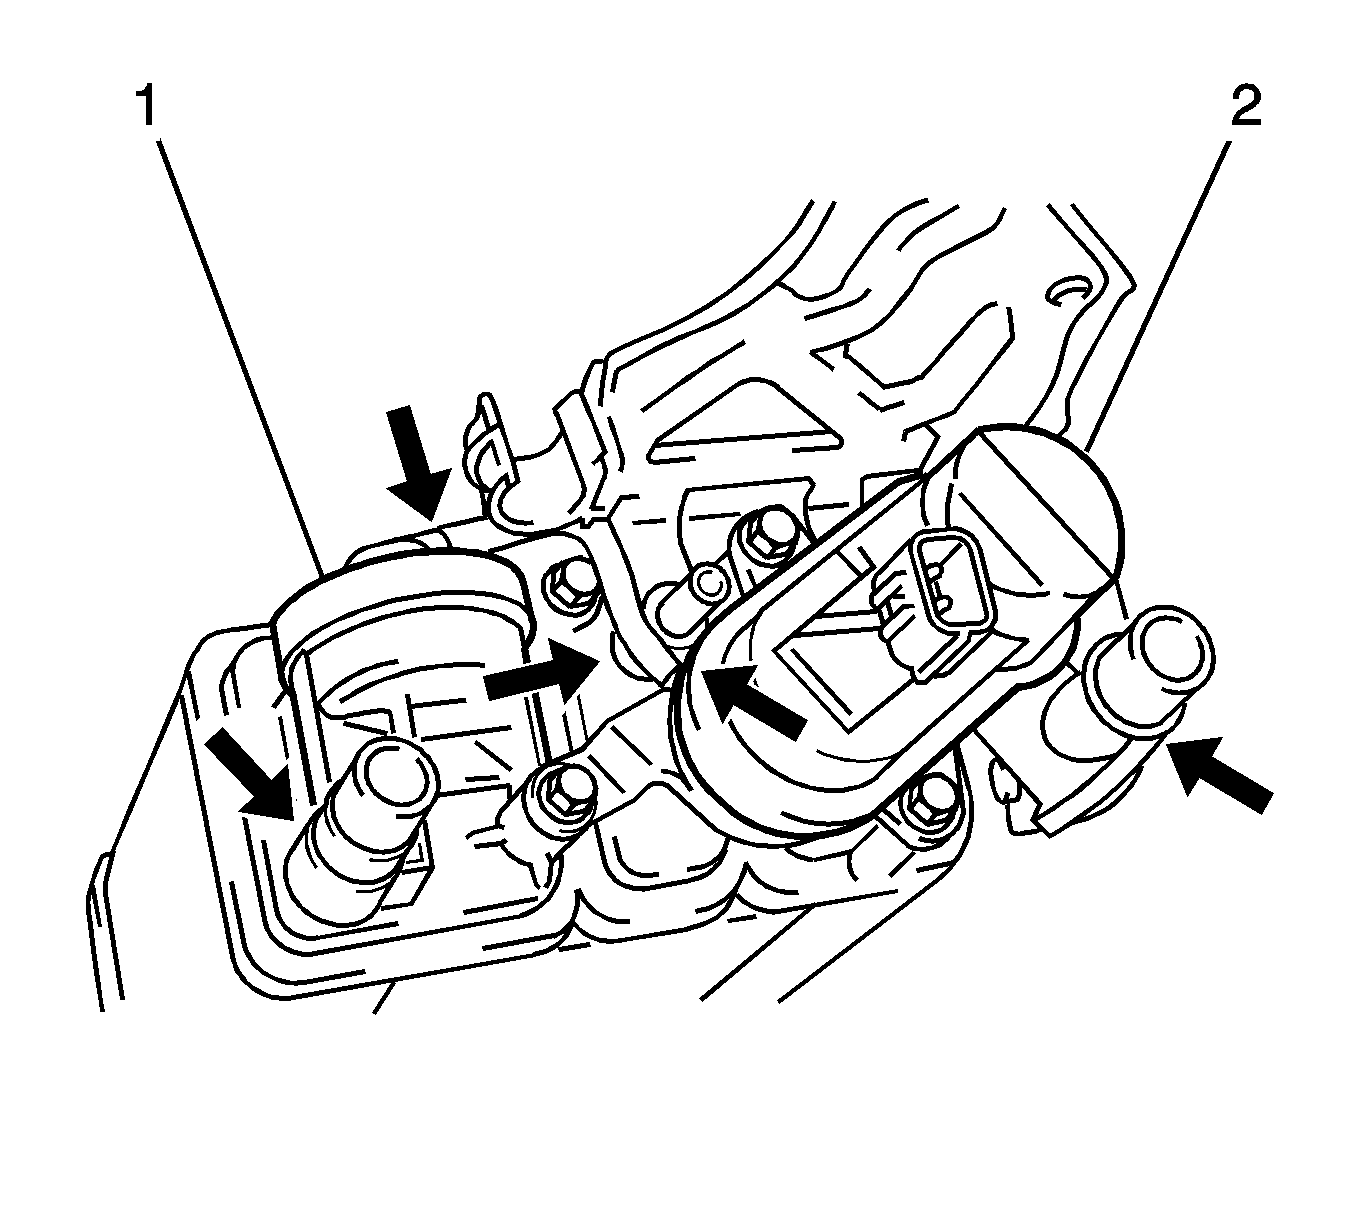
- Use the J 41413-300 or an equivalent in order to block the purge port (2) closed.
- Blow air with a pressure of 1.7 kPa (0.5 in Hg/0.25 psi) into the ORVR vent port (1).
- Verify that air flows out of inlet air port (3).
- Block the on-board refueling vapor recovery (ORVR) vent port (3) closed.
- Connect the J 23738-A or an equivalent to the purge port (1).
- Apply a vacuum of 0.85 kPa (0.25 in Hg/0.18 psi) into the purge port (1).
- Verify that air is drawn into the air inlet port (2).
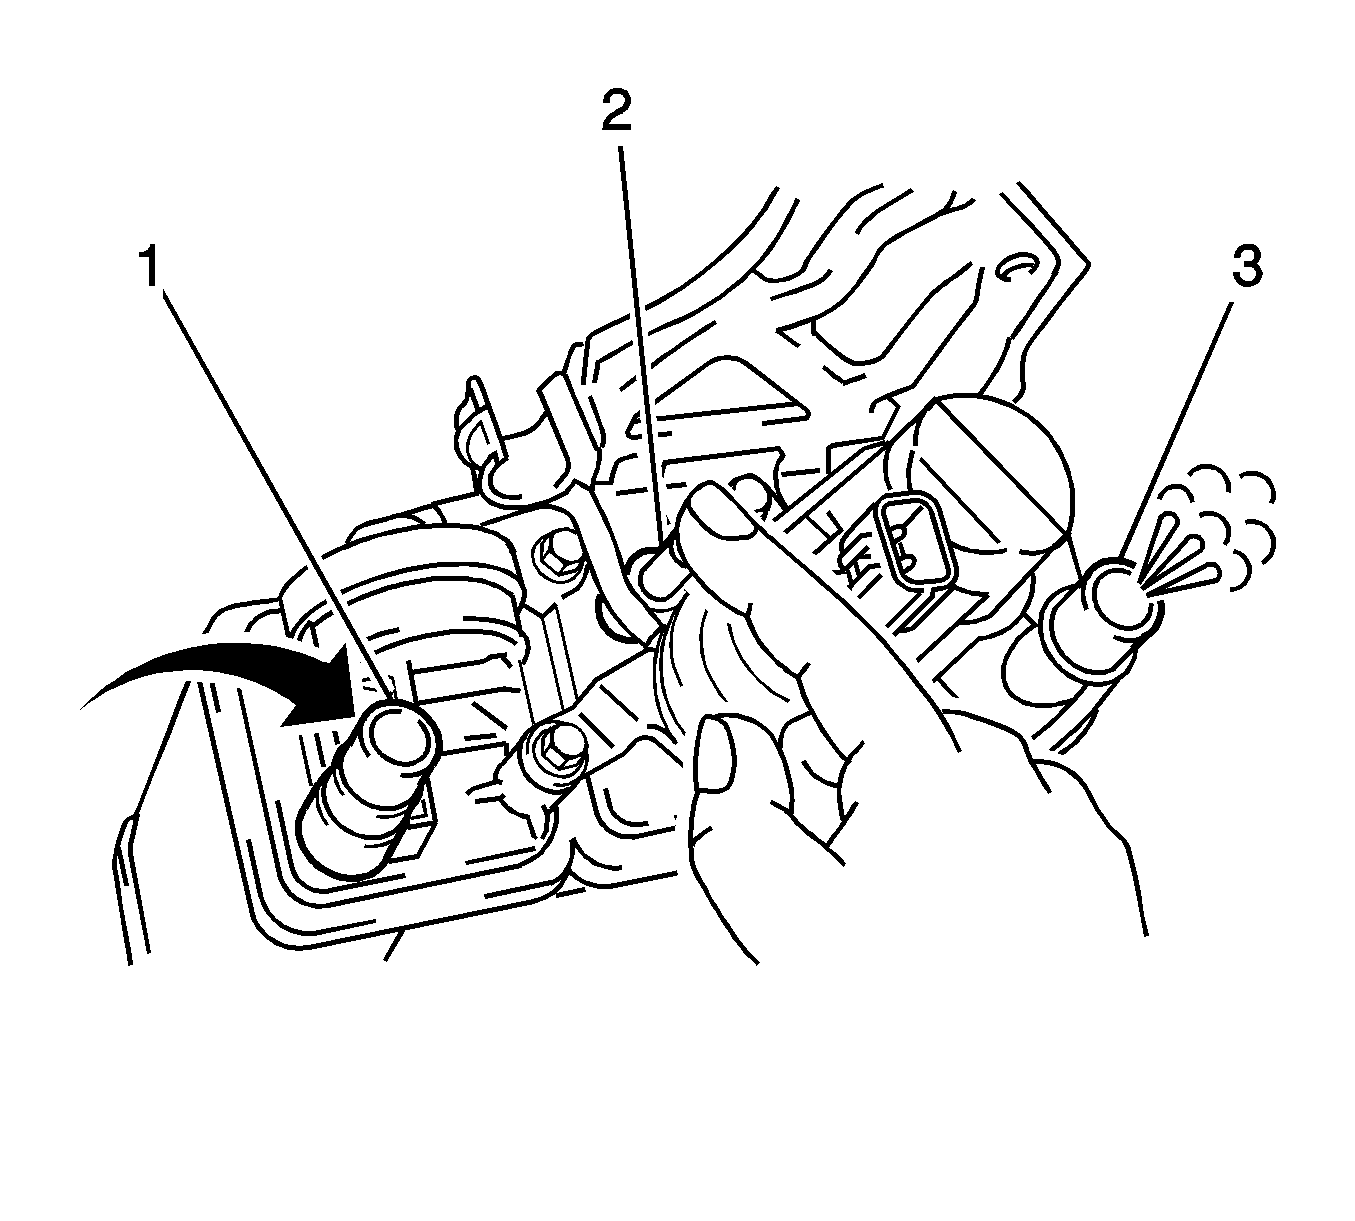
- Block the air inlet port (4) closed.
- Block the purge port (3) closed.
- Remove the small vacuum hose between the fill limiter vent valve (FLVV) port (1) and the EVAP vacuum leak pump port (2).
- Block the vacuum leak pump port (2) closed.
- Apply a pressure of 19.6 kPa (5.8 in Hg/2.81 psi) to the ORVR vent port (5).
- Verify that the pressure holds and does not leak out the small vacuum port (1).
- Replace the EVAP canister and EVAP vacuum leak pump if any of the inspections or tests are failed. Refer to Evaporative Emission Canister Replacement.
Caution: Do not breathe the air through the EVAP component tubes or hoses. The fuel vapors inside the EVAP components may cause personal injury.
EVAP Canister Vacuum Leak Pump Assembly Inspection
EVAP Canister Vacuum Leak Pump - Electrical Connector Pin Identification | |||
|---|---|---|---|
Reference Voltage | Sensor Signal | Sensor Ground | Pump Control |
Ignition Voltage | Solenoid Control | Space | Ground |
- Remove the EVAP canister vacuum leak pump. Refer to Evaporative Emission System Vacuum Leak Pump Replacement.
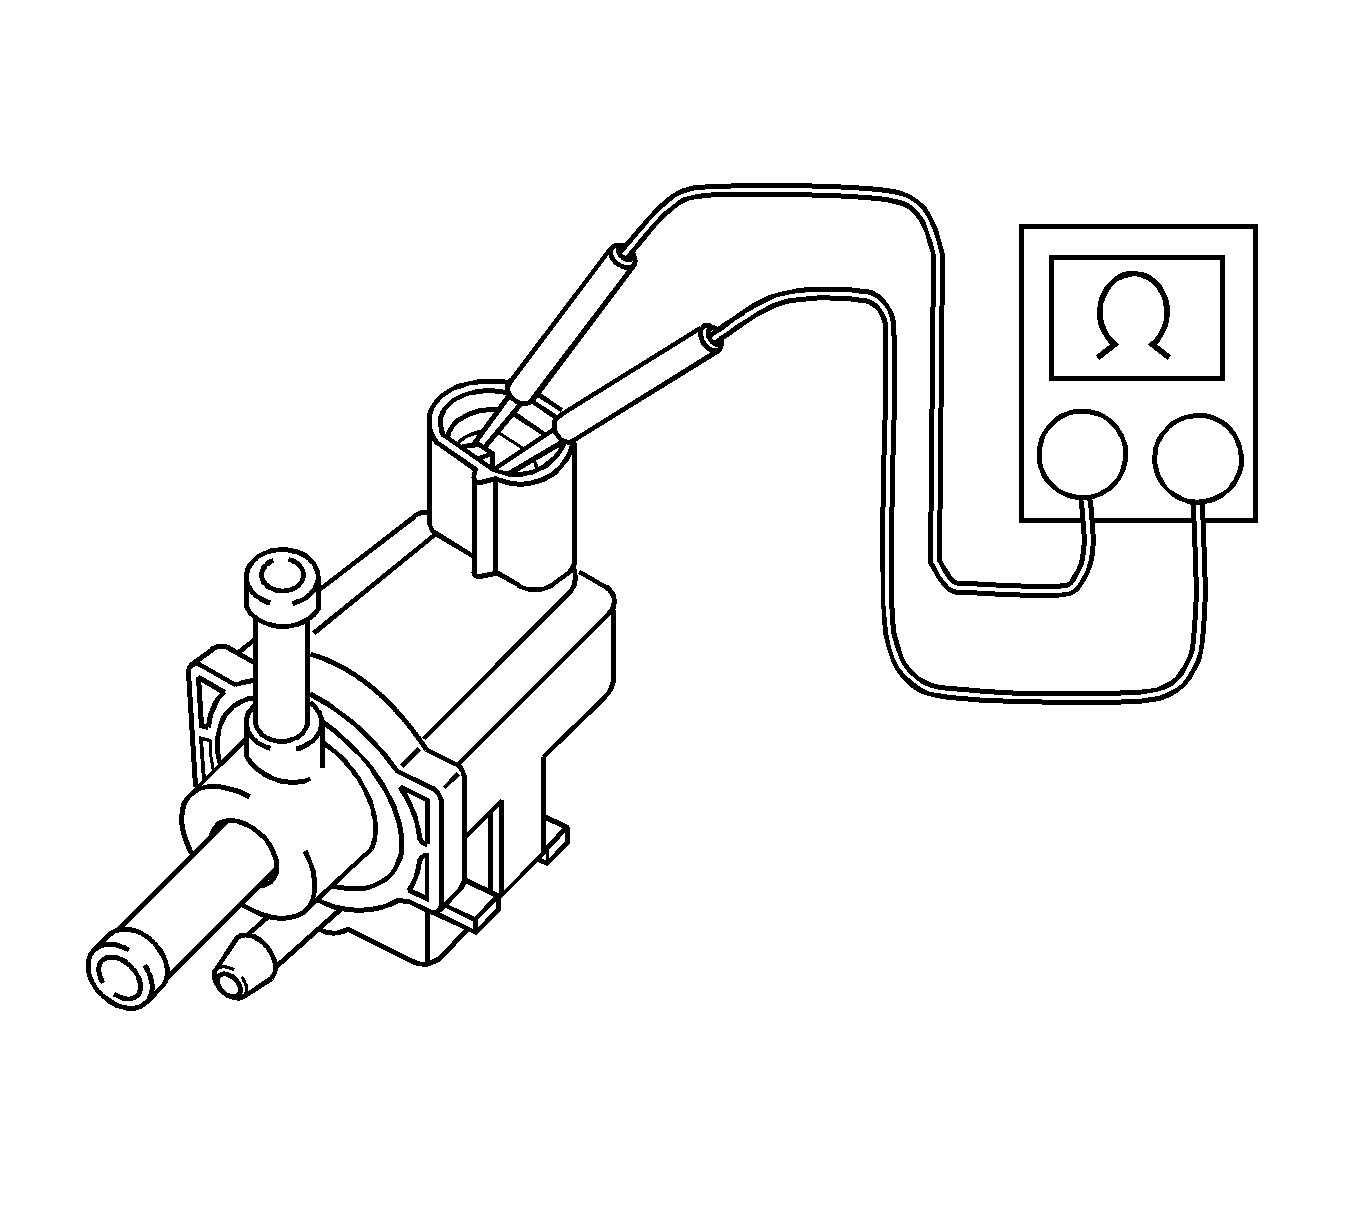
- Use a DMM in order to measure the resistance of the EVAP vent solenoid that is located in the EVAP vacuum leak pump assembly.
- Connect the DMM to the ignition voltage terminal and the solenoid control terminal. Refer to the vacuum pump terminal identification table above.
- Replace the EVAP vacuum leak pump assembly if the resistance is not within the specified range. The solenoid can damage the powertrain control module (PCM) if the resistance value is less than 25 ohms.
- Check the PCM and replace, if necessary. Refer to Control Module References in Computer/Integrating Systems for replacement, setup, and programming.
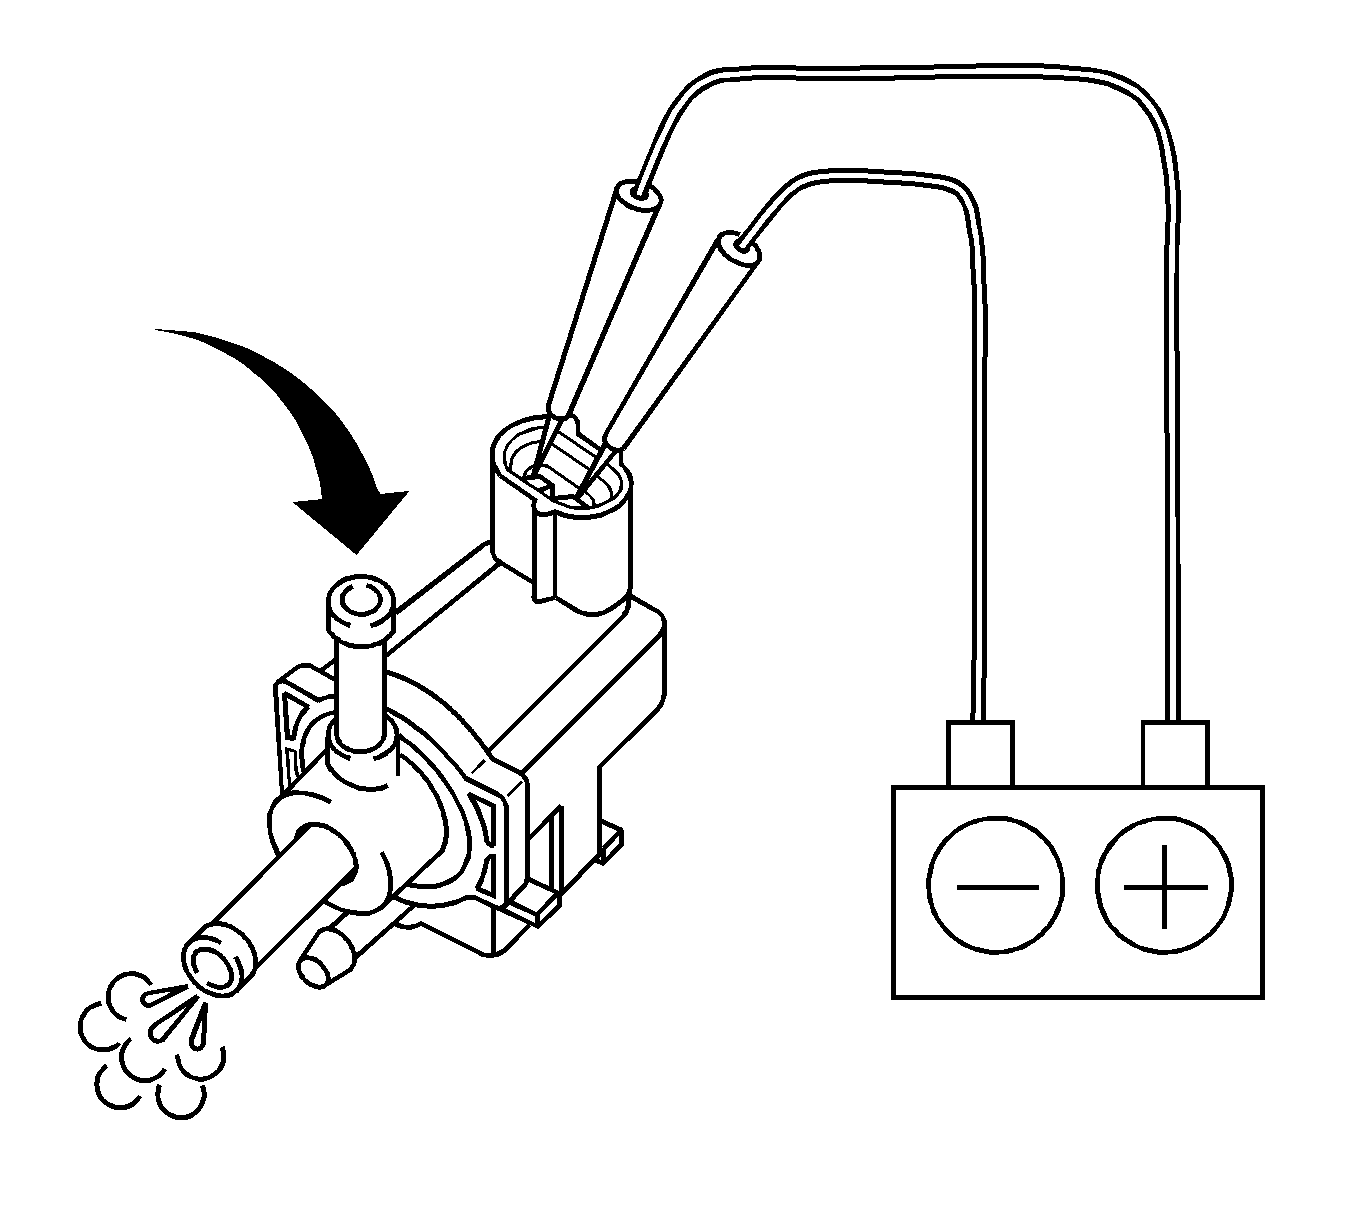
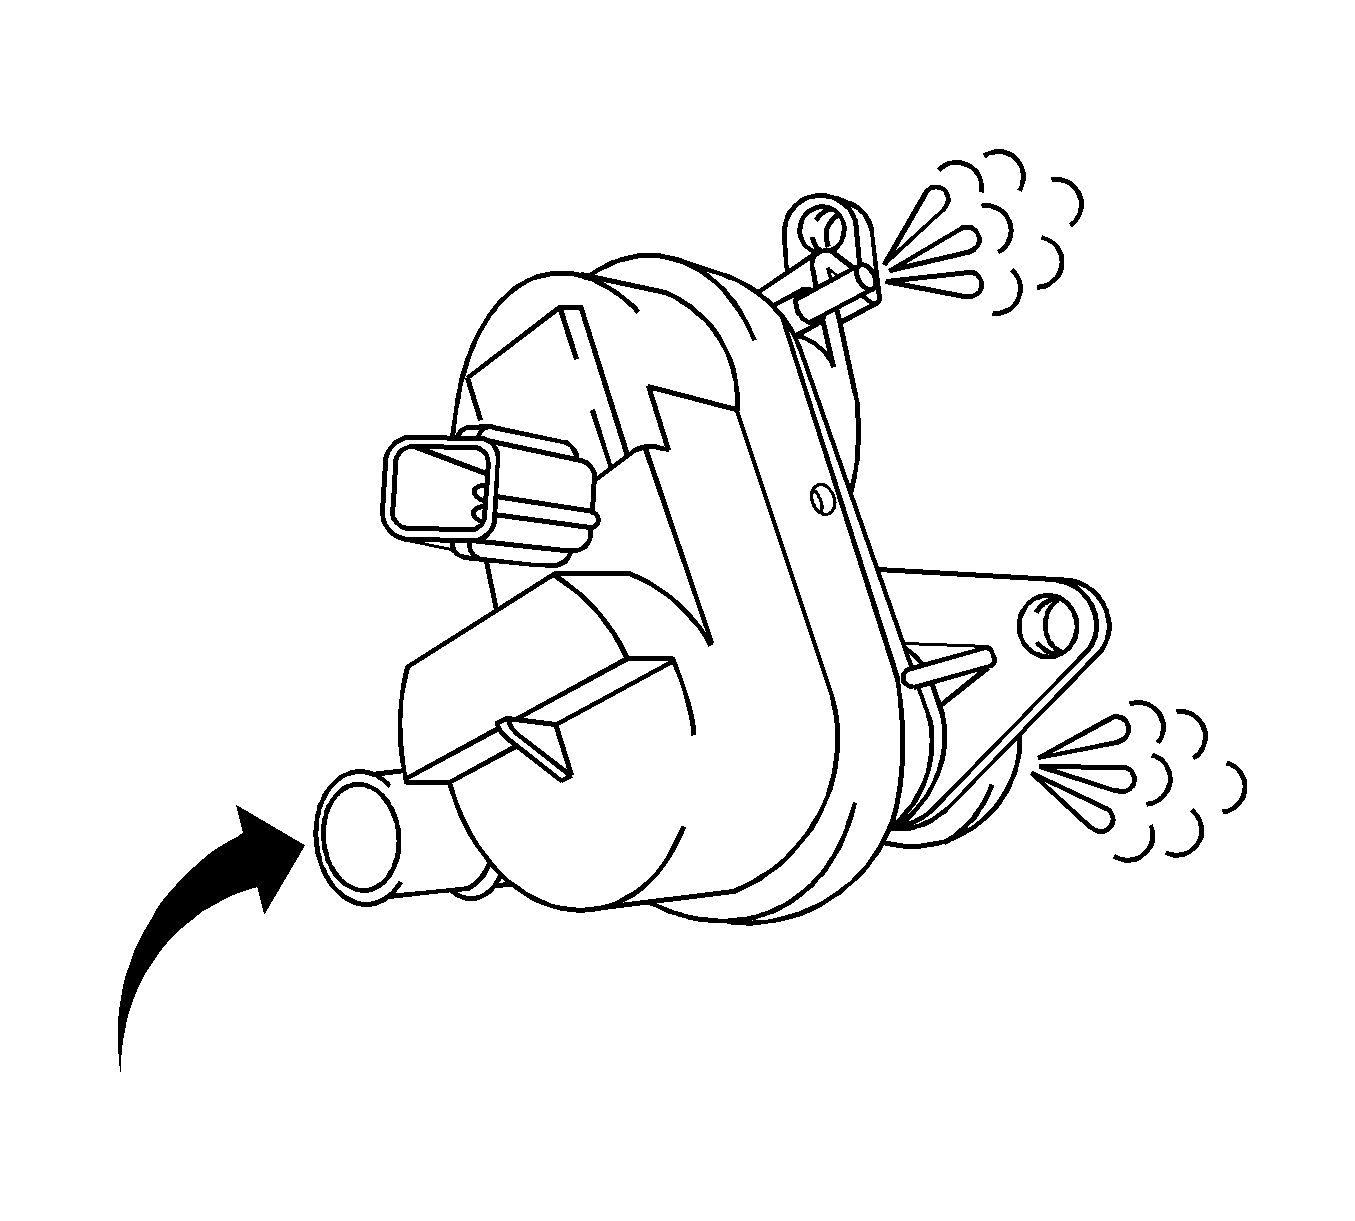
- Blow air into the air inlet port. The air should flow through the assembly and out of both ports.
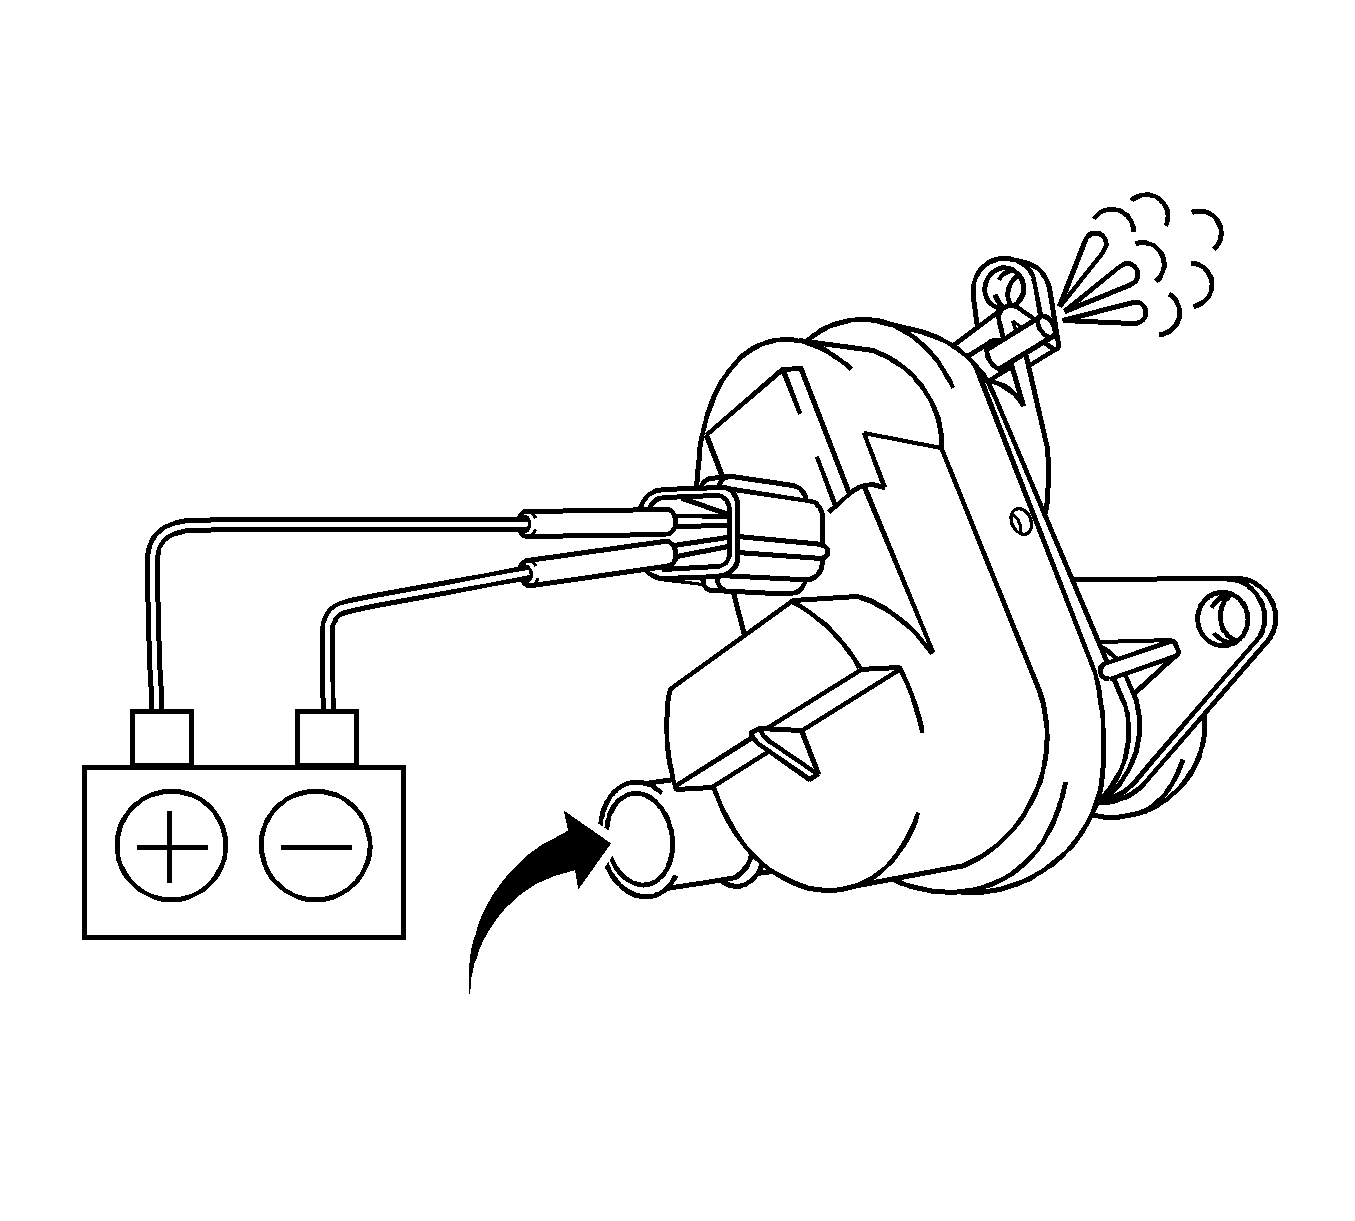
- Apply battery voltage to the ignition voltage terminal and ground to the solenoid control terminal. Refer to the vacuum pump terminal identification table above.
- Blow air into the air inlet port. The air should flow only through small port and NOT the large canister port.
- Replace the EVAP vacuum leak pump assembly if the pump failed either test. Refer to Evaporative Emission System Vacuum Leak Pump Replacement.
Caution: Do not breathe the air through the EVAP component tubes or hoses. The fuel vapors inside the EVAP components may cause personal injury.
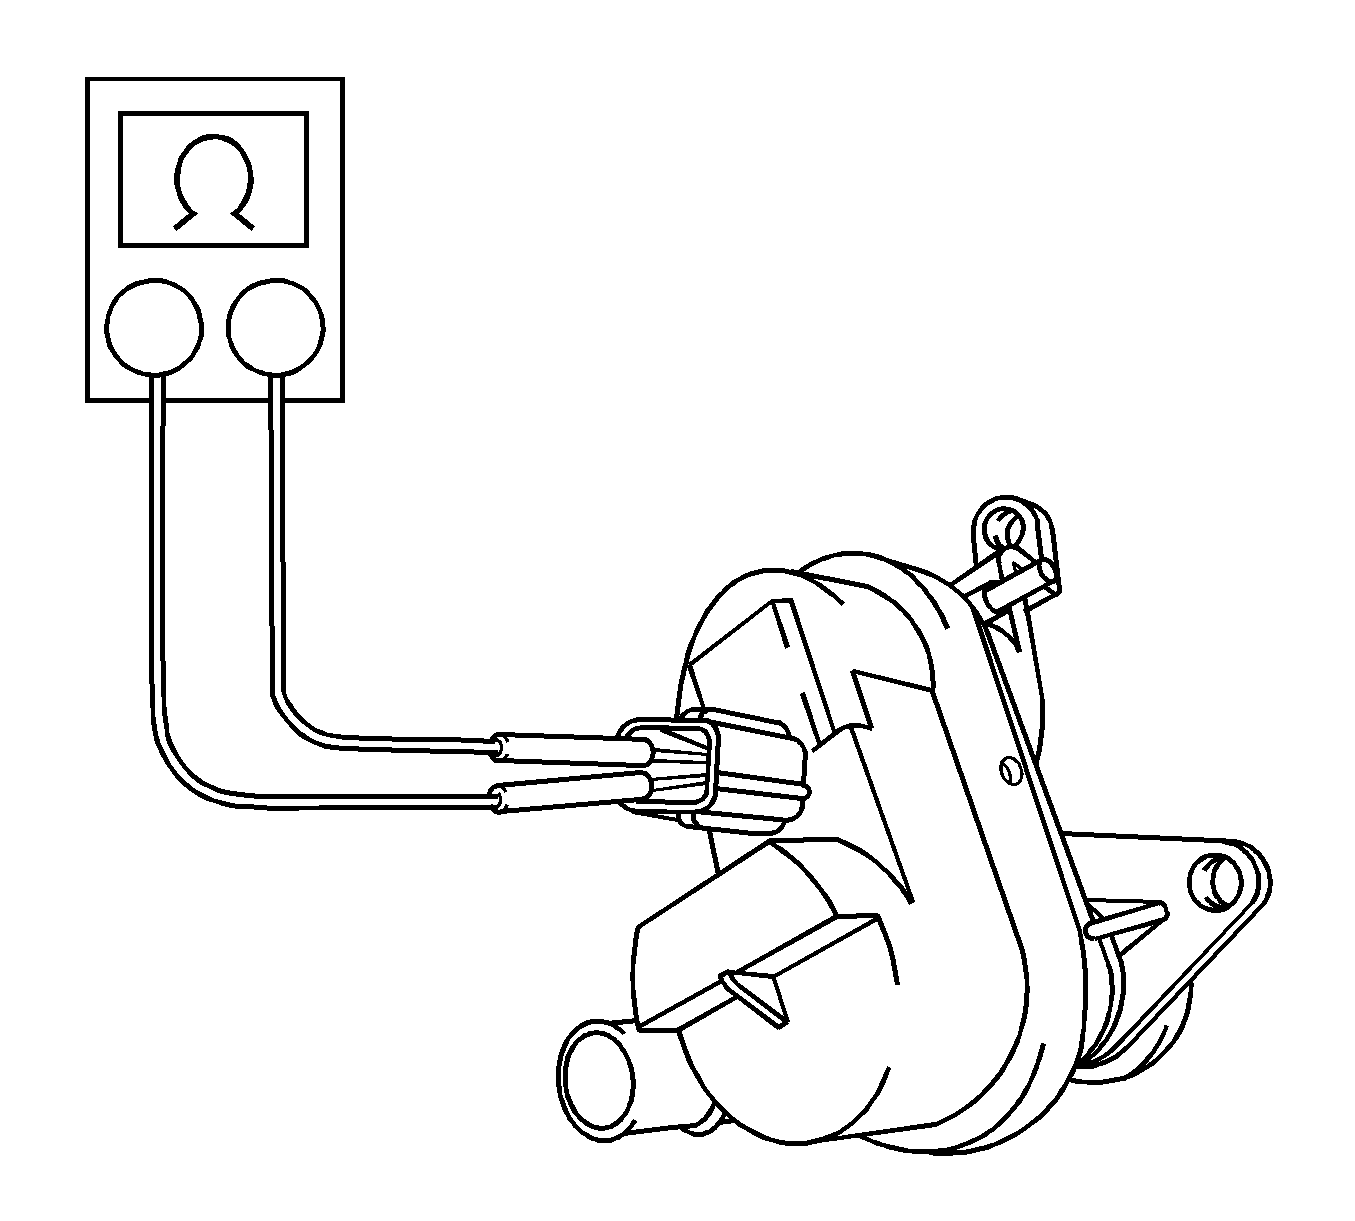
Measure
The EVAP canister vent valve resistance should be 25-30 ohms at 20°C (68°F).
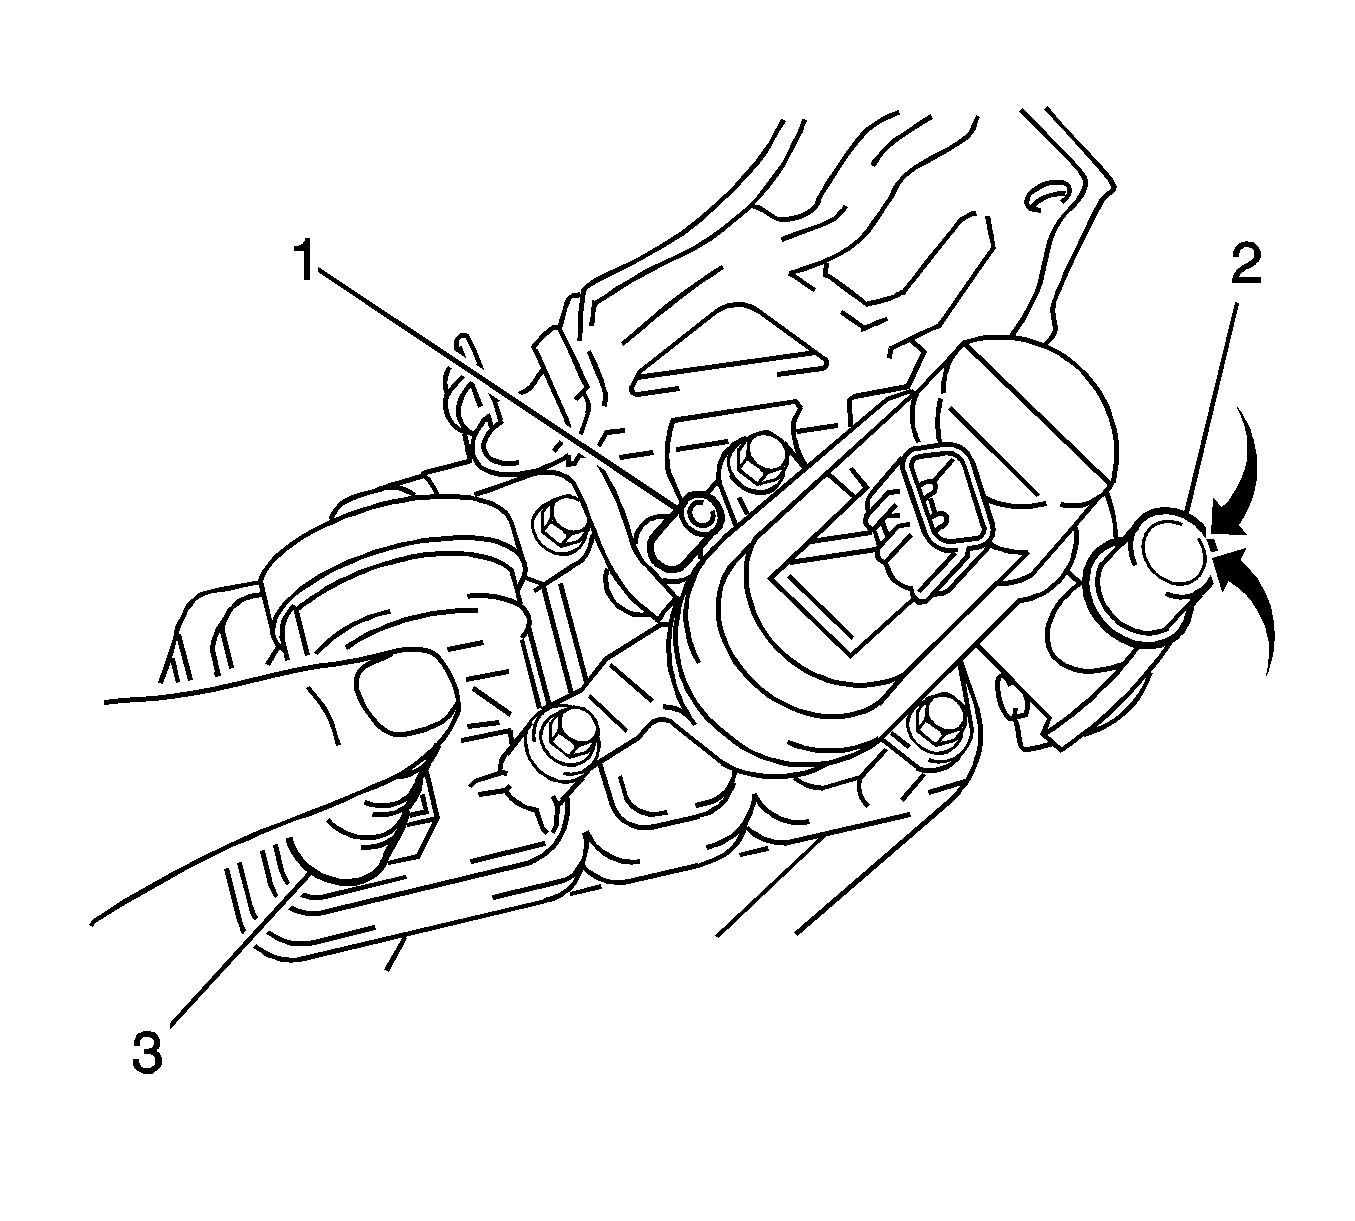
EVAP Canister Purge Valve Inspection
- Remove the EVAP canister purge valve. Refer to Evaporative Emission Canister Purge Solenoid Valve Replacement.
- Use a DMM in order to measure the resistance of the EVAP canister purge valve.
- Replace the EVAP canister purge valve if the resistance is not within the specified range. The solenoid can damage the powertrain control module (PCM) if the resistance value is less than 26 ohms.
- Check the PCM and replace, if necessary. Refer to Control Module References in Computer/Integrating Systems for replacement, setup, and programming.
- Blow air into one of the ports. The air should NOT flow through the opposite port.
- Apply battery voltage across the terminals of the EVAP canister purge valve.
- Blow air into the one port. The air should flow easily to the opposite port.
- Replace the EVAP canister purge valve if the valve failed either test. Refer to Evaporative Emission Canister Purge Solenoid Valve Replacement.
Caution: Do not breathe the air through the EVAP component tubes or hoses. The fuel vapors inside the EVAP components may cause personal injury.
Measure
The EVAP canister purge valve resistance should be 26-30 ohms at 20°C (68°F).