Tools Required
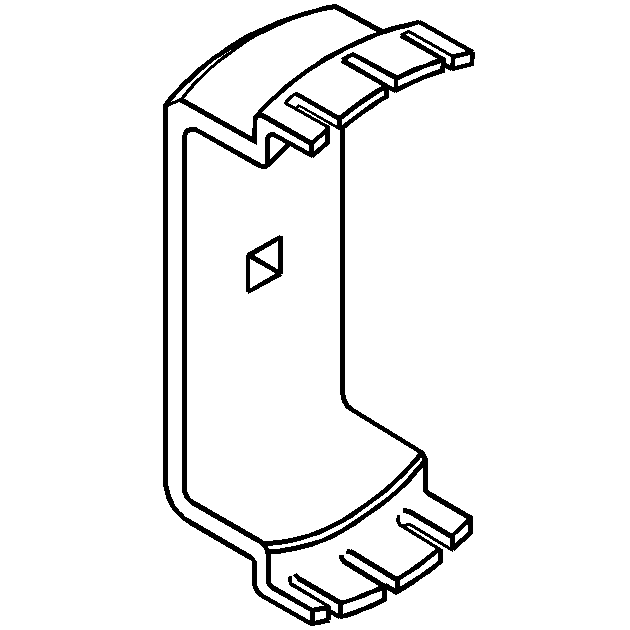
CH-47717 Fuel Lock Ring Remover Tool
Removal Procedure
Caution: Gasoline or gasoline vapors are highly flammable. A fire could occur if an ignition source is present. Never drain or store gasoline or diesel fuel in an open container, due to the possibility of fire or explosion. Have a dry chemical (Class B) fire extinguisher nearby.
Caution: Provide proper ventilation when working with fuel in enclosed areas where fuel vapors can collect. The lack of adequate ventilation may result in personal injury.
Caution: Always wear safety goggles when working with fuel in order to protect the eyes from fuel splash.
Caution: Remove the rear compartment floor trim to provide technician contact with the vehicle's metal surfaces. Failure to remove the rear compartment floor trim may cause a static electricity discharge to ignite any fuel vapor resulting in personal injury and vehicle damage.
Caution: Fuel Vapors can collect while servicing fuel system parts in enclosed
areas such as a trunk. To reduce the risk of fire and increased exposure to
vapors:
• Use forced air ventilation such as a fan set outside
of the trunk. • Plug or cap any fuel system openings in order to reduce fuel vapor
formation. • Clean up any spilled fuel immediately. • Avoid sparks and any source of ignition. • Use signs to alert others in the work area that fuel system work
is in process.
Notice: Cap the fittings and plug the holes when servicing the fuel system in order to prevent dirt and other contaminants from entering the open pipes and passages.
Notice: Clean all of the following areas before performing any disconnections
in order to avoid possible contamination in the system:
• The fuel pipe connections • The hose connections • The areas surrounding the connections
Important:
• Always replace the fuel sender assembly O-rings when reinstalling the
fuel sender assembly. • Always maintain cleanliness when servicing fuel system components. • Do not bend the arm of the fuel gage float while removing the fuel sender
assembly.
- Relieve the fuel system pressure. Refer to Fuel Pressure Relief .
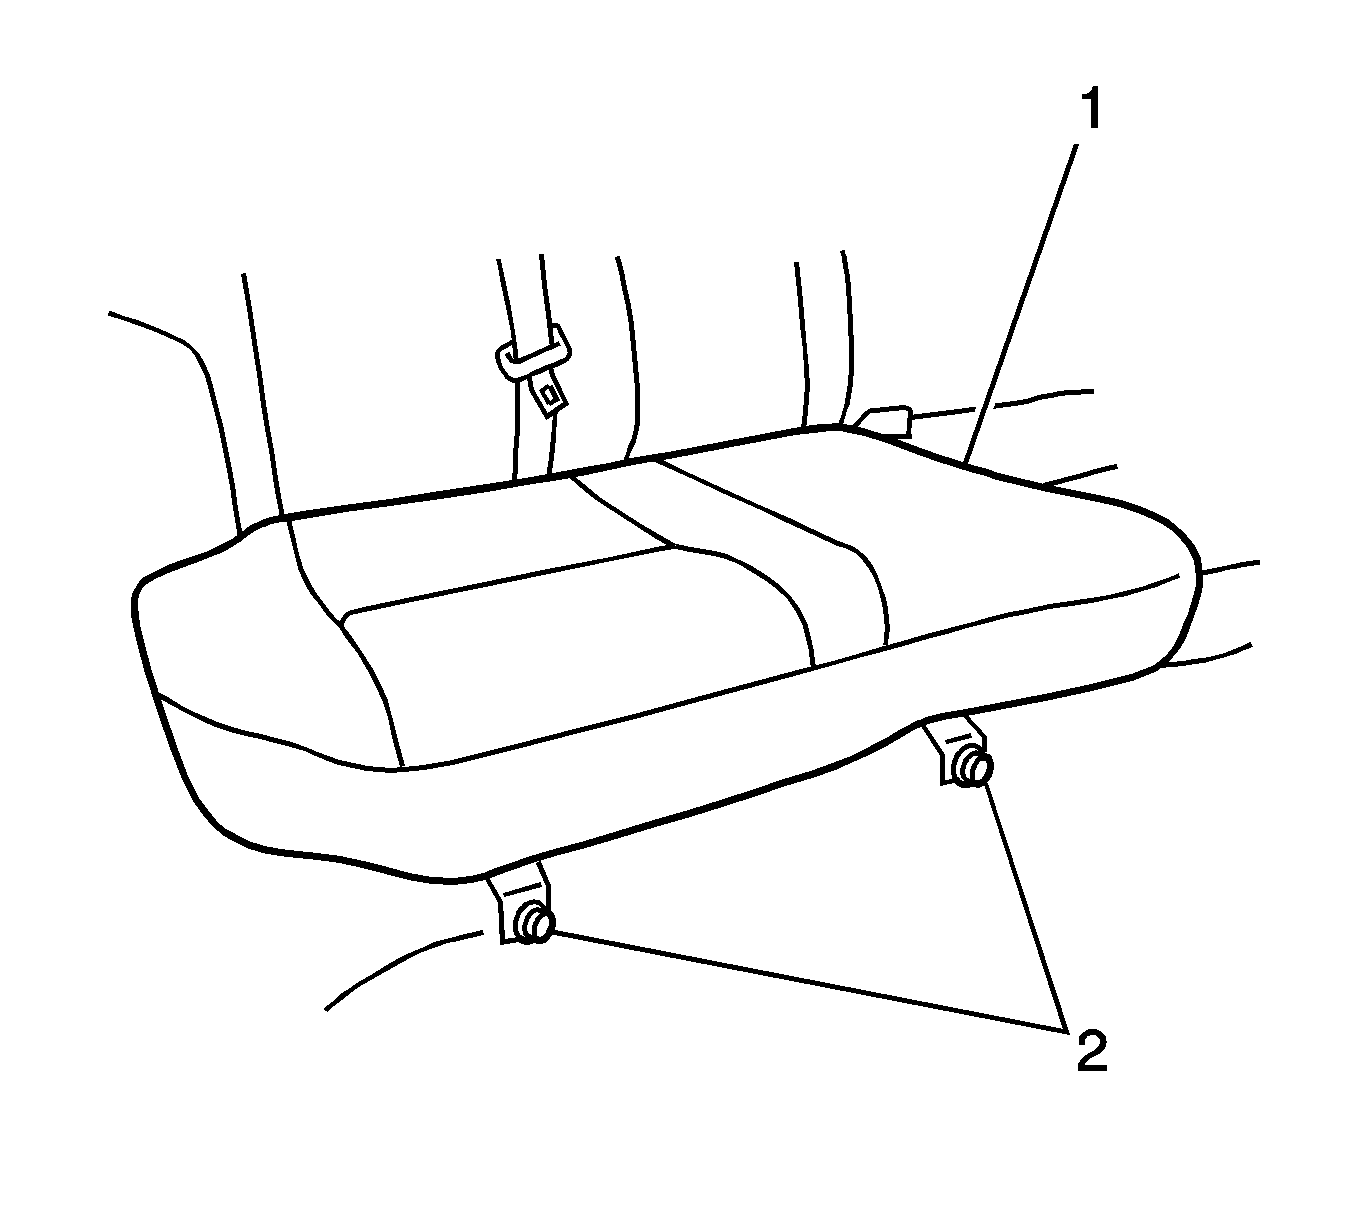
- Remove the 2 fasteners (2) of the right side cushion (1) and swing the rear seat bottom cushion (1) up and out of the way.
- Remove the sill plate from the right side door opening.
- Fold back the carpet, in order to maintain metal-to-metal contact, while servicing the fuel sender assembly.
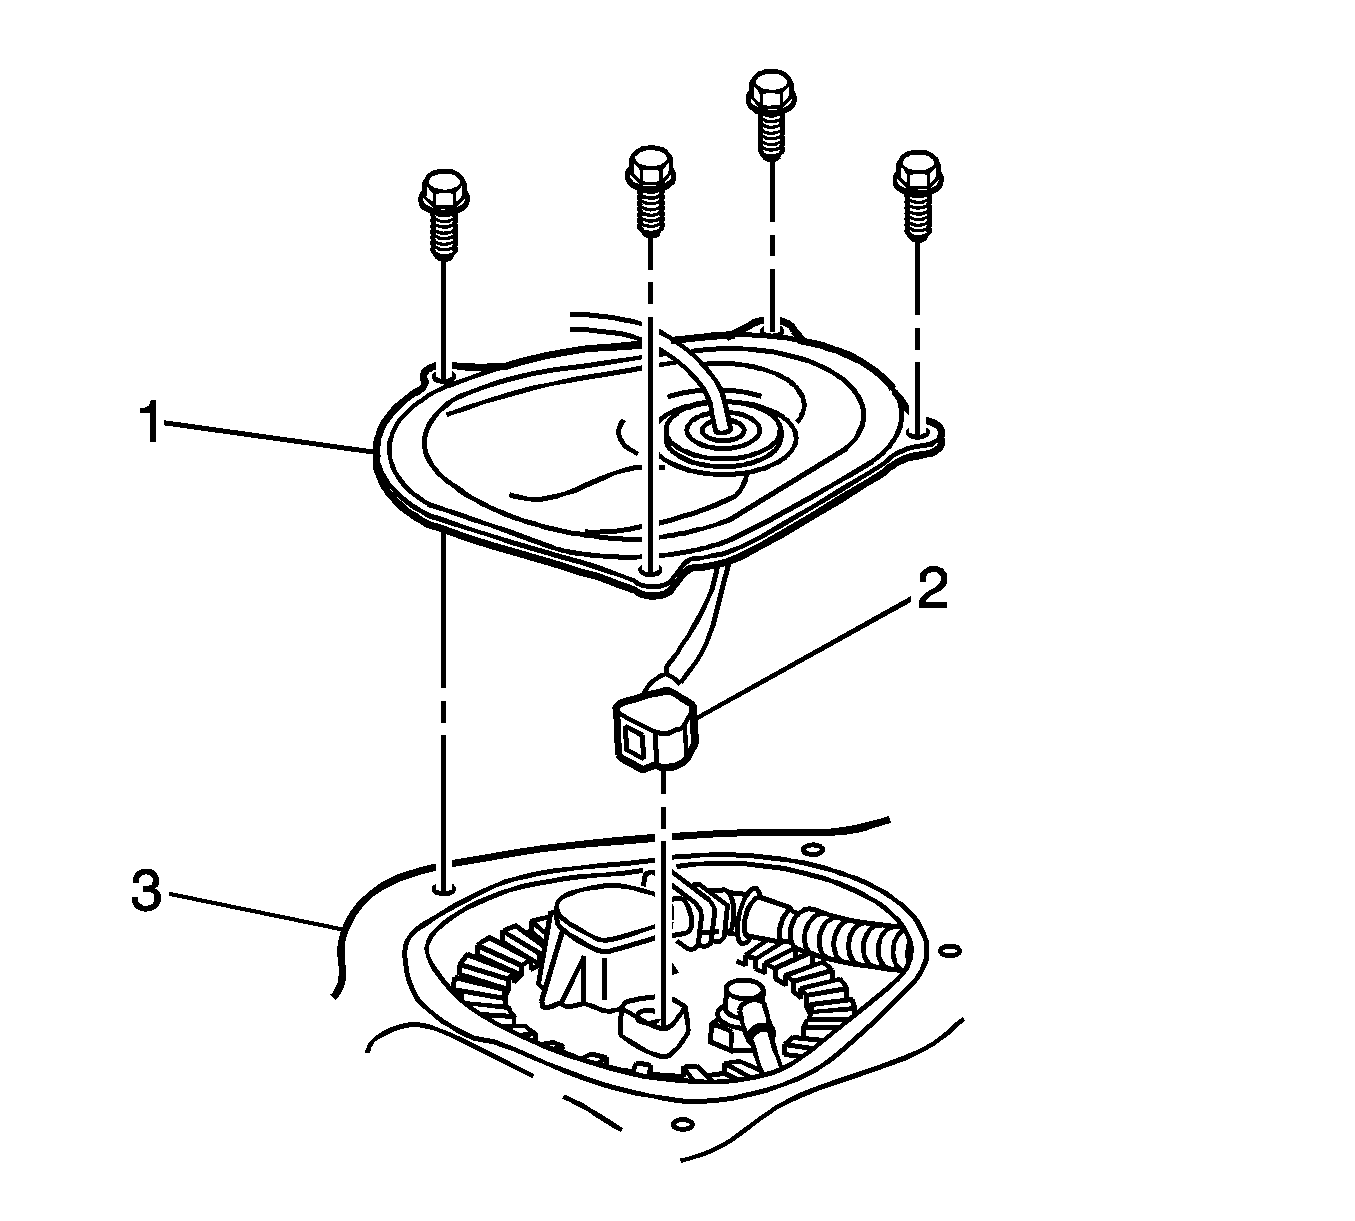
- Remove the 4 fasteners to the access panel (1) for the fuel sender assembly from the rear seat floor (3).
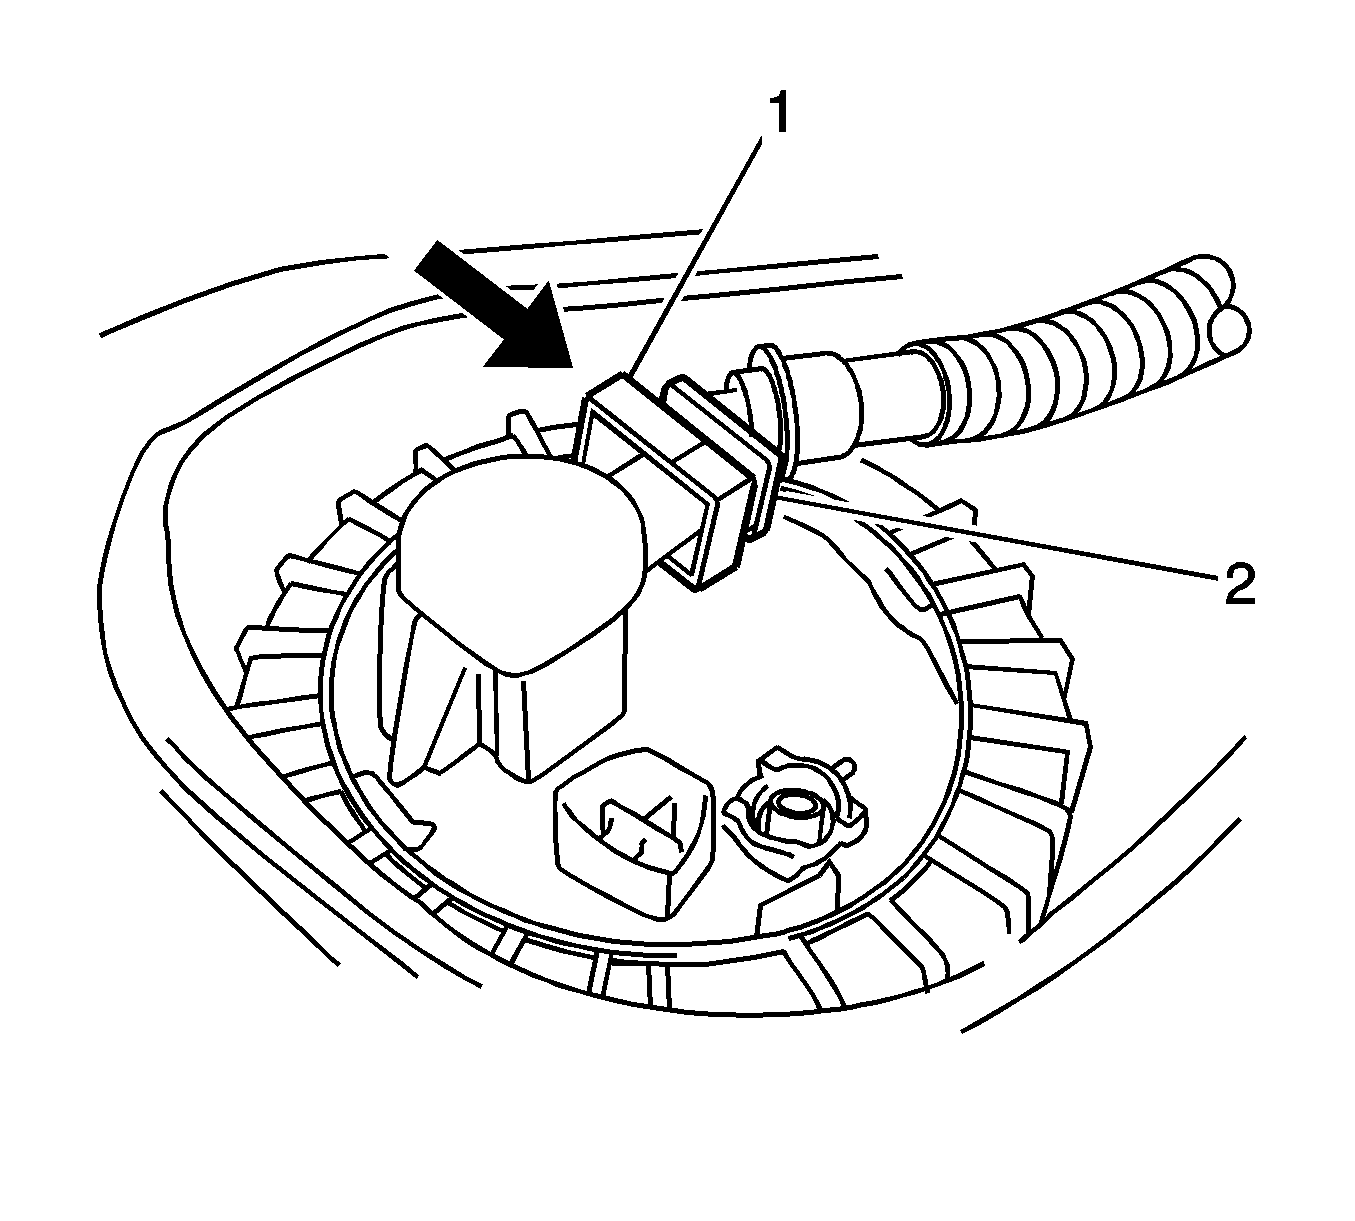
- Lift the access panel (1) and disconnect the fuel sender electrical connector (2) from the fuel sender assembly.
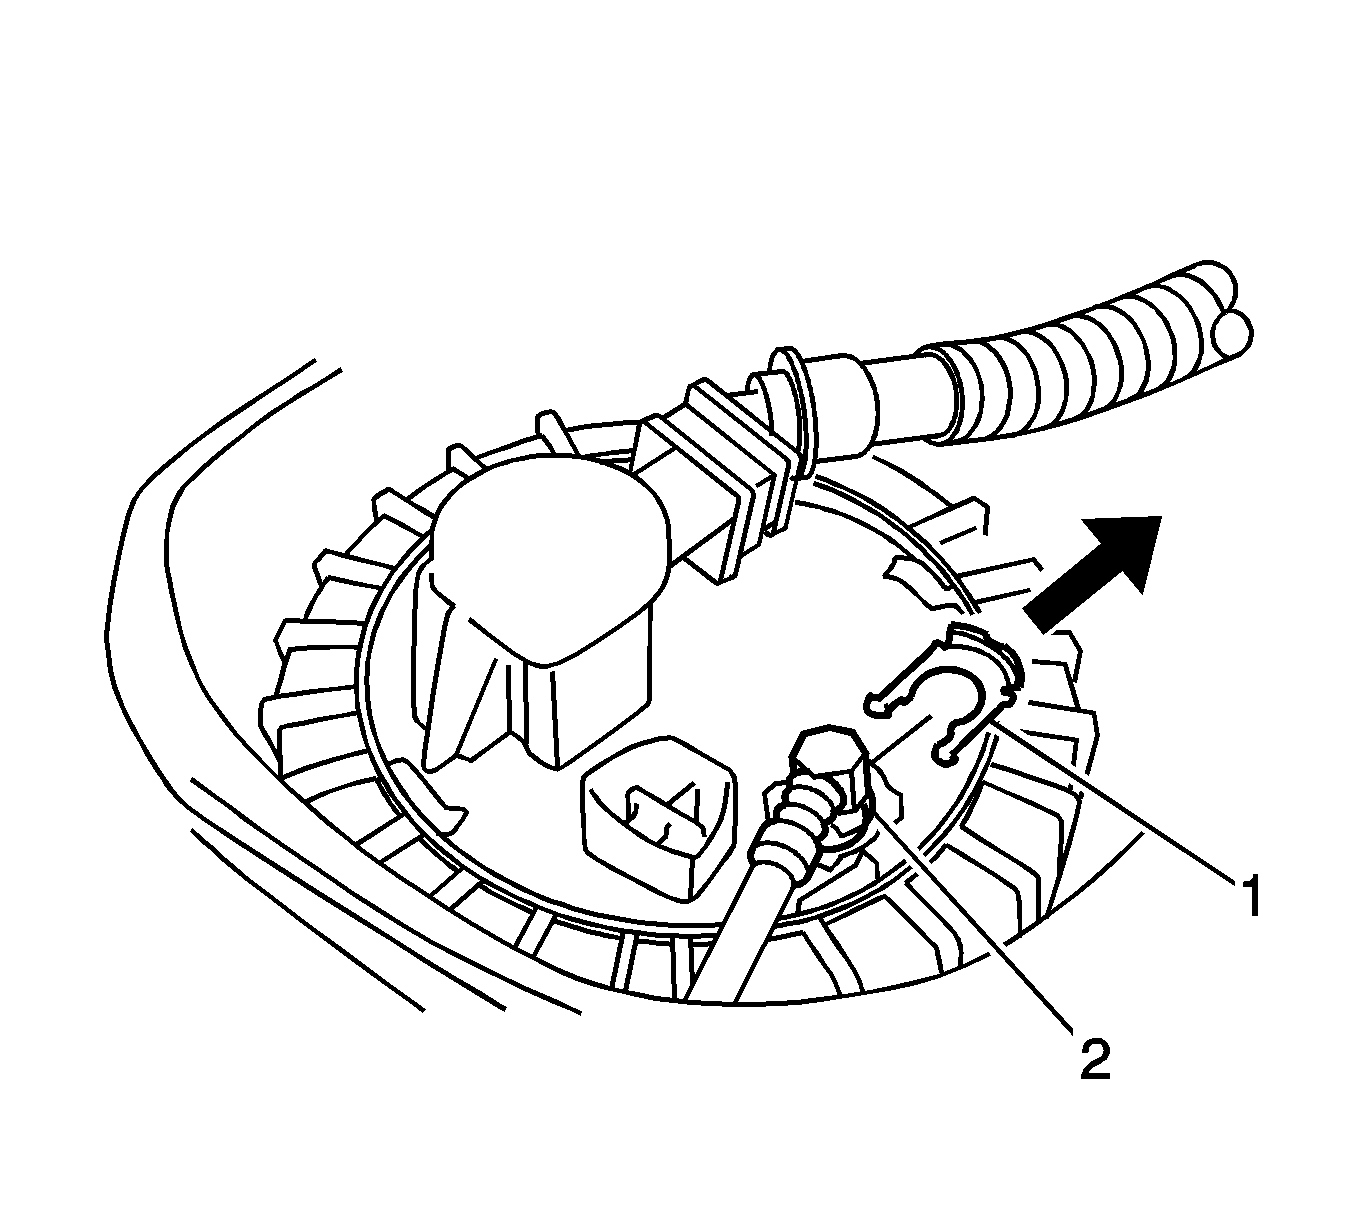
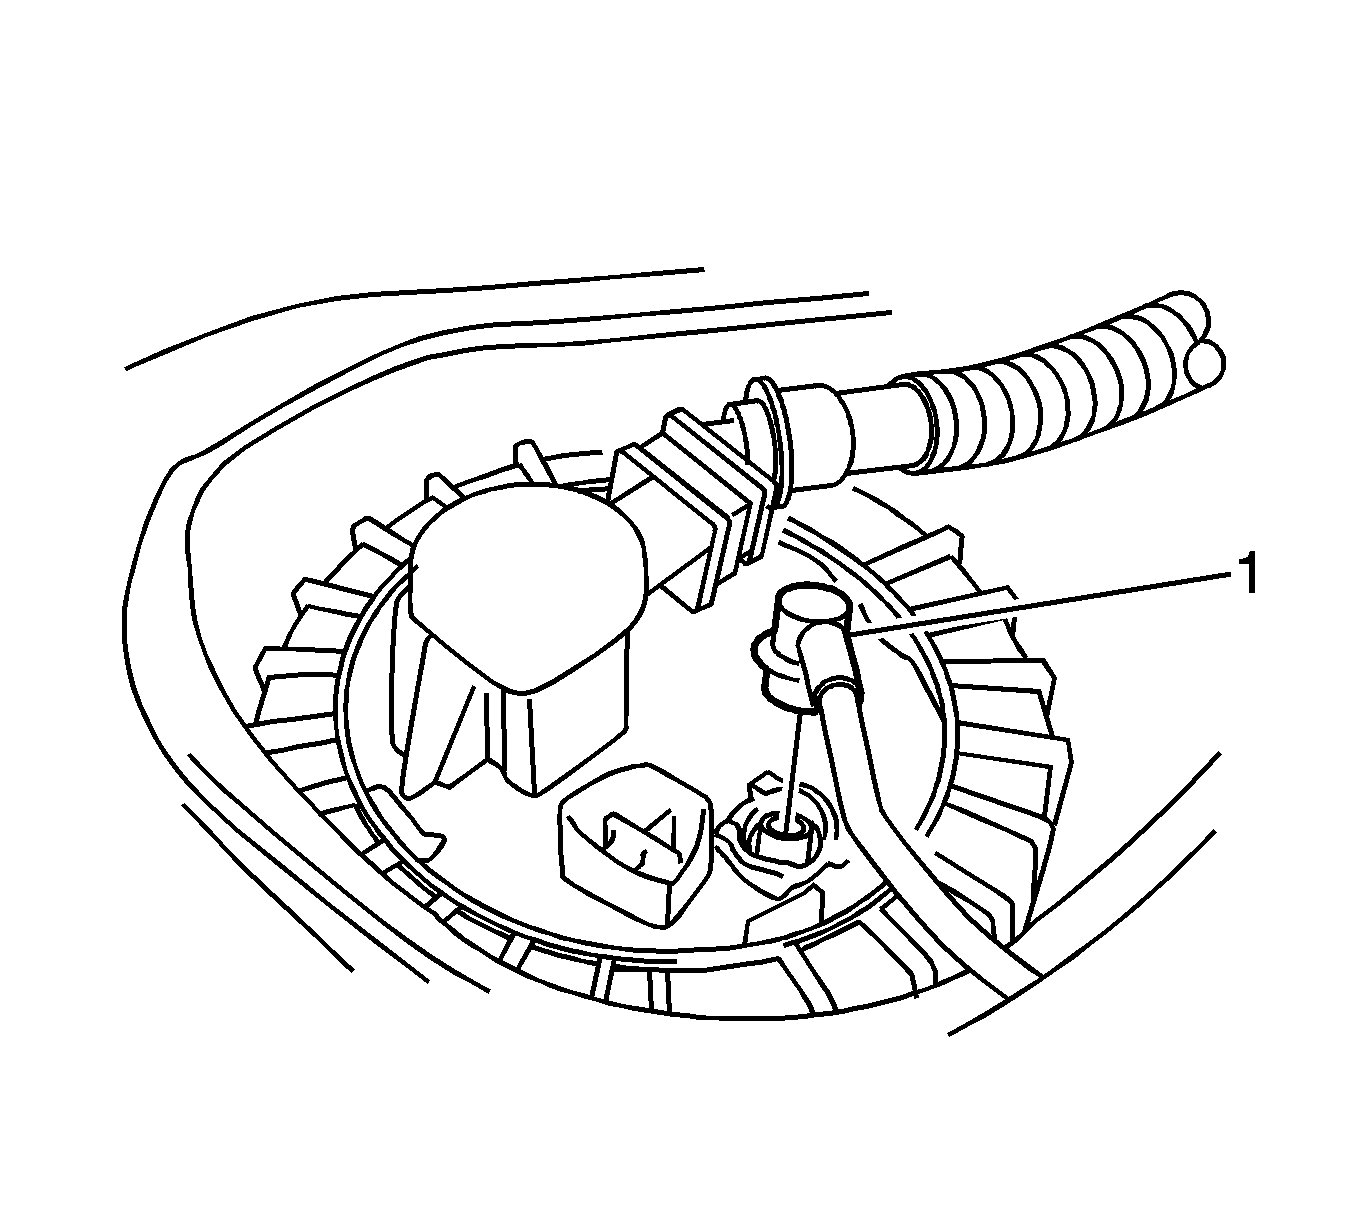
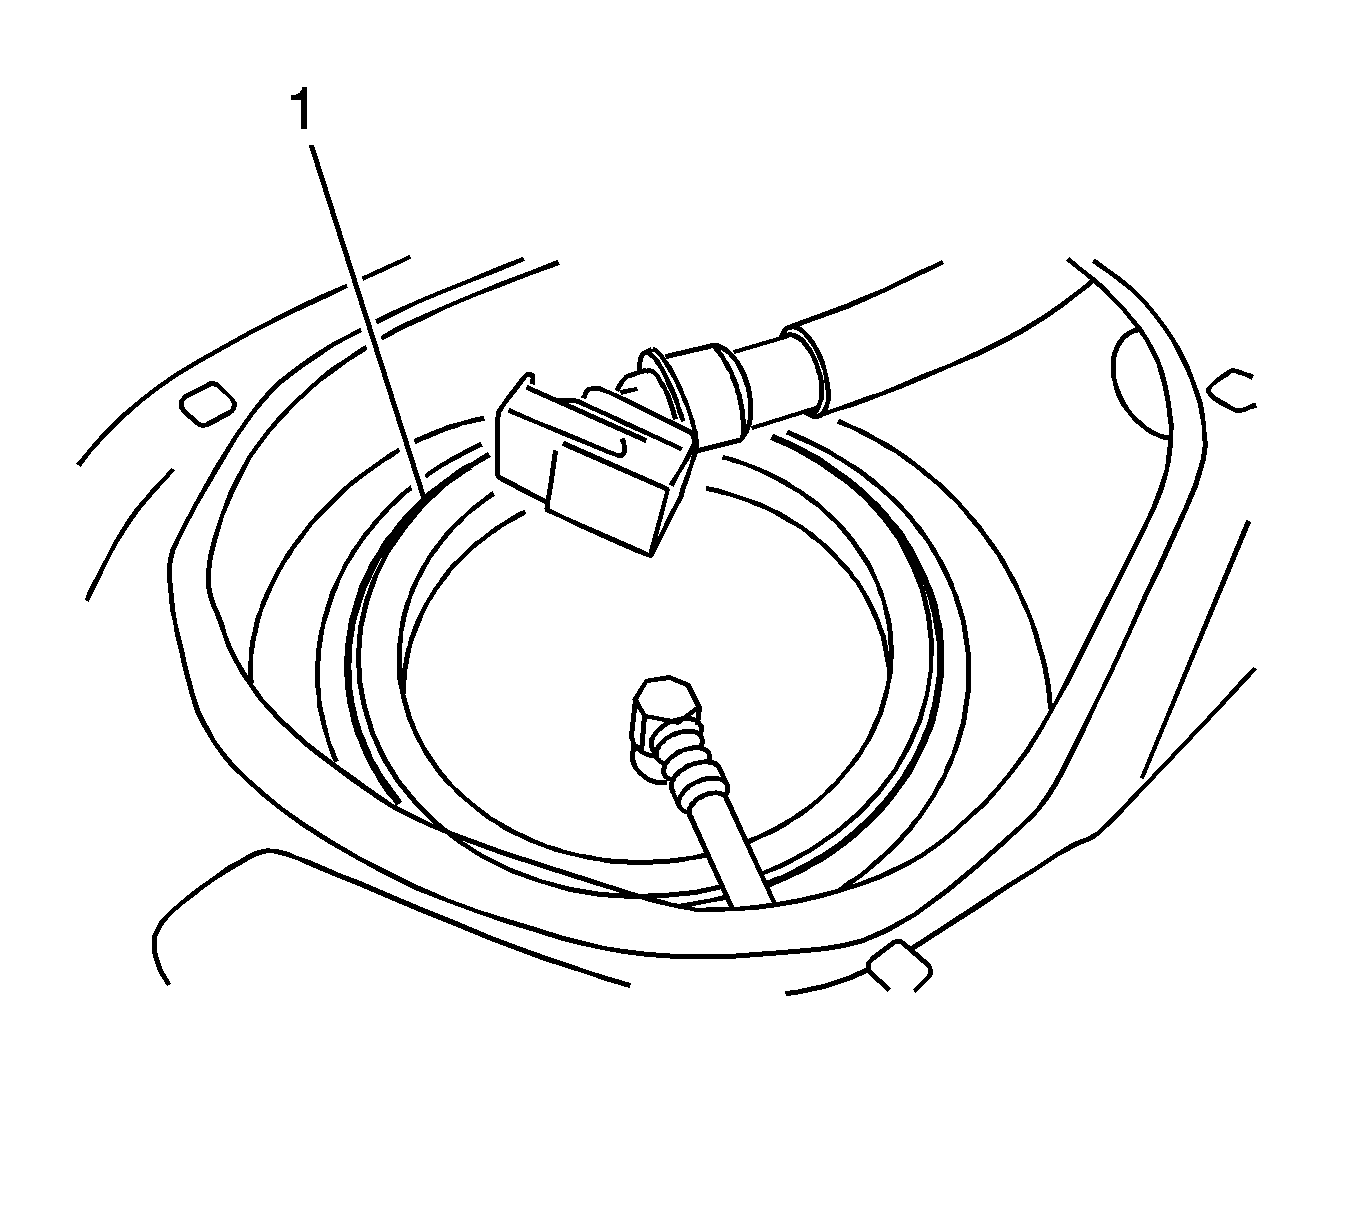
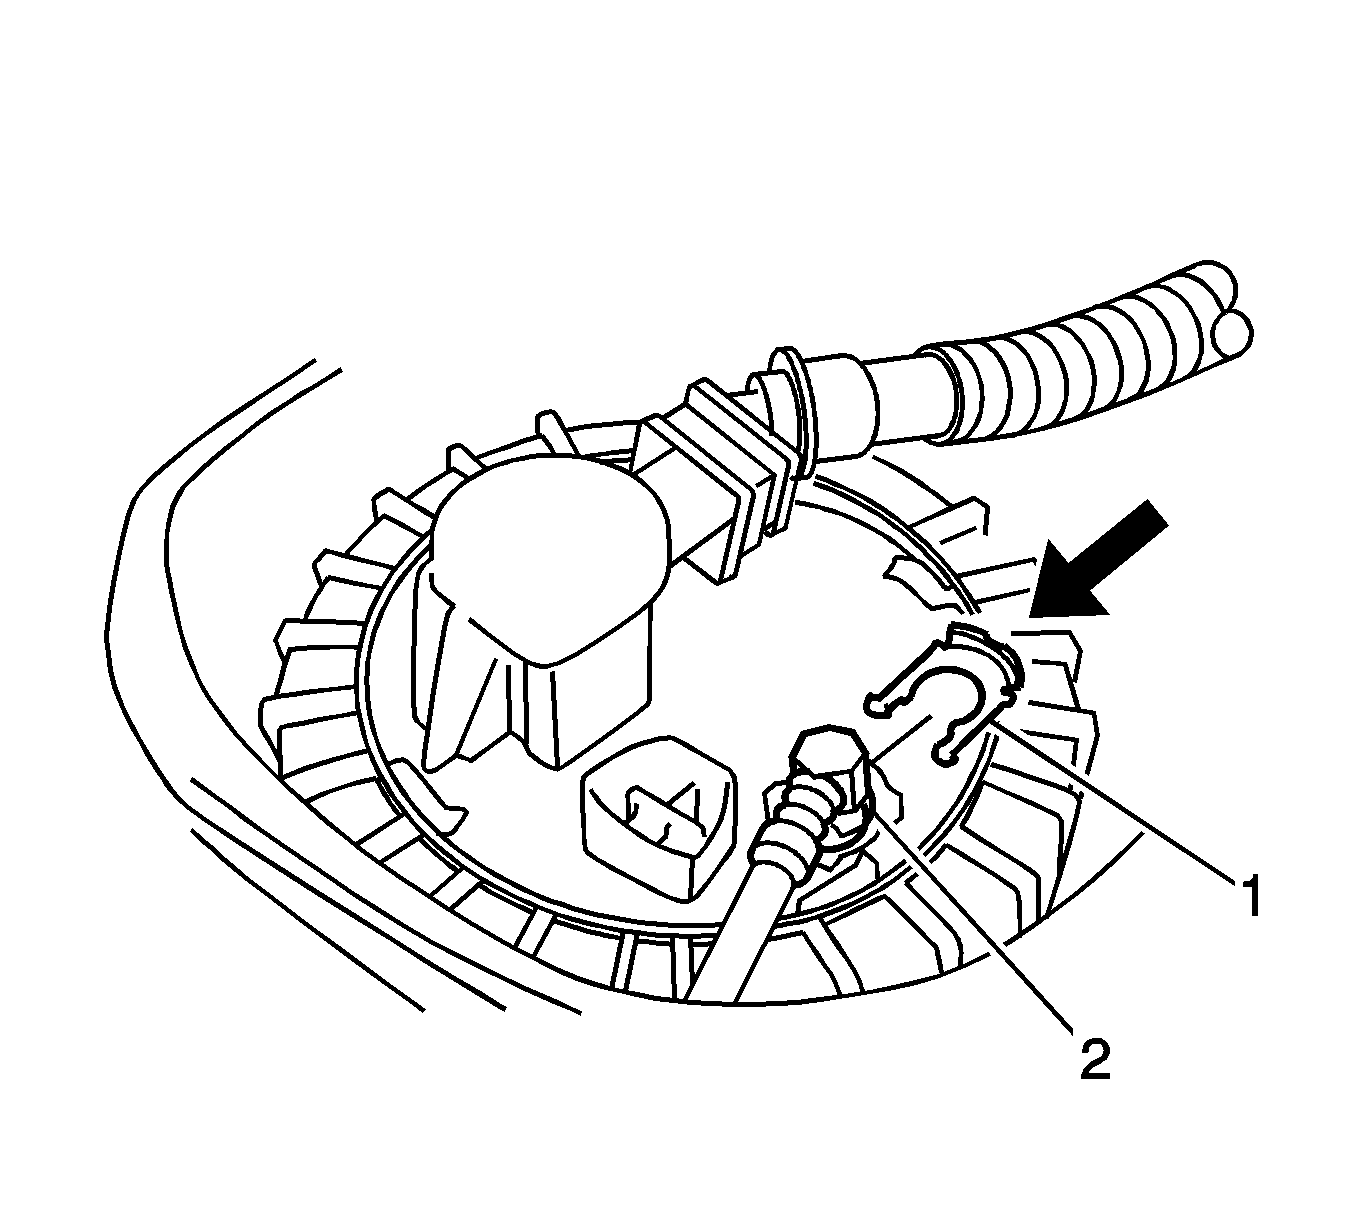
- Remove the retaining clip (1) from the fuel line fitting (2).
- Disconnect the fuel line (1) from the fuel sender assembly.
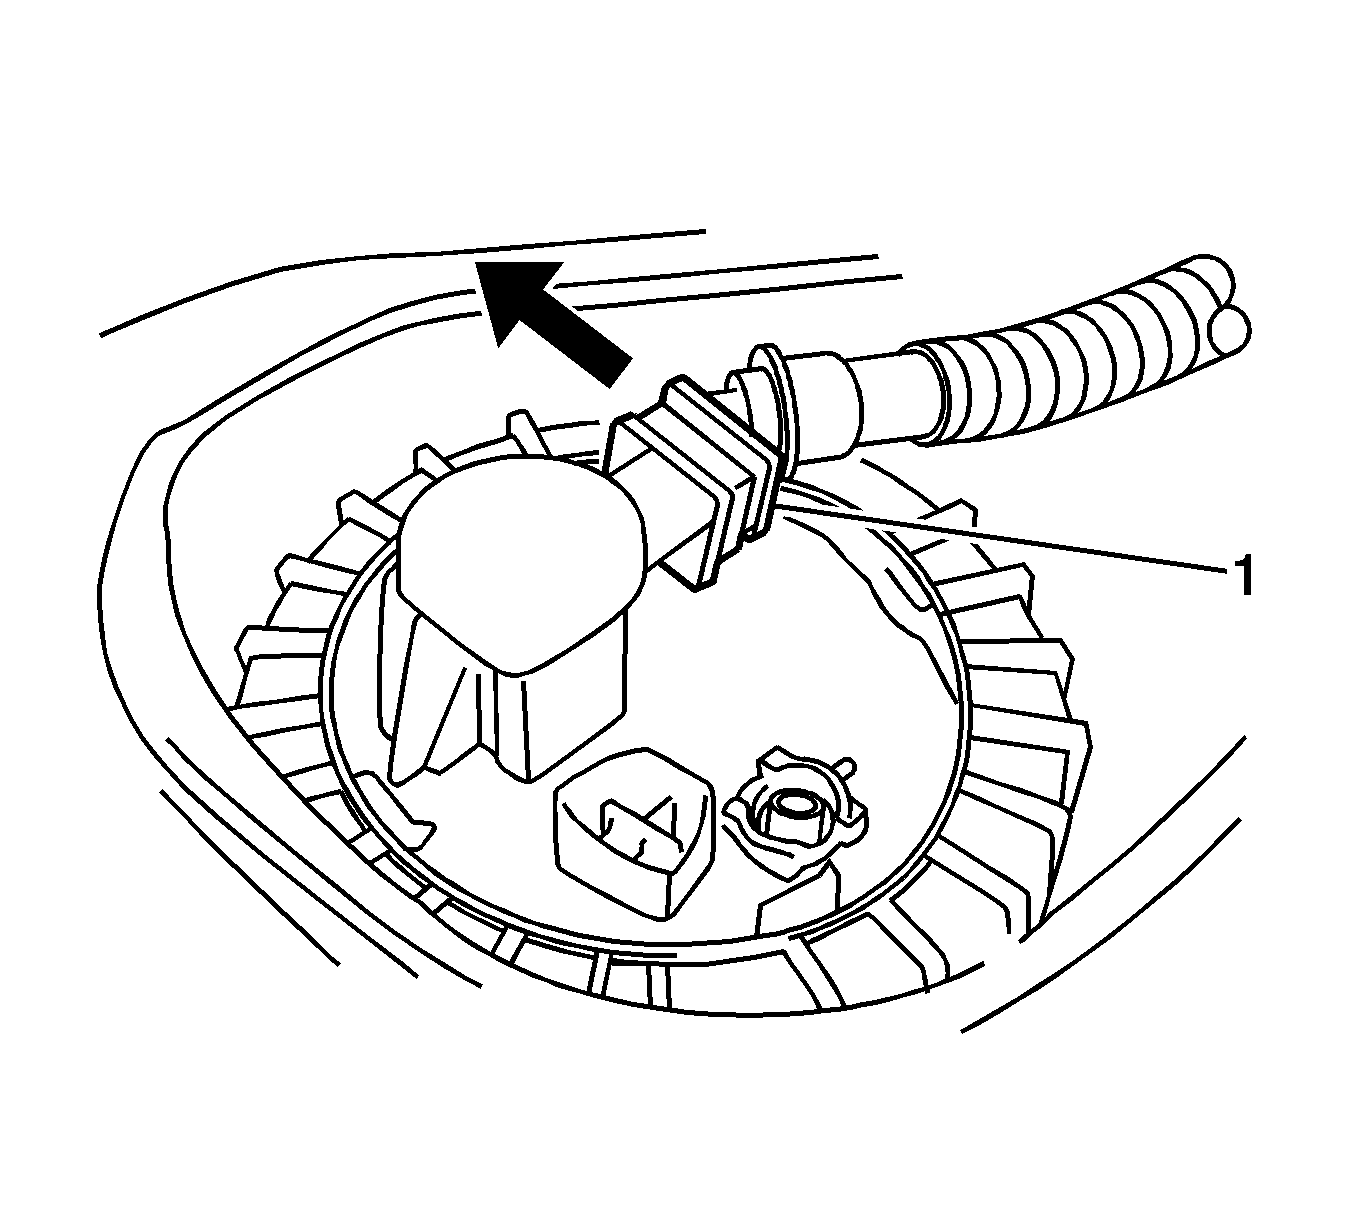
- Unlock the quick connect fitting of the on-board refueling vapor recovery (ORVR) vent line by sliding the lock clasp (1) to unlock position.
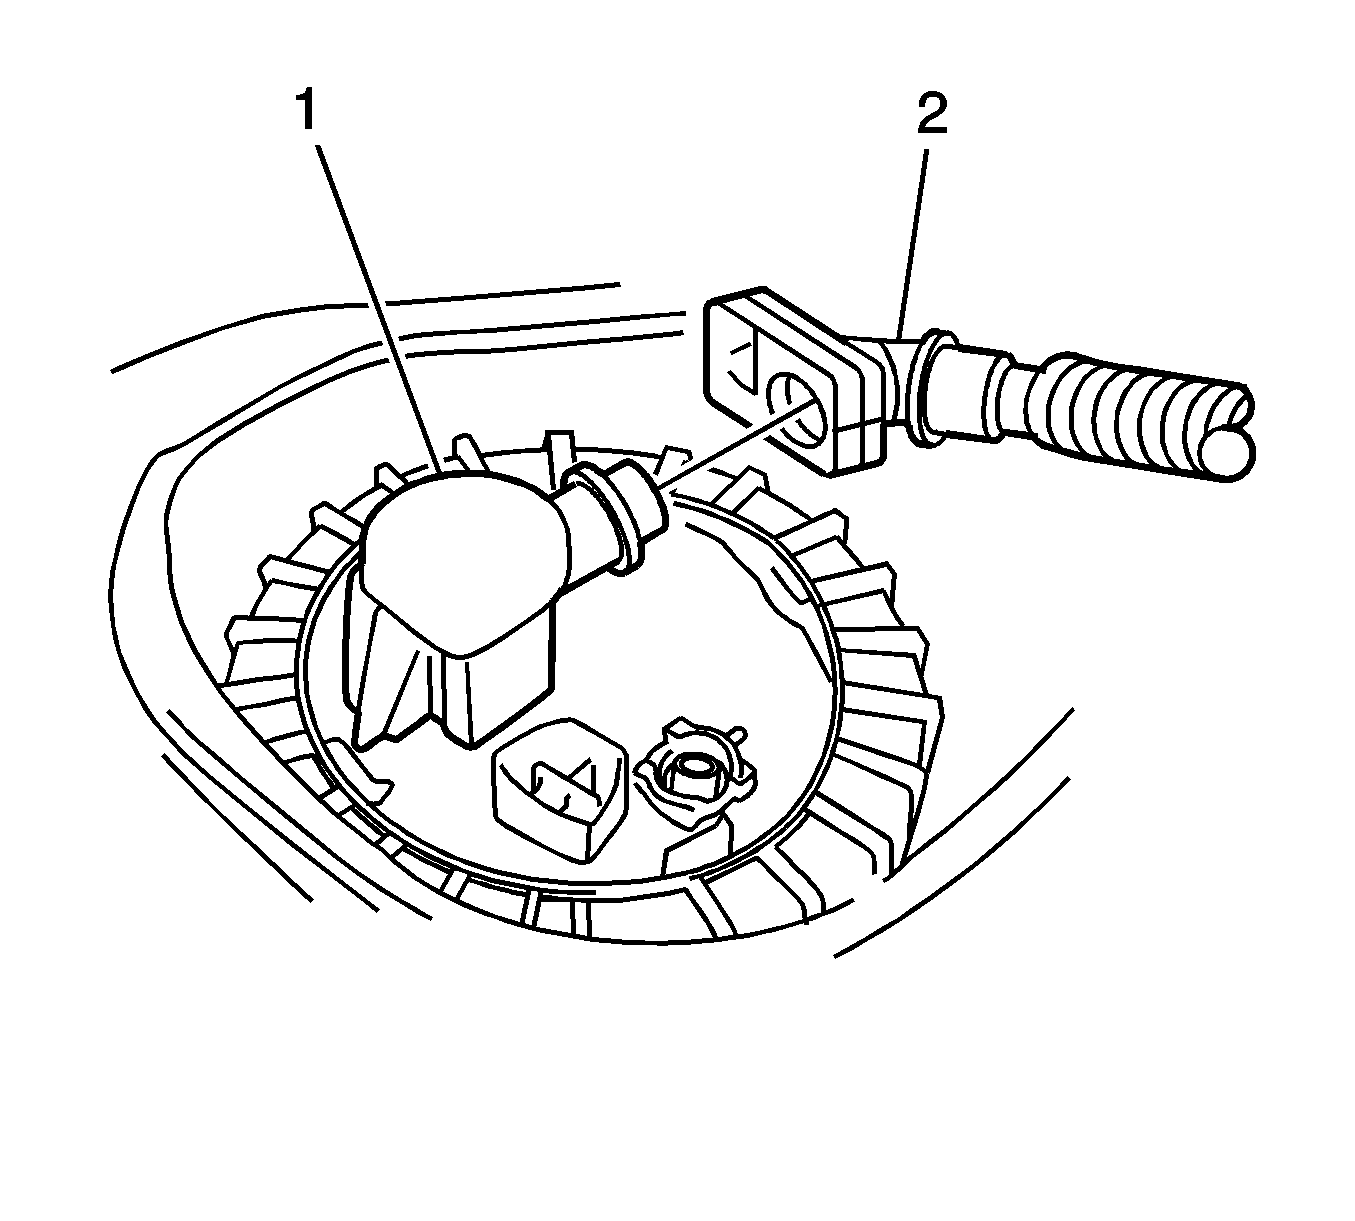
- Disconnect the ORVR vent line (2) from the fuel sender assembly (1).
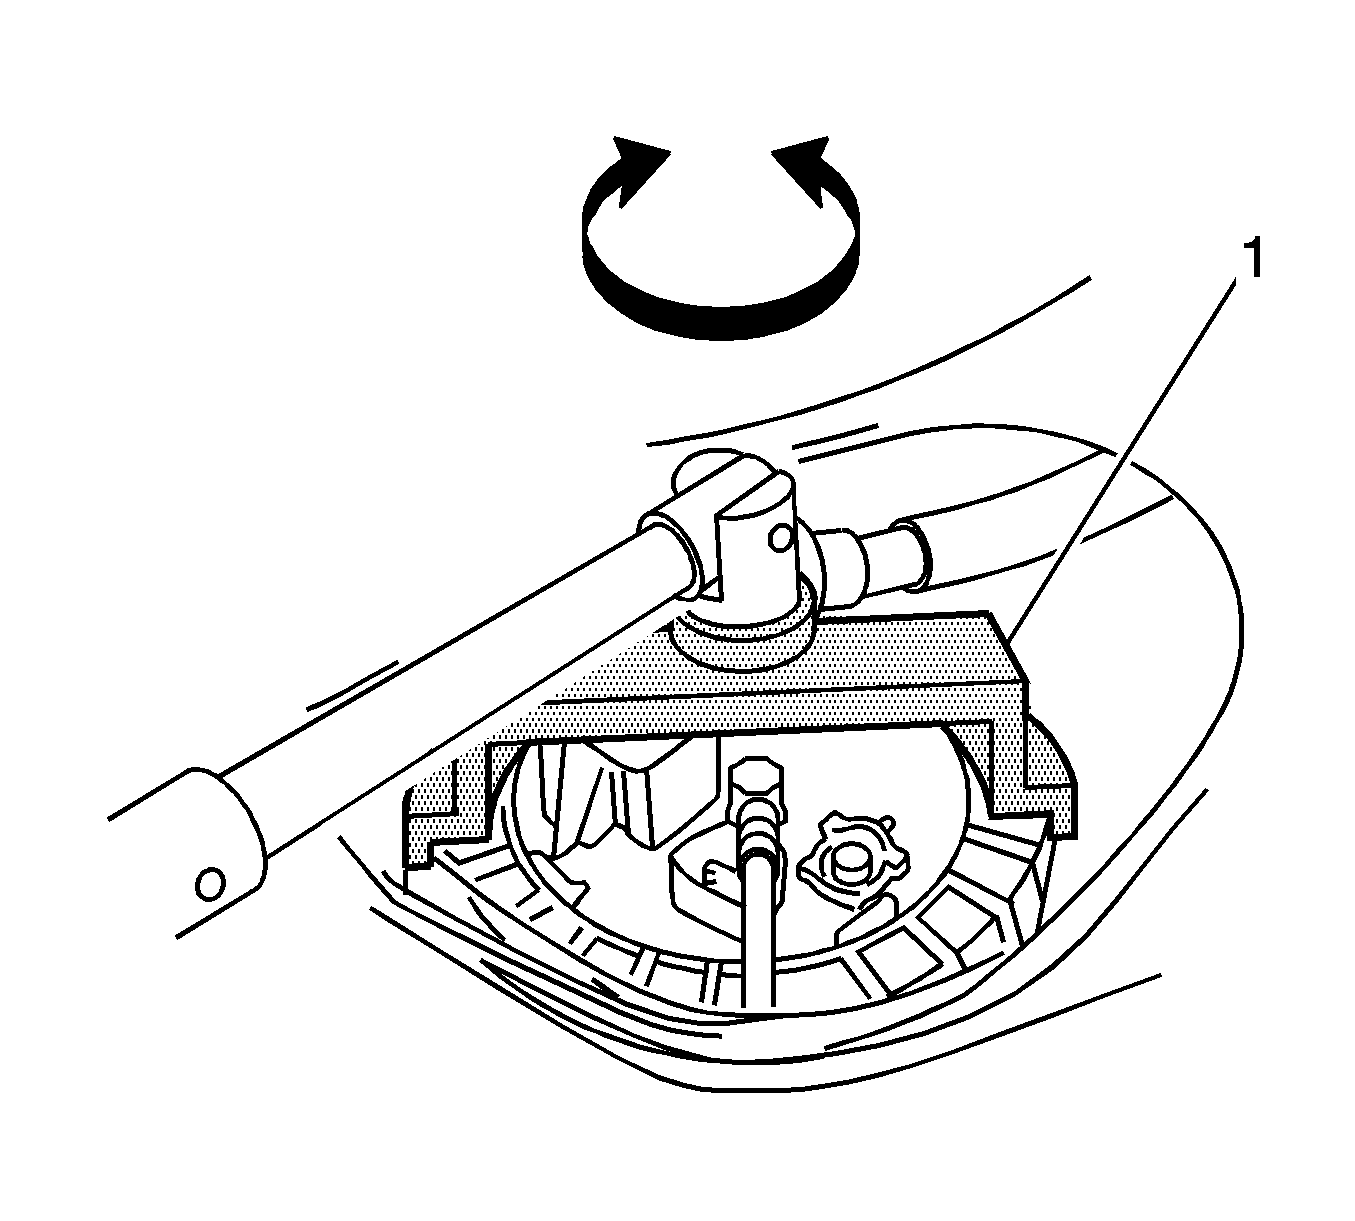
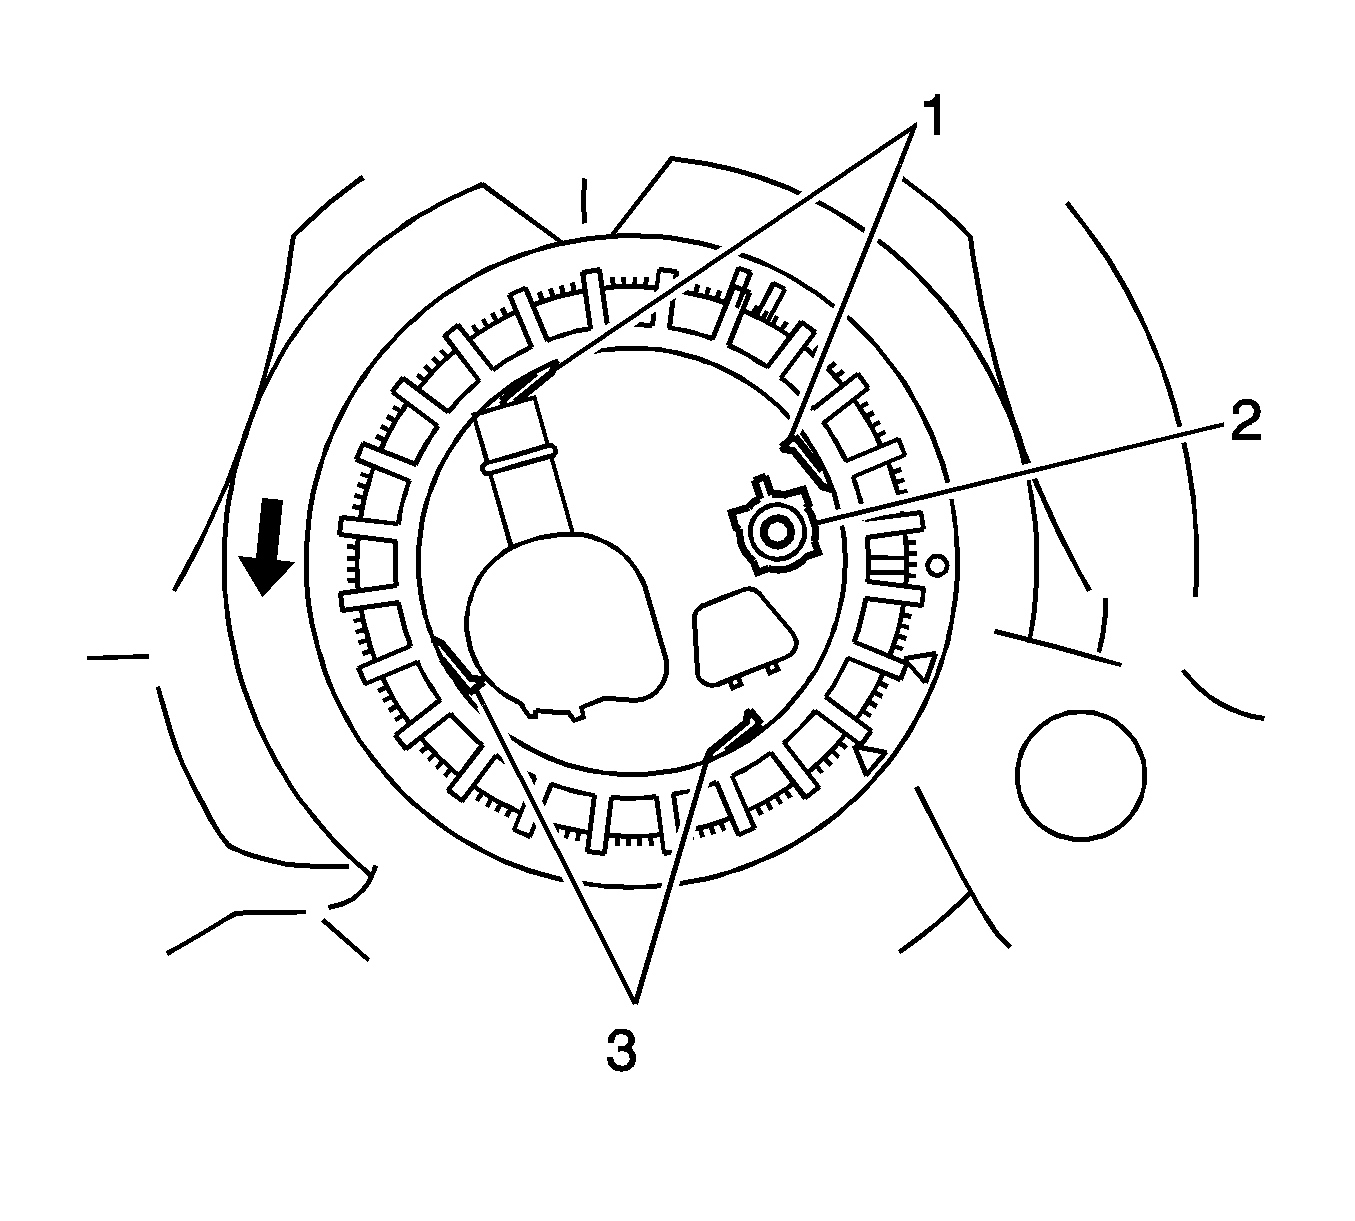
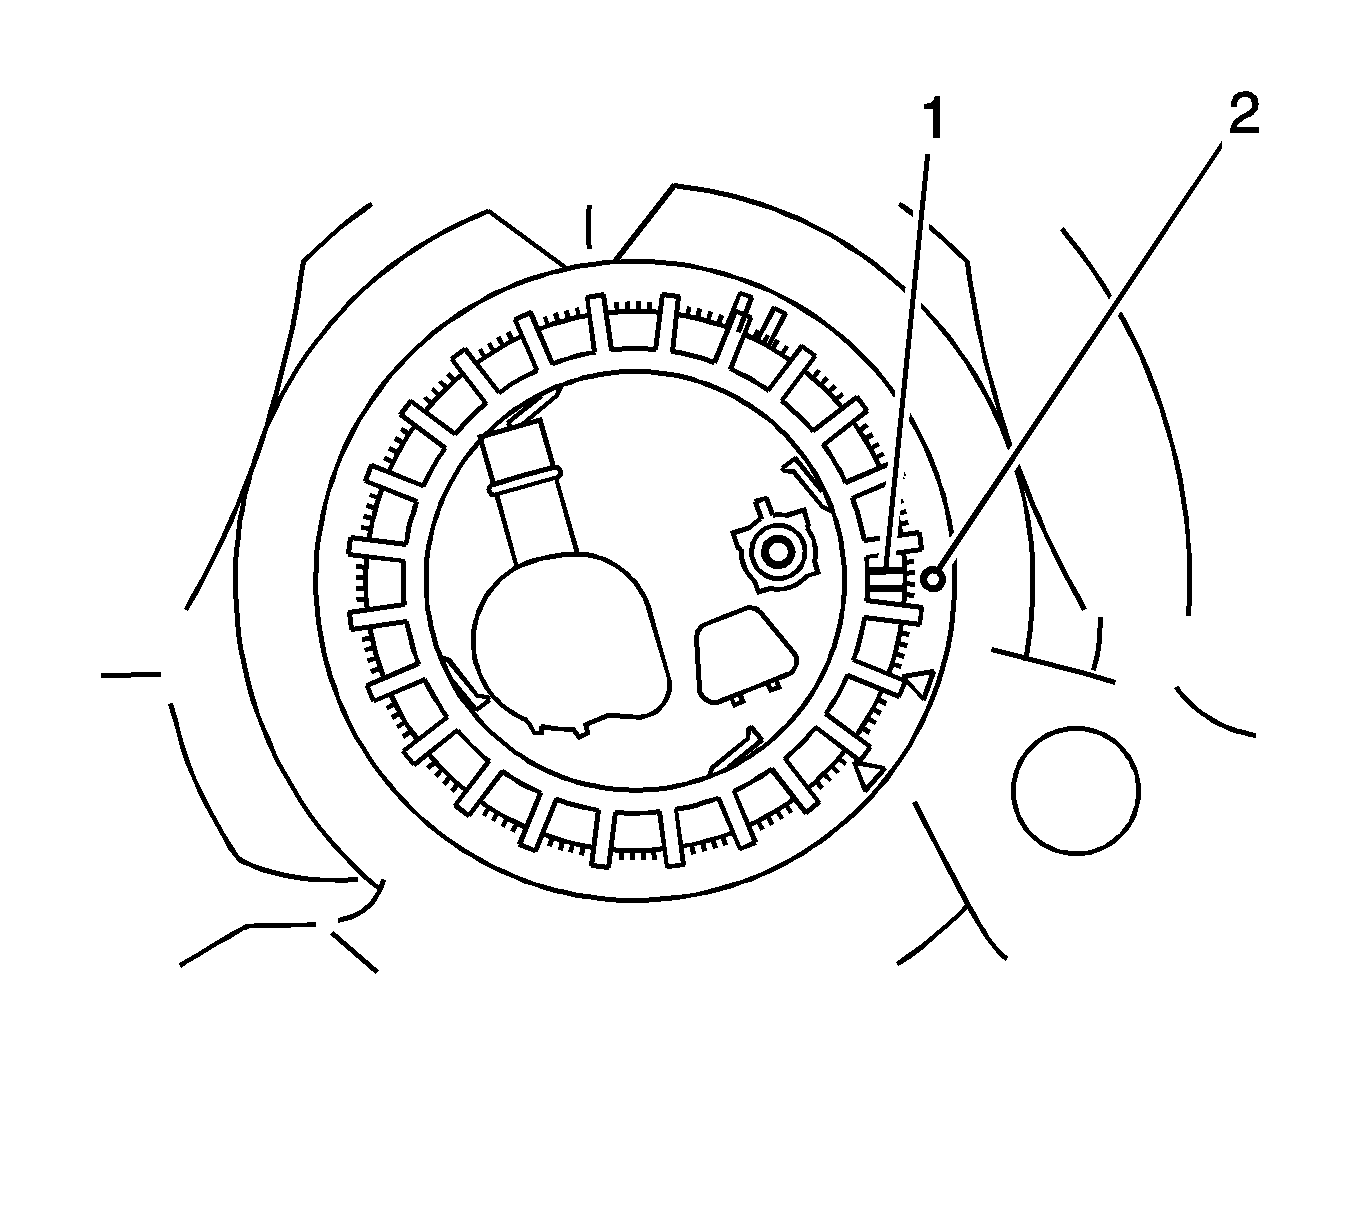
- Use the CH-47717 (1) in order to loosen the fuel sender assembly lock ring.
- Clean the area around the fuel and vent lines and the fuel sender assembly in order to prevent possible fuel contamination during removal.
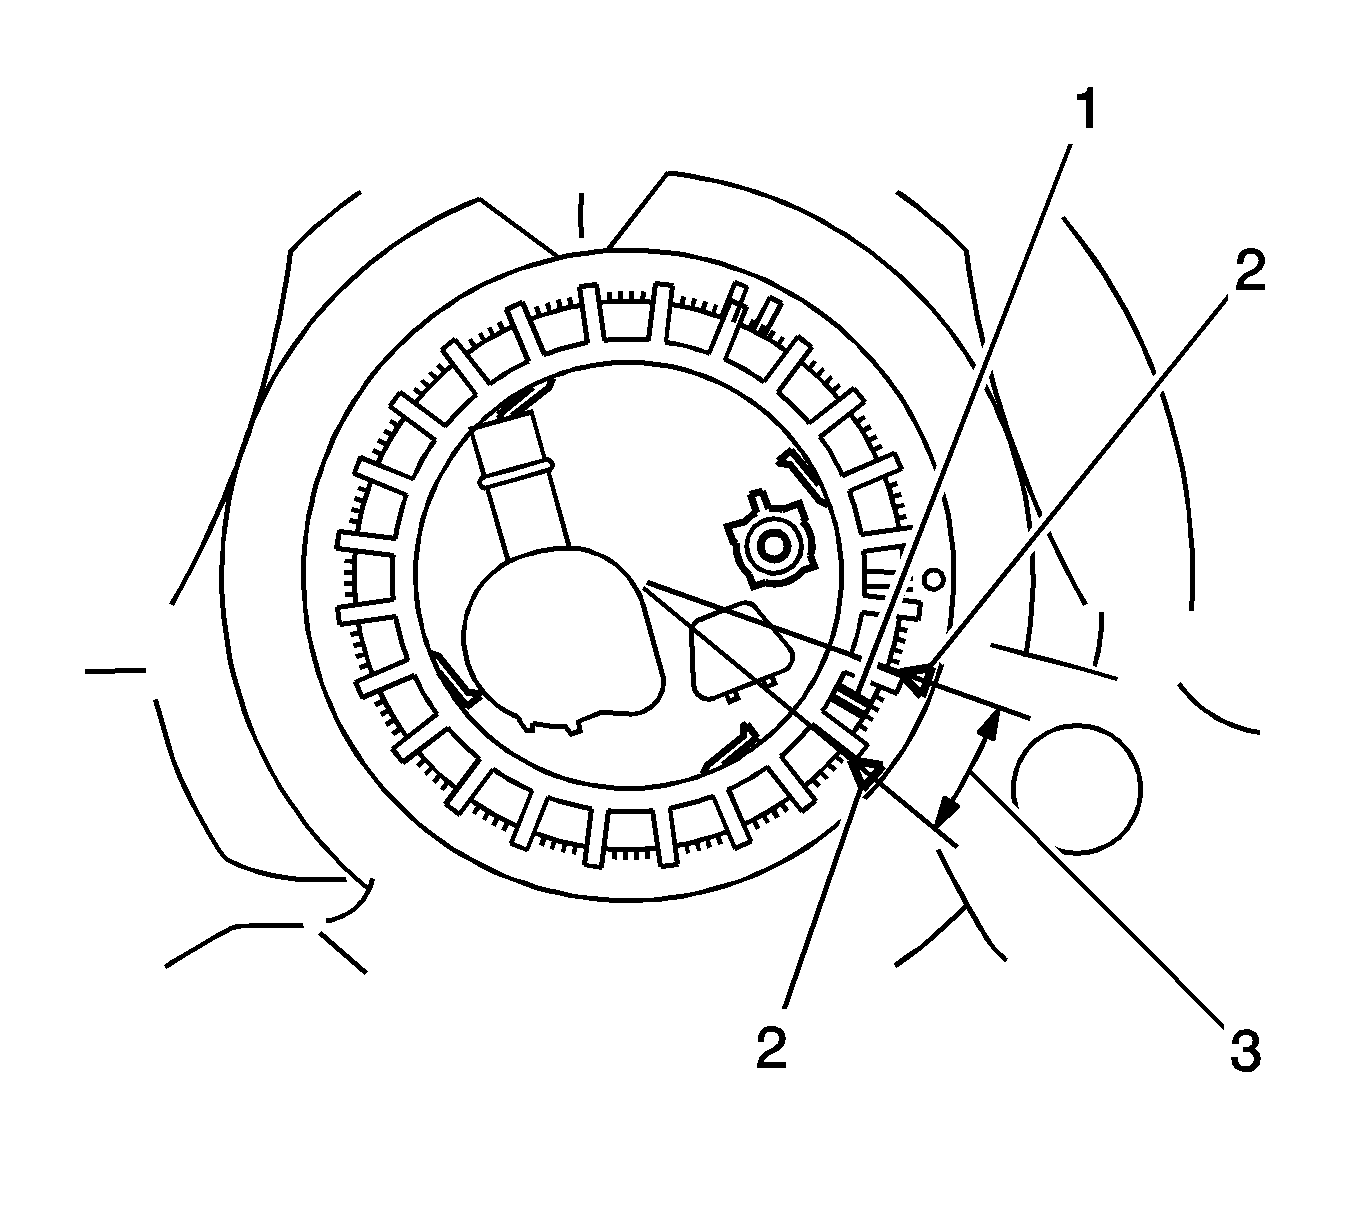
- Locate the 4 safety latches (1, 3) and the safety stop (2) on the fuel sender assembly lock ring.
- While rotating the lock ring during removal, ensure that each safety latch is gently depressed in order to pass without engaging the safety stop.
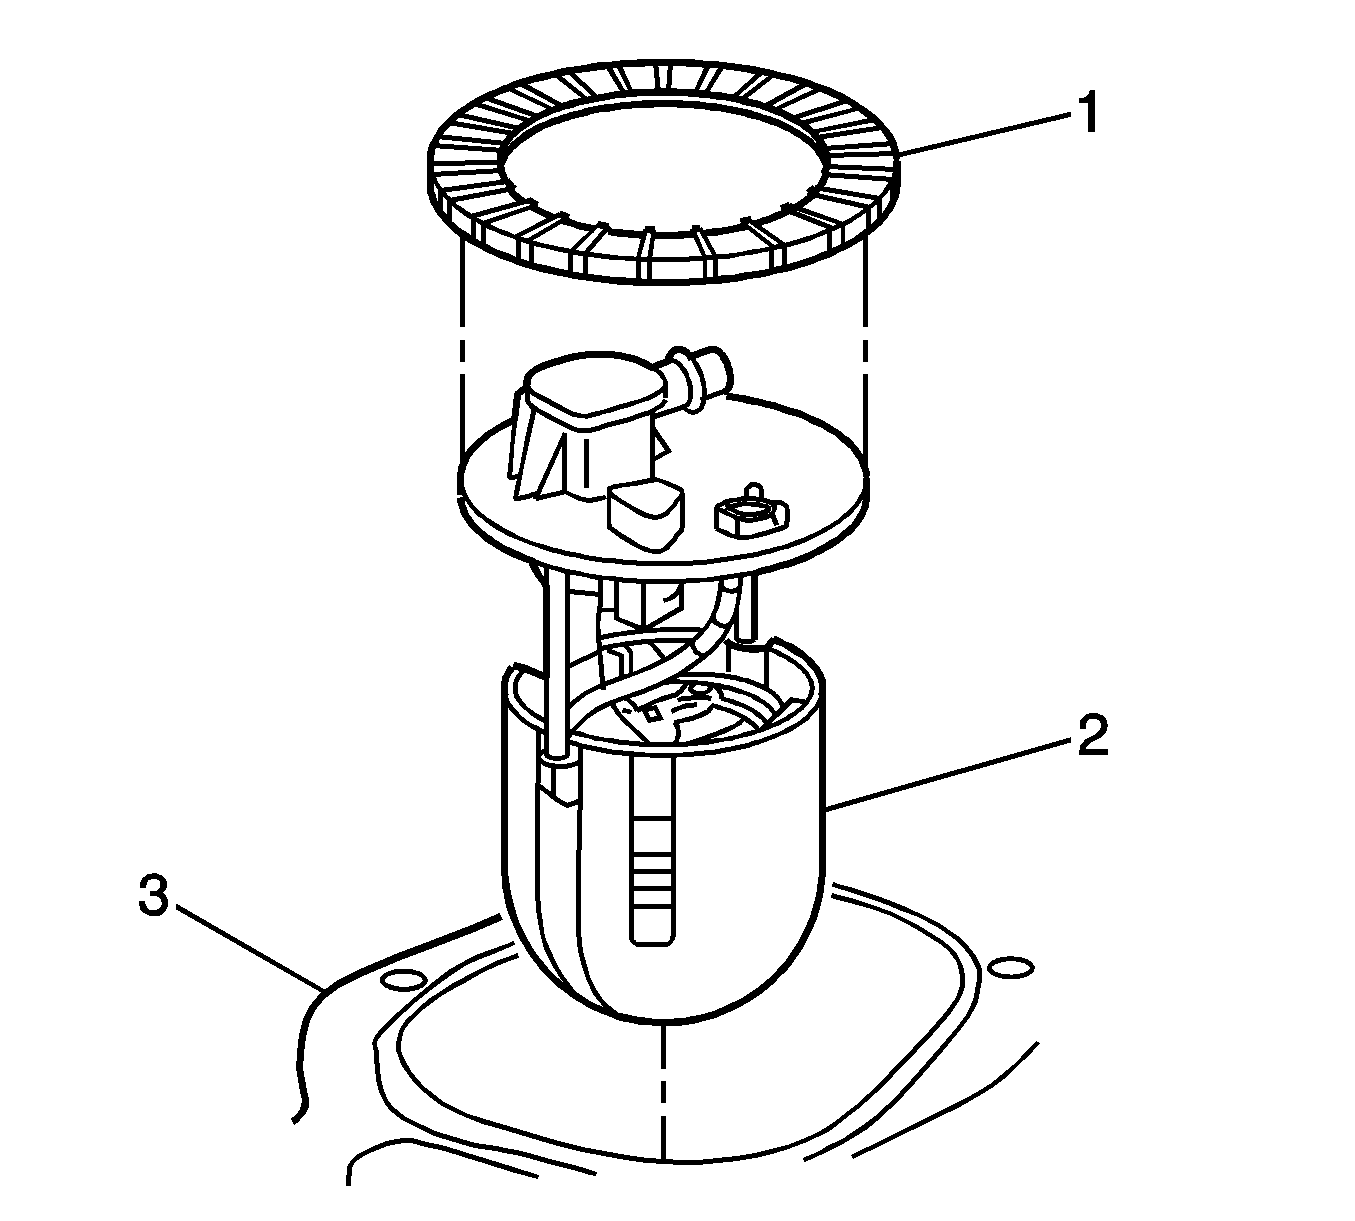
- Remove the lock ring (1).
- Remove the fuel sender assembly (2) from the fuel tank.
Important: Do not spill residual fuel or damage the fuel level sensor float while rotating and tilting the sender assembly during removal.
Installation Procedure
Notice: Always re-attach the fuel lines and fuel filter with all original type fasteners and hardware.
Do not repair sections of fuel pipes.- Install a new O-ring seal (1) onto the fuel tank.
- Install the fuel sender assembly (2) into the fuel tank through the floor panel opening (3).
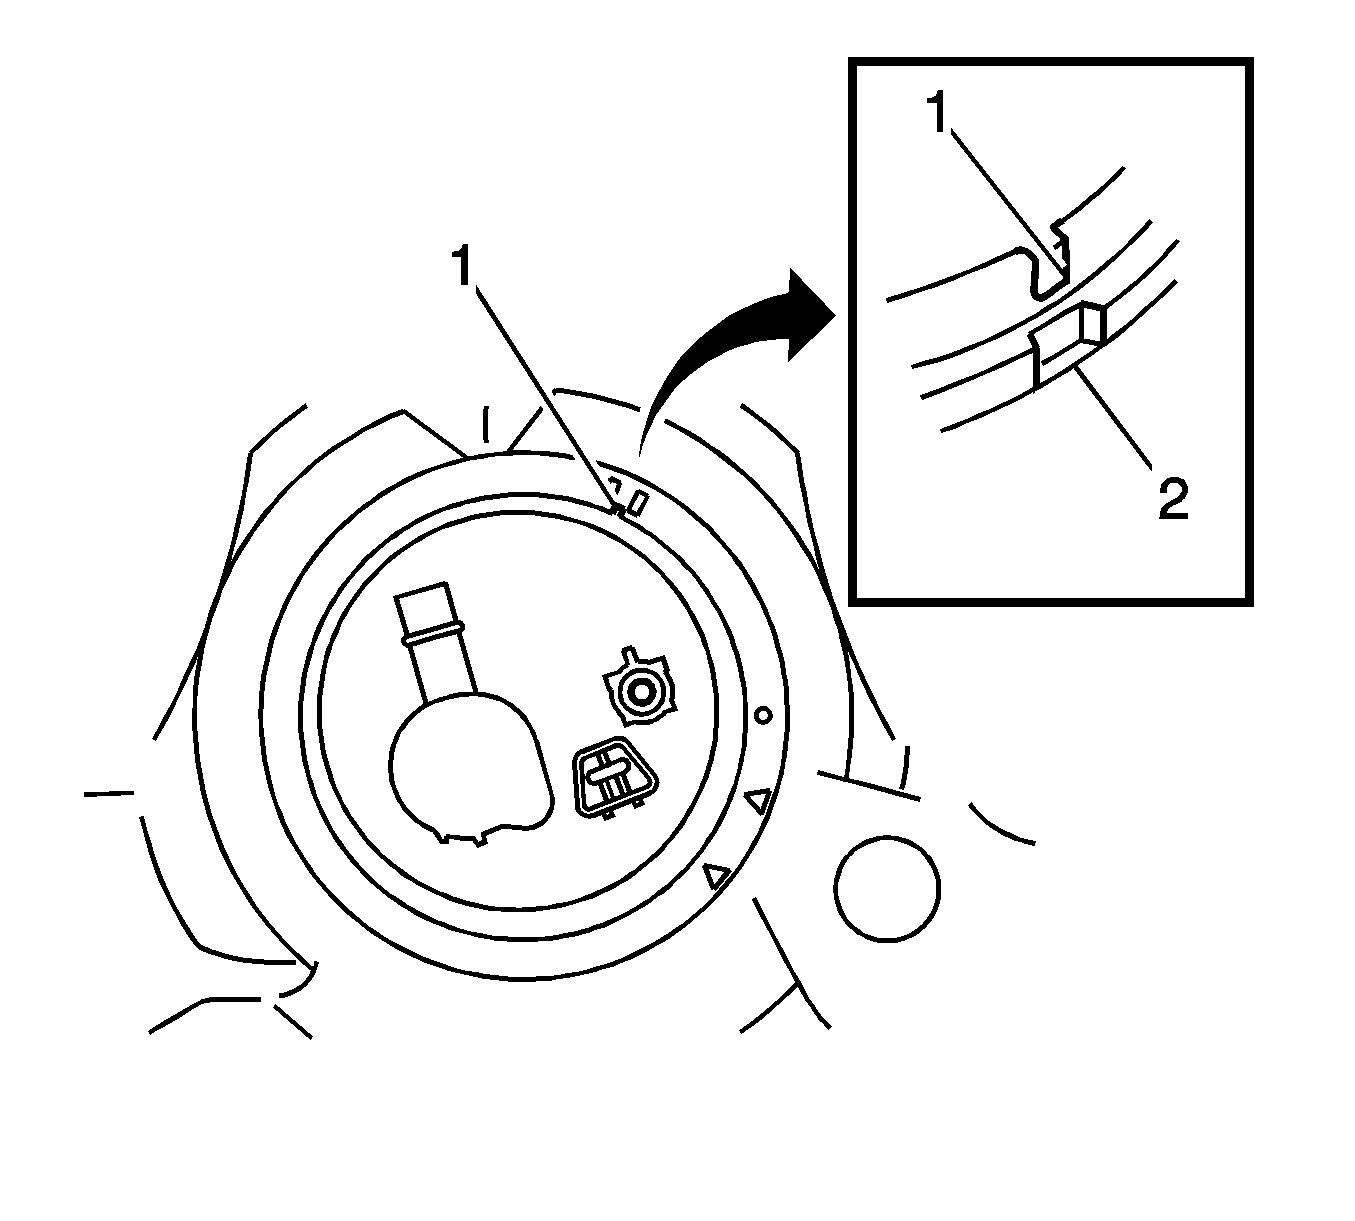
- Align the notch (1) on the fuel sender assembly with the slot (2) in the fuel tank opening.
- Align the extra ridge (1) on the fuel tank lock ring with the mark (2) on the fuel tank.
- Gently push down on the fuel sender while rotating the lock ring onto the fuel tank.
- Use the CH-47717 (1) in order to tighten the fuel sender assembly lock ring.
- After 2 full rotations of the lock ring, watch for the alignment of the lock ring extra ridge (1) with the 2 triangle marks (2) on the fuel tank.
- Rotate the lock ring until the ridge (1) is positioned within the 16 degree area (3) between the 2 marks (2).
- Connect the ORVR vent line (2) to the fuel sender assembly (1).
- Slide the quick connect clasp (1) into the lock position on the ORVR vent line (2).
- Connect the fuel supply line (1) to the fuel sender assembly.
- Secure the fuel supply line (2) to the sender assembly with the retaining clip (1).
- Connect the fuel sender electrical connector (2) to the fuel sender assembly.
- Add fuel to the fuel tank.
- Connect the negative battery cable.
- Pressurize the fuel system and check for leaks.
- Install the access panel (1) to the rear seat floor panel (3).
- Secure the access panel to the body with 4 bolts.
- Relocate the carpet under the ride side seat area and the right sill plate area.
- Install the sill plate to the right side door opening .
- Lower the rear seat bottom cushion (1) and secure with 2 bolts (2).
Notice: Refer to Fastener Notice in the Preface section.
Tighten
Tighten the retainer for the negative battery cable
terminal to 15 N·m (11 lb ft).
Tighten
Tighten the 4 bolts to 6 N·m
(53 lb in).
Tighten
Tighten the 2 bolts to 41 N·m
(30 lb ft).
