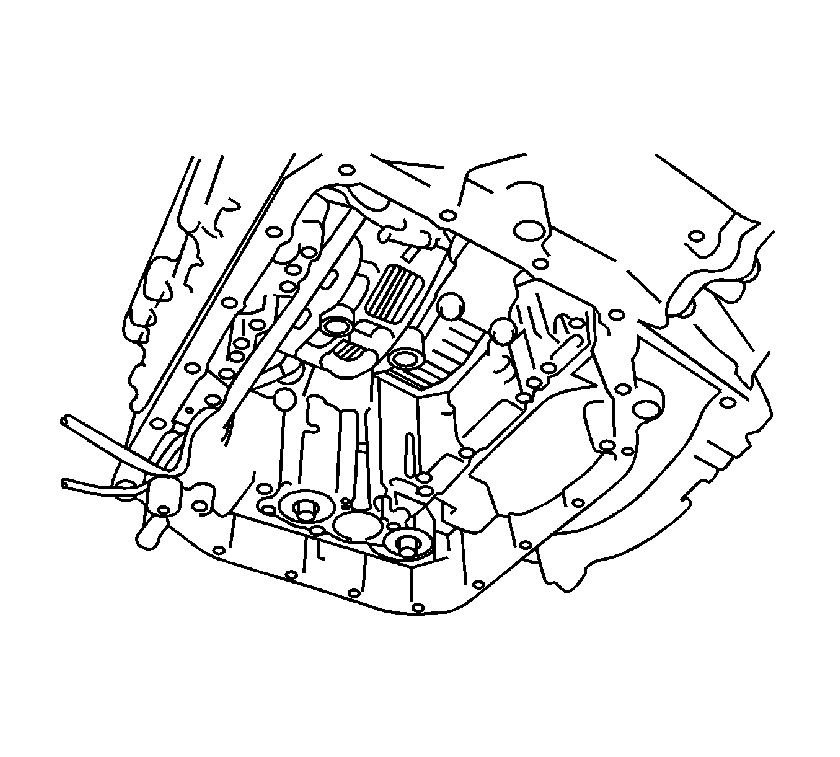
For 1990-2009 cars only
Removal Procedure
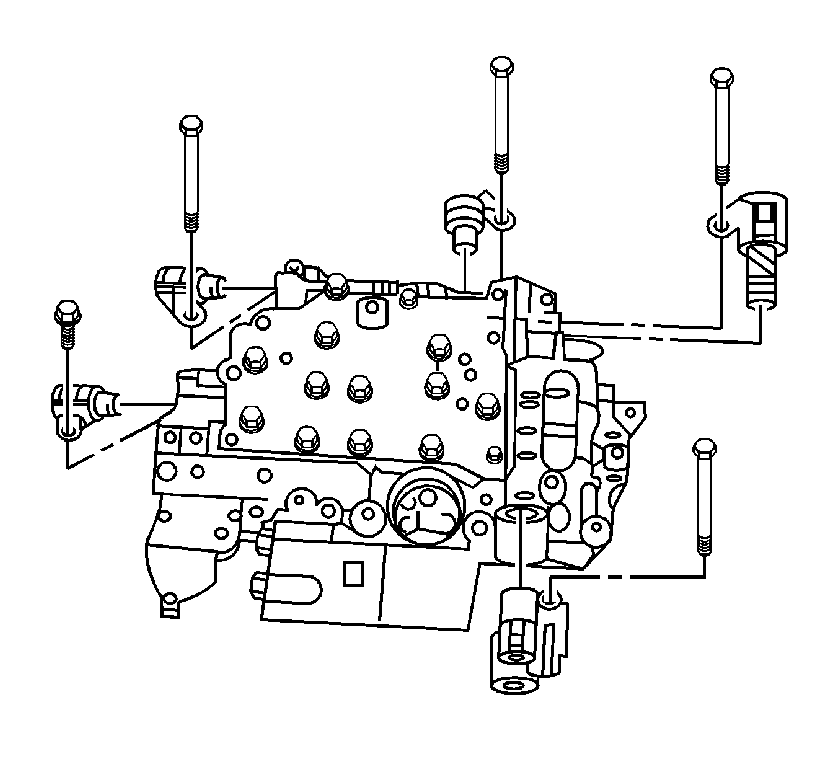
- Disconnect the 5 solenoid connectors.
- Remove the lock plate and bolt, then remove the ATF temperature sensor from the valve body.
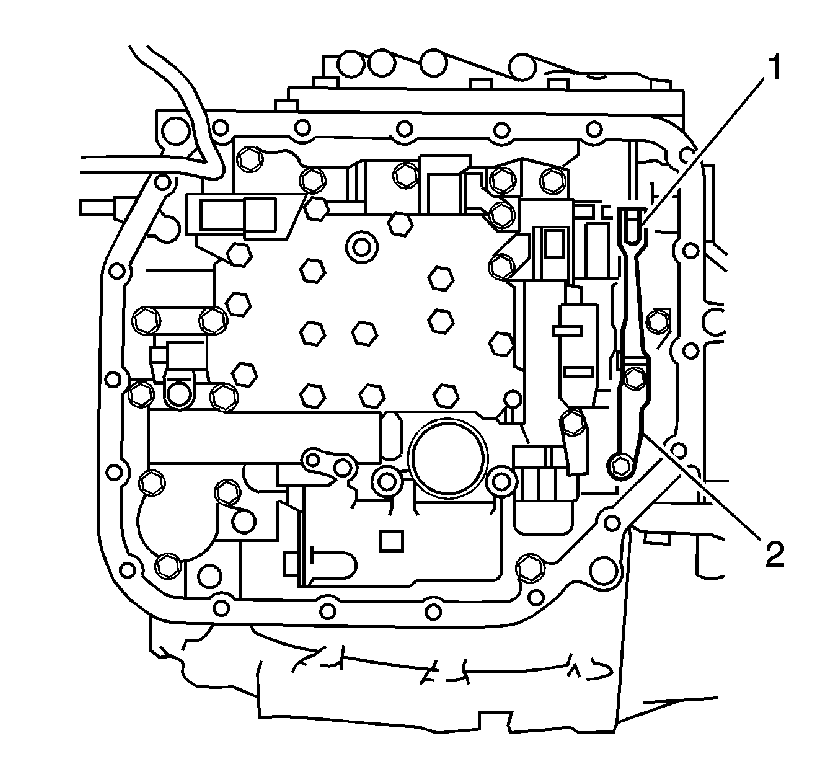
- Remove the manual detent spring (1) and cover (2) from the valve body.
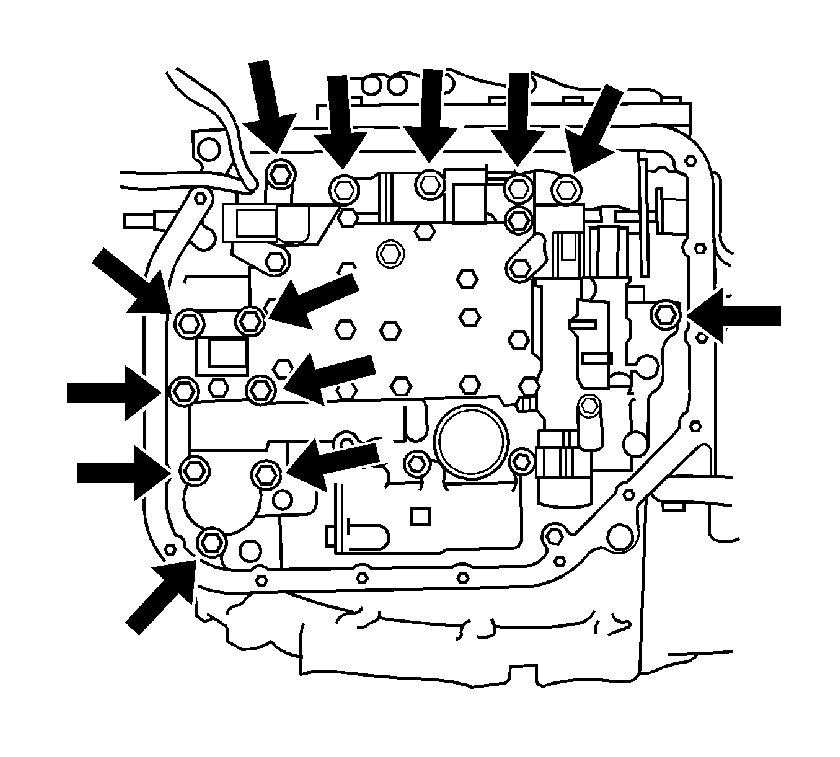
- Remove the 13 valve body retaining bolts and the valve body.
- Remove the check ball assembly and accumulator.
- Remove the 2 gaskets.
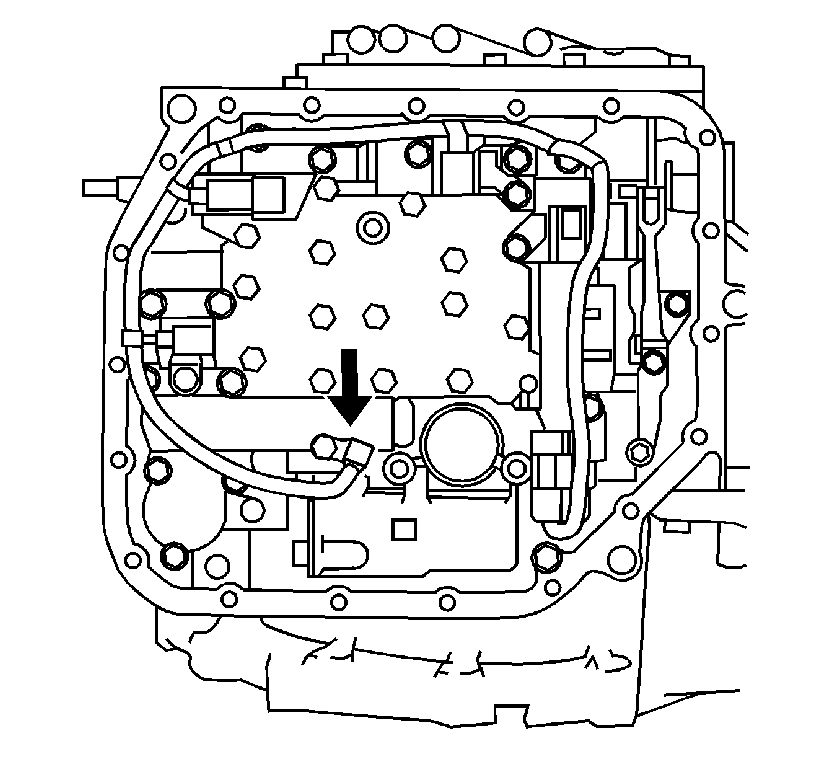
Important: Slowly lower the valve body from the transaxle, the check ball assembly and the accumulator piston located above the valve body may fall out of the transaxle case.
Installation Procedure
- Install the solenoids on the valve body.
- Install the 2 new gaskets.
- Install the accumulator and check ball assembly.
- Align the groove of the manual valve with the pin of the manual valve lever.
- Temporarily install the valve body with the 13 bolts.
- Temporarily install the detent spring (1) and the cover (2).
- Make sure the manual valve lever contacts the center of the roller at the tip of the detent spring.
- Tighten the 15 valve body retaining bolts.
- Install the ATF temperature sensor, then the lock plate and bolt on the valve body.
- Connect the 5 solenoid electrical connectors.
- Install the fluid filter and pan. Refer to Automatic Transmission Fluid and Filter Replacement .
- Install the left engine splash shield. Refer to Engine Splash Shield Replacement - Left Side in Body Front End.
- Lower the vehicle.
- Connect the negative (-) battery cable.
- Refill the transaxle as necessary.
Notice: Refer to Fastener Notice in the Preface section.
Tighten
Tighten the bolts to 11 N·m (97 lb in).
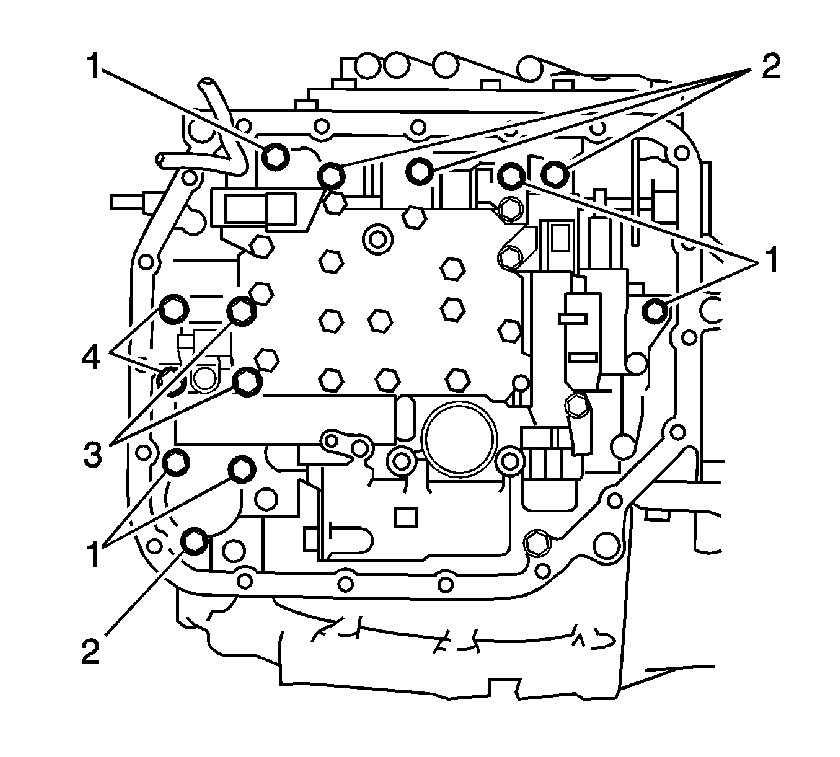
| • | Length of Bolt (1) 32 mm (1.26 in) |
| • | Length of Bolt (2) 22 mm (0.87 in) |
| • | Length of Bolt (3) 55 mm (2.17 in) |
| • | Length of Bolt (4) 45 mm (1.77 in) |
Tighten
Tighten the bolt to 11 N·m (97 lb in).
Tighten
Tighten the bolt to 11 N·m (97 lb in).
