For 1990-2009 cars only
Removal Procedure
- Lower the front suspension crossmember as far as necessary to remove the control arm fasteners. Refer to Front Suspension Crossmember Replacement .
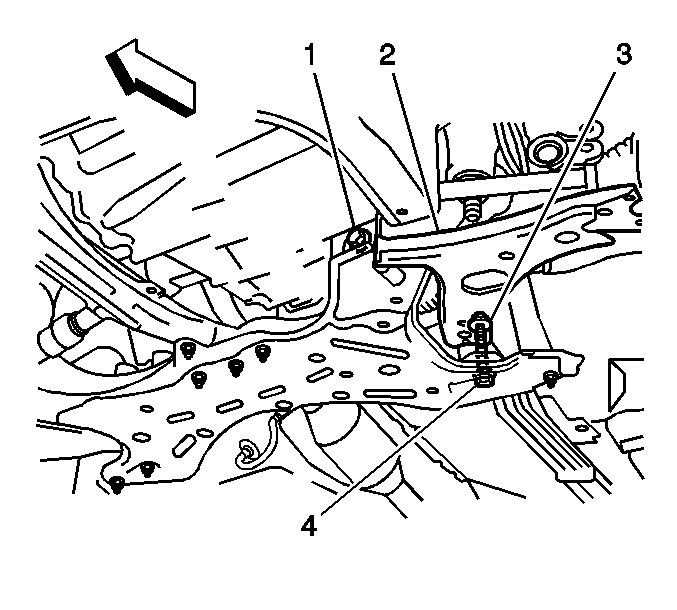
- Remove the 2 bolts (1, 4) and the 1 nut (3) in order to remove the control arm from the crossmember.
Installation Procedure
- Install the following components to the crossmember:
- Raise and install the lower control arms and the crossmember to the vehicle. Refer to Front Suspension Crossmember Replacement .
- With the weight of the vehicle on the tire and wheel assemblies, push down on the front bumper 3 times in order to bounce the vehicle and stabilize the suspension.
- Tighten the nut and the 2 bolts.
- Measure the wheel alignment. Adjust the wheel alignment if necessary. Refer to Wheel Alignment Measurement .
Important: DO NOT tighten the nut and bolts completely. The weight of the vehicle must be on the tire and wheel assemblies before tightening the nut and the bolts.
| • | The lower control arm (2) |
| • | The 2 bolts (1, 4) |
| • | The nut (3) |
Notice: Refer to Fastener Notice in the Preface section.
Tighten
Tighten the nut and the 2 bolts to 137 N·m (101.0 lb ft).
