| Table 1: | Line Pressure Results |
| Table 2: | Line Pressure Test Diagnosis |
Tools Required
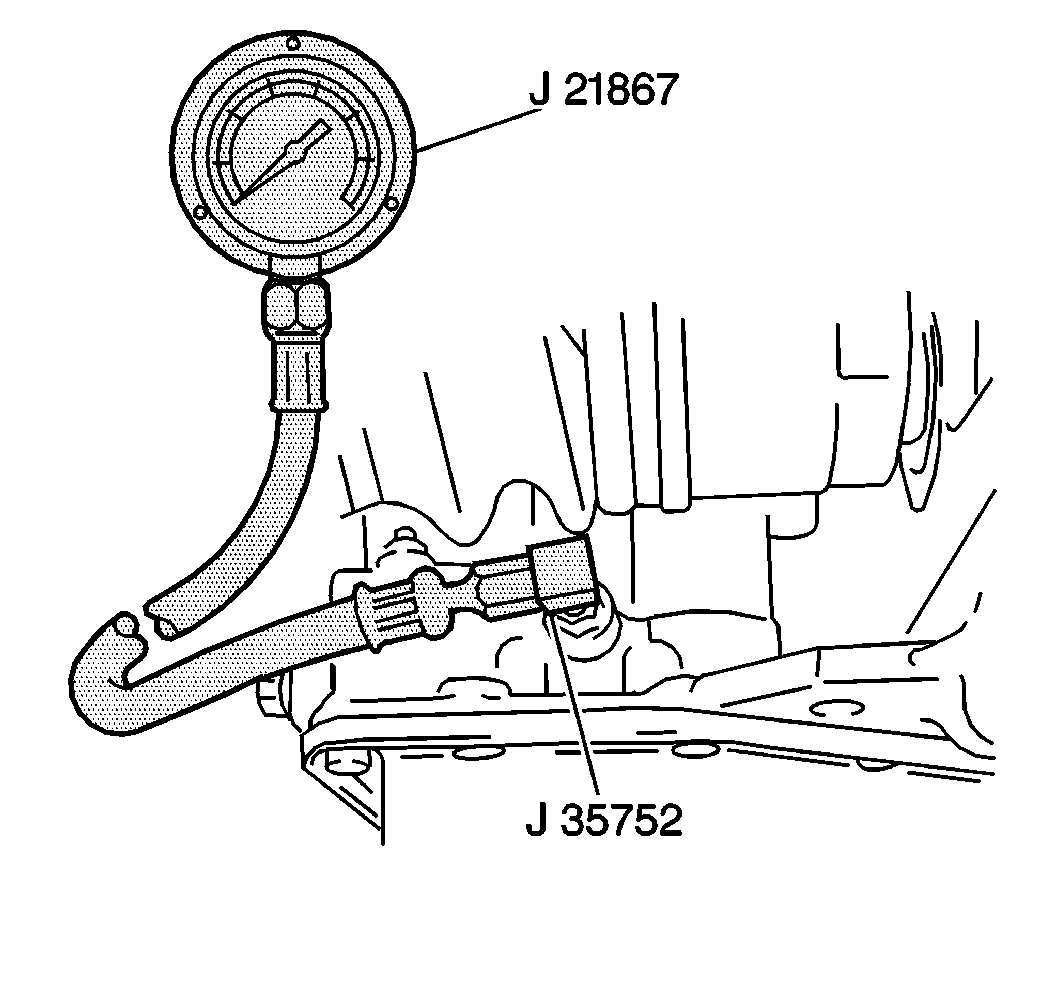
| • | J 35752 Oil Pressure Gage Adapter |
| • | J 21867 Universal Pressure Gage Set |
- Raise the vehicle. Support the vehicle. Refer to Lifting and Jacking the Vehicle.
- Remove the left splash shield from vehicle. Refer to Engine Splash Shield Replacement - Left Side.
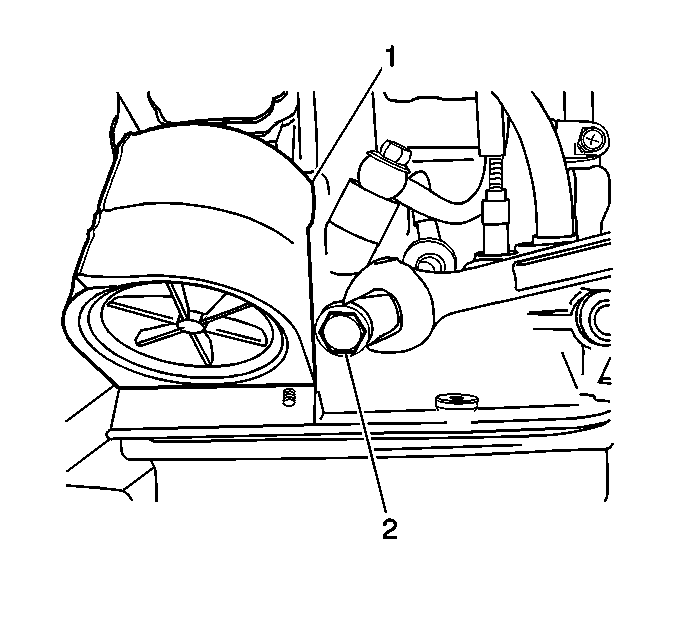
- Remove the pressure tap bolt (2) from the rear of the transaxle.
- Install into the line pressure tap at the rear of the transaxle.
- Install J 21867 into J 35752 .
- Lower the vehicle.
- Route hose over the front fender and through the driver's window so that it can be read from the passenger compartment.
- Connect the scan tool to the Data Link Connector (DLC) and display the engine RPM.
- Apply the parking brake and block the vehicle wheels.
- Press the brake pedal fully and start the engine.
- Display engine speed (RPM) on the scan tool.
- Place the manual selector in the drive (D) range and record the line pressure at idle speed (600-700 RPM).
- Press the accelerator pedal fully/wide open throttle and record the line pressure in the drive (D) range at stall speed (2,400-2,700 RPM). Release the accelerator pedal.
- Keeping the brake pedal fully pressed, place the selector lever in the reverse (R) range and record the line pressure at idle speed (600-700 RPM).
- Press the accelerator pedal fully/wide open throttle and record the line pressure in the reverse (R) range at stall speed (2,400-2,700 RPM). Release the accelerator pedal.
- Keep the brake pedal pressed.
- Place the manual selector in Low range. Record the line pressure at idle speed (600-700 RPM).
- Press the accelerator pedal fully/wide open throttle and record line pressure in Low range at stall speed (2,400-2,700 RPM). Release the accelerator pedal.
- Keeping the brake pedal fully pressed, place the manual selector in Reverse range and record line pressure at idle speed (600-700 RPM).
- Press the accelerator pedal fully/wide open throttle and record line pressure in Reverse range at stall speed (2,400-2,700 RPM). Release the accelerator pedal.
- Place the manual selector in Park range and turn the ignition switch to LOCK.
- Remove the scan tool from the vehicle.
- Remove J 21867 from the passenger compartment.
- Raise the vehicle. Support the vehicle. Refer to Lifting and Jacking the Vehicle.
- Remove J 21867 from J 35752 .
- Remove J 35752 from the line pressure tap at the rear of the transaxle.
- Install the line pressure tap bolt into the line pressure tap at the rear of the transaxle.
- Install the left splash shield. Refer to Engine Splash Shield Replacement - Left Side.
- Lower the vehicle.
Important: This test should only be performed at a normal operating fluid temperature of 50-80°C (122-176°F).


Notice: Refer to Fastener Notice in the Preface section.
Tighten
Tighten the line pressure tap bolt to 7.5 N·m (66 lb in).
Evaluation
Compare the line pressure test results with the Line Pressure Results in the following table. If the line pressure is not as specified, refer to the Line Pressure Test Diagnosis for further evaluation.
Engine Running at | R Range Line Pressure | D, 2, L Range Line Pressure |
|---|---|---|
Idle Speed (600-700 RPM) | 647-760 kPa (94 -111 psi | 382 -422 kPa (55-61 psi) |
Stall Speed (2400-2700 RPM) | 1,520-1,755 kPa (220-254 psi | 713-844 kPa (103-122 psi) |
Line Pressure Measurement | Probable Cause | ||||||||
|---|---|---|---|---|---|---|---|---|---|
Higher than Specification in Drive (D) and Reverse (R) Ranges |
| ||||||||
Lower than Specification in Drive (D) and Reverse (R) Ranges |
| ||||||||
Lower than Specification in Drive (D) Range Only |
| ||||||||
Lower than Specification in Reverse (R) Range Only |
|
