Tool Required
Removal Procedure
- Remove the manual transaxle assembly from the vehicle. Refer to
Transmission Replacement
.
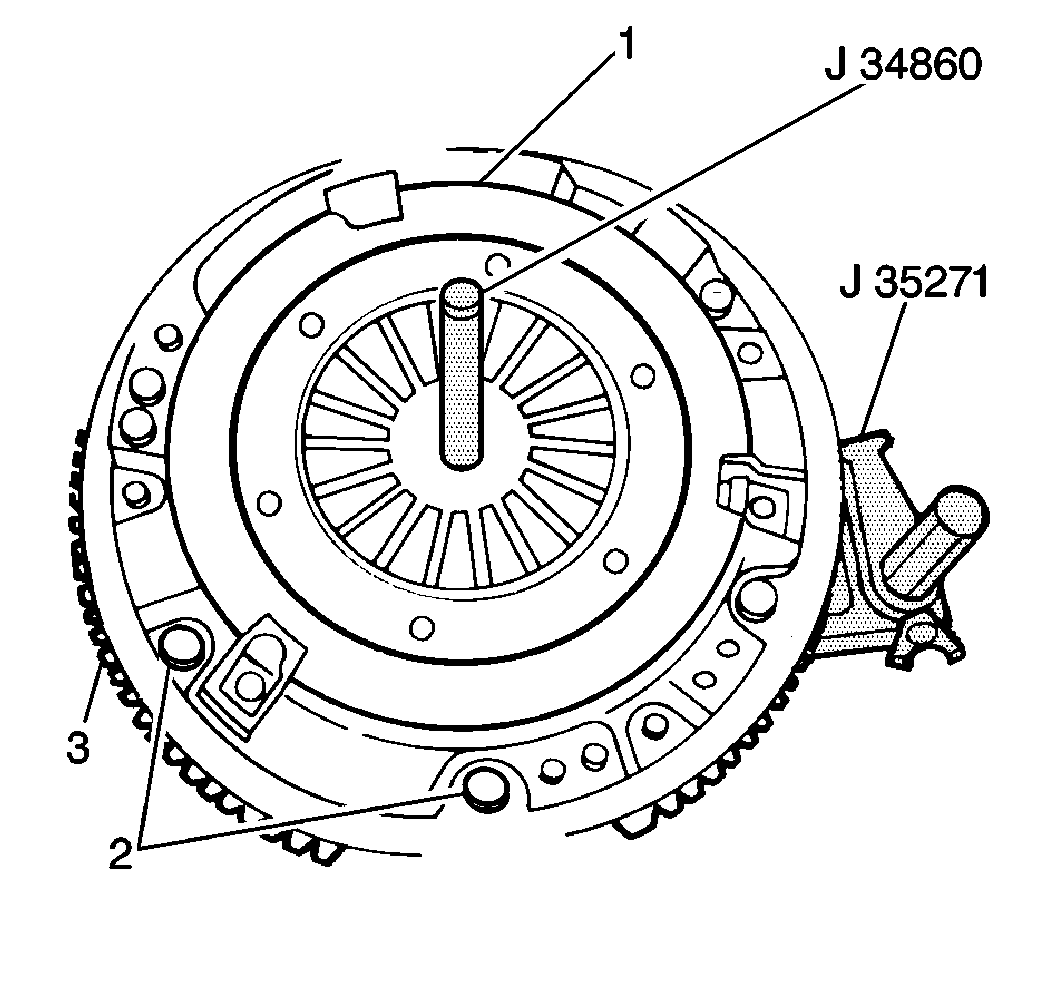
- Use the
J 35271
in order to hold the flywheel before removing the bolts.

- Slowly and evenly loosen the 6 clutch pressure plate cover bolts (2) until the clutch pressure plate spring tension
is completely released.
- Remove the 6 clutch pressure plate cover bolts and the pressure plate from the flywheel.
- Remove the clutch disc from the flywheel.

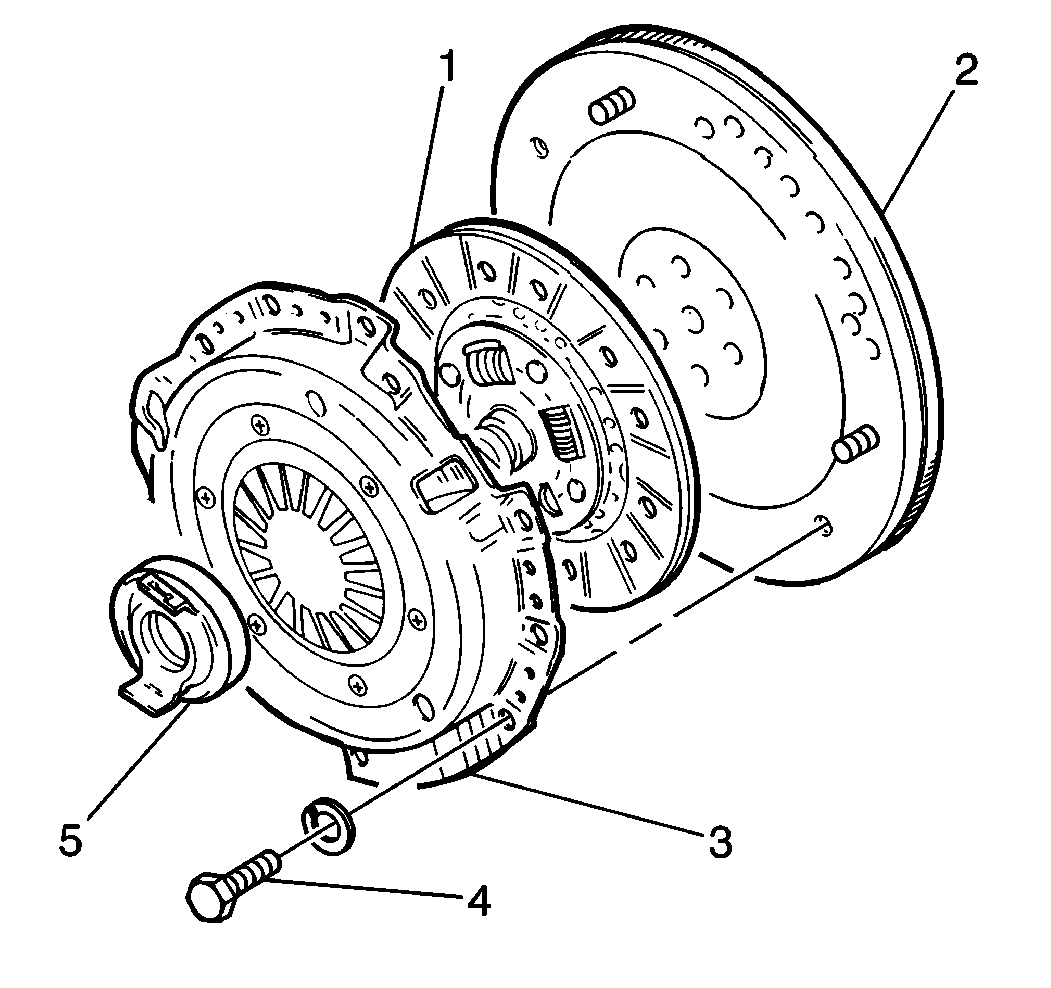
- Clean the flywheel (2) and the clutch pressure plate-to-clutch
disc (1, 3) mating surfaces of the following substances:
- Clean the clutch disc (1) using a clean dry cloth.
- Inspect the flywheel (2) and the clutch pressure plate (3) for the following conditions:
| • | Bent or broken pressure plate spring levers |
| • | Weak or damaged diaphragm spring |
Notice: If any of the following conditions exist, do not attempt to disassemble
or repair the clutch pressure plate. If the flywheel or the clutch pressure
plate appears excessively worn, replace the flywheel and/or clutch pressure
plate as necessary.
- Inspect the clutch disc for the following conditions:
| • | Damaged or weak torsional springs |

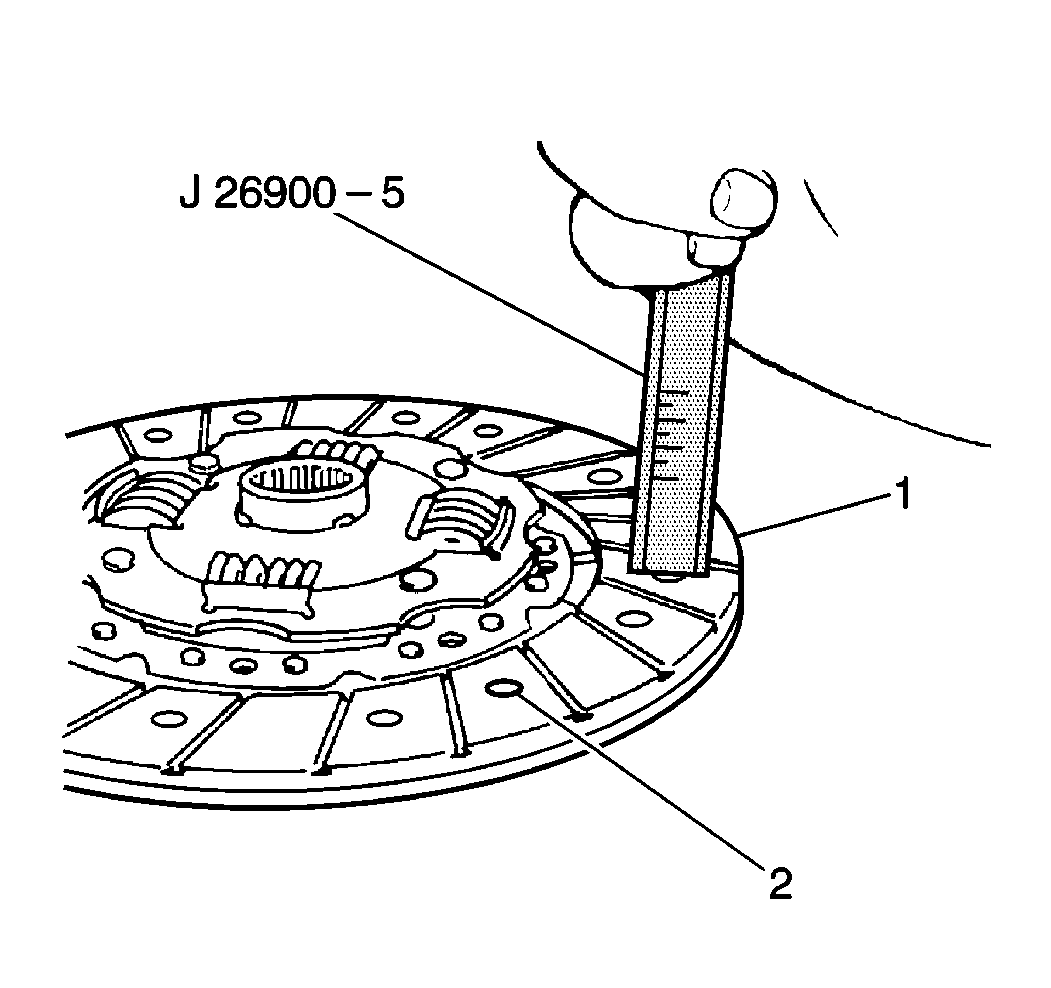
- Use
J 26900-5
in order to measure the clutch disc (1)
wear. Measure the depth of each rivet head depression (2). The following specifications are standard rivet head depth measurements:
- Replace the clutch disc if the clutch rivet depth is less than 0.3 mm (0.012 in).
Installation Procedure
- Install the clutch disc to the flywheel with the torsion springs offset toward the transaxle. Using a suitable clutch alignment arbor to center and hold in place the clutch disc on the flywheel.
Notice: Refer to Fastener Notice in the Preface section.
- Install the clutch pressure plate to the flywheel. Secure the flywheel with the 6 clutch pressure plate cover bolts.
Tighten
Tighten the clutch pressure plate cover bolts to 19 N·m (14 lb ft).
- Remove the clutch alignment arbor.
- Lubricate the transaxle input shaft splines and clutch release bearing using a thin coat of wheel bearing grease GM P/N 1051344 (Canadian P/N 993037) or the equivalent.
- Install the manual transaxle assembly into the vehicle. Refer to
Transmission Replacement
.


