Removal Procedure
- Remove the rear seat cushion assembly. Refer to Rear Seat Cushion Replacement.
- Remove the rear floor service hole cover.
- Discharge the fuel system pressure. Refer to Fuel Pressure Relief.
- Disconnect cable from the negative battery terminal.
- Disconnect the fuel tank main tube sub-assembly.
- Disconnect the fuel tank vent hose.
- Remove the fuel pump gage retainer.
- Remove the fuel suction tube assembly.
- Drain the fuel.
- Remove the catalytic converter assembly. Refer to Catalytic Converter Replacement.
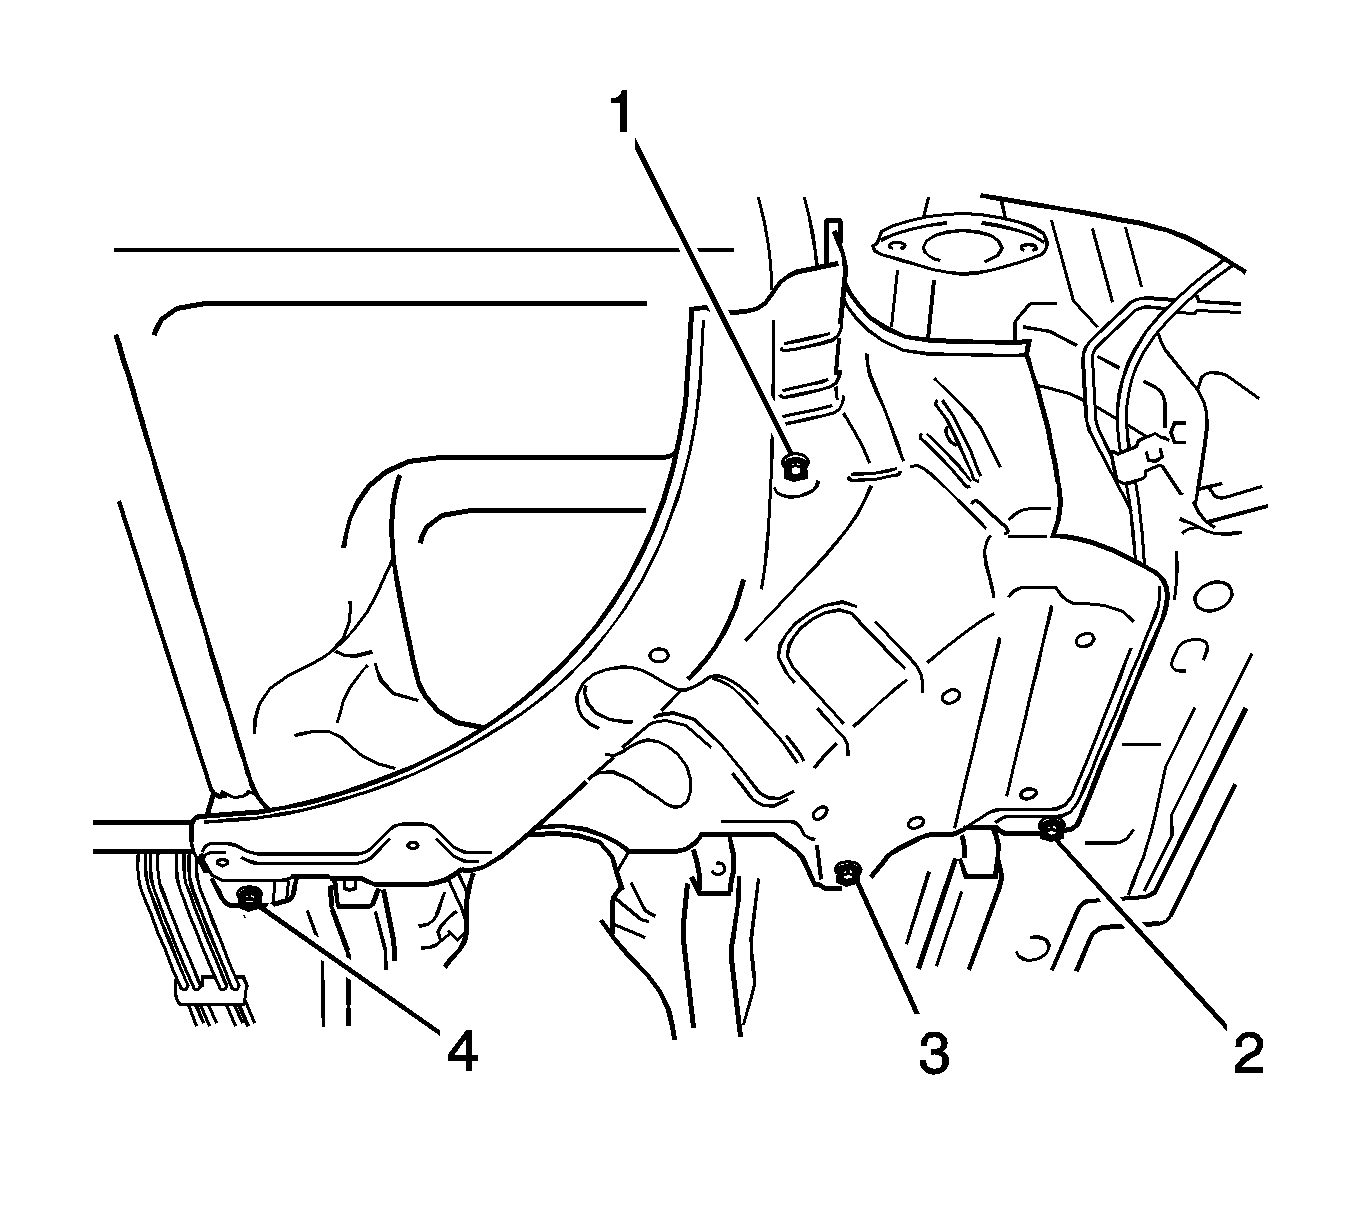
- Remove the no. 1 fuel tank protector sub-assembly.
- Remove the 4 bolts (1, 2, 3, 4) and the fuel tank protector sub-assembly.
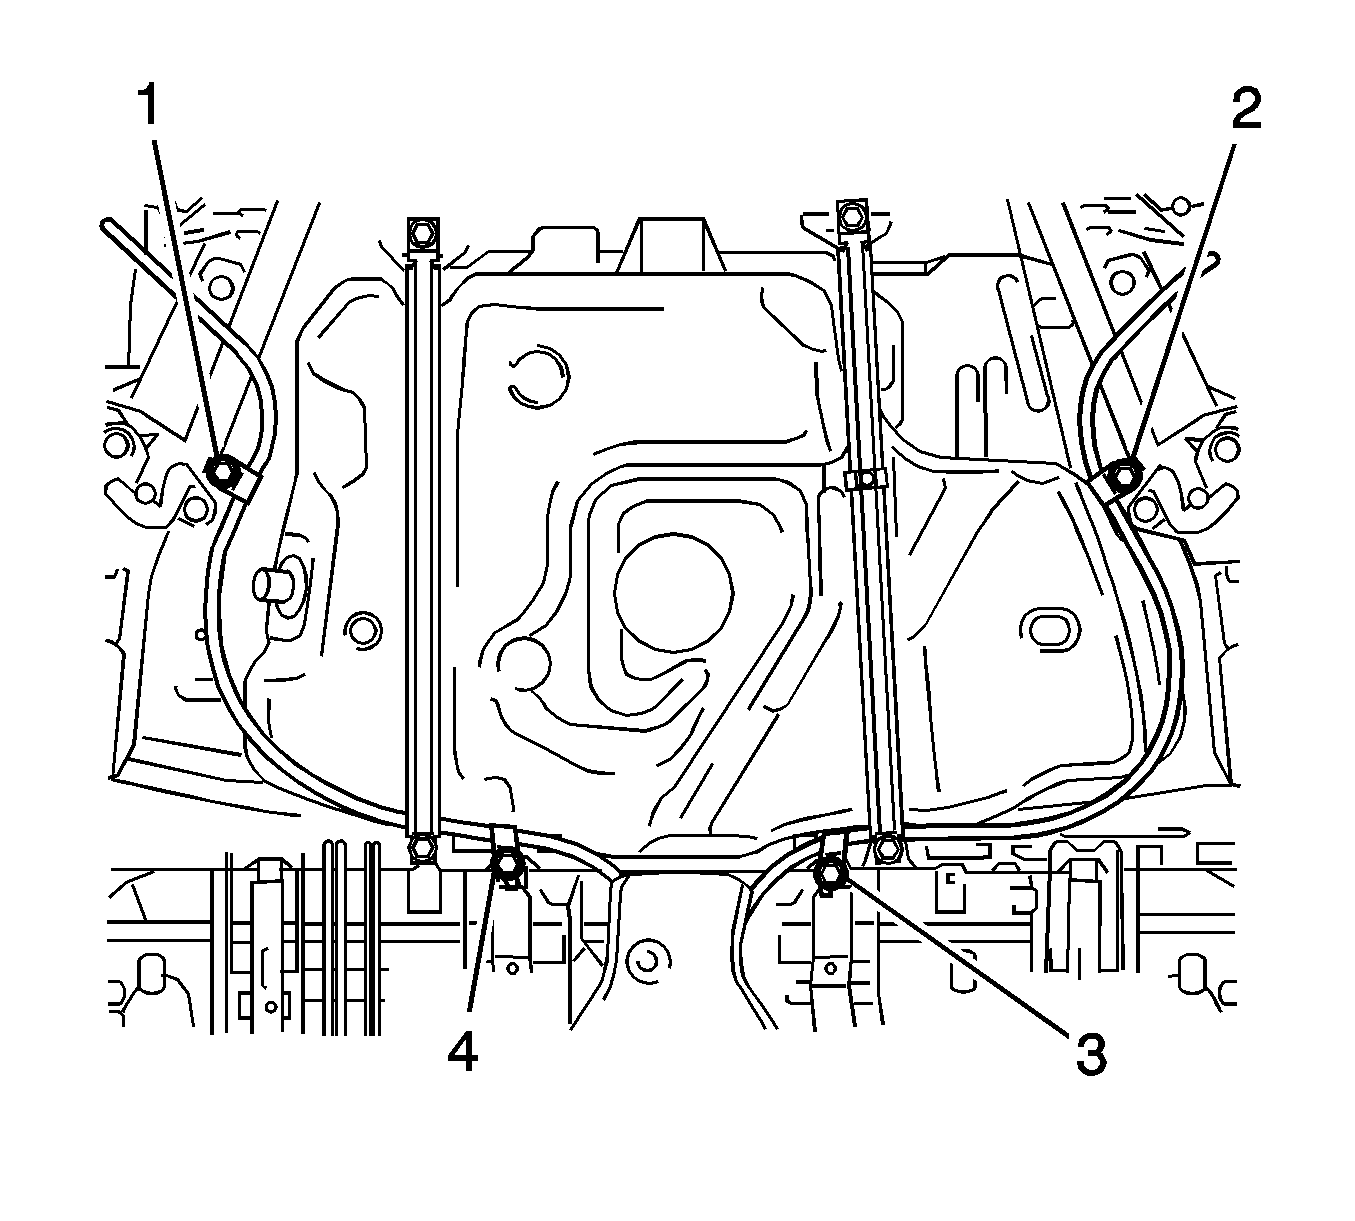
- Remove the 4 bolts (1, 2, 3, 4), and separate the parking brake cables.
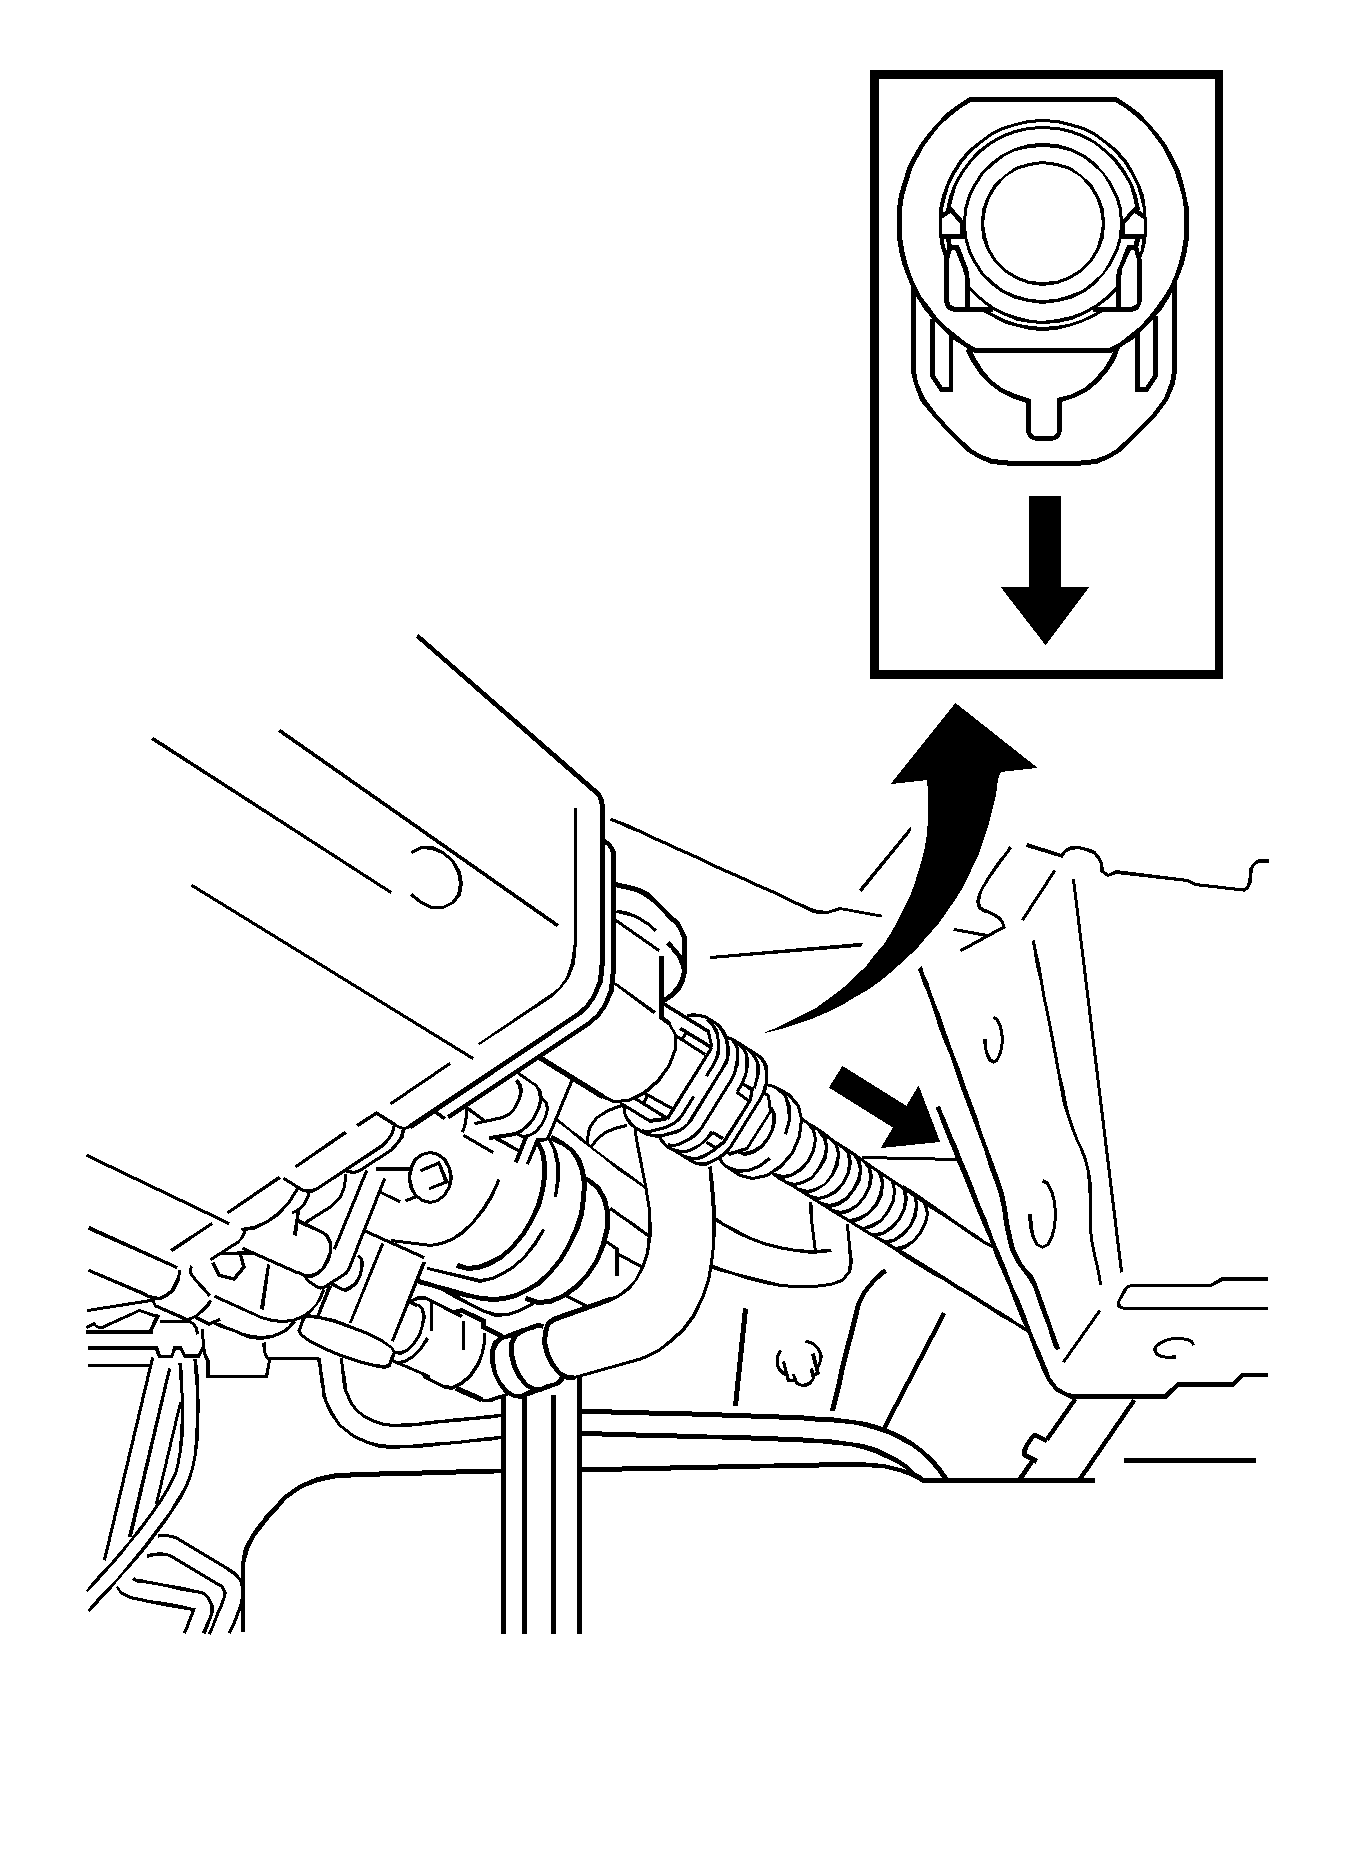
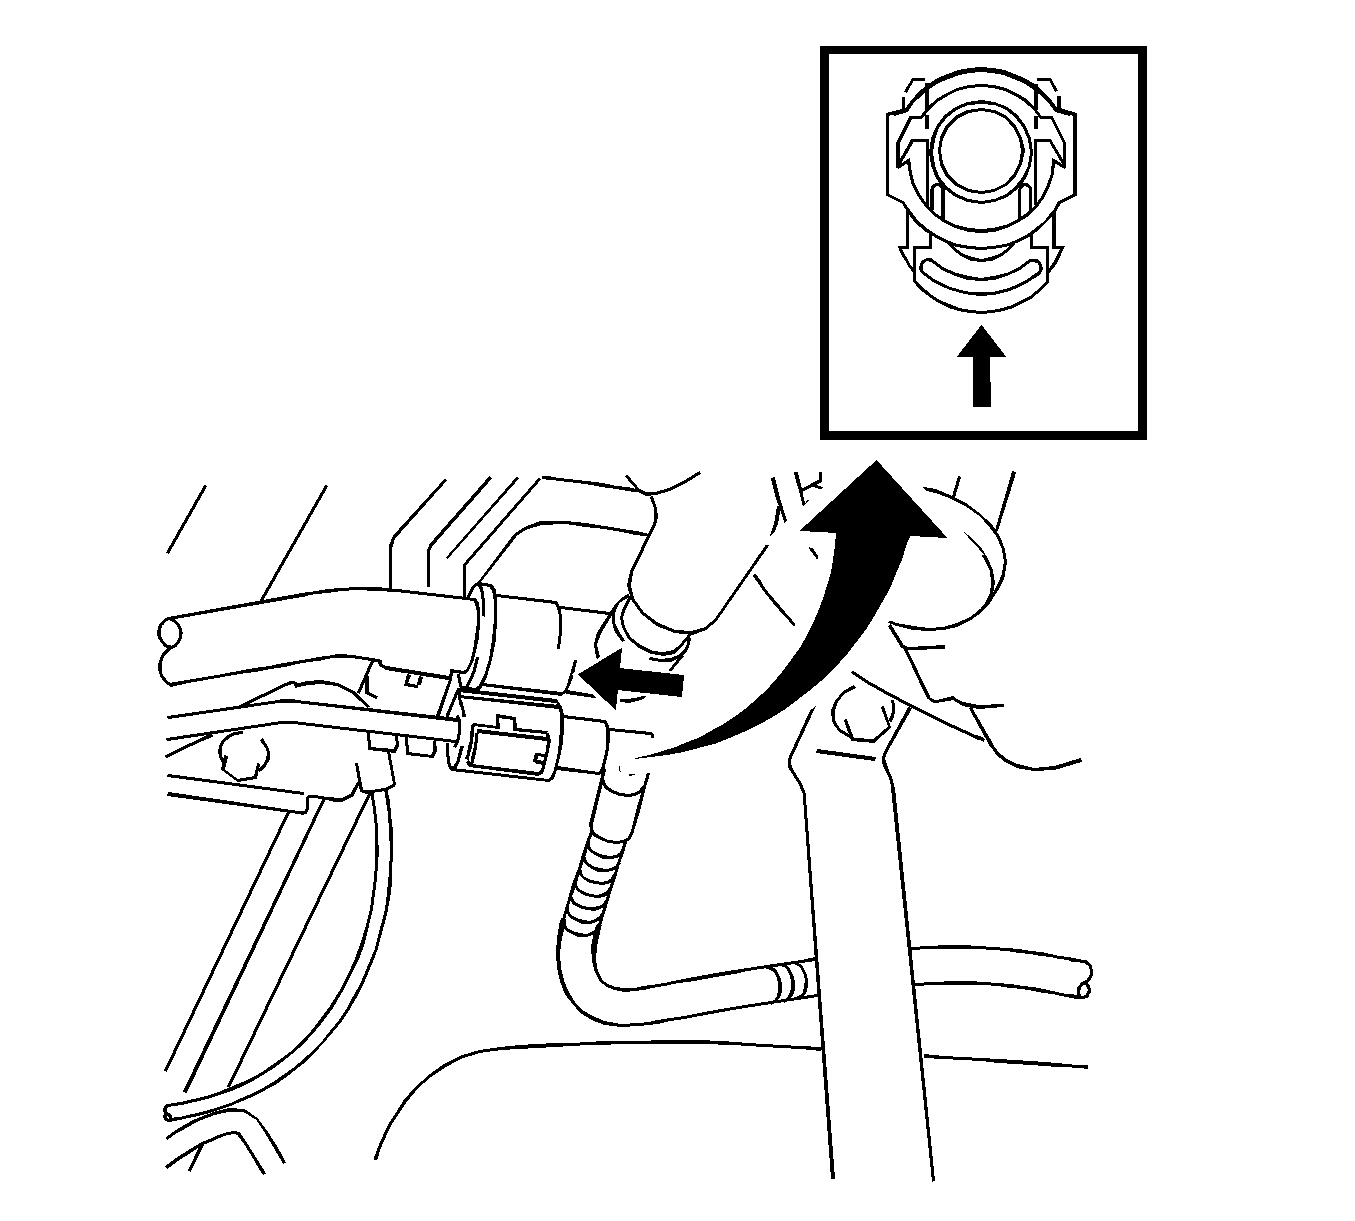
- Disconnect the fuel tank vent hose.
- Pull the fuel tank vent hose out of the pipe.
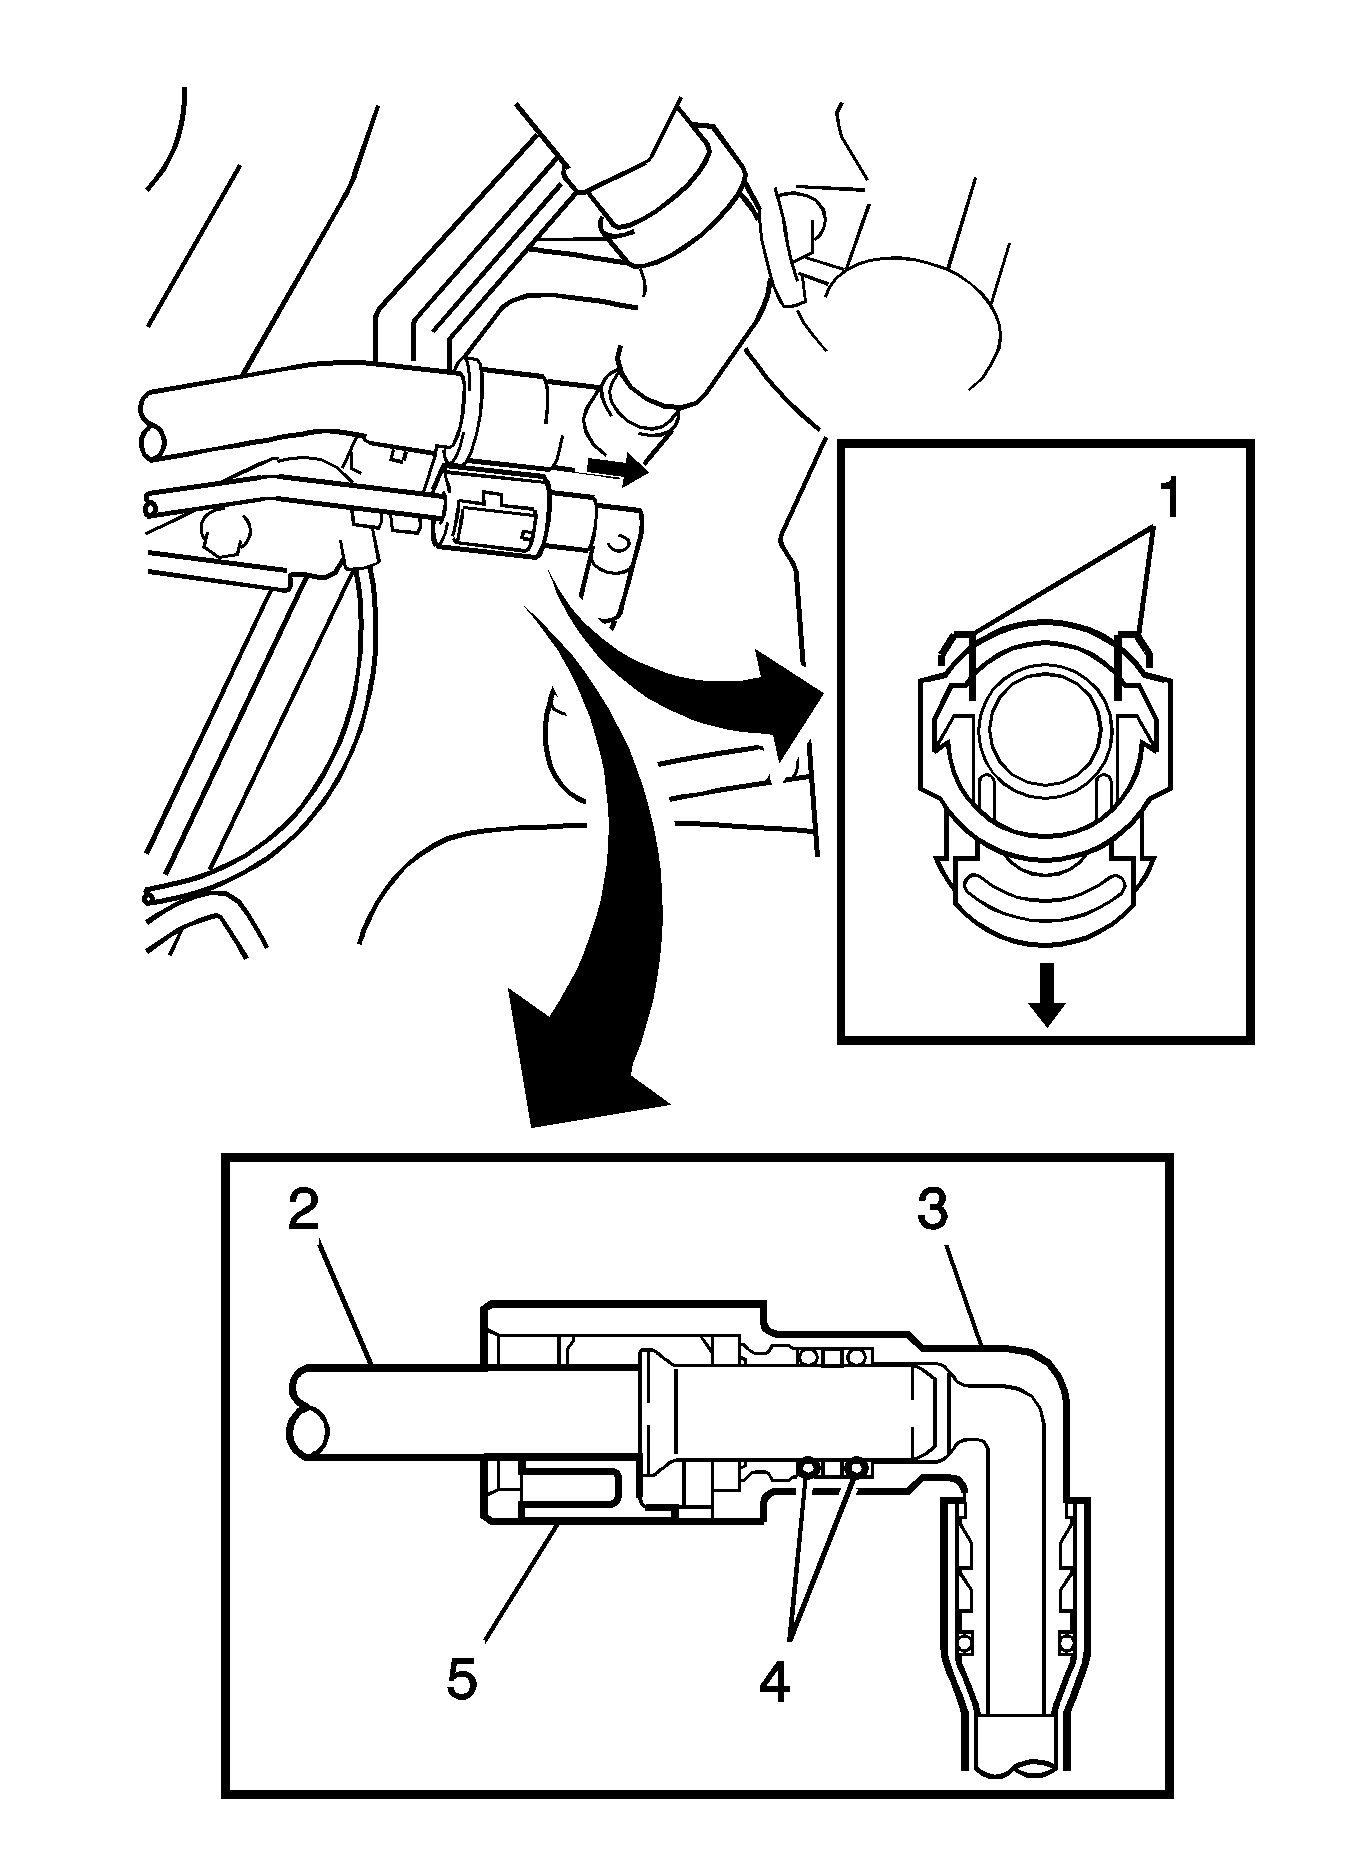
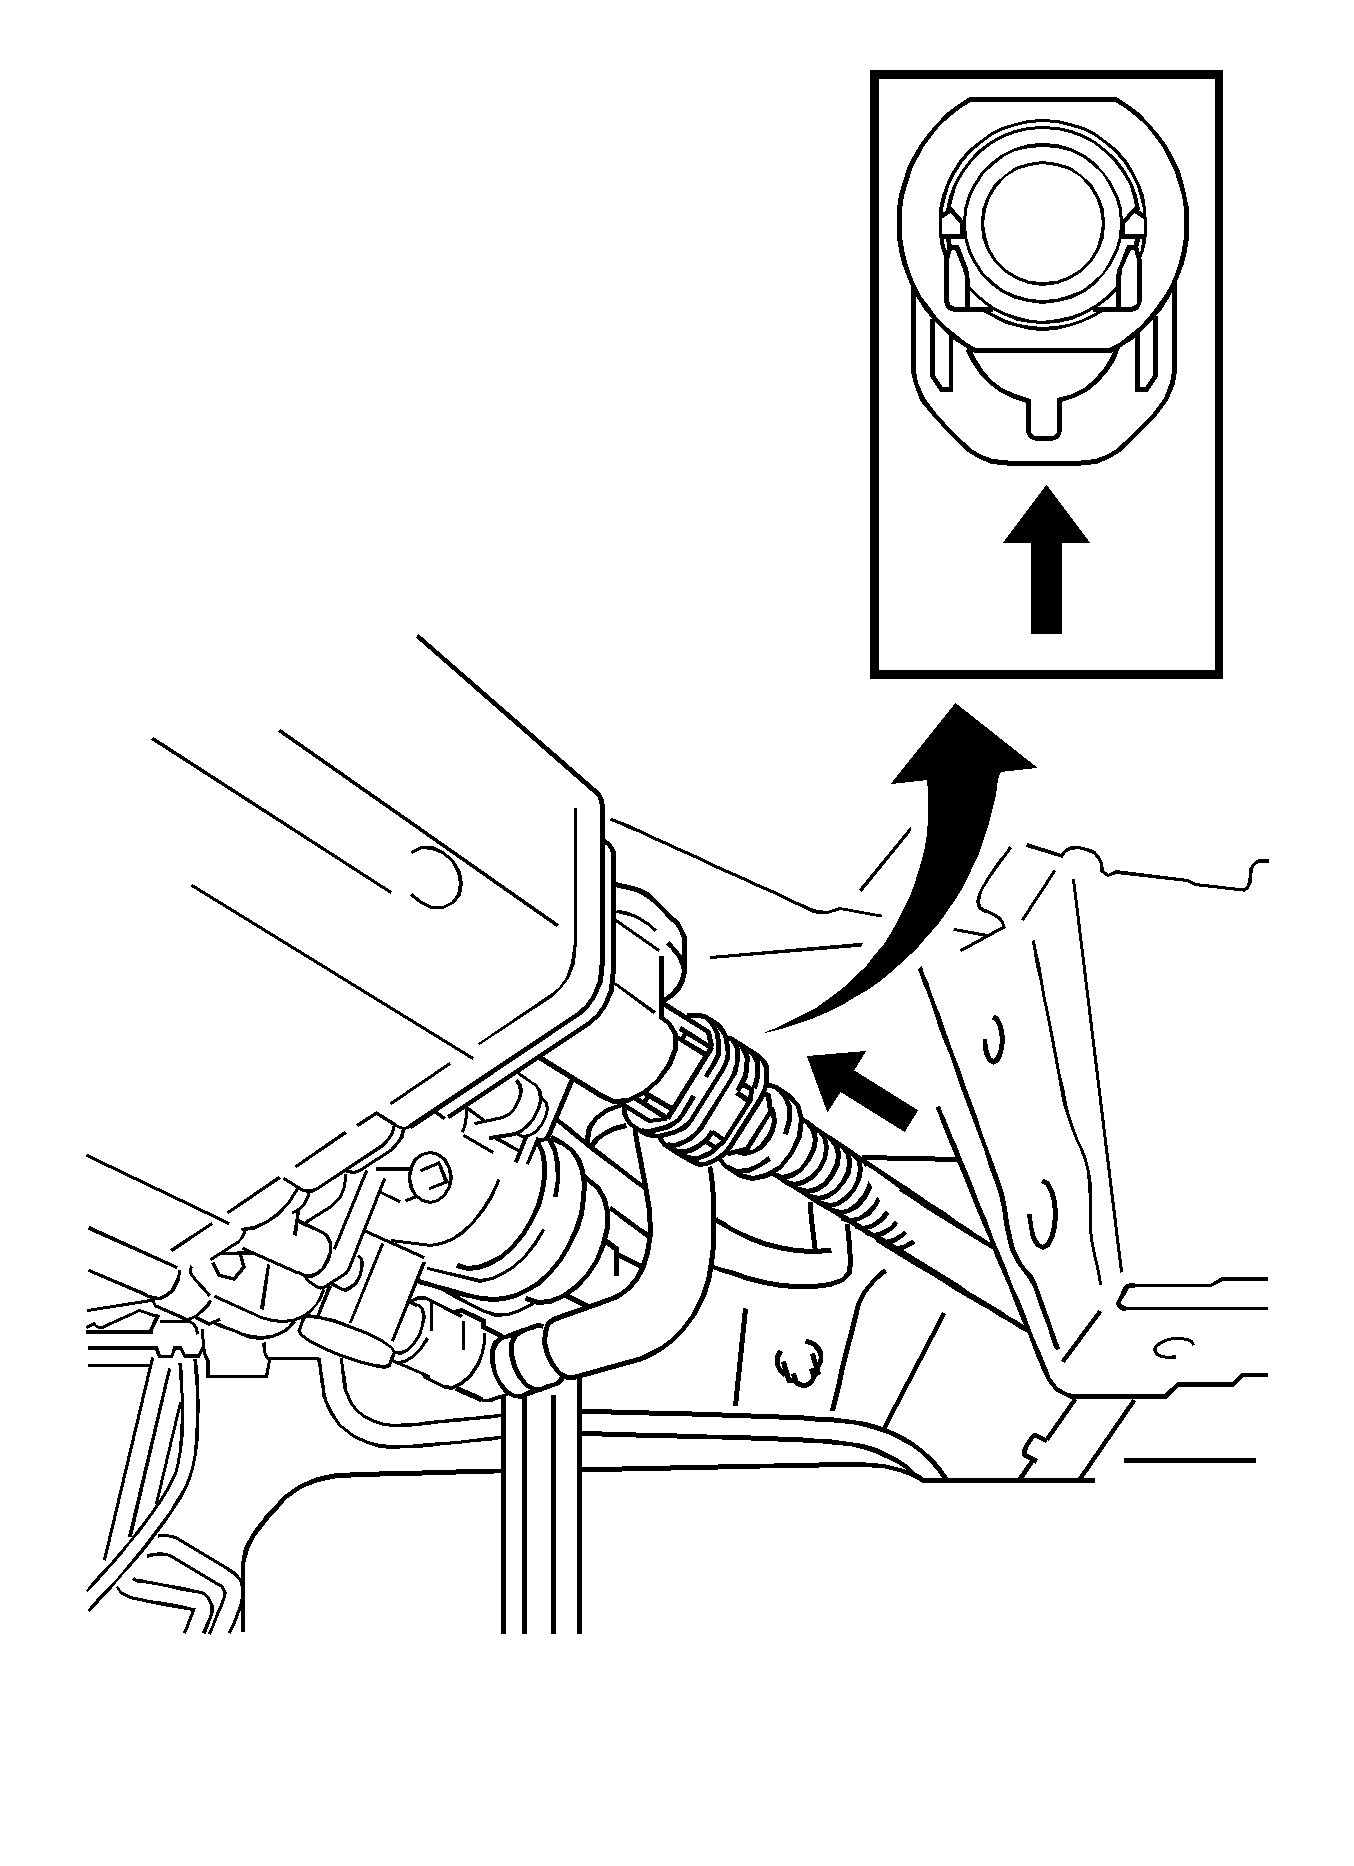
- Disconnect the breather tube fuel hose.
- Remove the checker of the fuel tube connector from the pipe.
- Pinch the retainer (1) of the fuel tube connector, then pull the fuel tube connector out of the pipe.
- Separate the fuel breather tube (1) fuel hose.
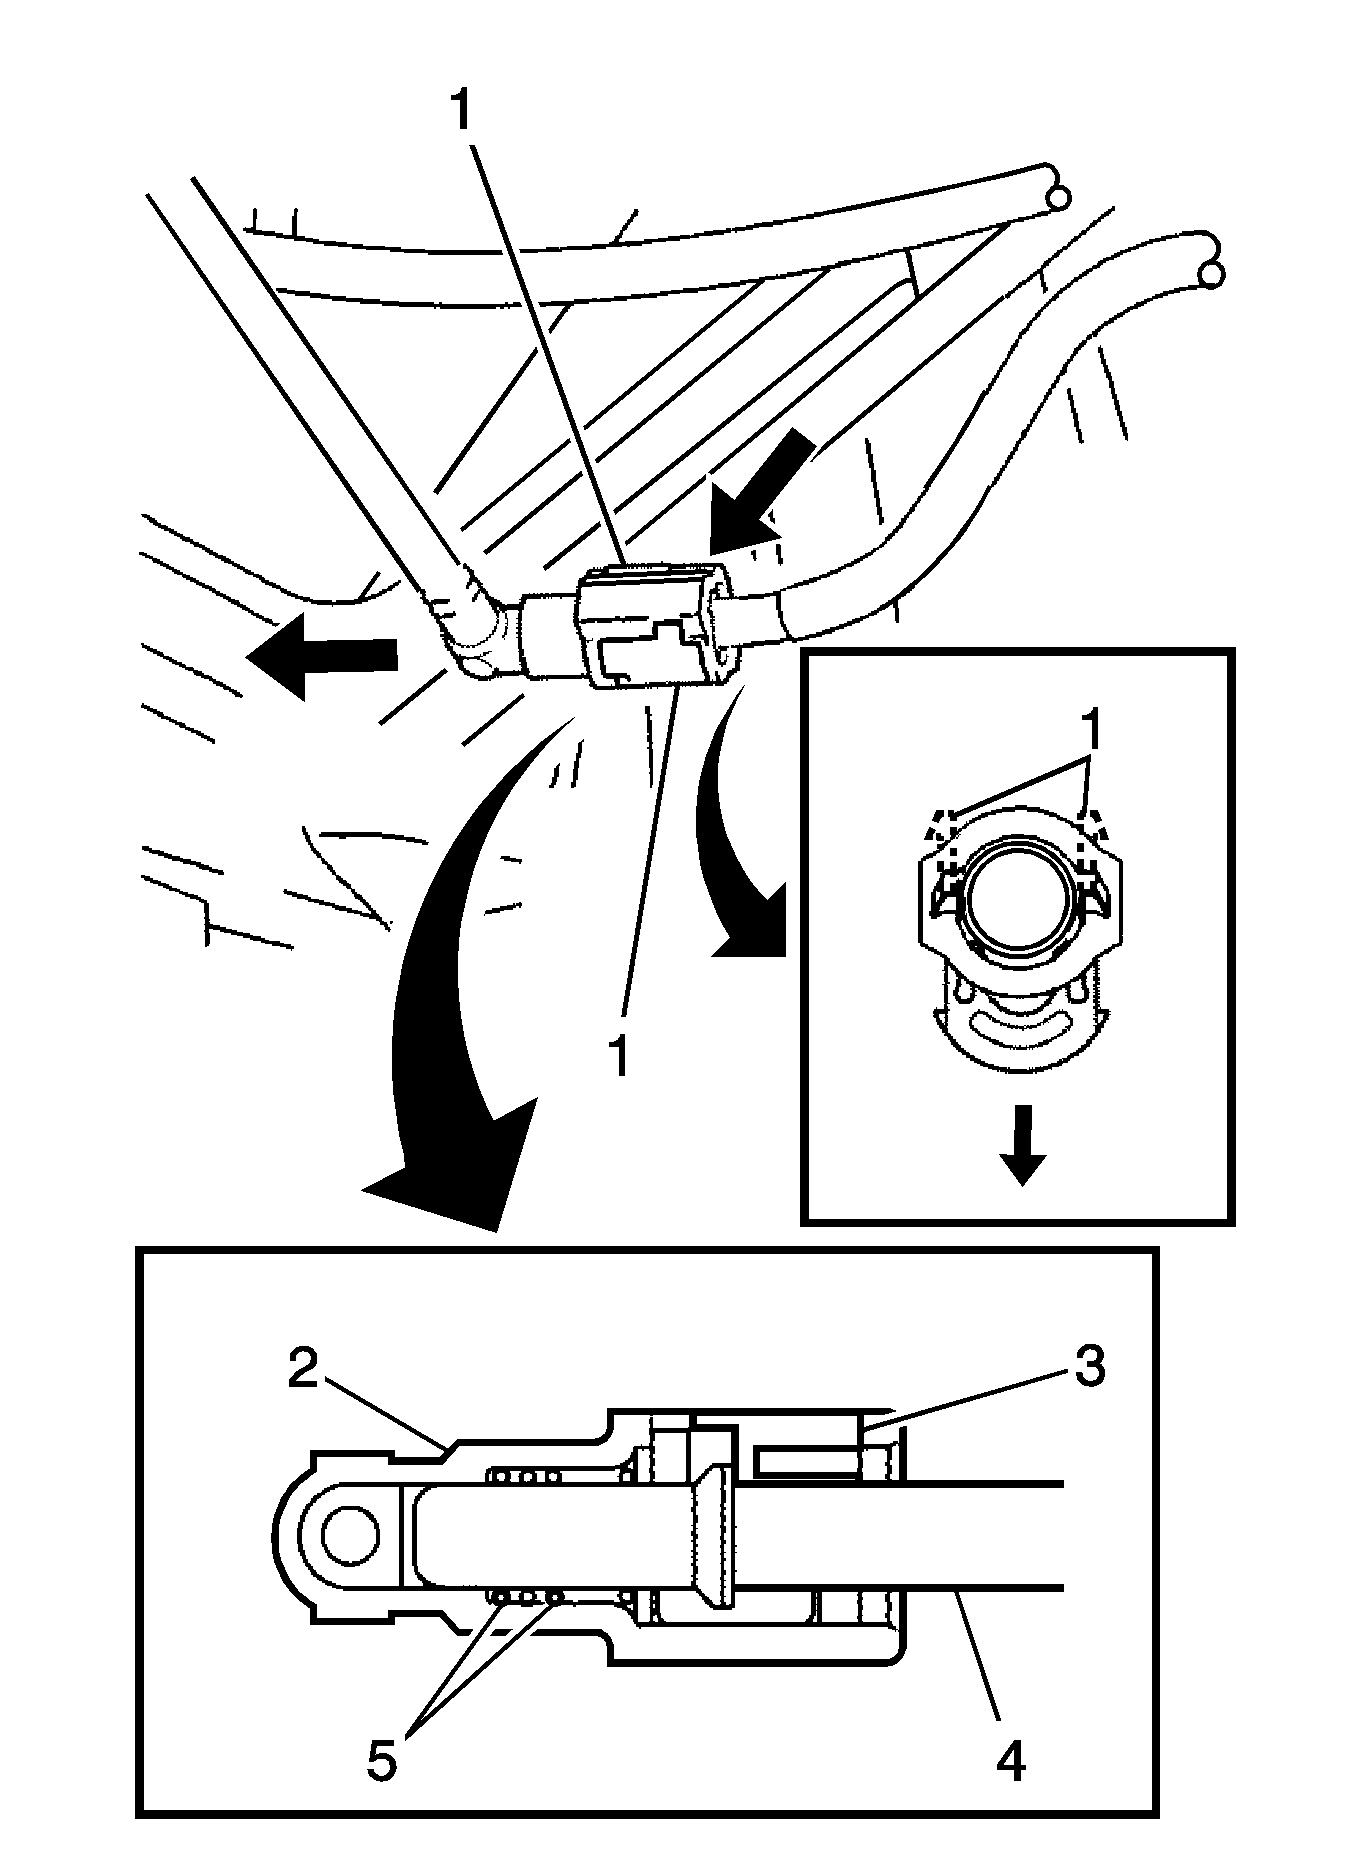
- Disconnect the fuel tank main tube sub-assembly.
- Pinch the tabs of the retainer (1) of the fuel tube connector to remove the lock claws and push it down.
- Pull the fuel tank main tube (4) out of the pipe (2).
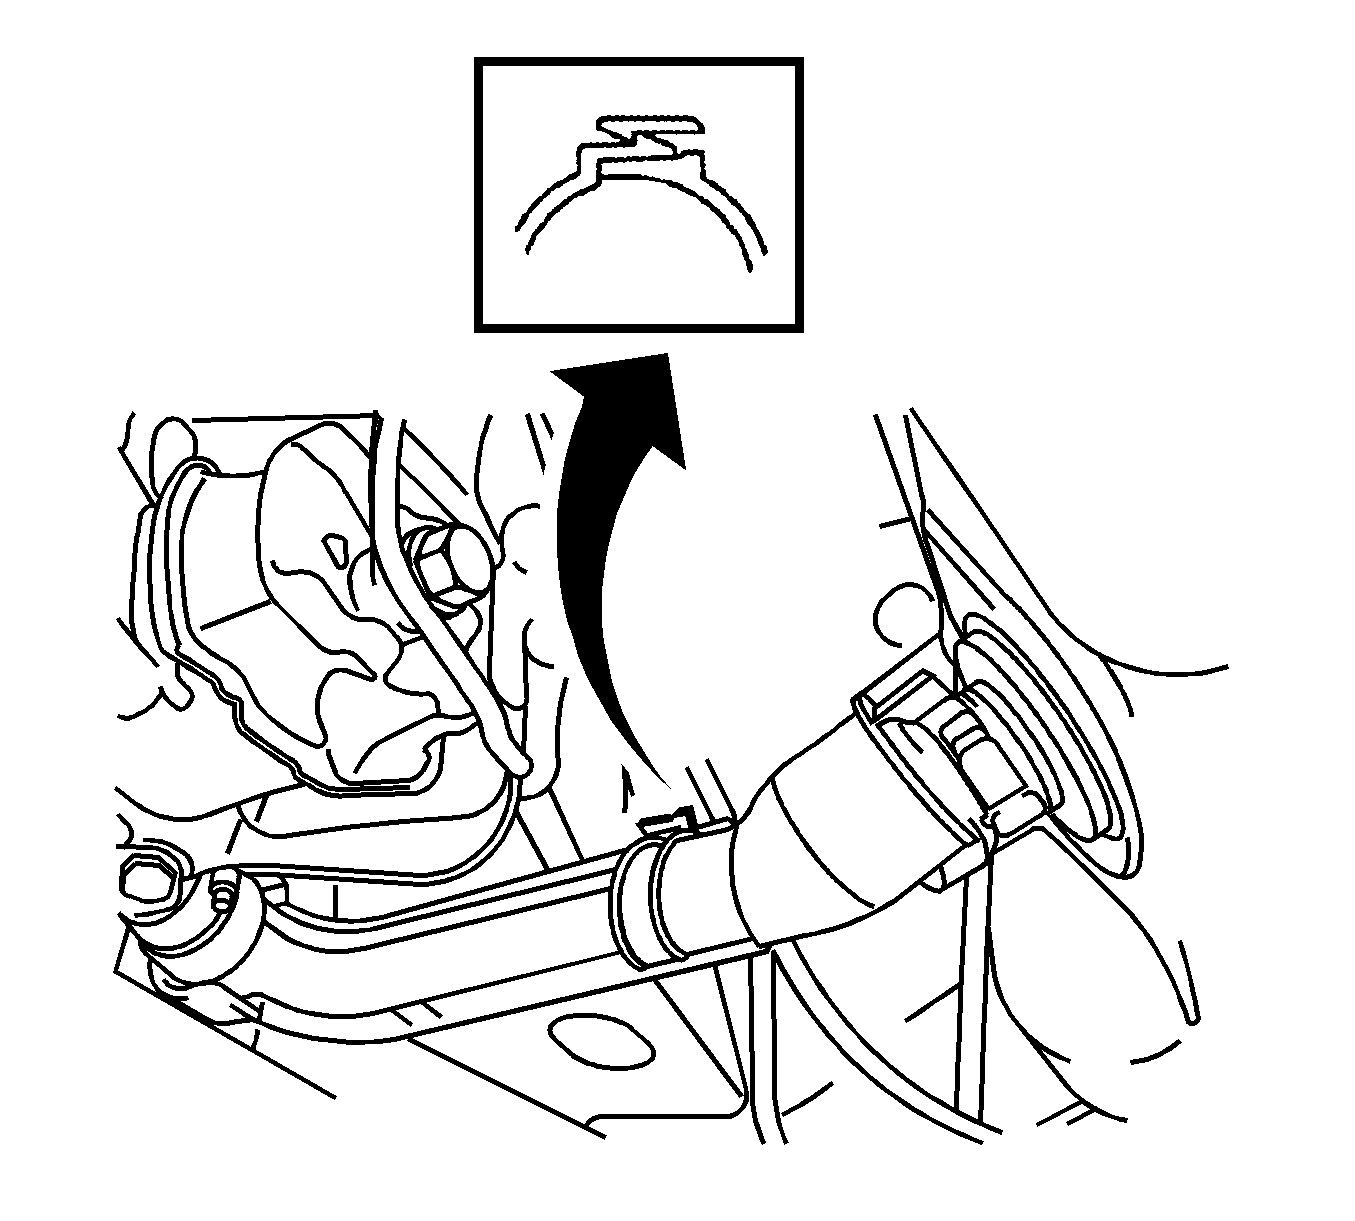
- Using a screwdriver, unfasten the claw. Then remove the fuel tank filler pipe cover from the fuel tank filler pipe.
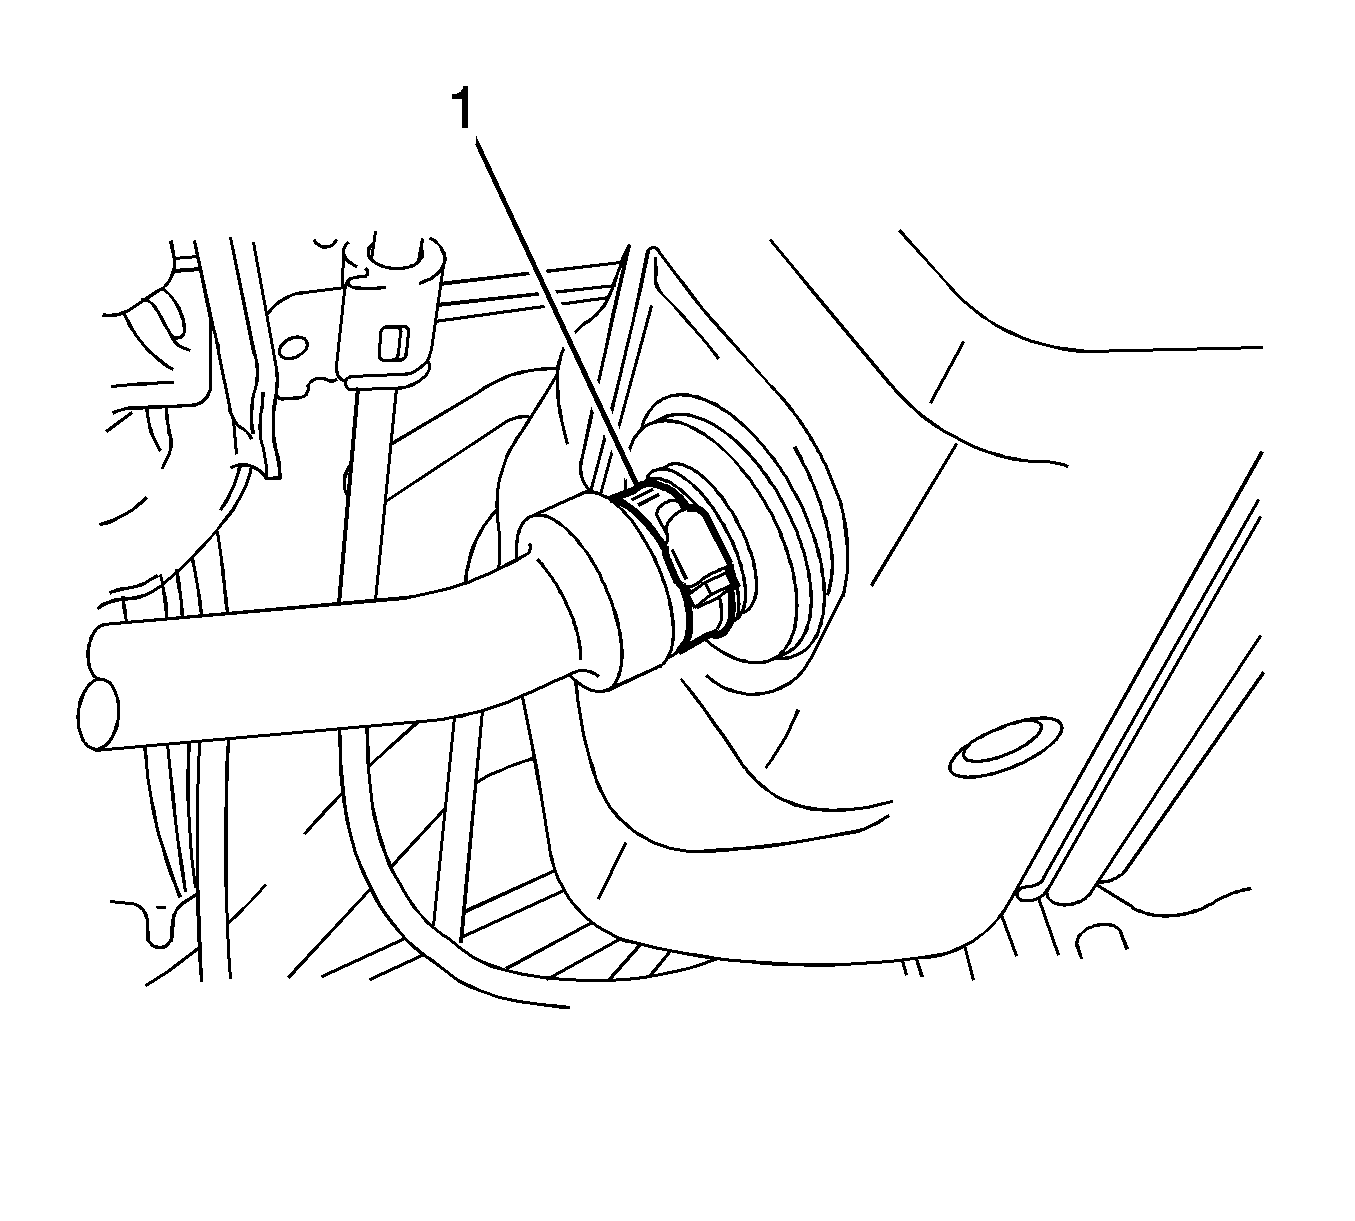
- Loosen the hose clamp bolt (1), then disconnect the fuel tank filler pipe hose from the fuel tank.
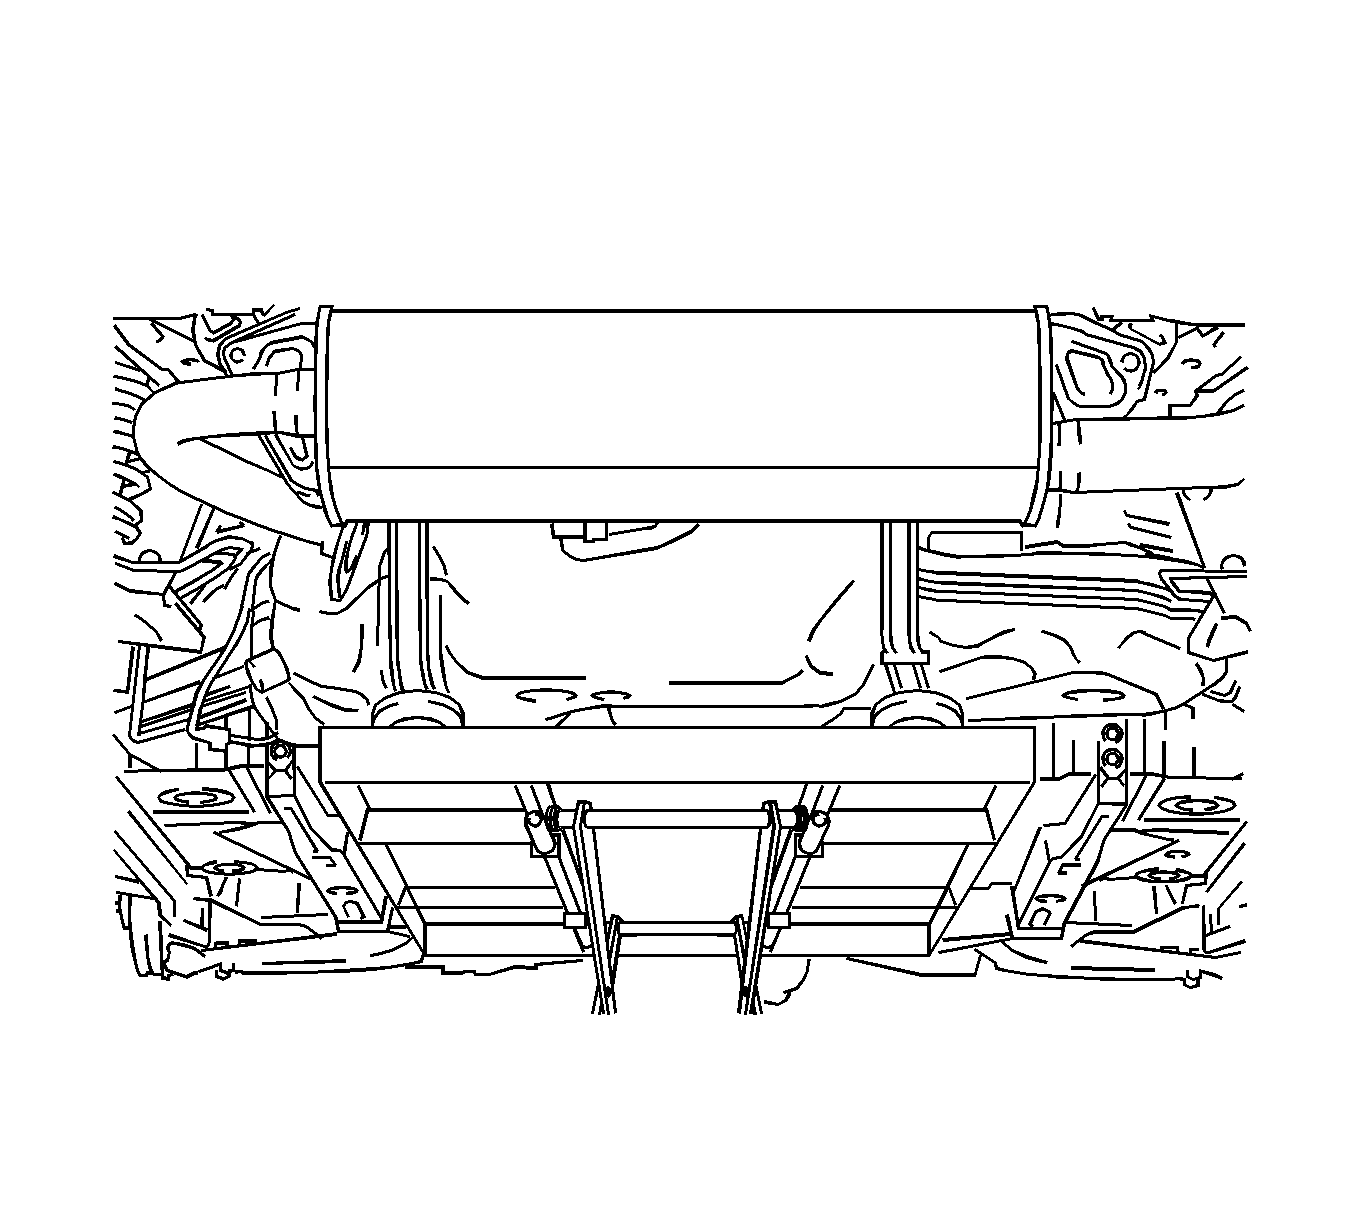
- Hold the fuel tank using a transmission jack.
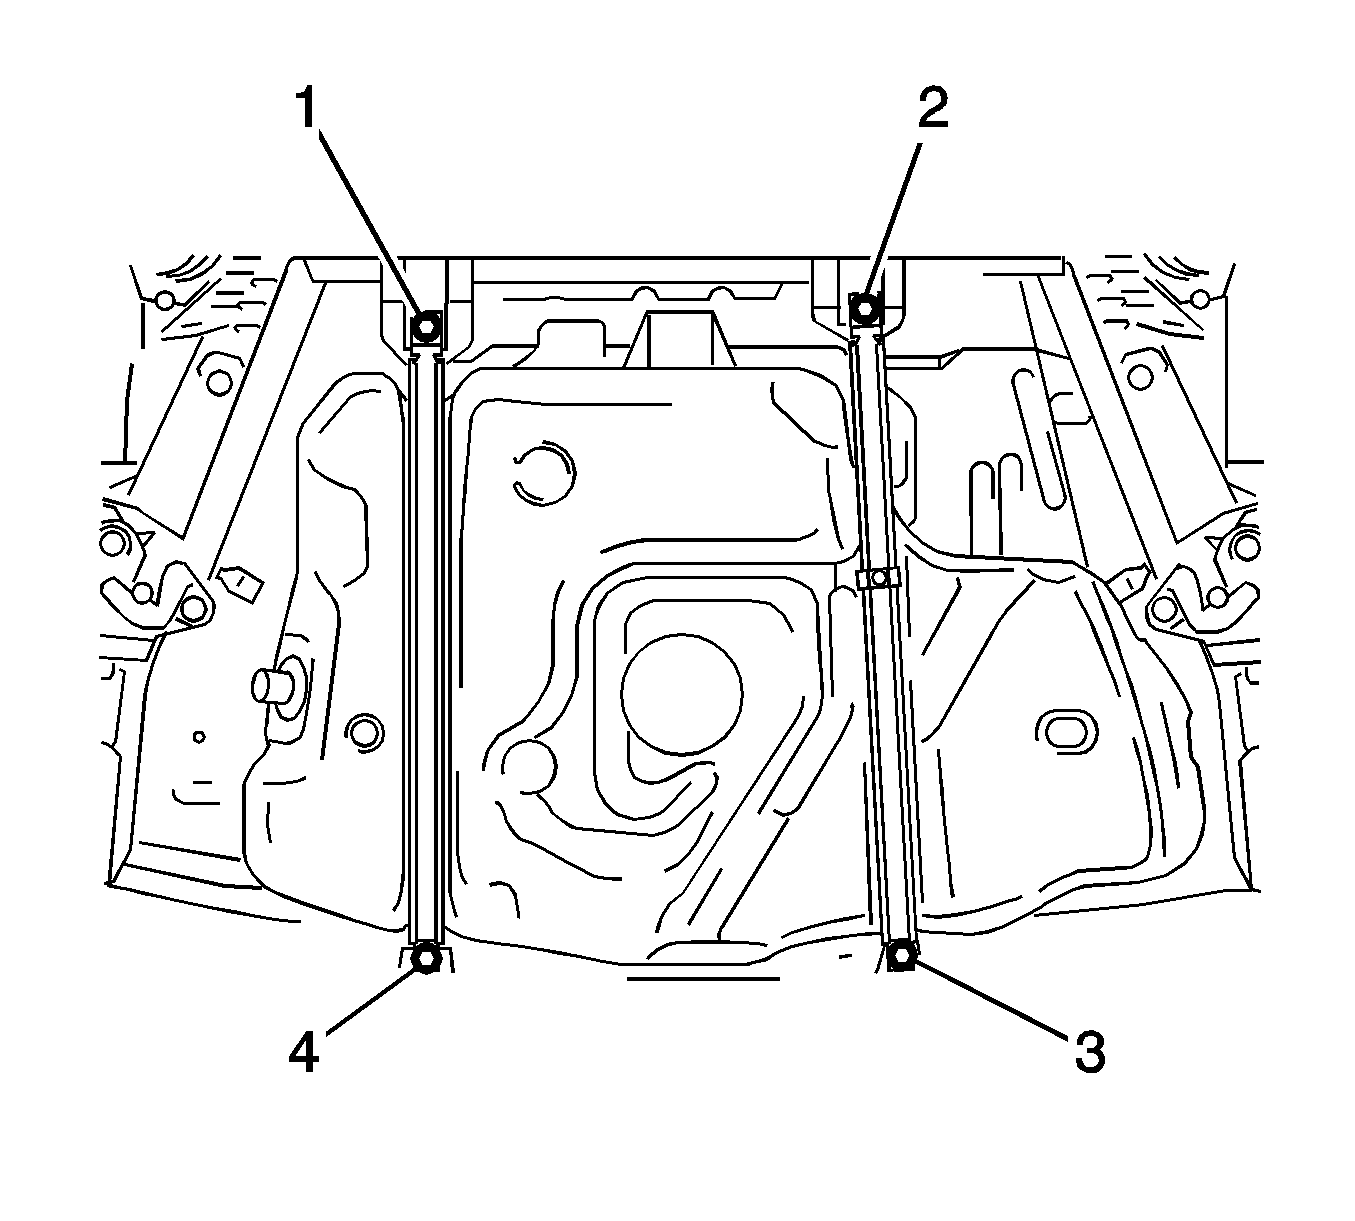
- Remove the 4 bolts (1, 2, 3, 4) move the 2 fuel tank bands.
- Operate the transmission jack, then remove the fuel tank.
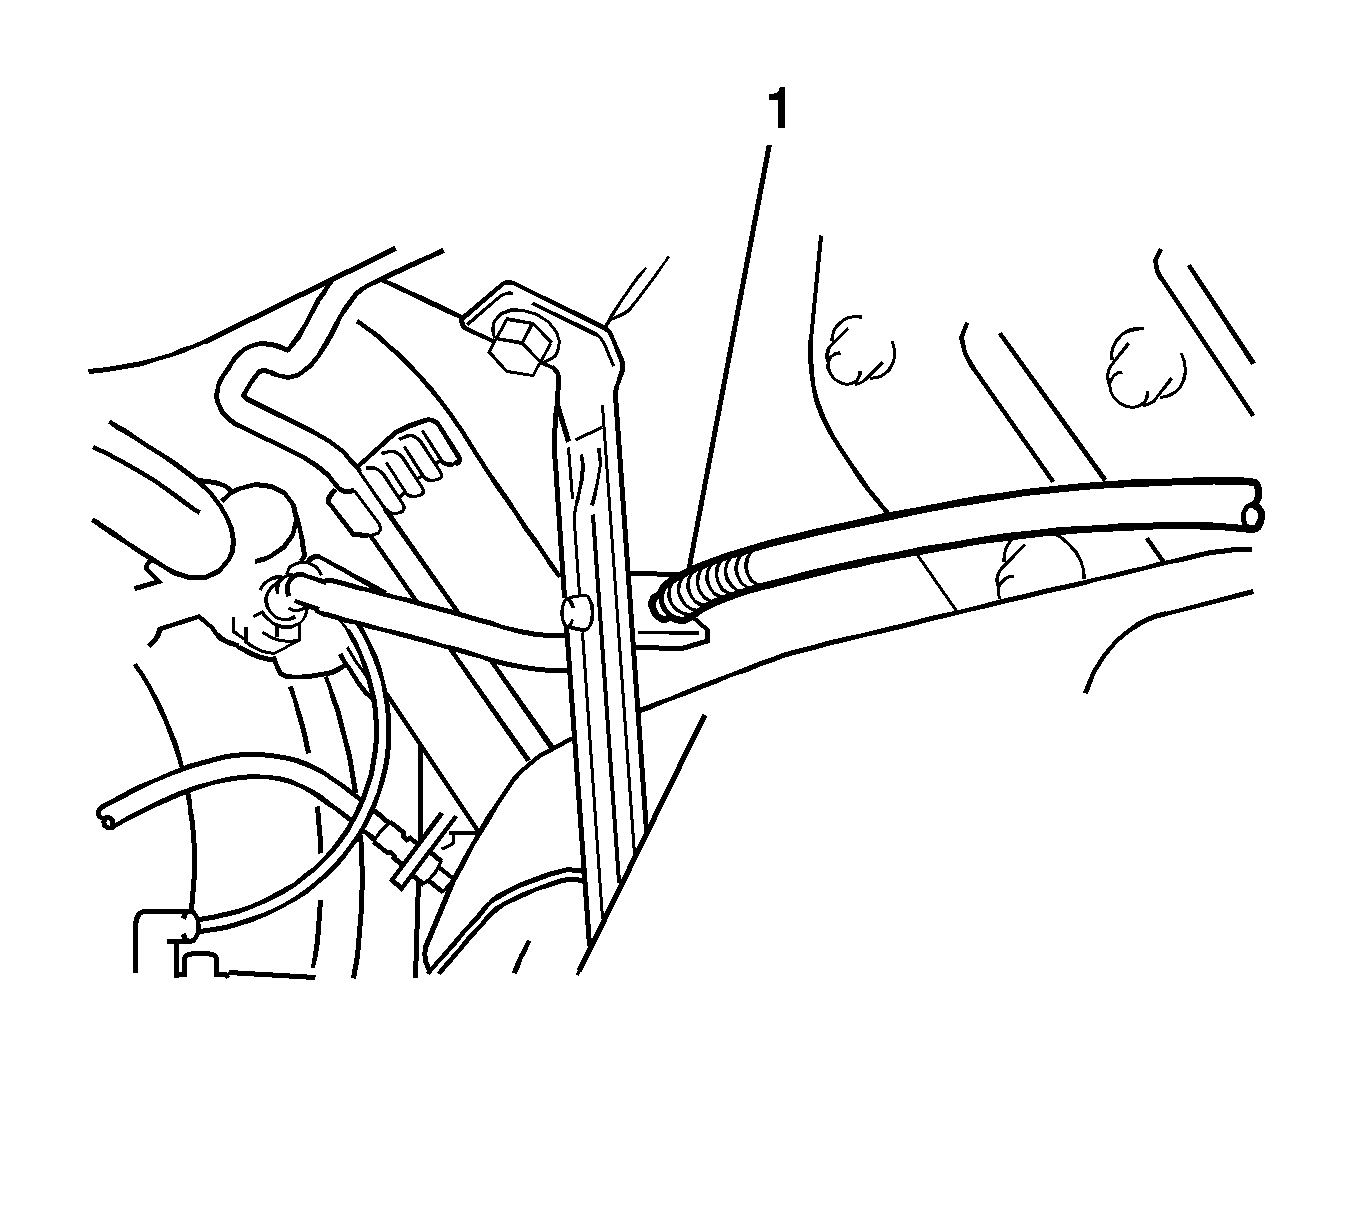
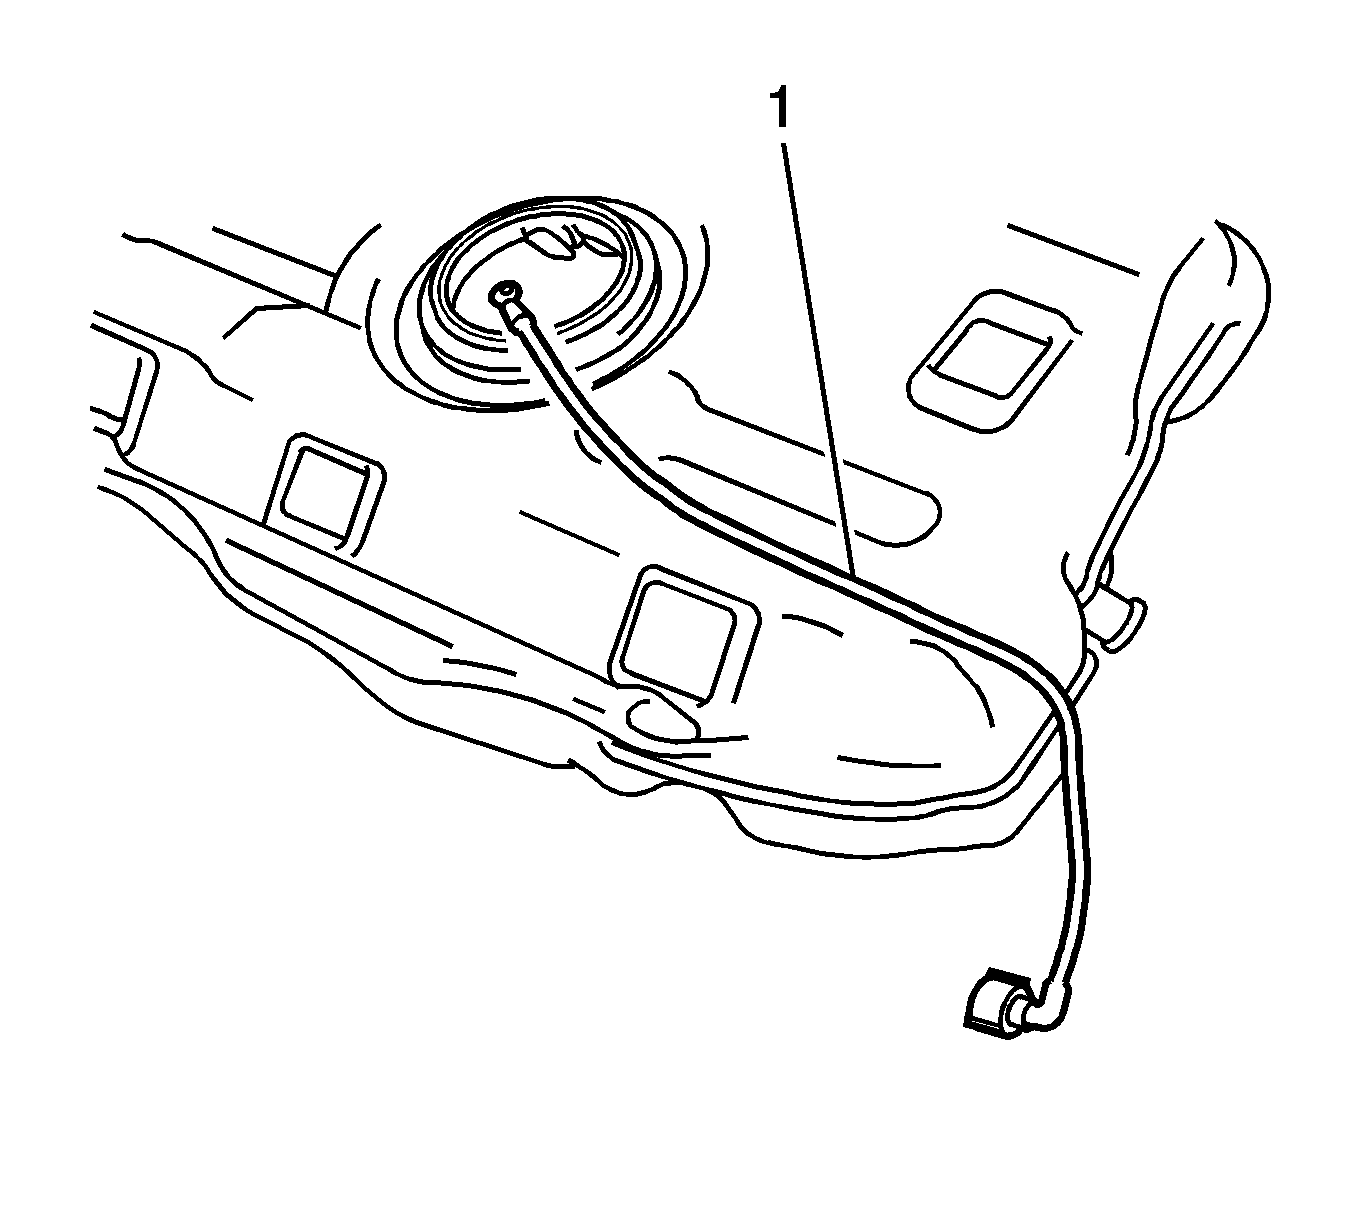
- Remove the fuel tank main tube (1) from the fuel tank.
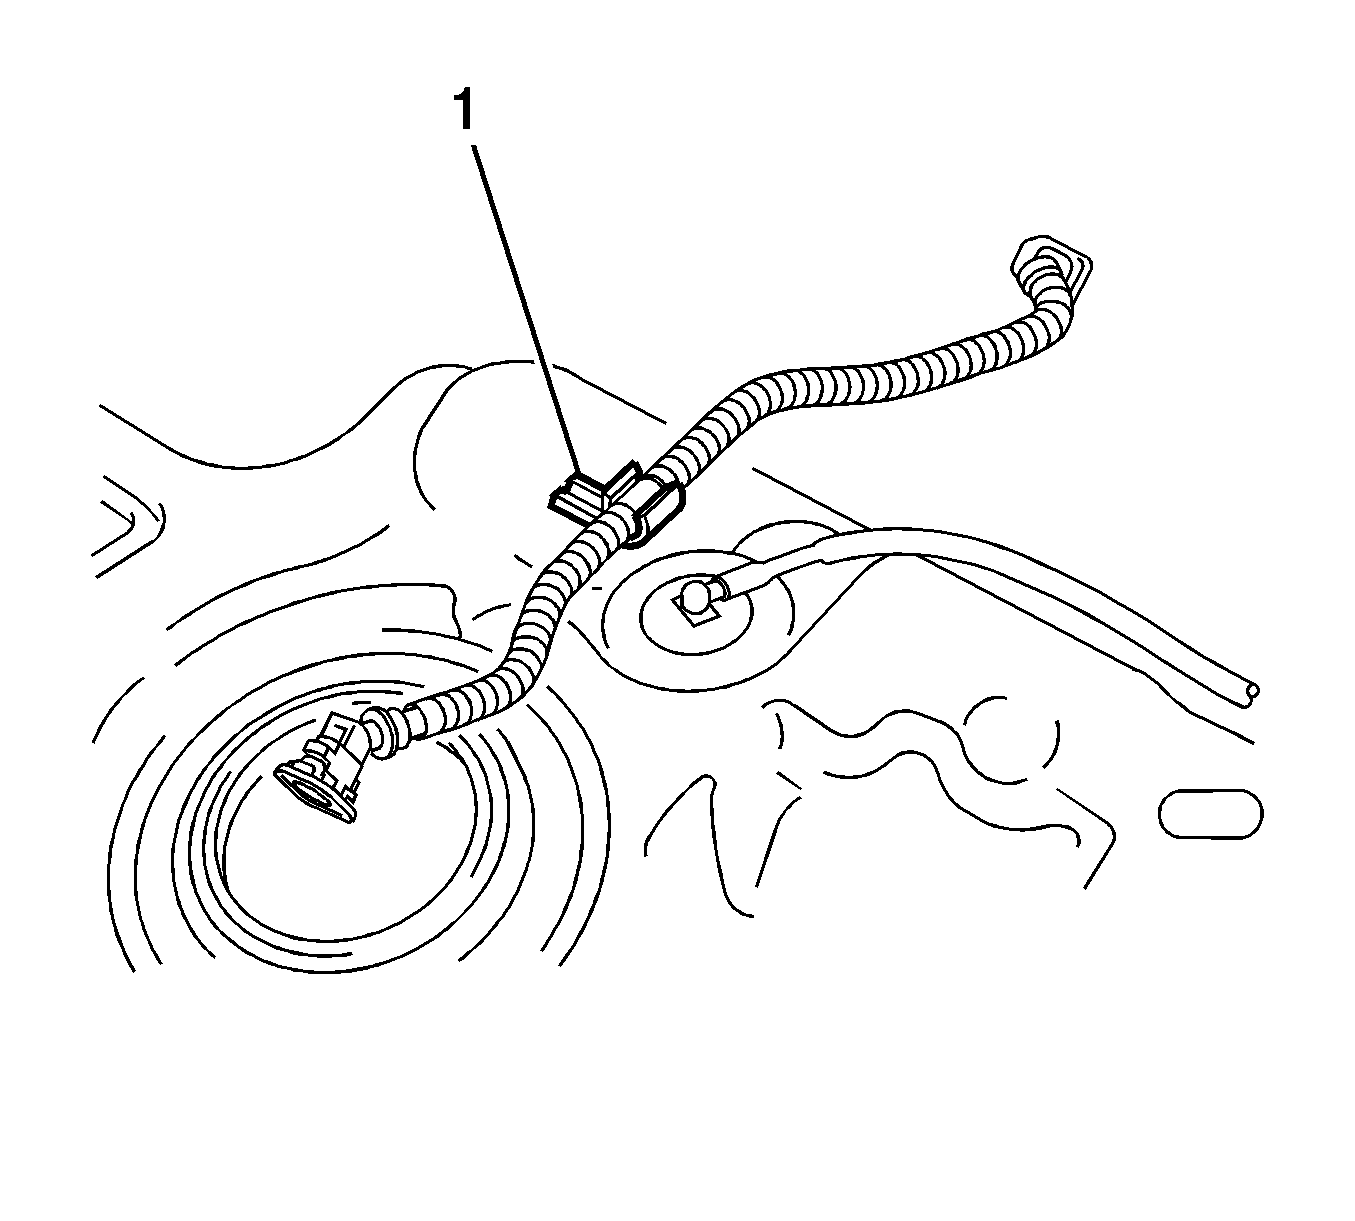
- Remove the fuel tank vent hose (1) from the fuel tank clamp.
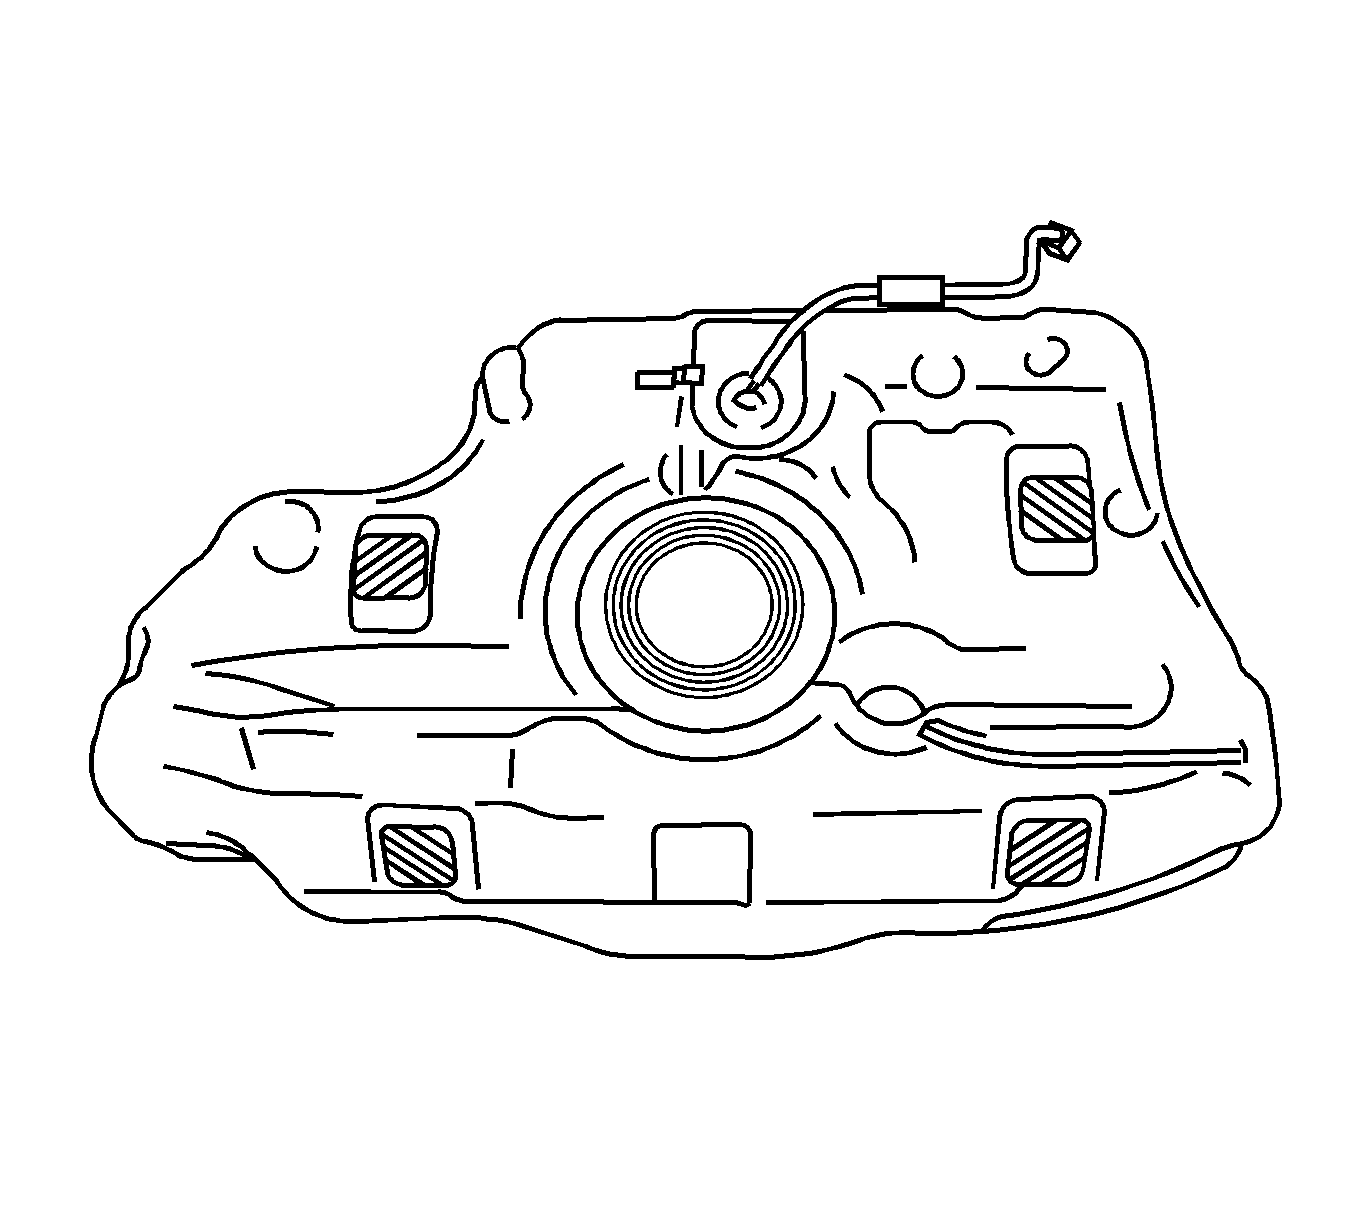
- Remove the fuel tank cushions from the fuel tank.
Warning: Refer to Battery Disconnect Warning in the Preface section.
Note: Check that there is no dirt or other foreign objects around the connector before disconnecting it. Clean the connector if necessary. It is necessary to prevent mud or dirt from entering the connector. If mud or dirt gets in the connector, the O-rings may not seal properly. Only disconnect the quick connector by hand. Do not bend, kink or twist the nylon tubes. Protect the connector by covering it with a plastic bag.
Installation Procedure
- Install the new fuel tank cushions onto the fuel tank.
- Install the fuel tank vent hose (1) onto the fuel tube clamp.
- Install the fuel tank main tube (1) onto the fuel tank.
- Set the fuel tank on a transmission jack.
- Operate the transmission jack, then install the fuel tank into the vehicle.
- Install the 2 fuel tank bands with the 4 bolts and tighten to 39 N·m (29 lb ft).
- Connect the fuel tank filler pipe (1) to the fuel tank.
- Engage the claw, then install the fuel tank filler pipe cover onto the fuel tank filler pipe.
- Connect the fuel tank main tube.
- Align the fuel tube connector with the pipe, then push the fuel tube connector in until it comes into contact with the seat to connect the fuel tank main tube to the pipe, then push the retainer up until the claws lock.
- Connect the breather tube fuel hose (1).
- Align the fuel tube connector with the pipe, then push the fuel tube connector in until the retainer makes a "click" sound to connect the fuel tank breather tube to the pipe.
- Install the checker onto the pipe.
- Connect the fuel tank vent hose.
- Align the fuel tube connector with the pipe, then push the fuel tube connector in until it comes into contact with the seat to connect the fuel tank vent hose to the pipe.
- Slide the retainer of the fuel tube connector to lock the claws.
- Install the charcoal canister assembly. Refer to Evaporative Emission Canister Replacement.
- Install the fuel tank protector sub-assembly with the 4 bolts (1, 2, 3, 4) and tighten to 5.5 N·m (49 lb in).
- Install the parking cables (1, 2, 3, 4) with the 4 bolts.
- Install the front exhaust pipe assembly. Refer to Catalytic Converter Replacement
- Add fuel.
- Install the fuel sender gage sub-assembly.
- Install the fuel suction tube assembly.
- Install the fuel pump gage retainer.
- Connect the fuel tank vent hose.
- Connect the fuel tank main tube sub-assembly.
- Connect the cable to the negative battery terminal.
- Inspect for a fuel leak.
- Inspect for a exhaust gas leak.
- Install the rear floor service hole cover.
- Install the rear seat cushion assembly. Refer to Rear Seat Cushion Replacement.


Caution: Refer to Fastener Caution in the Preface section.
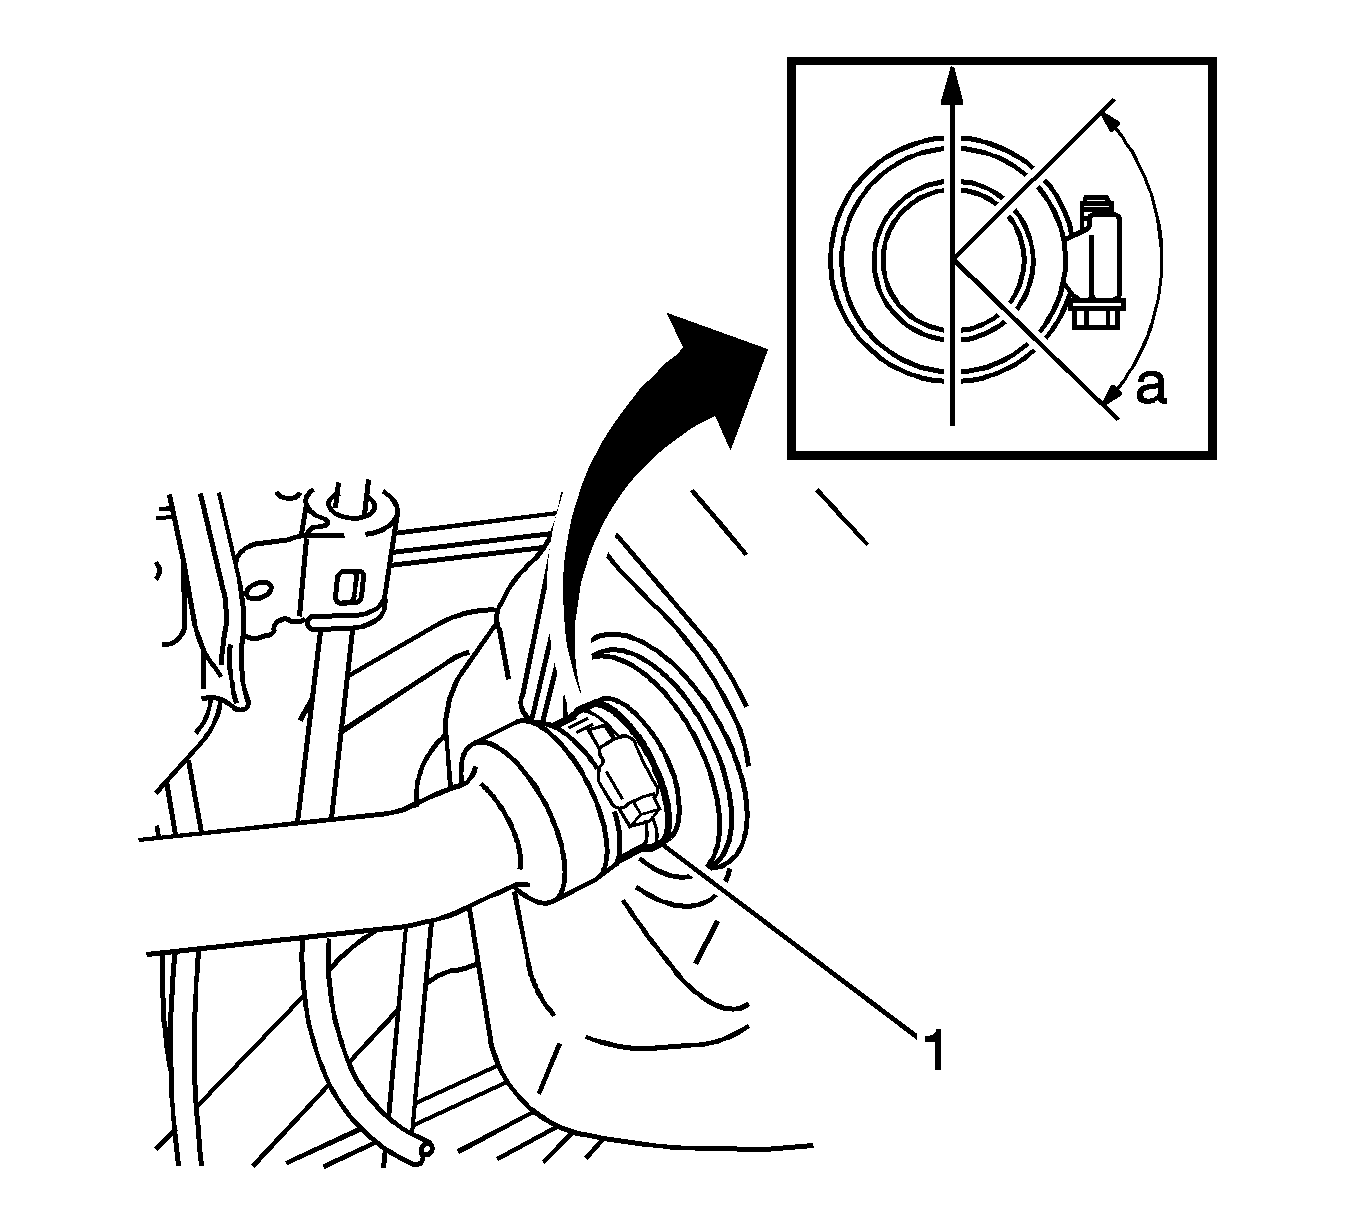
Note: Make sure that the hose clamp is facing in the correct direction when installing.
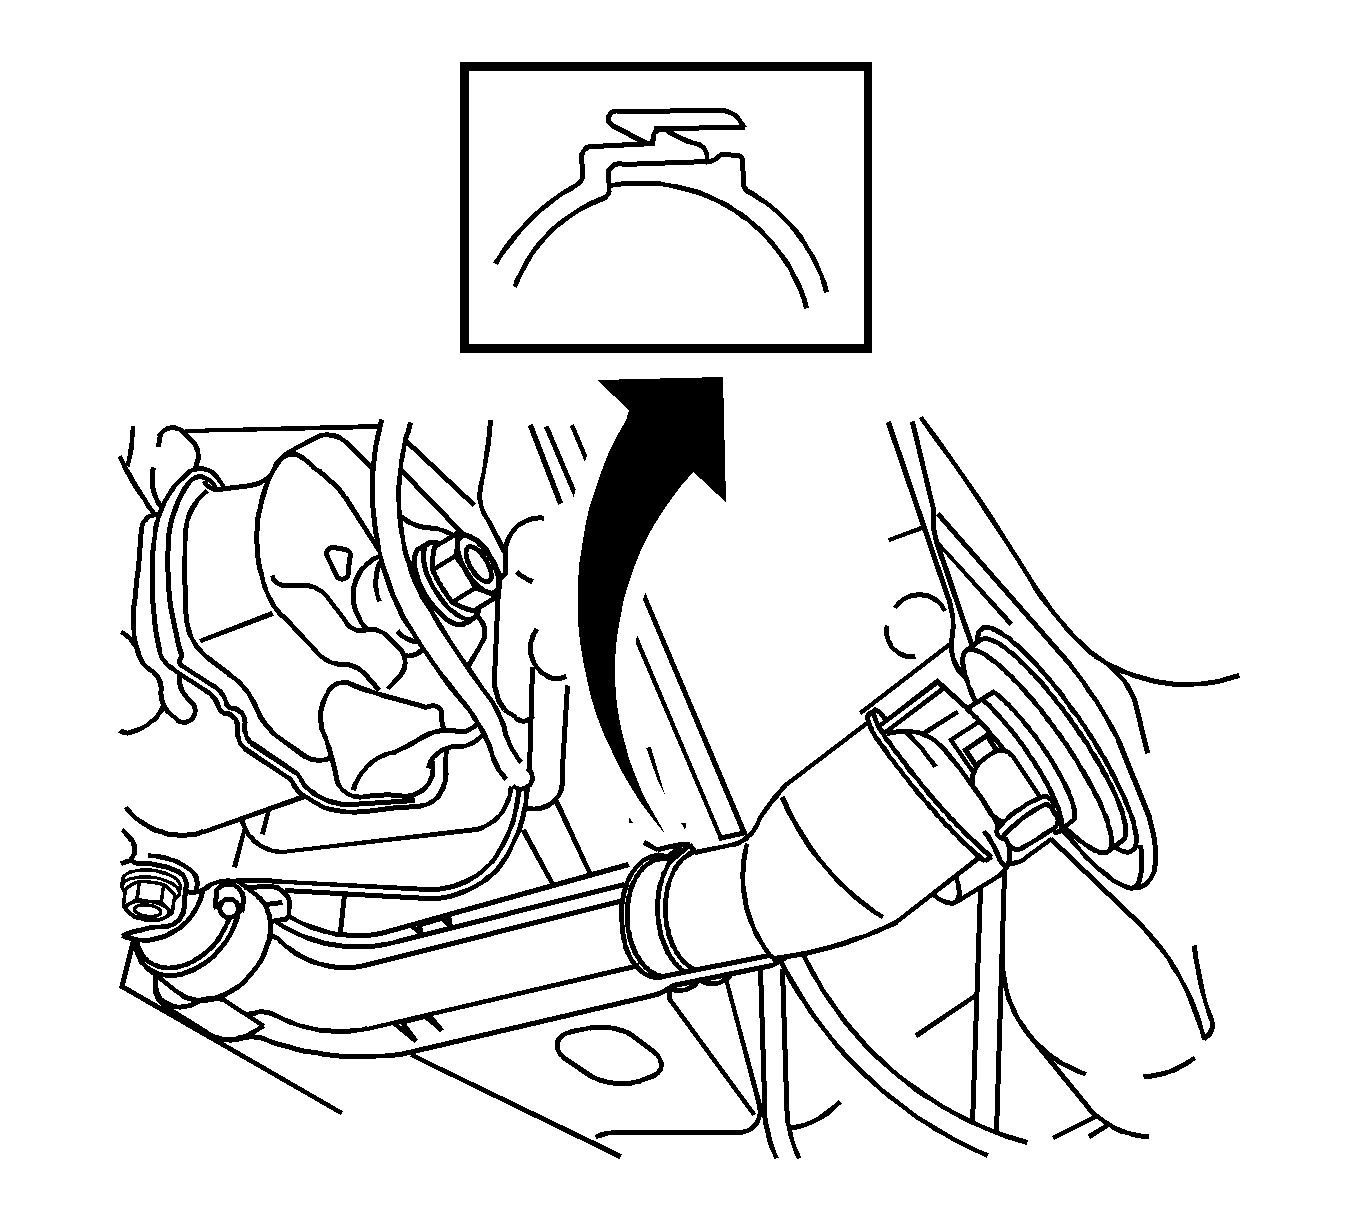
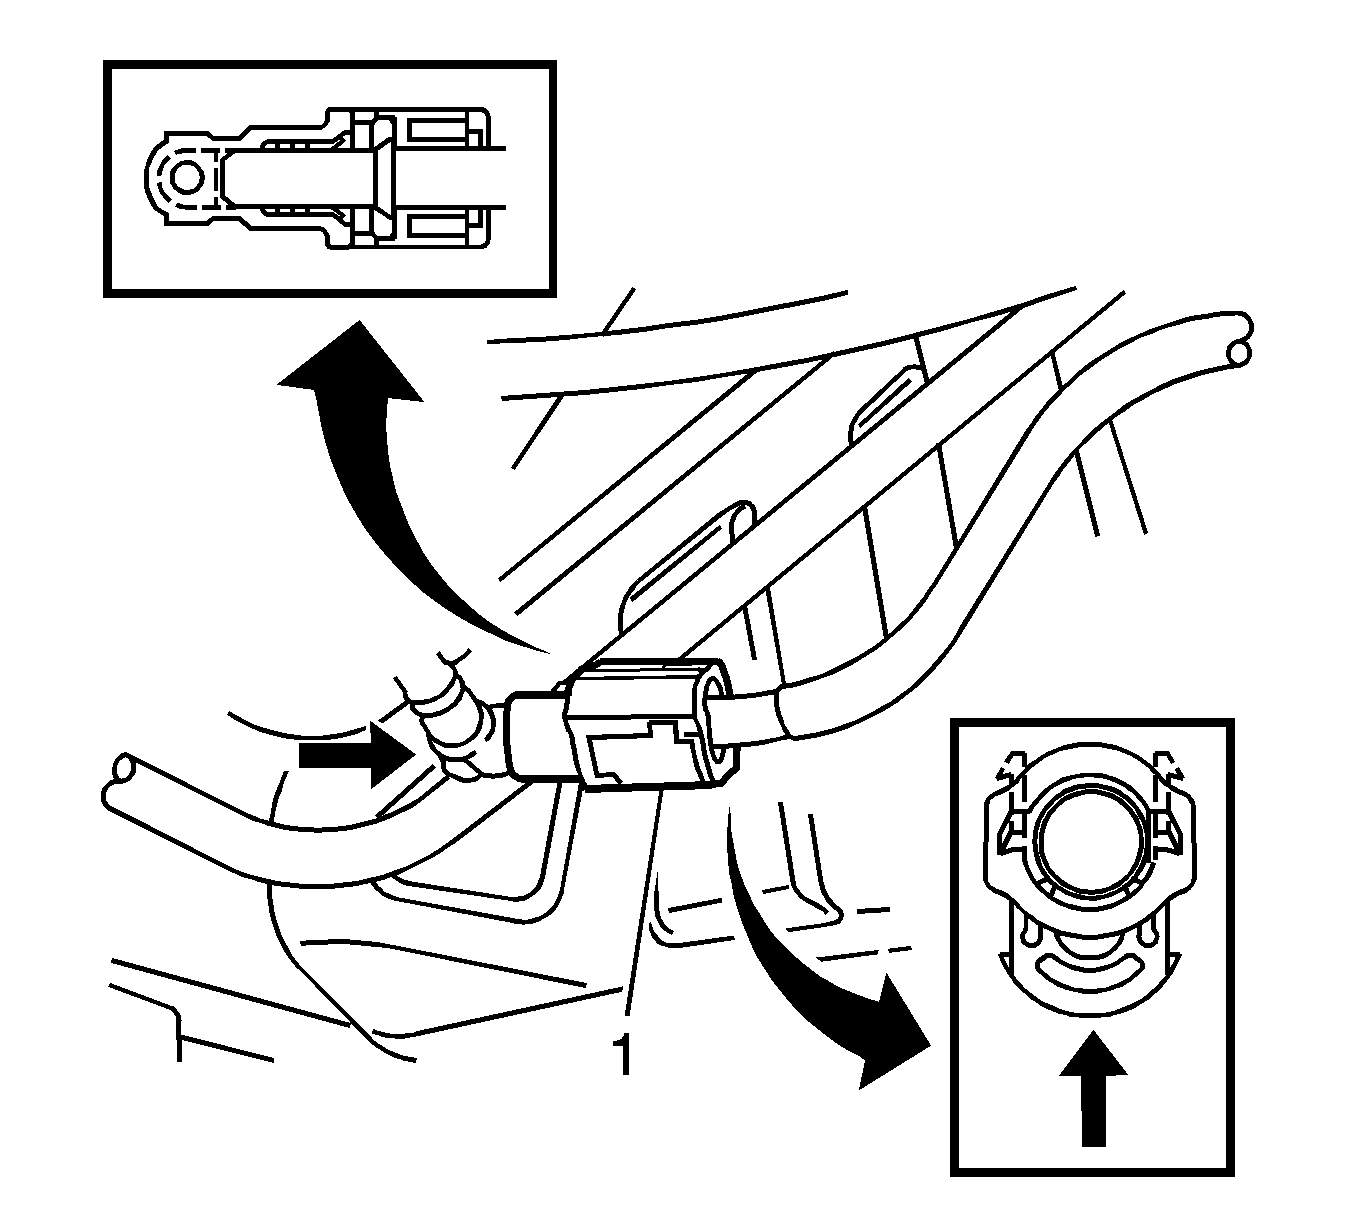
Note: Check that there are no scratches or foreign objects around the connecting surfaces of the fuel tube connector and pipe before performing this work. After connecting the fuel tank main tube, check that the fuel tank main tube is securely connected by pulling on the fuel tube connector and pipe.



Warning: Refer to Battery Disconnect Warning in the Preface section.
