For 1990-2009 cars only
Removal Procedure
- To remove the non-electrochmic glass, manually tilt the top edge of the glass away from the mirror housing in order to gain access to the retaining tab located behind the glass.
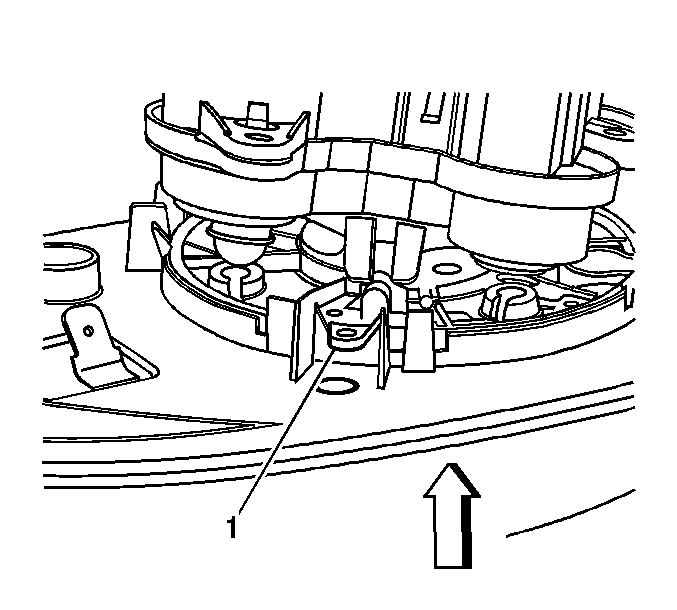
- Using a flat-bladed tool, carefully release the upper tab (1) that retains the glass to the actuator while simultaneously tilting the glass away from the mirror housing.
- Partially remove the glass from the mirror assembly.
- Disconnect the 2 heated mirror connectors from the glass, if equipped.
- Remove the glass from the mirror assembly.

Important:
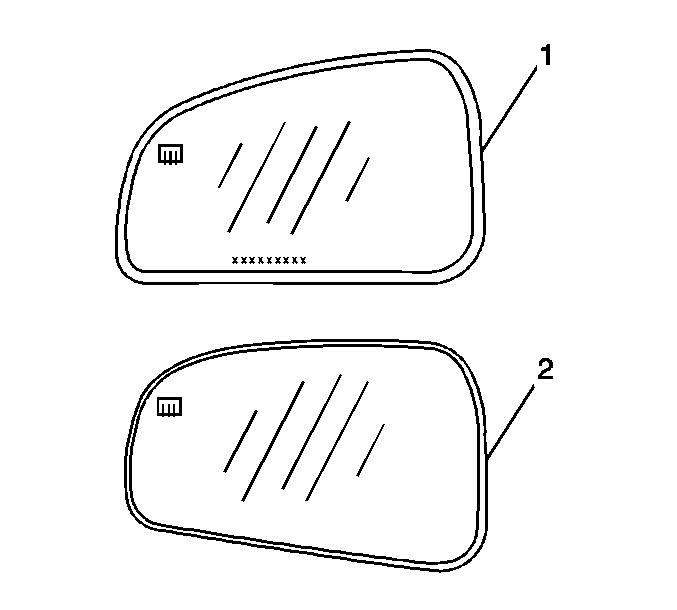
• In order to identify the electrochromic mirror (1), take note
of the glass bezel thickness of 5 mm (3/16 in). • Only the electrochromic mirror (1) has identification numbers
located at the bottom center edge of the glass. • In order to identify the non-electrochromic mirror (2), take note
of the glass bezel thickness of 3 mm (1/8 in). • The electrochromic glass is not serviceable. Replace the mirror only
as an assembly. Refer to
Outside Rearview Mirror Replacement
.
Caution: Approved safety glasses and gloves should be worn when performing this procedure to reduce the chance of personal injury.

Installation Procedure
- Position the glass to the mirror assembly.
- Connect the 2 heated mirror connectors to the glass, if equipped.
- Carefully attach the glass to the actuator by pushing the glass into the actuator, ensuring the upper (1) and lower retaining tabs are fully seated.
- Verify proper operation of the mirror assembly.

