18 Inch Accessory Wheels Available Through GM Accessories

| Subject: | 18" Accessory Wheels Available Through GM Accessories |
| Models: | 2006 Buick Rainier |
| 2006 Chevrolet TrailBlazer, TrailBlazer EXT |
| 2006 GMC Envoy, Envoy XL, Envoy Denali, Envoy Denali XL |
| 2006 Saab 9-7X |
The purpose of this bulletin is to provide a reference guide for the technician to upgrade a vehicle from factory wheel and tires to 18" wheels and tires, which are available through GM Accessories. This guide will cover Tires, Wheels, Parts Information, Warranty Information.
TIRES
GM offers one tire, the Goodyear Fortera HL P245/60R18 104S BSL, to be used in conjunction with the 18" accessory wheels. The Goodyear Fortera tire has a Tire Performance Criteria (TPC) spec of #1252MS, which meets or exceeds all Federal safety guidelines.
The Saab 9-7X and Envoy Denali come standard with 18" wheels as original equipment and do not require new tires.
Important: When mounting the tires, rubber lubricant, P/N 12345884 (in Canada, 5728223), MUST be used. Also, the vehicle should not be driven aggressively (hard acceleration or braking) for at least 6-8 hours after tire mounting to allow the lubricant to dry. Failure to do so may cause the tire to slip on the rim. This condition will affect wheel balance, which could result in a vibration.
Valve Stems
When installing the Envoy, Rainier, TrailBlazer and 9-7X Accessory Wheels, a new valve stem should also be installed.
WHEELS
Center Cap
Install the center cap onto the wheel after the tire has been mounted and balanced, but BEFORE the assembly is installed onto the vehicle. The preferred method for center cap installation is by hand. As an alternate, use a non-metallic object to push the center cap into place. Attempting to "hammer on" the caps may result in damage to the cap.
Wheel (Lug) Nuts

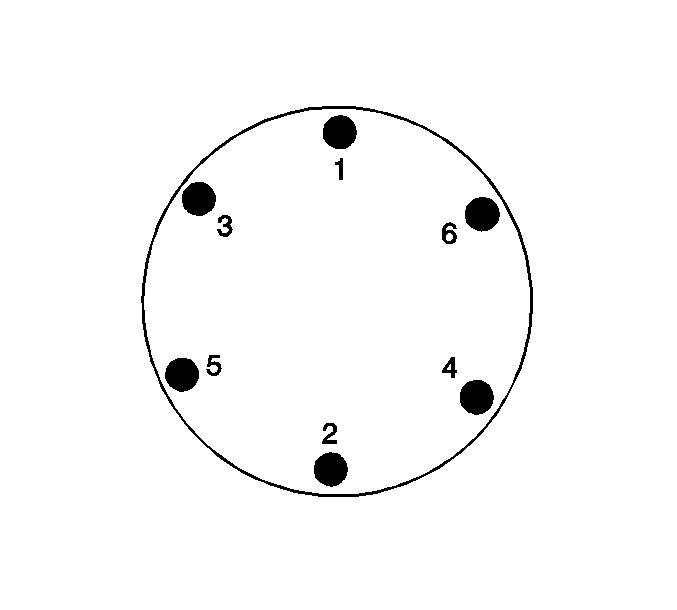
ALUMINUM WHEELS REQUIRE SPECIAL WHEEL NUTS. Each wheel nut should be tightened to 140 N·m (103 lb ft) using the tightening sequence illustrated above. The torque should be re-checked after the first 160 km (100 mi). To help protect the wheels from theft, a wheel lock kit is also available.
Caution: : Incorrect wheel nuts or improperly tightened wheel nuts may cause the wheel to become loose and even come off. This could lead to an accident. Be sure to use the correct wheel nuts.
Care/Cleaning
Use soap, hot water and a 100% cotton cloth to clean and polish the new wheels. If using a wheel cleaner, be sure to select one that will not harm the wheel surface, such as GM Chrome and Wire Wheel Cleaner, P/N 1052929 (in Canada, use P/N 10953202). Avoid car washes that use carbide tipped brushes, as these may damage the wheel's finish. Periodically clean the backside of the wheel to remove road grime, brake dust and grease.
Balancing
Use MC style balance weights on the inboard rim and stick-on weights mounted on the outboard-center of the rim (behind the spokes).
Front Stabilizer Shaft Replacement
Important: This modification is required for the following vehicles:
• 2006 Buick Rainier • 2006 Chevrolet TrailBlazer, TrailBlazer EXT • 2006 GMC Envoy, Envoy XL
- Raise and support the vehicle.
- Remove the tires and wheels.
- Remove the stabilizer shaft links to the stabilizer shaft retaining nut.
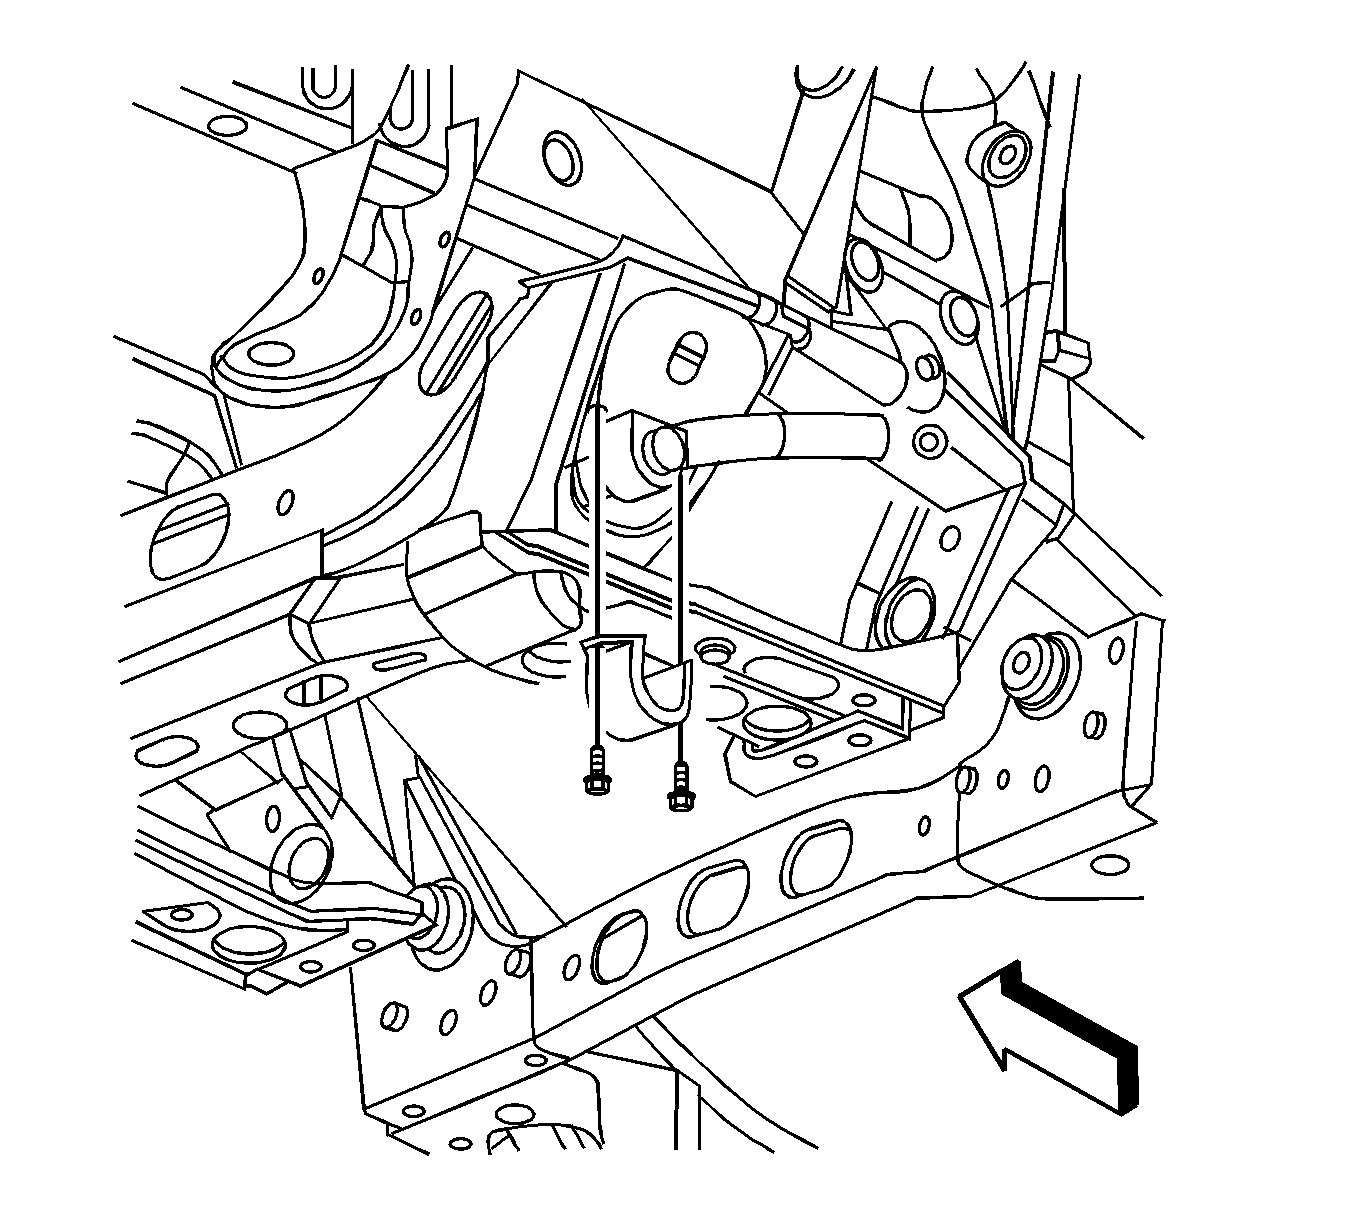
- Remove the stabilizer shaft insulator clamp mounting bolts.
- Remove the stabilizer shaft insulator clamp from the stabilizer shaft insulator.
- Remove the stabilizer shaft insulators from the stabilizer shaft.
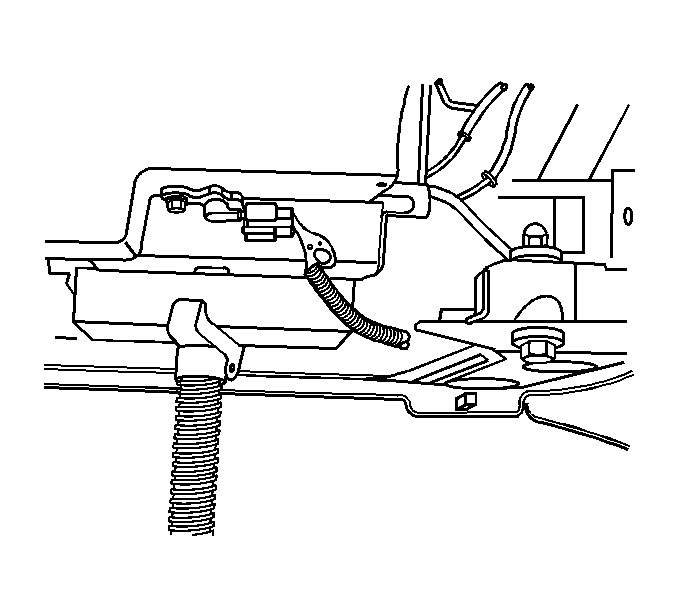
- Remove the engine protection shield mounting bolts and shield.
- Install a pole jack underneath the oil pan.
- Insert a block of wood between the oil pan and the pole jack.
- Raise the engine 10 mm (0.39 in) measuring from the bottom of the oil pan to the rear edge of the transmission support crossmember.
- Remove the stabilizer shaft from the vehicle.
- Install the stabilizer shaft to the vehicle, with the bend down and away from the engine. There may be a label on the shaft. If so, it should be on the LH side.
- Lower the engine.
- Remove the block of wood between the oil pan and the pole jack.
- Remove the jackstand from underneath the oil pan.
- Install the engine protection shield and mounting bolts.
- Install the stabilizer shaft insulators to the stabilizer shaft.
- Install the stabilizer shaft insulator clamp to the stabilizer shaft insulator.
- Install the stabilizer shaft insulator clamp mounting bolts.
- Install the stabilizer shaft links to the stabilizer shaft.
- Install the stabilizer shaft link to stabilizer shaft retaining nuts.
- Install the tires and wheels.
- Lower the vehicle.

Important: Note the position of the bend in the stabilizer shaft.

Important: The jackstand should only be used to support the weight of the powertrain. DO NOT lift the entire weight of the front end of the vehicle by the jackstand.


Tighten
Tighten the engine protection shield mounting bolts to 25 N·m (18 lb ft).
Tighten
Tighten the stabilizer shaft insulator clamp mounting bolts to 55 N·m (41 lb ft).
Tighten
Tighten the stabilizer shaft link retaining nuts to 155 N·m (114 lb ft).
Tire Label
Important: : DO NOT PLACE THE LABEL OVER TOP OF ANY EXISTING LABELS.
The tire label is provided as a guide for tire inflation pressures and information for vehicle mass calculation. After installing the recommended P245/60R18 tire, place the label on the driver's door jam, near the existing tire label. GM recommends that the surface to which the label is to be applied be cleaned with a suitable solvent (50% isopropyl alcohol, FS 1062 hi-flash naptha or equivalent) and dried with a clean cloth. The surface temperature should not be less than 65°F (21°C). Peel the liner from the backside of the label being careful not to touch or contaminate the adhesive by allowing dirt or any foreign material to come in contact with it. Carefully align the label to the receiving surface, press firmly and smooth out.
PARTS INFORMATION
Wheels | Single Part | Multi-Pack Set | ||
|---|---|---|---|---|
Name (Style #) | P/N | Pcs/Pack | 4-Pack P/N | Pcs/Pack |
ST182 | 17800182 | 1 | 17800183 | 4 |
ST191 | 17800191 | 1 | 17800192 | 4 |
ST188 | 17800188 | 1 | 17800189 | 4 |
ST328 | 17800328 | 1 | 17800329 | 4 |
ST243 | 19155243 | 1 | 19155244 | 4 |
ST354 | 17800354 | 1 | 17800355 | 4 |
ST357 | 17800357 | 1 | 17800358 | 4 |
Center Cap (Chevrolet) | 88966039 | 1 | 17800085 | 4 |
Center Cap (GMC) | 88966040 | 1 | 17800086 | 4 |
Center Cap (Buick) | 88966041 | 1 | 17800087 | 4 |
Center Cap (Saab) | 88966042 | 1 | 17800088 | 4 |
Part Number | Description | Qty |
|---|---|---|
274288 | Valve Stem (5 pack) | 1 |
9594683 | Lug Nuts | 24 |
9593570 | Lug Nut Cap (Chrome) | 24 |
9593175 | Lug Nut Cap (Stainless) (10 pack) | 3 |
12498073 | Wheel Lock Kit | 1 |
19156213 | Front Stabilizer Shaft Package (Includes 1 Shaft, 2 Insulators, 2 Clamps) | 1 |
WARRANTY INFORMATION
Wheels
All GM Accessories sold and permanently installed on a GM vehicle PRIOR to new vehicle delivery, will be covered under the provisions of the New Vehicle Limited Warranty.
For the U.S., in the event GM Accessories are installed AFTER the New Vehicle Delivery, or are replaced under the New Vehicle Warranty, they will be covered (parts and labor) for the balance of the vehicle warranty, but in no event less than 12 months/12,000 miles. This coverage is only effective for GM Accessories permanently installed by a GM dealer or a GM approved ADI (Accessory Distributor/Installer).
For Canada, in the event GM Accessories are installed AFTER the New Vehicle Delivery, they will be covered (parts and labor) for the balance of the vehicle warranty, or up to 12 months/Unlimited kilometers depending on month installed. For replacement under New Vehicle Warranty, refer to claim type "B" guidelines.
GM Accessories sold over-the-counter, or those not requiring installation, will continue to receive the standard GM Dealer Parts Warranty of 12 months from the date of purchase (parts only).
Tires
Any approved tire installed on a GM Vehicle PRIOR to delivery will be covered under the provisions of the New Vehicle Limited Warranty. Tires are covered against defects in material and workmanship. Tires are warranted for defects "without" prorated charge for tread mileage. Subsequent replacements under this warranty will continue to be covered for the remainder of the New Vehicle Limited Warranty.
Any approved tire installed on a GM Vehicle PRIOR to delivery may continue to be warranted on a prorated basis by the tire manufacturer once the New Vehicle Limited Warranty expires.
Any approved tire installed AFTER delivery will be covered under the provisions of the tire manufacturer warranty.
USA dealers should refer to GM Warranty Administration Bulletin 00-03-10-003I and GM Parts Process/Policy Bulletin IB03-001 for more information. GM of Canada dealers should refer to GM Warranty Administration Bulletin 01-03-10-003B.
