Notice: Before adding any sound equipment to the vehicle, such as an audio system, CD player, CB radio, mobile telephone, or two-way radio, make sure that it can be added by checking with your dealer/retailer. Also, check federal rules covering mobile radio and telephone units. If sound equipment can be added, it is very important to do it properly. Added sound equipment can interfere with the operation of the vehicle's engine, radio, or other systems, and even damage them. The vehicle's systems can interfere with the operation of sound equipment that has been added.
Notice: The chime signals related to safety belts, parking brake, and other functions of the vehicle operate through the navigation system. If that equipment is replaced or additional equipment is added to the vehicle, the chimes may not work. Make sure that replacement or additional equipment is compatible with the vehicle before installing it. See "Accessories and Modifications" in the Index of the vehicle's owner manual.
The vehicle has a feature called Retained Accessory Power (RAP). With RAP, the audio system continues to play even after the ignition is turned off. See "Retained Accessory Power (RAP)" in the Index of the vehicle's owner manual for more information.
The audio system is operated using navigation system menus.
Playing the Radio
(Power/Volume): Press to turn the audio and navigation system on and off. Turn to increase or decrease the volume. If the vehicle is equipped with a Bose® sound system it is equipped with six channels of custom equalization.Finding a Station
BAND: Press to access the band screen and to switch between AM, FM1, FM2, XM1, and XM2, if equipped.(Tuning) Knob: Turn to change radio frequencies.
SEEK : Press the up or the down arrow to go to the next or previous station and stay there.
To scan stations, press and hold the up or down arrow for two seconds until a beep is heard. The radio goes to a station, plays for a few seconds, then goes to the next station. Press either arrow again to stop scanning.
To scan preset stations, press and hold the up or down arrow for more than four seconds. Two beeps are heard and PSCAN displays, along with the highlighted preset. The radio goes to the next preset station, plays for a few seconds, then goes to the next preset station. Press either arrow again to stop scanning presets.
The radio only seeks and scans stations with a strong signal that are in the selected band
Setting Preset Stations
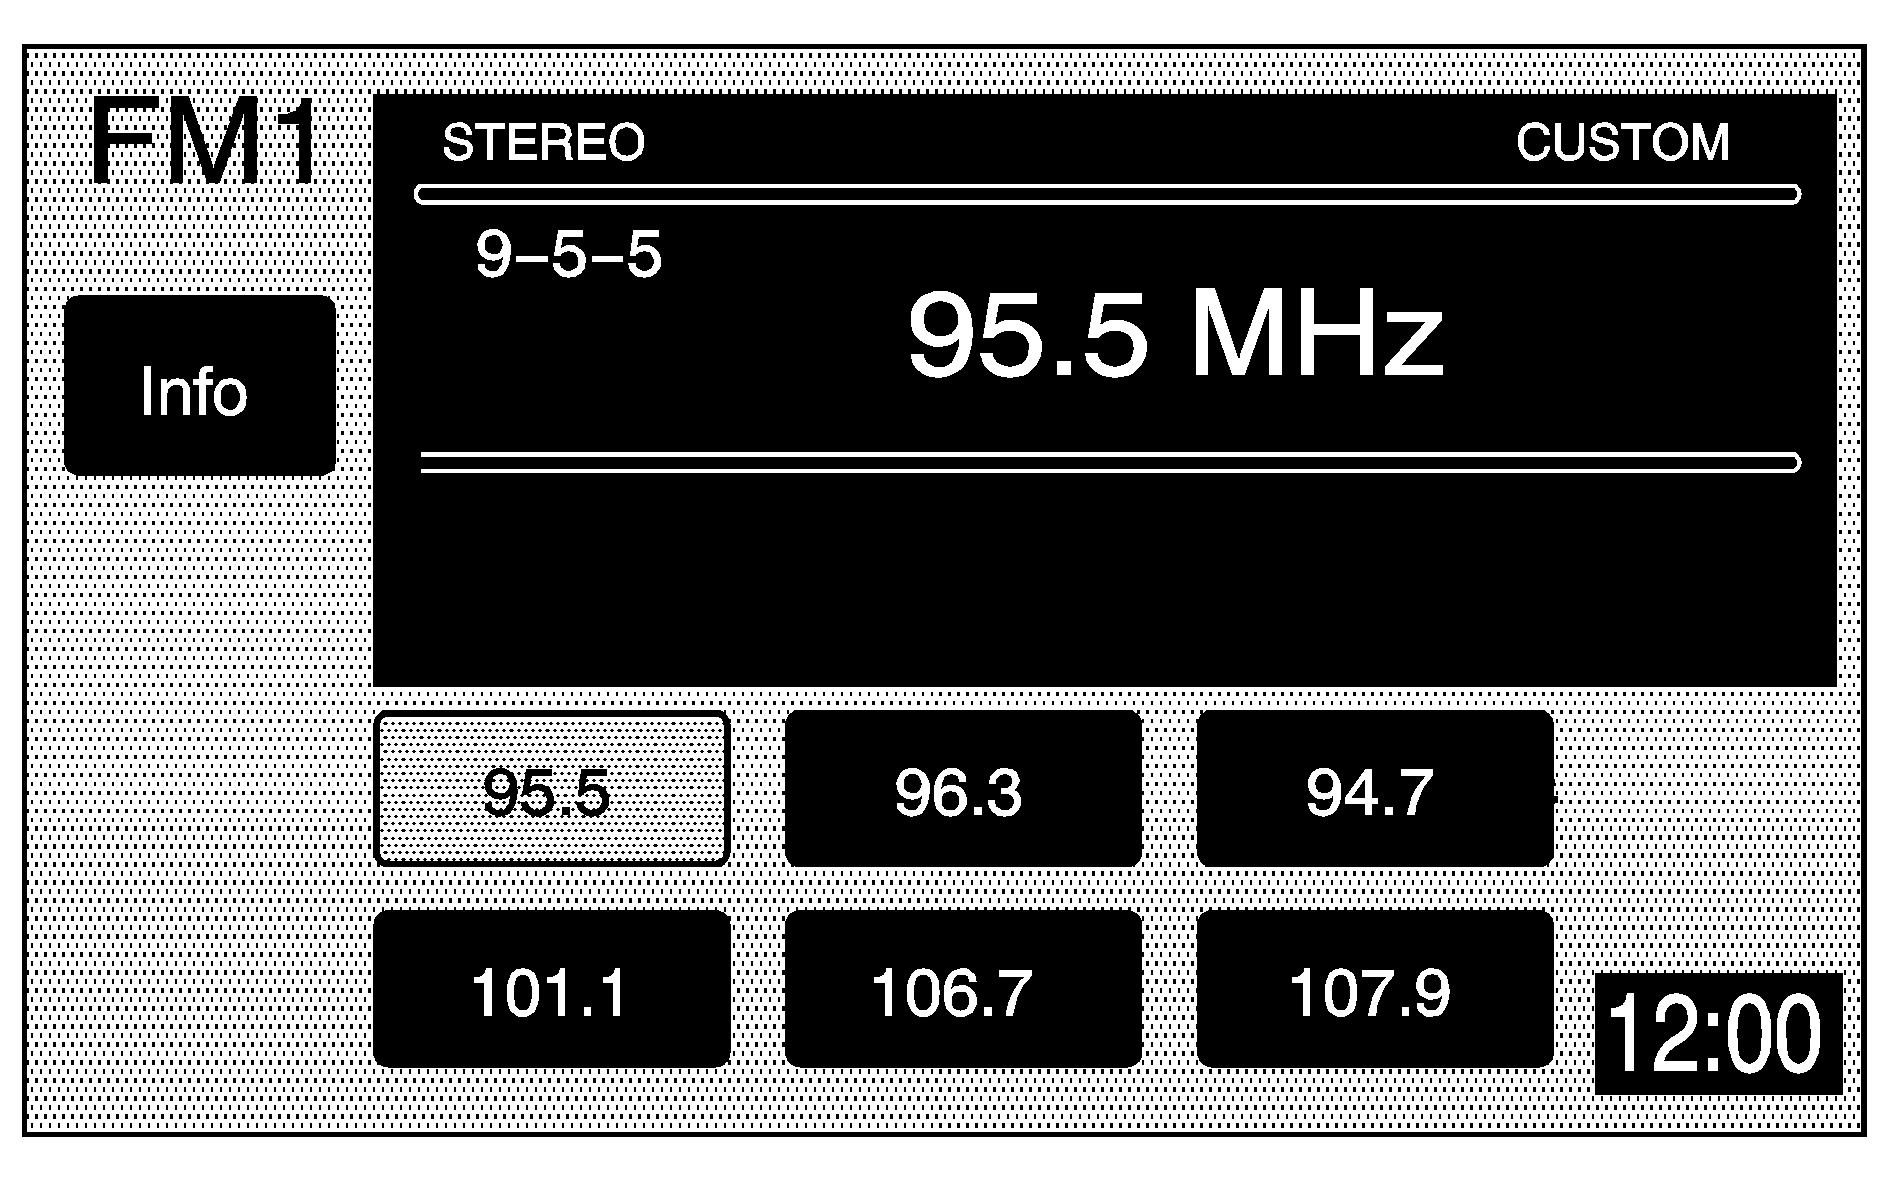
Up to 30 stations, six AM, six FM1, six FM2, six XM1, and six XM2, if equipped, can be programmed using the six screen buttons on the bottom of each band menu. To set preset stations:
- Turn the audio system on.
- Press the BAND hard key to select AM, FM1, FM2, XM1, or XM2, if equipped.
- Tune to the desired station using the SEEK hard key or the tuning knob.
- Press and hold one of the six preset screen buttons until you hear a beep. Whenever that preset screen button is pressed, the station that was set returns.
- Repeat the steps for each preset and source.
Band Menu
If the radio is on while the navigation system is not in use, this band menu displays the current audio information, as well as list the presets for the current band.
FM1 Source shown, Other Sources similar
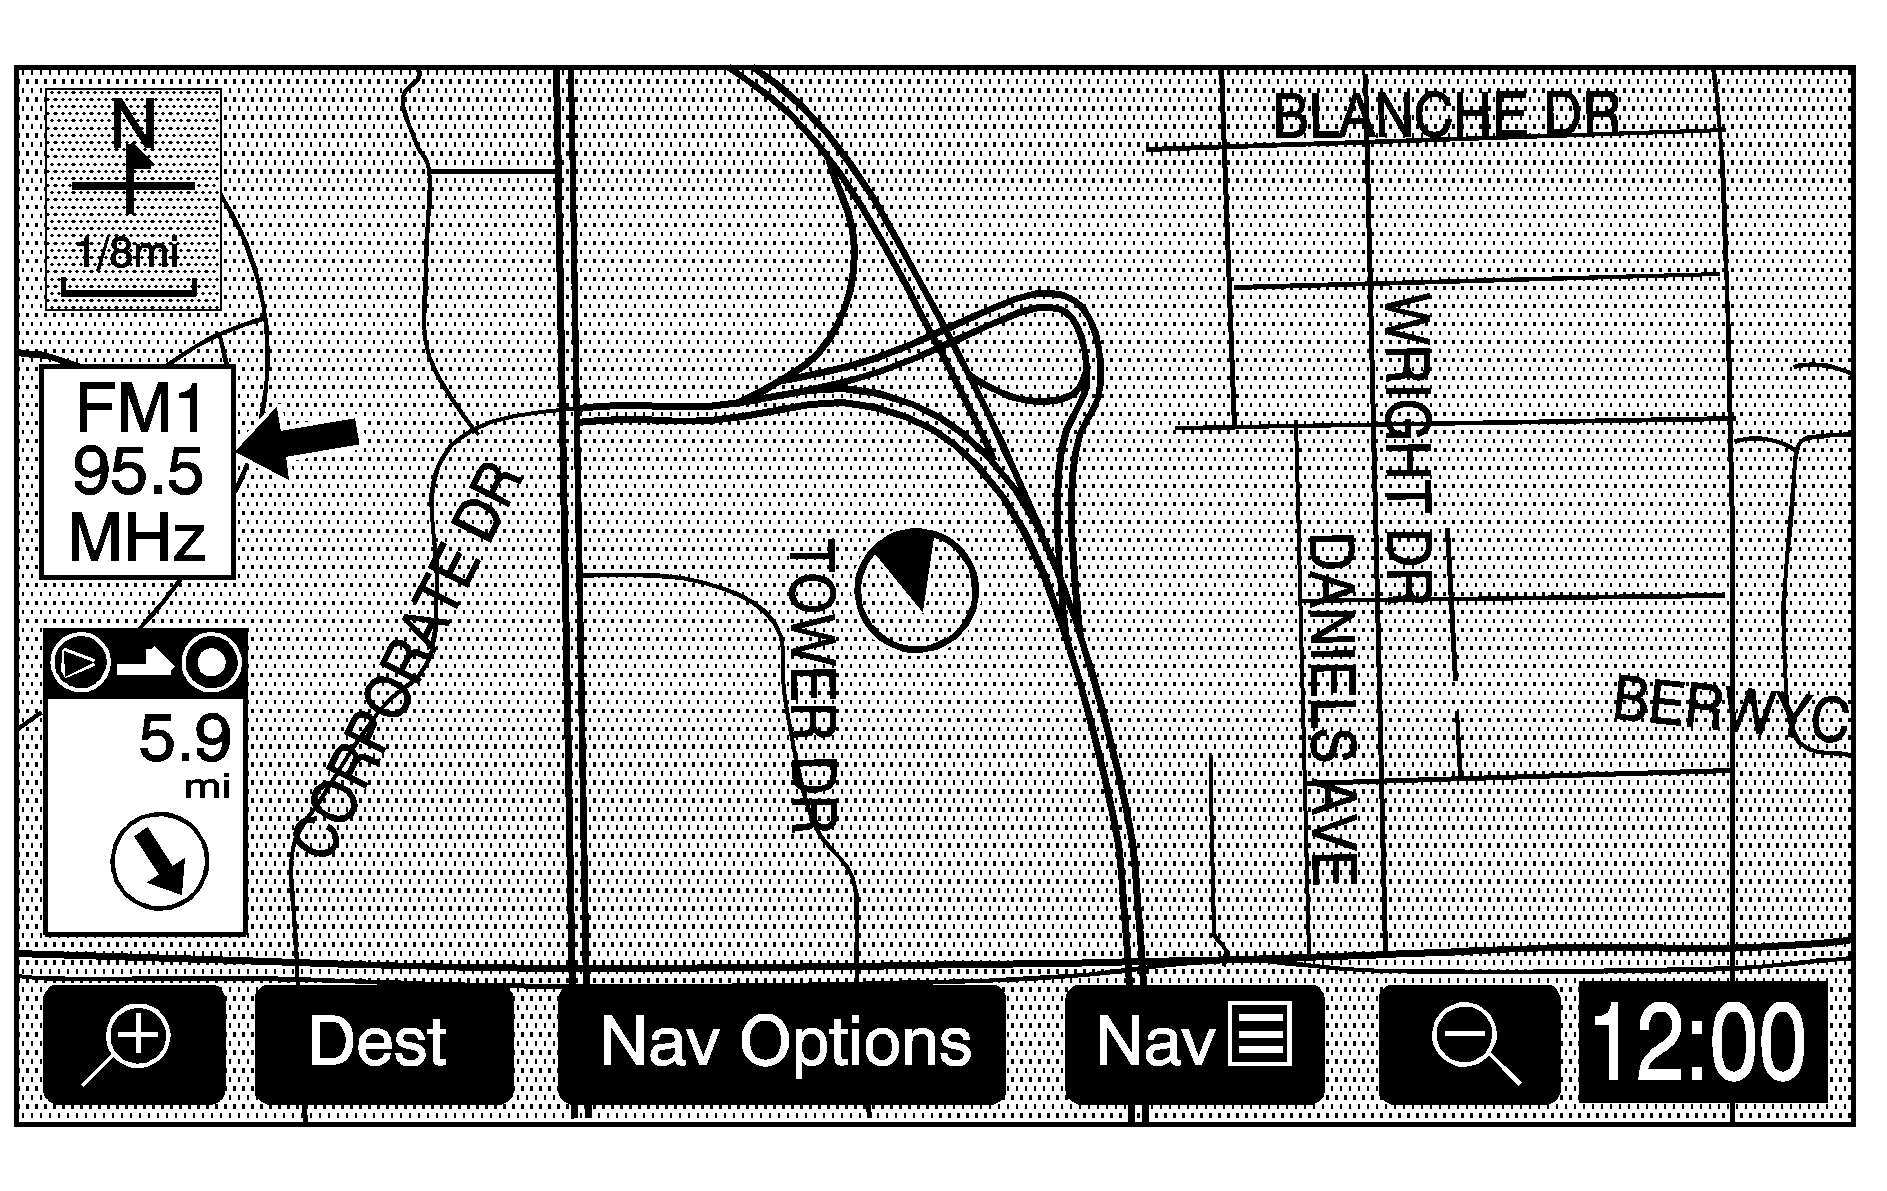
If the radio is on while the navigation system is in use, a smaller band menu appears, located on the left side of the map screen. This audio screen displays the current audio information, such as band and station. Touch the smaller band menu screen button to access the full screen band menu.
FM1 Source shown, Other Sources similar
Audio Menu
(Audio): Press to display the Audio menu. Several adjustment options are available from this menu.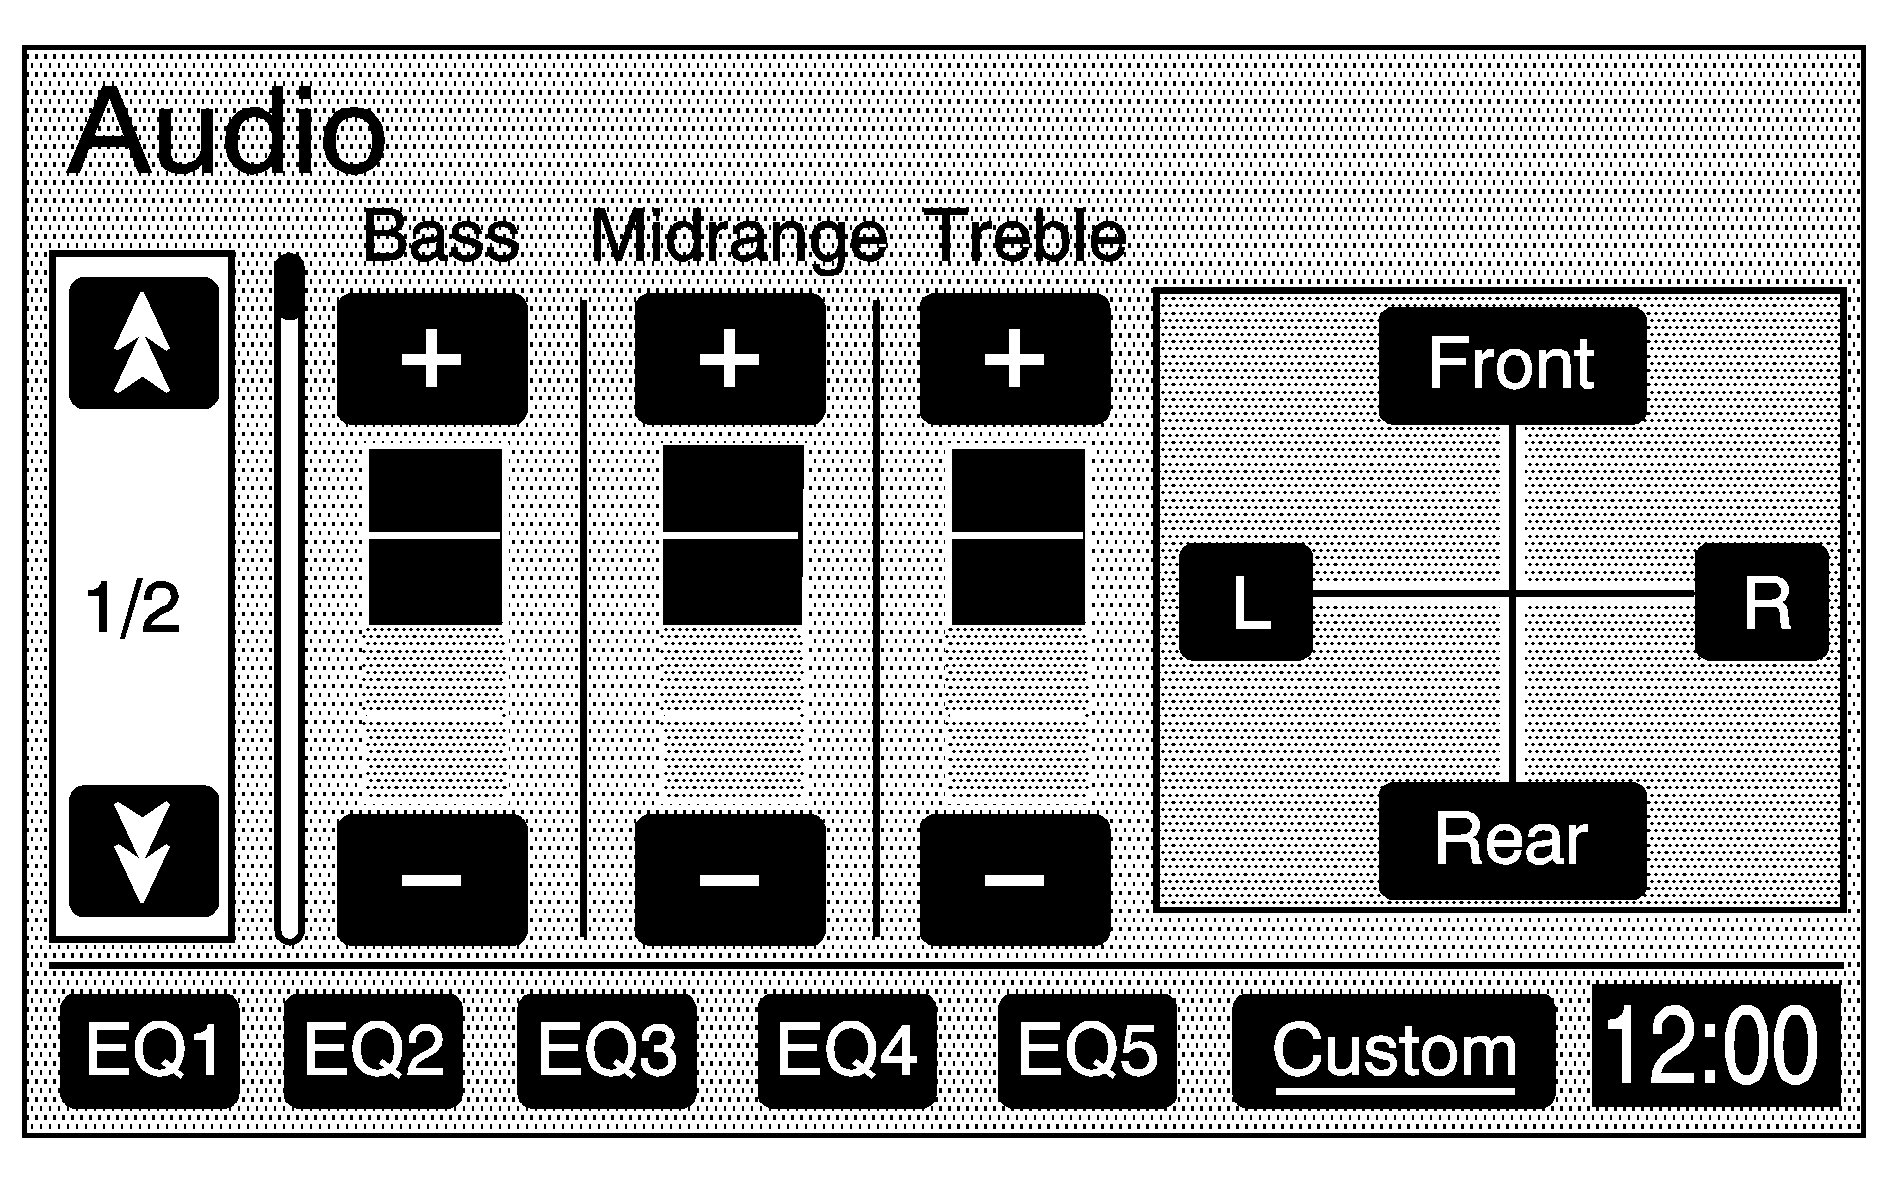
Tone (Bass/Midrange/Treble): Touch the plus (+) and minus (-) sign screen buttons to increase or decrease the Bass, Midrange, or Treble. If a station is weak or noisy, decrease the treble.
Speakers (Balance/Fade): Touch the L (left) or R (right) screen buttons to adjust the balance between the left and right speakers. Touch the Front or Rear screen buttons to adjust the fade between the front and rear speakers.
Speed Compensated Volume (SCV): With SCV, the audio system adjusts automatically to make up for road and wind noise while driving, by increasing the volume as vehicle speed increases. Touch the down arrow screen button to access the second page of the Audio menu. Set the volume at the desired level, then select Low, Mid (Medium), or High. Touch the Off screen button to turn this feature off.
EQ (Equalizer): Use the screen buttons labeled EQ1 through EQ5 to choose preset bass, midrange, and treble equalization settings. The Custom screen button allows you to choose and set equalization levels. To set a custom equalization setting, adjust each setting to the desired level, then touch the Custom screen button until a beep is heard. After adjustments are made, press the BAND hard key to go back to the preset station menu. Now that you have preset the station and the EQ setting, the EQ can be assigned to the preset station. To do this, touch the desired preset station screen button until a beep is heard. The EQ setting is now assigned to that preset until changed. If at the CD screen before setting an EQ and the CD hard key is pressed, the CD screen returns, and the EQ is set to that screen until changed.
See "Rear Seat Audio (RSA)", "Theft-Deterrent Feature", "Audio Steering Wheel Controls", "Radio Reception", and antenna information in the Index of the vehicle's owner manual for more information.
Radio Data Systems (RDS)
The audio system has a Radio Data System (RDS). RDS features are available for use only on FM stations that broadcast RDS info. With RDS, the radio can:
| • | Display station name |
| • | Display messages from radio stations |
| • | Display song title and artist name |
This system relies on receiving specific information from these stations and only works when the information is available. In rare cases, a radio station may broadcast incorrect information that causes the radio features to work improperly. If this happens, contact the radio station.
While the radio is tuned to an RDS station, the station name appears on the display with the frequency.
Touch the Info screen button on the band menu to receive information the selected radio station is currently broadcasting.
XM™ Satellite Radio Service
XM™ is a satellite radio service that is based in the 48 contiguous United States and 10 Canadian provinces. XM Satellite Radio has a wide variety of programming and commercial-free music, coast-to-coast, and in digital-quality sound. During your trial or when you subscribe, you will get unlimited access to XM Radio Online for when you are not in the vehicle. A service fee is required to receive the XM service. For more information, contact XM at xmradio.com or call 1-800-929-2100 in the U.S. and xmradio.ca or call 1-877-438-9677 in Canada.
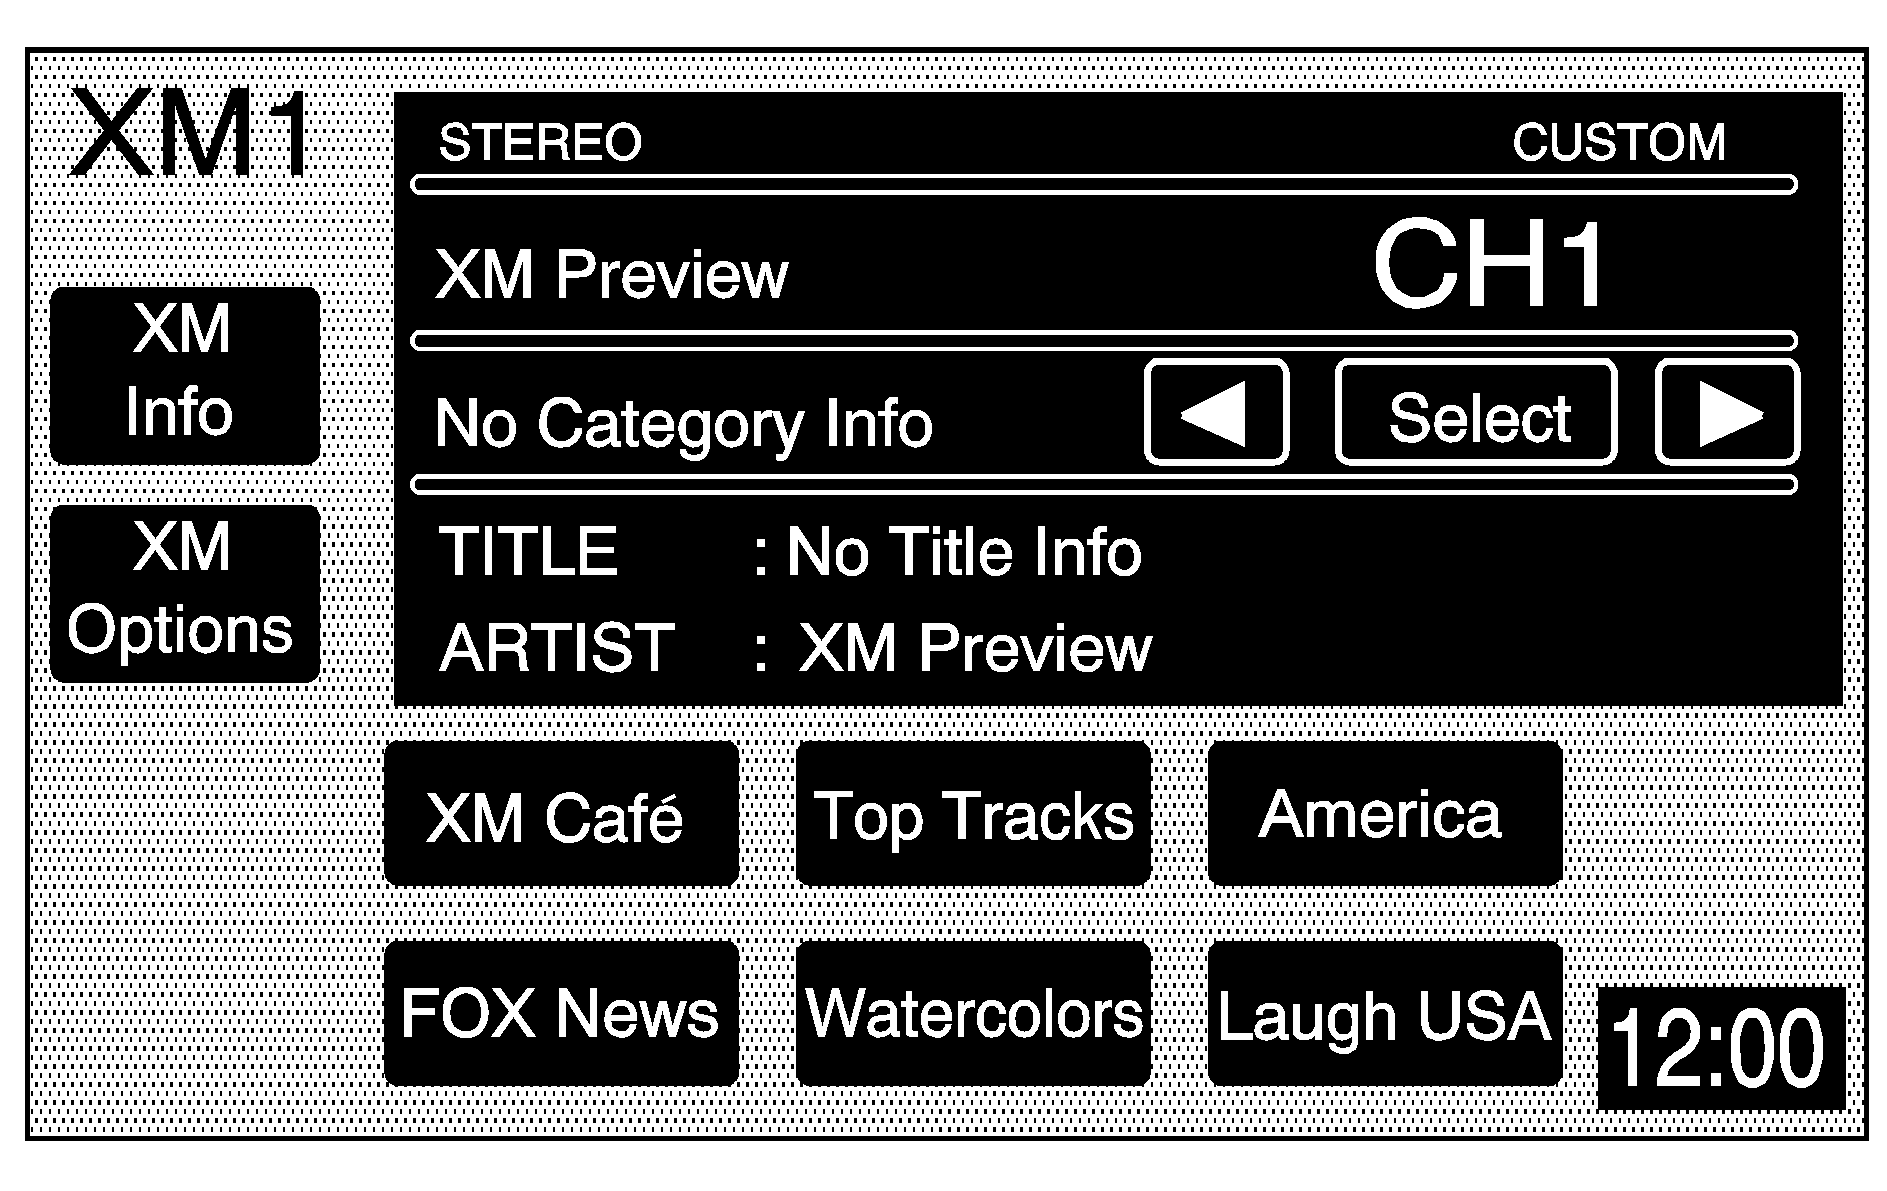
Press the BAND key repeatedly until you reach the XM™ selection. When XM™ is active, the channel name and number, song title, and artist will display on the screen.
Touch the XM Info screen button to display additional XM station information.
XM™ Options
Touch the XM Options screen button to access the XM Options menu.
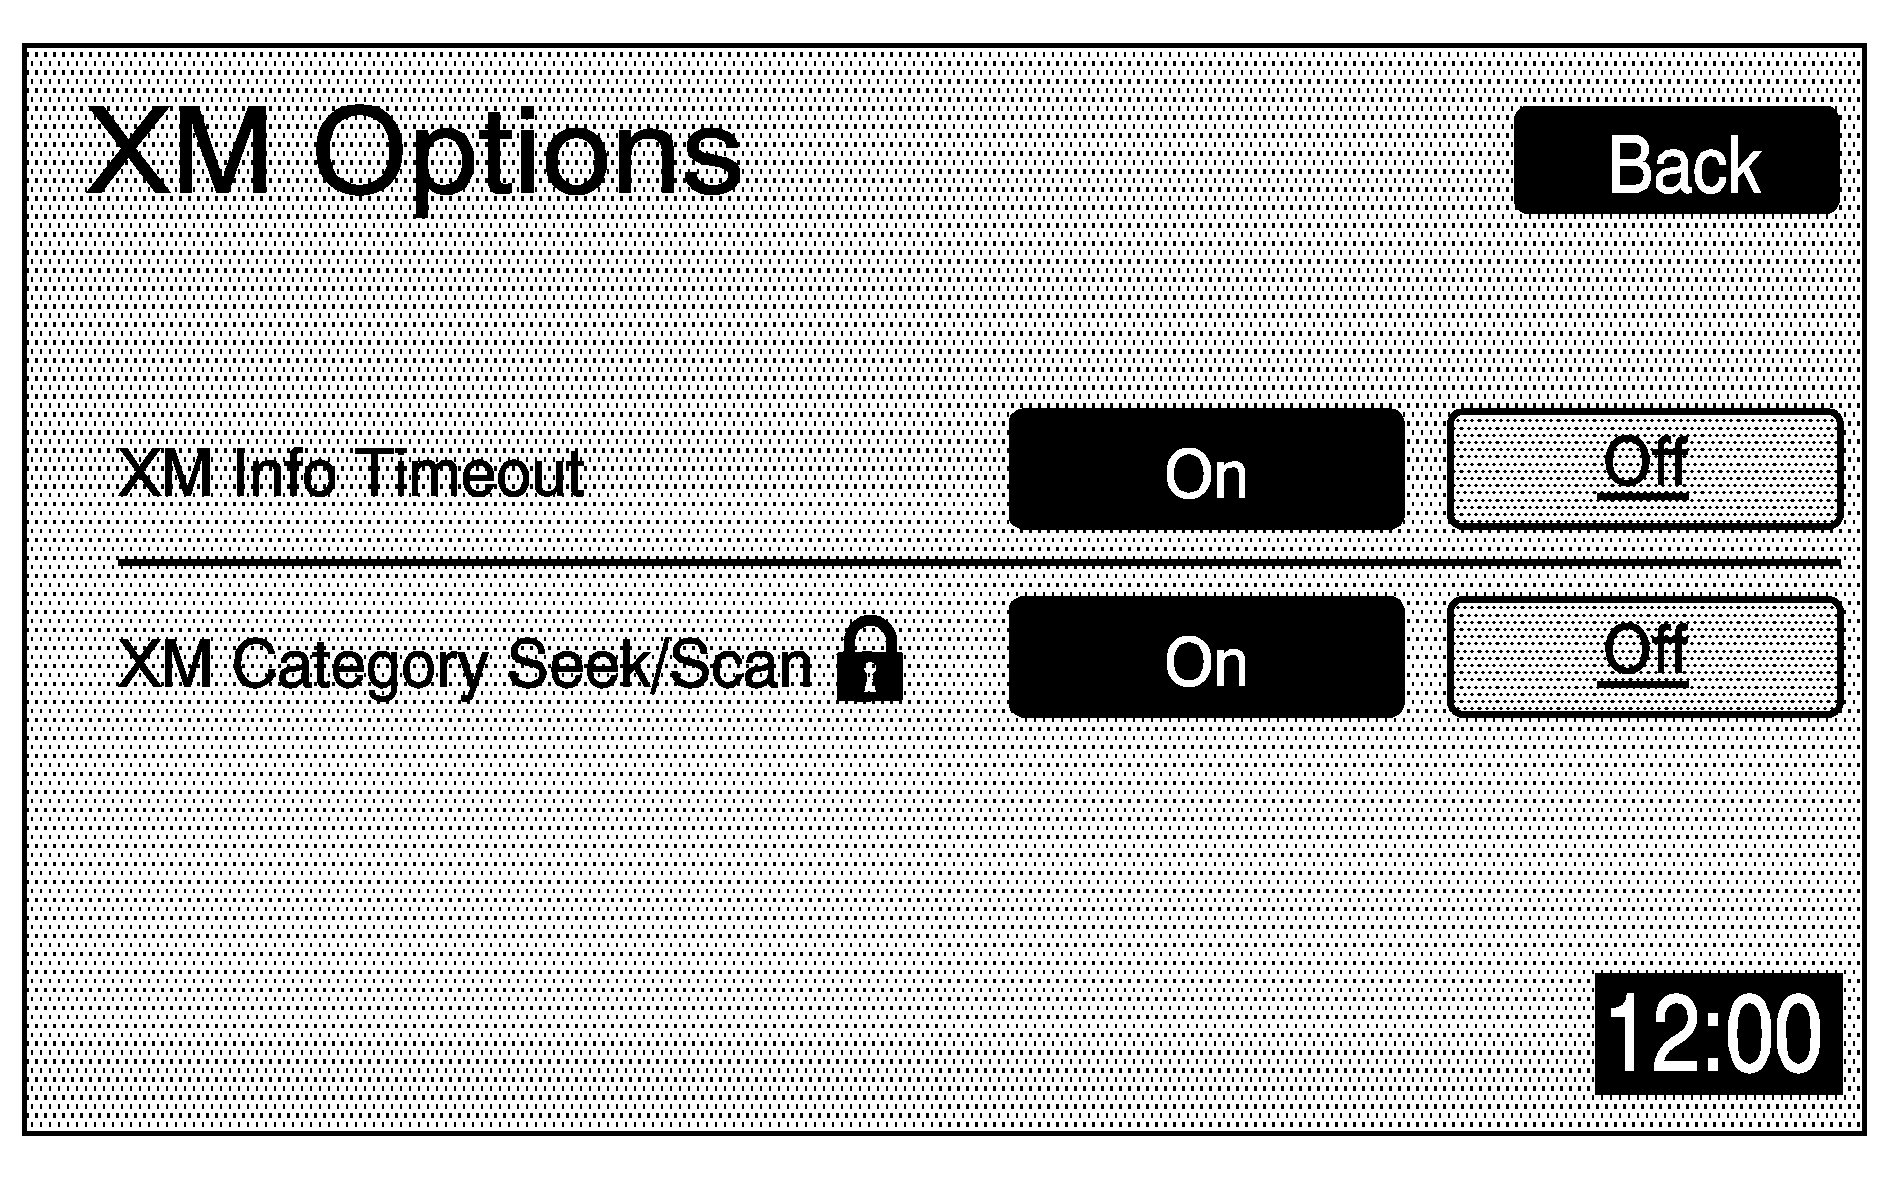
This menu allows you to seek or scan for stations based on their category. Touch the On screen button next to XM Info Timeout to hide XM™ information after a certain amount of time has passed. Touch Off to turn this feature off.
While in this menu, turn XM Category Seek/Scan on to scroll through the categories you want to seek to. It goes to the first available channel in that category.
XM™ Radio Messages
See "XM™ Radio Messages" in the vehicle's owner manual" for a list of possible XM messages.
