For 1990-2009 cars only
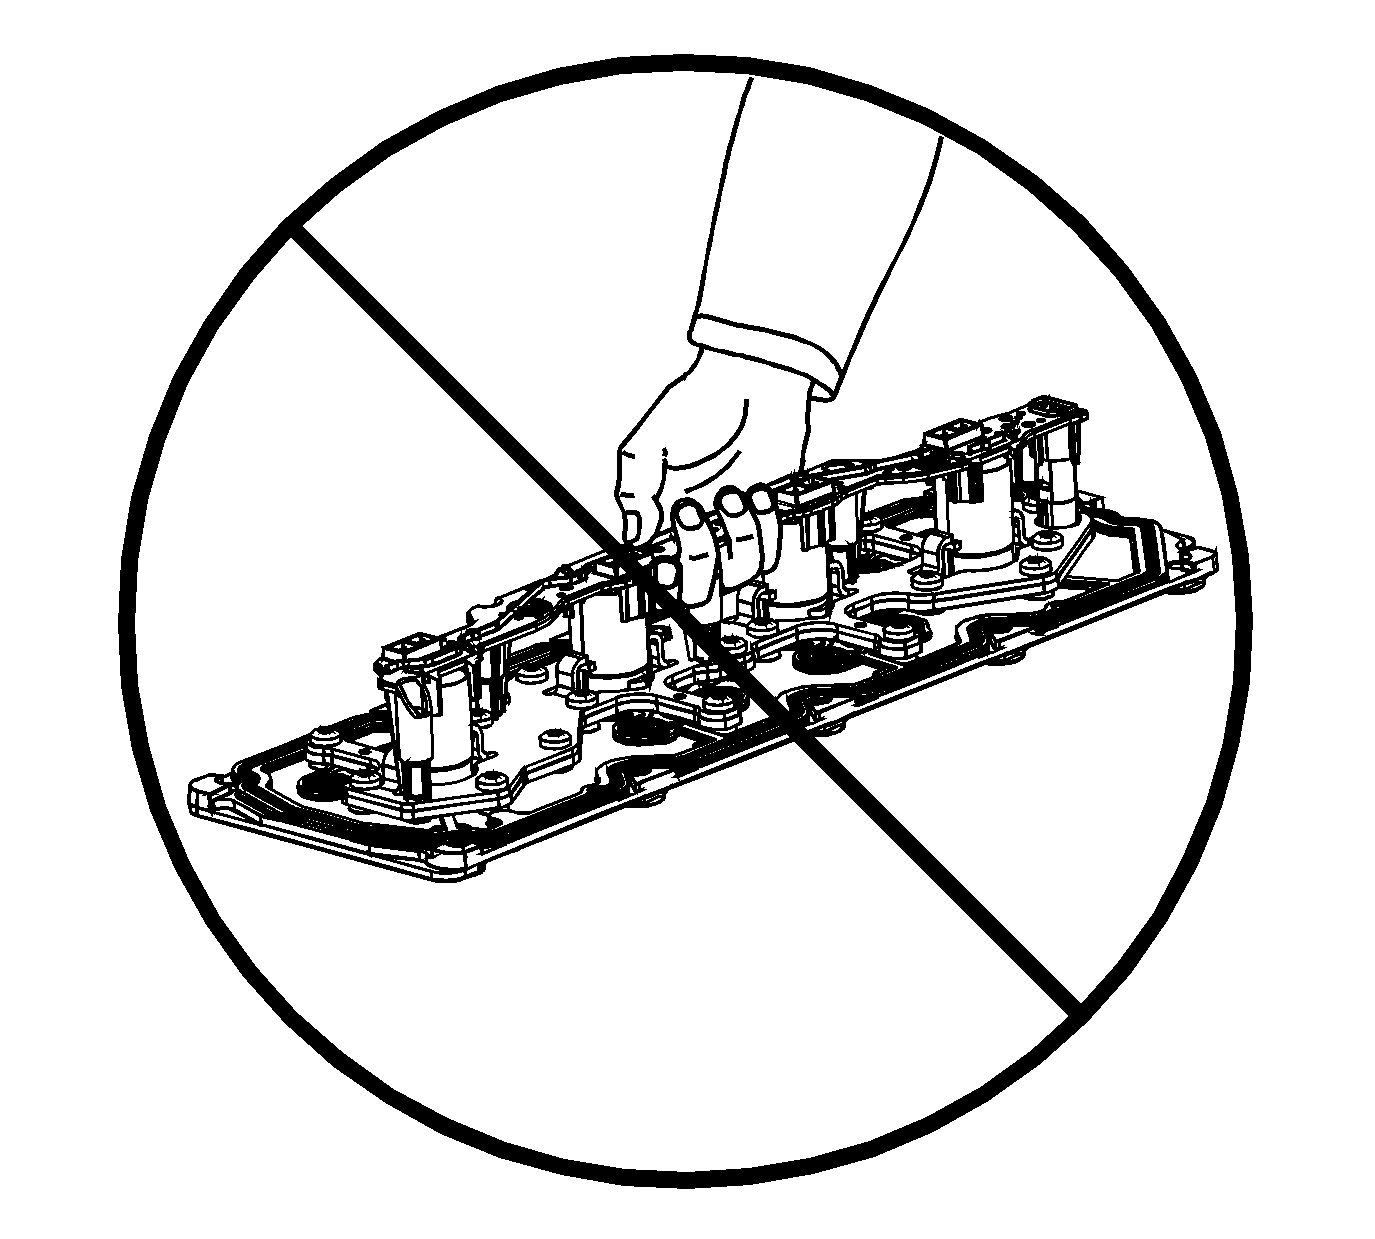
- Do not lift the manifold assembly by the electrical lead frame.
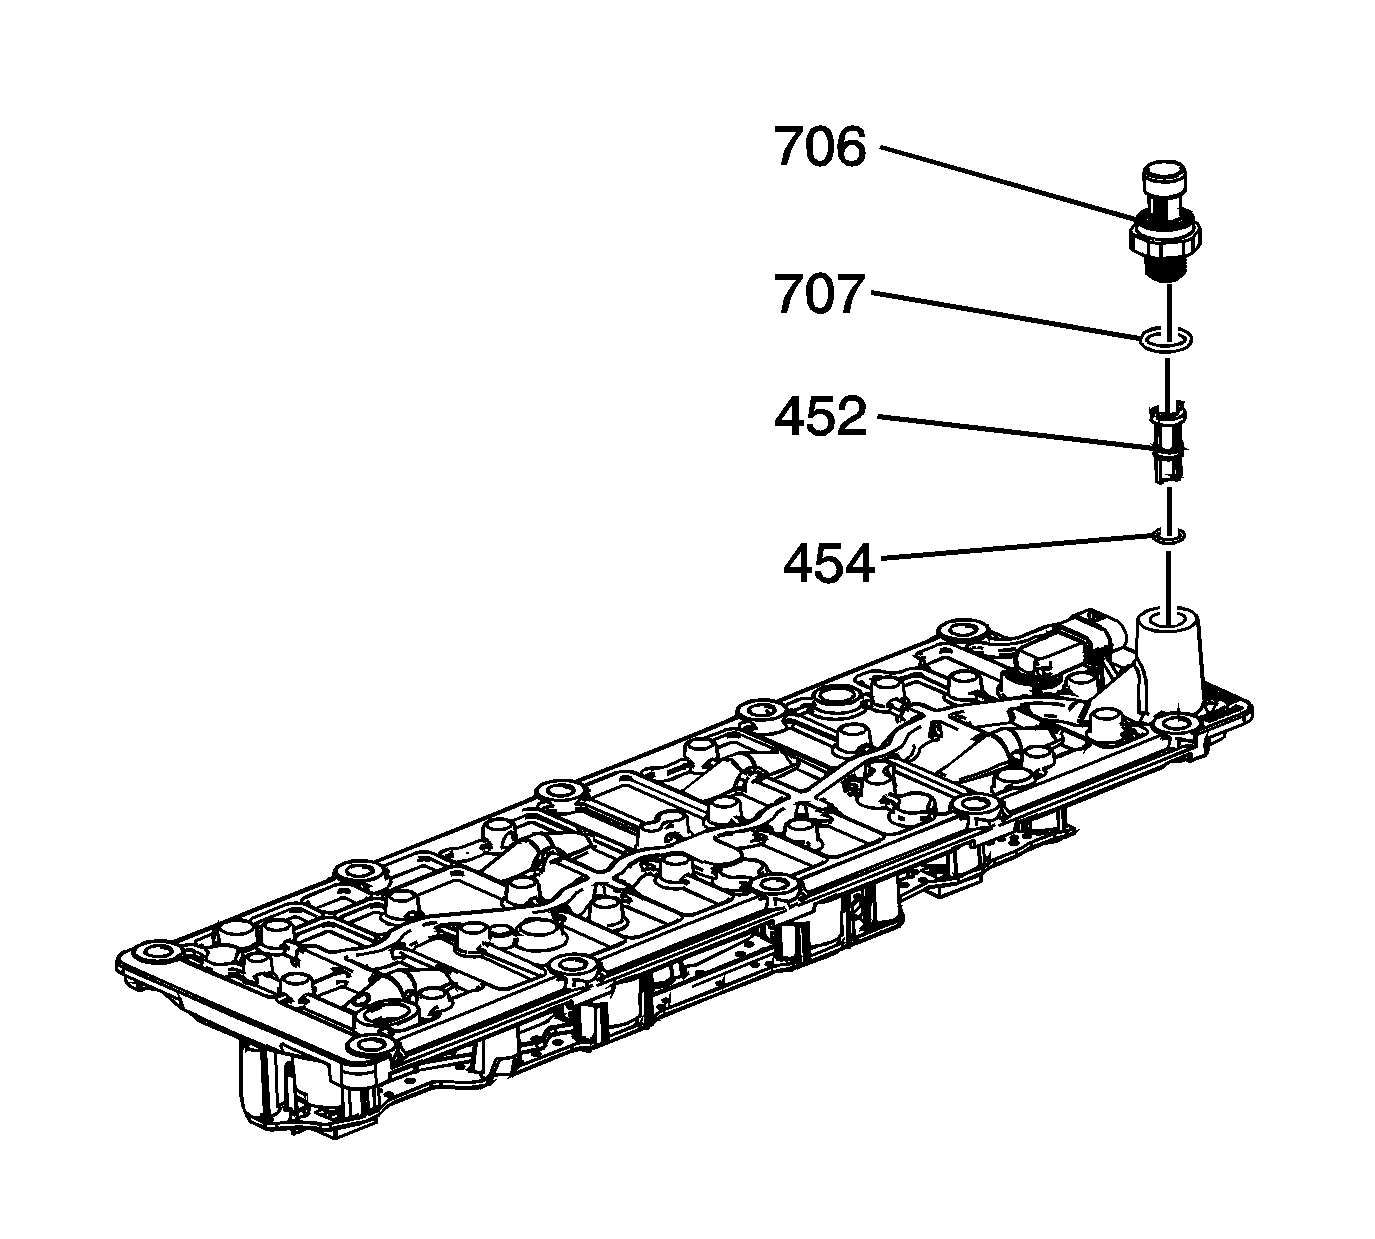
- Remove the oil pressure sensor (706) and washer (707).
- Remove the oil screen (452) with O-ring (454).
- Clean the manifold with compressed air.
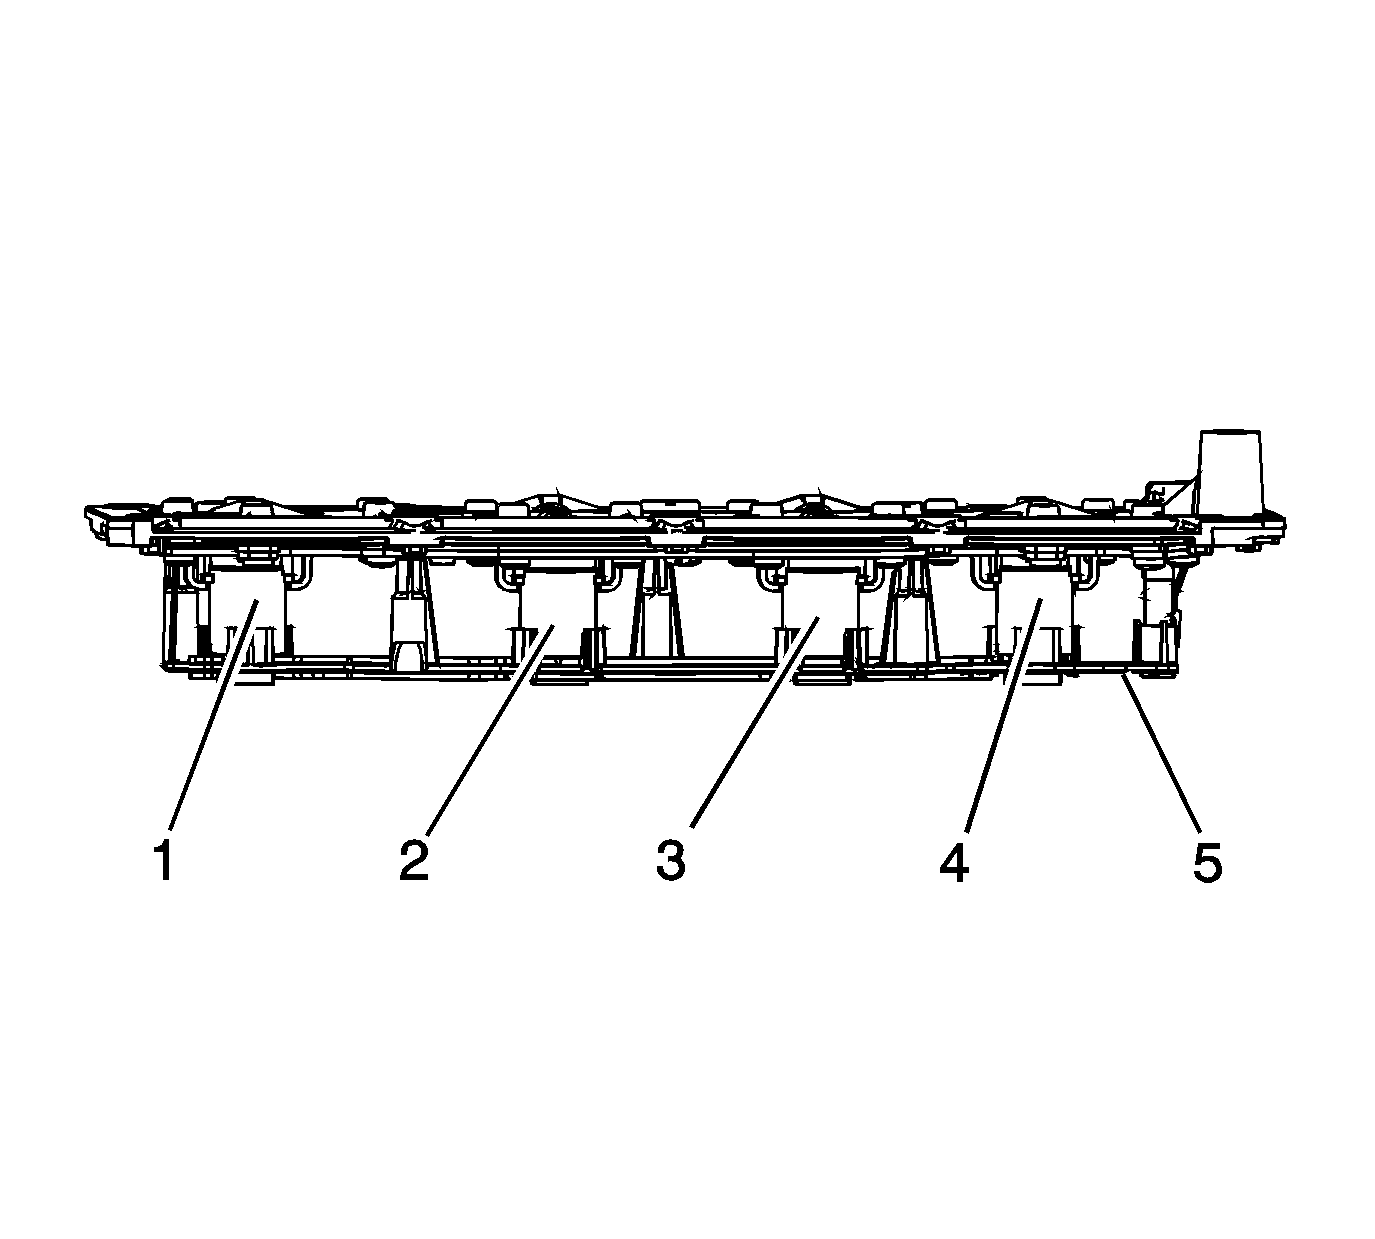
- Inspect for loose electrical solenoids (1-4) or loose or missing bolts.
- Inspect for damage to the electrical lead frame (5).
- Inspect for a damaged electrical connector, for bent or corroded pins.
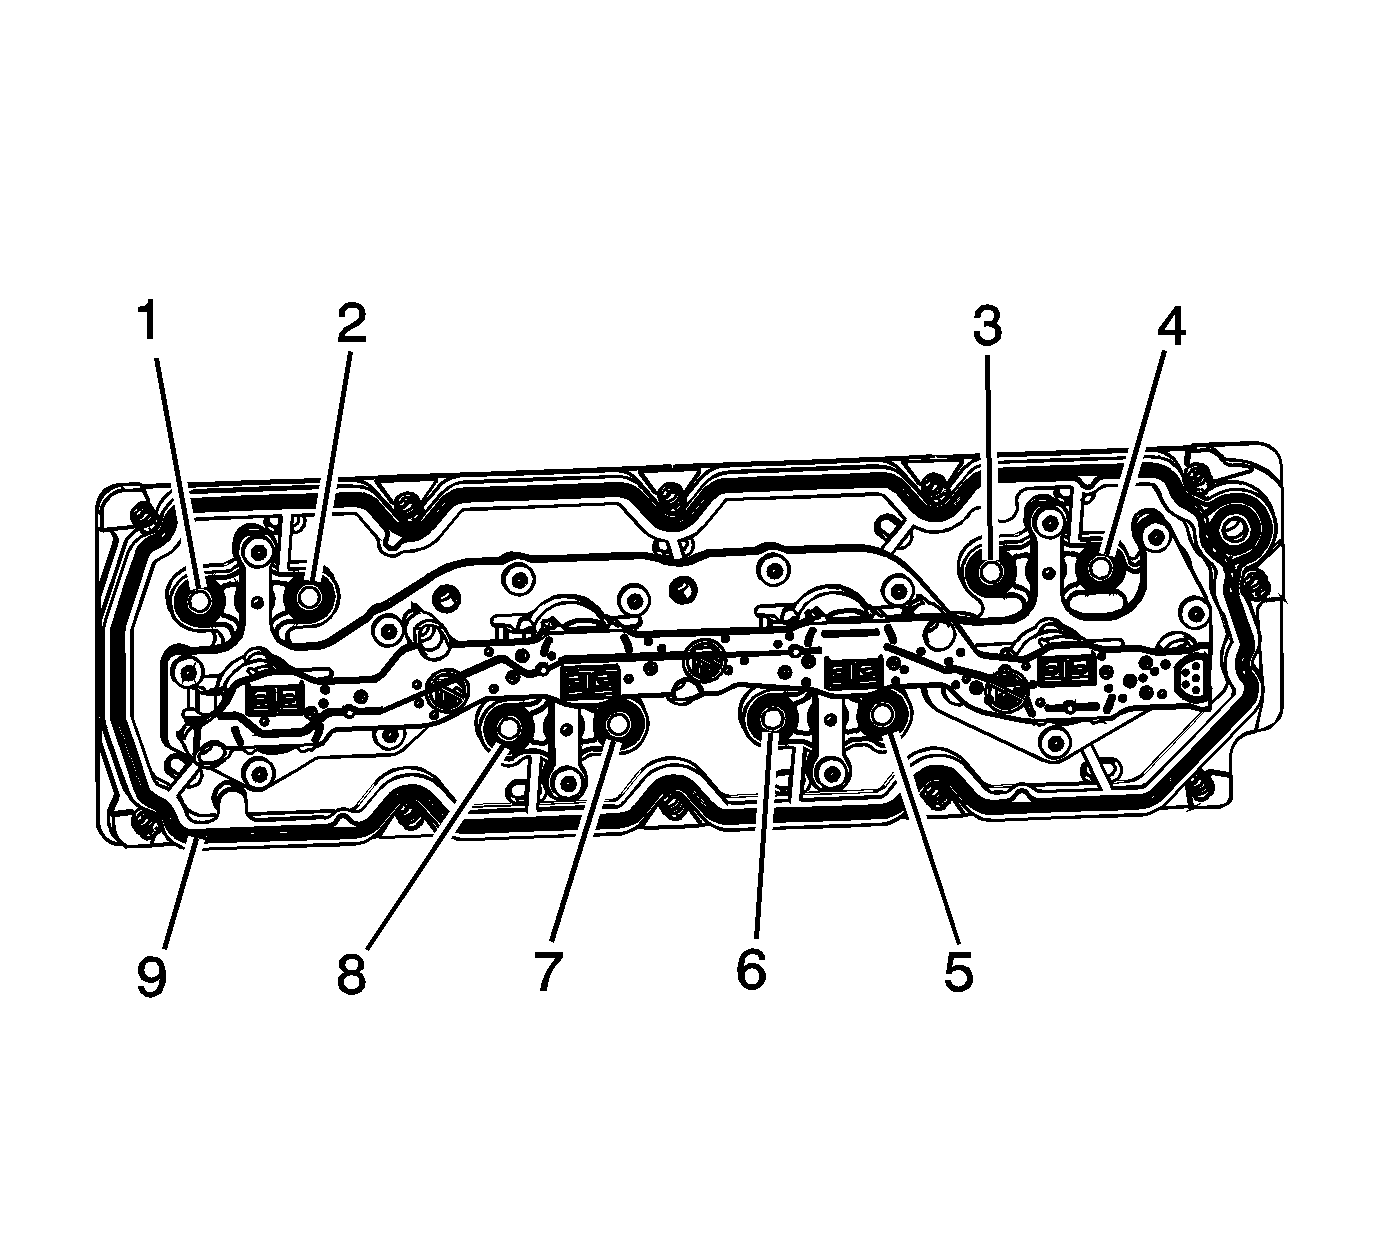
- Inspect for damaged interior sealing gaskets (1-8). If the interior sealing gaskets are damaged, the manifold must be replaced as an assembly.
- Inspect for a damaged exterior sealing gasket (9) or scored gasket surfaces.
- Inspect for debris or restrictions within the oil passages of the manifold. Refer to Cylinder Deactivation (Active Fuel Management) Valve Lifter Oil Manifold Diagnosis and Testing.

Note:
• Do not allow dirt or debris to enter the oil passages of the manifold. Plug, as required. • Do not disassemble the electrical components from the manifold. • Do not submerge the electrical components in cleaning solvent. • Do not use the manifold exterior gasket again. Remove the exterior gasket and install a NEW service gasket during assembly.

Warning: Refer to Safety Glasses Warning in the Preface section.


