For 1990-2009 cars only
Removal Procedure
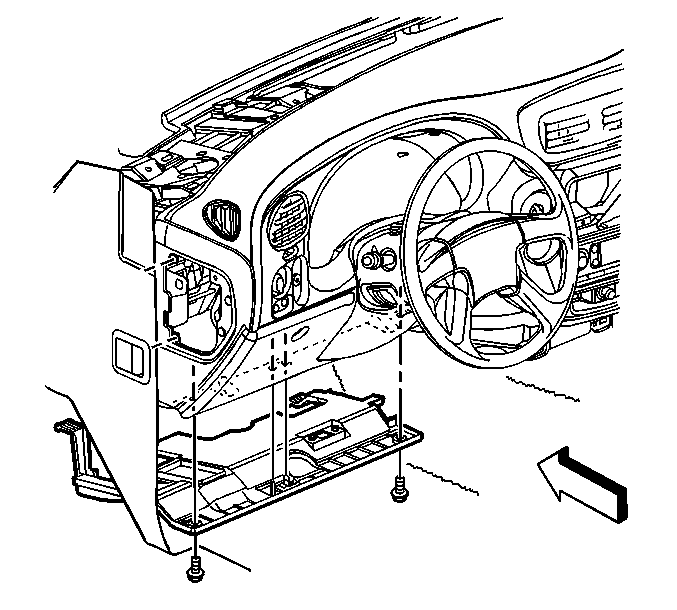
- Remove the 2 screws that retain the insulator panel to the instrument panel (I/P).
- Release the insulator panel retaining clip from the I/P substrate.
- Lower the insulator panel.
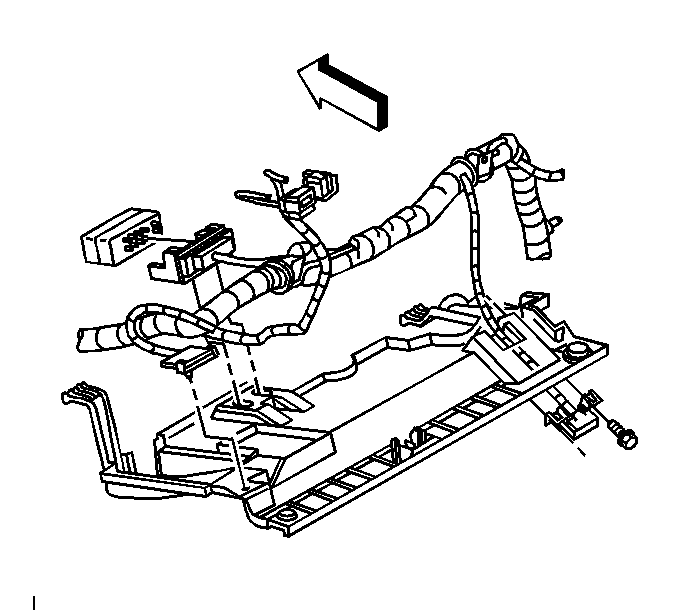
- Remove the 2 data link connector (DLC) retaining screws.
- Remove the DLC from the insulator panel.
- Remove the splice pack from the insulator panel.
- Remove the hazard and turn signal flasher from the insulator panel. Refer to Hazard and Turn Signal Flasher Replacement.
- Remove the insulator panel from the I/P.


Installation Procedure
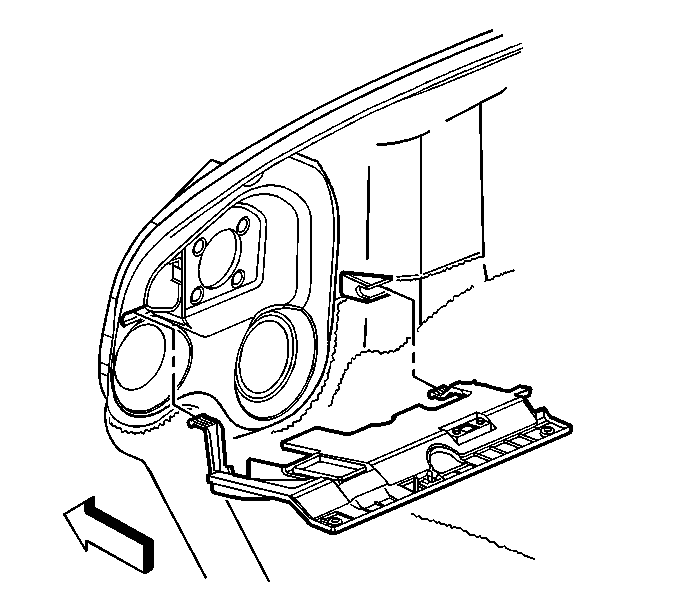
- Position the insulator panel to the I/P.
- Install the hazard and turn signal flasher to the insulator panel. Refer to Hazard and Turn Signal Flasher Replacement.
- Install the splice pack to the insulator panel.
- Position the DLC to the insulator panel.
- Install the DLC retaining screws and tighten to 2.5 N·m (22 lb in).
- Install the insulator panel tabs to the cowl slots.
- Raise the insulator panel to the I/P.
- Install the insulator panel retaining clip to the I/P substrate.
- Install the 2 screws that retain the insulator panel to the I/P and tighten to 2.5 N·m (22 lb in).

Caution: Refer to Fastener Caution in the Preface section.


