Proper road illumination and safety require the fog lamps to be aimed. The front
fog lamp aim should be checked when a new front fog lamp assembly is installed, or
if any service repairs have been performed to the vehicle which disturb the front
fog lamp mounting or the vehicle ride height.
There are no horizontal adjustments for aiming the front fog lamp assemblies
on this vehicle.

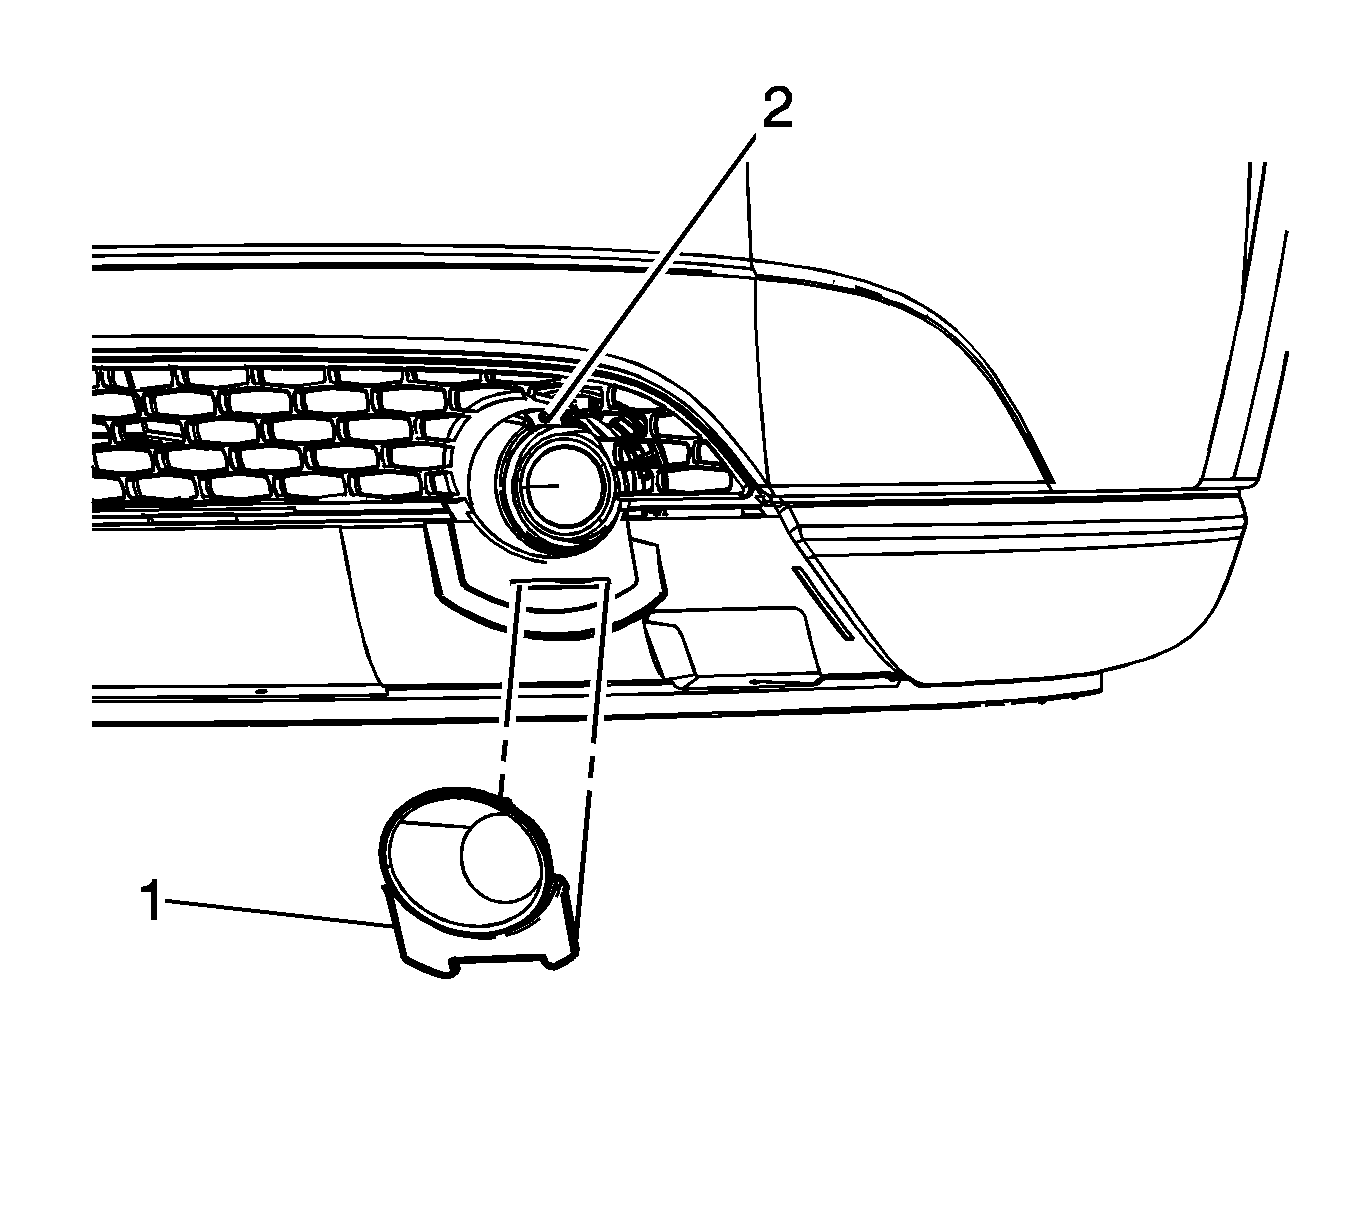
Remove the fog lamp bezel (1) and the adjustment screw (2) can
be seen. Refer to
Front Bumper Fascia Extension Replacement.
The front fog lamps can be adjusted by turning the adjustment screw (1)
located below the backside of the lamp, next to the electrical connector.
Use the following guidelines in order to adjust the aim:
| • | Turn the TORX® adjustment screw clockwise in order to raise the aim. |
| • | Turn the TORX® adjustment screw counter-clockwise in order to lower
the aim. |

- To ensure accurate vertical front fog lamp aiming, first perform the following
steps to prepare the vehicle.
| • | Make sure that all the components are in place on the vehicle, the tires
are properly inflated, and there is not any mud or snow clinging to the vehicle. |
| • | Stop all other operations of work on the vehicle. |
| • | Make sure the fuel level is 1/2 full or more. |
| • | Jounce the vehicle to settle the suspension. |
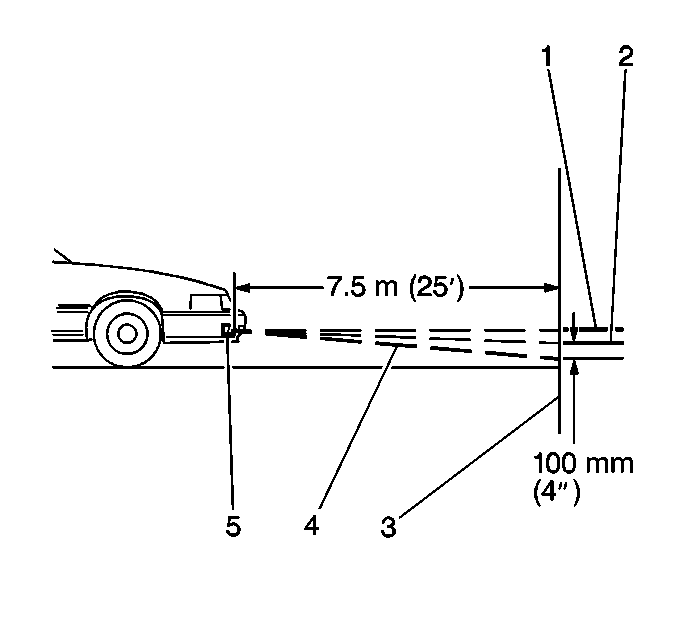
| • | Place the vehicle on a level surface 7.6 m (25 ft) from
the target screen. |
| • | Measure the distance from the floor to the center of the fog lamp (5). |
| • | Using this measurement, mark the horizontal centerline of the fog lamp (1)
on the target screen directly in front of the vehicle. |
| • | Start the vehicle in order to level the suspension. |
- Turn the front fog lamps ON.

- Access the fog lamp vertical adjuster.
- Adjust the fog lamp screw (2) up or down until the top edge of
the high intensity zone on the screen is 102 mm (4 in) below (2)
the horizontal centerline (1).
- Turn OFF the front fog lamps.
- Install the fog lamp bezel (1) and the adjustment screw (2)
can be seen. Refer to
Front Bumper Fascia Extension Replacement.


